Table of Contents
Advertisement
Quick Links
Solar Surveillance Installation Guide
SLR-A75 Series
WiFi Solar Surveillance System (SLR-A75-4W)
4G Solar Surveillance System (SLR-A75-4G)
Thank you for purchasing a SLR-A75 Series Solar Surveillance System.
This install guide covers basic setup, installation and use of your surveillance system.
For more information, please visit:
www.activeonline.com.au
Version 230818
Advertisement
Table of Contents

Related Manuals for Vip-Vision Solar Surveillance SLR-A75 Series


Summary of Contents for Vip-Vision Solar Surveillance SLR-A75 Series
- Page 1 Solar Surveillance Installation Guide SLR-A75 Series WiFi Solar Surveillance System (SLR-A75-4W) 4G Solar Surveillance System (SLR-A75-4G) Thank you for purchasing a SLR-A75 Series Solar Surveillance System. This install guide covers basic setup, installation and use of your surveillance system. For more information, please visit: www.activeonline.com.au Version 230818...
-
Page 2: Included Components
SLR-A75 Series | Solar Surveillance 1. Pre-install Information 1.1 Included components Part Product Code Image Solar Panel SSL-A40MN (Optional remote control device) 4.0MP Mini PTZ Dome Camera VSIP4MPPTZMINI Camera Adapter VSBKTA106 Right Angle Bracket VSBKTB305W Junction Box VSBKTA140 Pole Mount Bracket VSBKTA150 128GB microSD card MICROSD128GB... -
Page 3: Camera Information
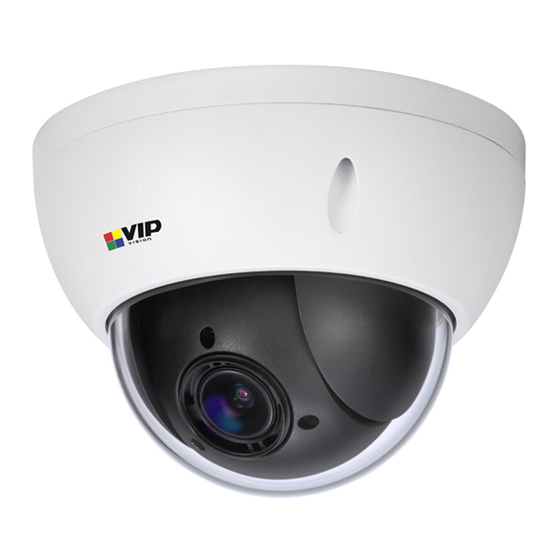
1. Pre-install Information 1.2 Camera Information Professional Series 4.0MP 4x Zoom Mini PTZ Dome Note: Camera has been preinstalled with the supplied 128GB microSD card and has been preconfigured to record 4.0MP (2592 x 1520) at 25fps. The username and password details for the camera can be found on the configuration sheet inside the junction box. - Page 4 SLR-A75 Series | Solar Surveillance 1.3 Solar Panel Information Motion Sensing Solar Panel with 40W Street Light Note: This solar panel system is fitted with undervoltage protection, which disconnects the load at approximately 10.8V. If you are not receiving any voltage on the output wires, place the panel in direct sunlight for a minimum of one hour and re-test.
- Page 5 1. Pre-install Information Solar Panel Dimensions 526mm 1063mm Solar Panel Screw Diagram M8*30 x 4 M6*15 C x 4 M8 x 4 M6 O x 4 O x 2 M6 O x 2 C x 2 6 C x 2 M8*2 0 x 2 M6*16 x 2...
-
Page 6: Installation
SLR-A75 Series | Solar Surveillance 2. Installation 2.1 Mounting the solar panel to the pole Caution: Solar panel must be placed so it is in direct sunlight all day. Any shading will greatly reduce the solar panel’s performance! 1. Drill an 8mm hole in the pole (minimum 15cm down from the top of the pole) on the same side that the camera will be mounted. - Page 7 2. Installation 2.2 Adjusting solar panel angle To ensure your solar panel absorbs as much light as possible, it’s important to adjust the solar panel angle to an ideal angle, depending on your region (refer to table below). 1. Use a flat head screwdriver to remove the bracket cover (Fig. 2.2a). 2.
- Page 8 SLR-A75 Series | Solar Surveillance 2.3 Mounting the camera to the pole The camera, camera adapter, right angle bracket and junction box are already connected (A, B, C & D). • Mount the pole mount bracket to the pole first. •...
- Page 9 2. Installation 1. Mount the pole mount bracket onto the pole using 3 included band clamps (Fig. 2.3b). Note: The 3 included band clamps are 65-89mm for poles 50-60mm in diameter. If installing on a thicker pole (eg. 80-150mm), larger band clamps will be required. Fig.
- Page 10 SLR-A75 Series | Solar Surveillance Caution: Do not allow the negative and positive power supply wires from the solar panel to touch (short circuit) - this will cause the lithium polymer battery to enter protection mode and output voltage will drop to 0V. The only way to recover from this is to disconnect and then reconnect the battery inside the panel - Please contact VIP Vision™...
- Page 11 3. Connections 3. Connections 3.1 Connect using WiFi (SLR-A75-4W) This section covers how to set up the WiFi network for your WiFi Solar Kit. Most of the setup for the solar panel side of the installation has already been done - it just needs to be connected to the solar panel battery for power.
- Page 12 SLR-A75 Series | Solar Surveillance Ethernet Power Solar Panel WiFi Wireless Bridge (AP) Camera Wireless Bridge 240VAC Power (Station) PoE Injector Network Switch Router (optional) NVR (optional) Internet Fig. 3.1a Example WiFi Setup Crucial evidence. Always.
- Page 13 3. Connections 3.2 Connect using 4G (SLR-A75-4G) NOTE: 4G setup requires an active SIM card (not included). For more information on how to configure the 4G router, refer to the 4G router manual (included). 1. Insert an active SIM card into the SIM slot. 2.
- Page 14 SLR-A75 Series | Solar Surveillance QR code remote access setup (4G) 1. Install the free app from the App Store for iOS (iDMSS Plus) or Play Store for Android (gDMSS Plus). 2. Open the iDMSS Plus/gDMSS Plus app you have installed on your device and select “Camera” 3.
- Page 15 3. Connections 3.3 Finish camera installation 1. Close the junction box and securely fasten the 4 attached bolts (Fig. 3.3a). Fig. 3.3a Complete solar surveillance system www.activeonline.com.au...
- Page 16 SLR-A75 Series | Solar Surveillance 4. Solar Sensor Light Configuration (Optional) This section covers how to set up the motion-activated 40W LED light on the solar panel. Our example will show you how to configure your solar panel & light with the remote control, showing you the steps required to set up the light to activate after motion is detected at night.
-
Page 17: Operation
4. Solar Panel LED Configuration 3. Point the remote control at the solar panel’s black sensor and press Param (Parameters) to open the settings editing menu. • Use the + and - keys to scroll. Press Set to begin editing values. The value should start flashing. •... - Page 18 SLR-A75 Series | Solar Surveillance Disabling Motion Activated LED Light To disable the LED light system again, simply change all S-Time values (S-Time-1, S-Time-2 & S-Time-) back to 0H. This will skip every Interval after the sun sets, so editing other values after this point is unnecessary. 4.2 Check Solar Panel Configuration Fig.
-
Page 19: Troubleshooting
5. Troubleshooting 5. Troubleshooting 1. I can't connect to the camera using the QR code. • Ensure that your camera is powered on power. • Check that the inserted SIM card is active. 2. Video footage is slow/laggy/choppy. • Ensure that your camera is in an area with good mobile service coverage and that only one user is viewing the system at once. - Page 20 SLR-A75 Series | Solar Surveillance Note: All products, designs and software here are subject to change without prior written notice. Please visit our website for more information. For more information, please visit: www.activeonline.com.au Crucial evidence. Always. Crucial evidence. Always.
Need help?
Do you have a question about the Solar Surveillance SLR-A75 Series and is the answer not in the manual?
Questions and answers