
Related Manuals for Bticino 344643


Summary of Contents for Bticino 344643
- Page 1 Classe 300X 344642 - 344643 Installation Manual RA00138AG-10/21-PC www.bticino.com...
- Page 2 Classe 300X Installation Manual...
-
Page 3: Table Of Contents
Classe 300X Installation Manual Contents General information Warnings and recommendations Warnings and consumer rights Front view Rear view Dimensional data and installation heights Wall-mounted installation Installation on the table-top base Physical configuration Configurators Functions of the M units configurator (Favorites key) Functions of the M tenths configurator (Quick actions) First switching on Settings... -
Page 4: General Information
We would like to inform you that the service provided by BTicino by means of remote use via the APP involves the use of data. The cost linked to data usage depends on the type of contract which the... -
Page 5: Warnings And Consumer Rights
Classe 300X Installation Manual Warnings and consumer rights Read carefully before use and keep for future reference. Touching the units with wet hands is forbidden. Using liquid cleaners or aerosols is forbidden. Blocking the ventilation openings is forbidden. Modifying the devices is forbidden. Removing protective parts from the devices is forbidden. -
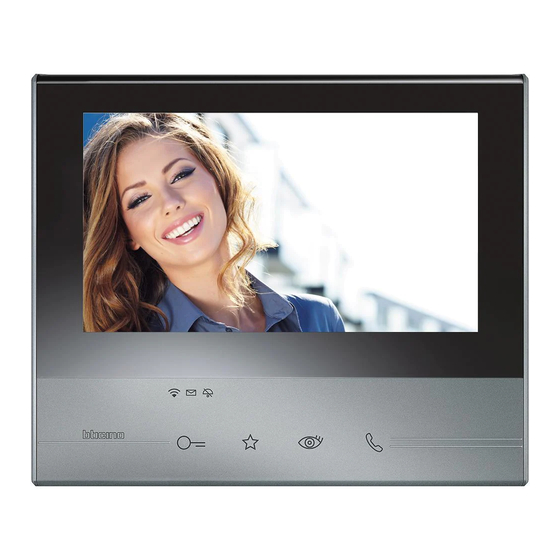
Page 6: Front View
Classe 300X Installation Manual Front view 10:36 Tuesday, 22 April Download the Door Entry App Quick Actions Private camera Answering machine Cameras Memo External intercom Pager Intercom Activations Settings Lock Note: The image* shows the device with all its functions enabled. In this manual check how to enable them. - Page 7 Classe 300X Installation Manual 16. Favorites key: the red LED turns on when the key is pressed (Basic configuration = STAIRCASE LIGHT. For a different configuration refer to the physical configuration table) 17. Door lock release key: the red LED turns on when the key is pressed 18.
-
Page 8: Rear View
Classe 300X Installation Manual Rear view 1. Configurator socket 2. Configurator J1: Remove if the additional power supply is present (clamp 1 and 2) 3. Configurator J2: for correct operation do not remove 4. Line termination ON/OFF micro-switch 5. Mini USB socket for device Firmware update using the MyHomeSuite software Note: the device must be powered (1-2 or BUS) 6. -
Page 9: Dimensional Data And Installation Heights
Classe 300X Installation Manual Dimensional data and installation heights 194 mm 25 mm 10:36 Lunedì, 22 Aprile Download the Door Entry App Quick Actions Private camera Answering machine Cameras External intercom Memo Pager Intercom Activations Settings Lock Altezza consigliata salvo diversa normativa vigente... -
Page 10: Wall-Mounted Installation
Classe 300X Installation Manual Wall-mounted installation Caution: avoid fastening the bracket on uneven or irregular surfaces and excessive screw tightening, in order to prevent any bracket distortion that may compromise the correct installation of the device. The device must slide in the appropriate bracket rails with a slight pressure and without straining. -
Page 11: Installation On The Table-Top Base
Classe 300X Installation Manual Installation on the table-top base Position the microswitch on ON to terminate the line. 8-way socket: 336982/83/84 Livinglight 349414/15/18 Axolute... - Page 12 Classe 300X Installation Manual Wi-Fi installation requirements Check the Wi-Fi signal quality from the device display (see the Installer Manual). If it is low or does not exist, make sure that: – the device is not installed near large metal objects or electric devices that can generate electromagnetic field;...
-
Page 13: Physical Configuration
Classe 300X Installation Manual Physical configuration The device must be configured both physically or in advanced mode, the main differences are shown in the following table: Note: the connection of the configurators to the N - P - M sockets precludes the possibility of using the advanced configuration. -
Page 14: Configurators
Classe 300X Installation Manual Configurators J1 J2 Configurator functions 1. J1 = Remove if the additional power supply is present (clamp 1 – 2) 2. J2 = For correct operation do not remove 3. NN = Device address 4. PP = Address of the EP of which you can open the Door Lock with IU idle, and to which you can send the auto-on command 5. -
Page 15: Functions Of The M Units Configurator (Favorites Key)
Classe 300X Installation Manual Functions of the M units configurator (Favorites key) J1 J2 MOD=9 MOD=9 MOD=9 MOD=9 MOD=9 MOD=9 Staircase Light Control MM = MOD=9 MOD=9 MOD=9 Direct control of P+1 Door lock MM = 346210 346210 346210 P+1 P+1 P+1 P+1 MOD=5 P+1 P+1... -
Page 16: Functions Of The M Tenths Configurator (Quick Actions)
Classe 300X Installation Manual Functions of the M tenths configurator (Quick actions) The MM - (tenths) physical configurator decides which are the 4 QUICK ACTIONS icons that appear on the HOME PAGE, and can be activated by touching the display. J1 J2 –+ –+... - Page 17 Classe 300X Installation Manual Myself Pager Myself Poste externe 1 Camera 1 Intercom 1 Lock 1 Lock 1 Camera 1 Lock 2 Lock 2 Lock 1 346210 346210 MOD=9 MOD=9 346210 346210 346210 MOD=9 P+1 P+1 P+1 P+1 MOD=5 MOD=5 346210 346210 346210...
- Page 18 Classe 300X Installation Manual Intercom 2 Intercom 2 Intercom 2 Intercom 3 Intercom 3 Intercom 3 Lock 1 Lock 1 Intercom 4 Lock 2 Lock 2 Intercom 5 346210 346210 P+1 P+1 P+1 P+1 MOD=5 MOD=5 346210 346210 P+2 P+2 P+2 P+2 MOD=5 MOD=5...
- Page 19 Classe 300X Installation Manual Intercom 2 Camera 1 Lock 1 Lock 2 Intercom 3 Intercom 1 Intercom 4 Lock 1 Lock 3 Intercom 5 Lock 2 Lock 4 346210 346210 MOD=9 P+1 P+1 MOD=5 346210 P+2 P+2 MOD=5 346210 346210 P+1 P+1 P+3 P+3 MOD=5...
-
Page 20: First Switching On
Classe 300X Installation Manual First switching on After the device has been configured physically and connected, it is mandatory to perform the customisations using the menu. Wait for the LEDS to stop flashing and then touch the display to switch it on. Languages Next English... - Page 21 Classe 300X Installation Manual Back Time and date Next Set automatically date and time based on network Auto Date-Time and position 2013 5. Touch the icon for the parameter to set (date or time); the icons to increase or decrease the value appear.
- Page 22 Classe 300X Installation Manual 10:36 Tuesday, 22 April Download the Door Entry App Quick Actions Pager Camera 1 Lock 1 Answering machine Memo Settings Lock 2 9. Touch to proceed with the device customisation in the Settings section.
-
Page 23: Settings
Classe 300X Installation Manual Settings Wi-Fi/Associated accounts/Time and date/Language/Information/ Generals Key tone Volume/Intercom ringtone/Entrance Panel Ringtone/Other Ringtones ringtones... Clean monitor/Background/Calibration Display Recording Mode/Welcome Message/Record Message... Answering machine Add quick action Quick Actions Activation of Answering machine/ Professional Studio (Office) Configuration General settings This section contains the general settings and device information. - Page 24 Classe 300X Installation Manual Wi-Fi In this section it is possible to connect the device to your Wi-Fi network. Wi-Fi Back Wi-Fi 1. Touch to activate the function. Back Wi-Fi Wi-Fi Home Wi-Fi Wi-Fi 1 Wi-Fi 2 Wi-Fi 3 2. Select the domestic network to which you want to connect the device. Note: your domestic network must have the following features: –...
- Page 25 Classe 300X Installation Manual Wi-Fi Back Confirm Home Wi-Fi Password: ?123 3. Enter the password (if required). 4. Touch to display the unencrypted password. 5. Touch to activate the connection. The device provides the display or modification of the network connection parameters Back Wi-Fi Wi-Fi...
- Page 26 Classe 300X Installation Manual Back Wi-Fi Forget DHCP Home Wi-Fi IP address 192.168.178.43 Primary DNS 8.8.8.8 Network mask 255.255.255.0 Secondary DNS 8.8.4.4 Gateway 192.168.178.1 00:03:50:81:02:9E 7. Touch to disable the DHCP mode and to manually modify the parameters. IP address and Subnet mask: typical parameters of TCP/IP protocol networks, necessary •...
- Page 27 Classe 300X Installation Manual Wi-Fi Back Forget DHCP Home Wi-Fi IP address 192.168.178.43 Primary DNS 8.8.8.8 Network mask 255.255.255.0 Secondary DNS 8.8.4.4 Gateway 192.168.178.1 00:03:50:81:02:9E 8. Touch to modify the device IP address. IP address Back Confirm 9. Enter the new IP address. 10.
- Page 28 Classe 300X Installation Manual Associated accounts In this section it is possible to display the list of the users associated to your Classe 300X and the smartphones connected. It is also possible to disconnect the single smartphones or dissociate the user. Associated accounts Back This is the list of users associated to the video internal unit;...
- Page 29 Classe 300X Installation Manual j.smith@legrand.com Back Delete User Press on the bin to disconnect the smartphone. Press on delete user to dissociate the user and all his smartphones. You are disconnecting the smartphone, it can no longer interact with the video inter- smartphone 1 nal unit connected functions.
- Page 30 Classe 300X Installation Manual Time and date Set the current time and date. Back Time and date Set automatically date and time based on network Auto Date-Time and position GMT 00 London, Lisbon, Dublin GMT +1 Rome, Paris, Berlin GMT +2 Athens, Istanbul, Bucharest GMT +3 Moscow, Mogadishu, Doha GMT +3:30 Tehran 1.
- Page 31 Classe 300X Installation Manual If the symbol , appears in the Home page, touch it to update the date and time. 10:36 Tuesday, 22 April Download the Door Entry App Quick Actions Private camera Answering machine Cameras External intercom Memo Pager Intercom Activations...
- Page 32 Classe 300X Installation Manual Information In this section it is possible to display some information about the device configuration, the QR Code to download the user manual and the DOOR ENTRY APP and you can decide to display the APP banner in the Home Page. Back Info Banner in the homepage...
-
Page 33: Ringtones
Classe 300X Installation Manual Ringtones This section can be used to associate specific ringtones to certain events, and to adjust their volume. Settings Back Volume Generals Ringtones Main entrance panel Display Answering machine Internal intercom Quick Actions Configuration More ringtones... A. -
Page 34: Display
Classe 300X Installation Manual Display This section is used to calibrate, clean the monitor, and to change the background image. Settings Back Generals Ringtones Clean monitor Display Background Answering machine Quick Actions Calibration Configuration Clean monitor It’s used to disable the display and the keys for cleaning purposes, without the risk of sending unwanted commands. - Page 35 Classe 300X Installation Manual Background It gives the possibility to change the background image of the device. Back Background home 1. Scroll through the available images to get a background preview. 2. Touch to go back and save the settings. Calibration It can be used to adjust the touch pressure for the display.
-
Page 36: Answering Machine
Classe 300X Installation Manual Answering machine This page can be used to set the quality of the videos recorded by the answering machine, or to record, enable, disable the welcome message. Back Settings Generals Video recording resolution Ringtones Alta Display Welcome message Answering machine Record message... - Page 37 Classe 300X Installation Manual Record message Back Press to record 4. Touch to start recording, and then record the message. Back Record message 0:20 Press to stop recording 5. Touch to end the recording. Record message Cancel Save 0:20 Press to listen recording 6.
-
Page 38: Quick Actions
Classe 300X Installation Manual Quick actions In this section it is possible to decide which actions to display in home page, selecting them among the ones available based on the configuration of socket M, tenths (See “Functions of the M tenths configurator (Quick Actions)”). - Page 39 Classe 300X Installation Manual Back Add quick action Pager Camera 1 Lock 1 Lock 2 3. Touch to return to the quick action screen and save the settings. Back Settings Generals Pager Ringtones Camera 1 Display Answering machine Lock 1 Quick Actions Lock 2 Configuration...
-
Page 40: Configuration
Classe 300X Installation Manual Settings Back Generals Pager Ringtones Camera 1 Display Answering machine Lock 1 Quick Actions Lock 2A Configuration Configuration Settings Back Generals Pager Ringtones Camera 1 Display Answering machine Lock 1 Quick Actions Lock 2A Configuration 1. Touch to configure the device, manage the compatible devices, send notifications to the after- sales service and reset the device and/or the Wi-Fi settings. -
Page 41: Compatible Devices
Classe 300X Installation Manual Compatible devices This page can be used to display and enable all the devices compatible with your Classe 300X Settings Back Generals Installer menu Ringtones Compatible devices Display Answering machine Report a problem Quick Actions Device reset Configuration Wi-Fi reset 1. - Page 42 This page can be used to manage the devices that are compatible with your video internal unit NETATMO cameras 2. Touch to access NETATMO cameras and complete the authentication process. “Netatmo” login Confirm Back User: J.Smith@bticino.com Password: ?123 3. Enter your NETATMO account credentials. 4. Touch to save it.
- Page 43 Classe 300X Installation Manual NETATMO Select the home from which to recover the presence information Main home Mountain home Seaside home 5. Select the home where the Welcome NETATMO camera/s to associate to Classe 300X is/are installed Back NETATMO List of “Netatmo” cameras Entrance camera Corridor camera Playroom camera...
-
Page 44: Report A Problem
Classe 300X Installation Manual Report a problem Settings Back Generals Installer menu Ringtones Compatible devices Display Answering machine Report a problem Quick Actions Device reset Configuration Wi-Fi reset 1. Touch to point out a problem which has occurred. Note: you will not receive a direct answer, but your signal will be used by developers to improve the service. - Page 45 Classe 300X Installation Manual Report a problem Cancel Send Your suggestions will be used by our developers to improve the service Problem Report not sent. Please retry to send report A. Display of the send notification message not successful. Report a problem Cancel Send Your suggestions will be used by our developers to improve the service...
-
Page 46: Device Reset
Classe 300X Installation Manual Report a problem Cancel Send Your suggestions will be used by our developers to improve the service Describe the problem 4. Touch to return to the previous page. Device reset Settings Back Generals Installer menu Ringtones Compatible devices Display Answering machine... -
Page 47: Wi-Fi Reset
Classe 300X Installation Manual Wi-Fi reset Settings Back Generals Installer menu Ringtones Compatible devices Display Answering machine Report a problem Quick Actions Device reset Configuration Wi-Fi reset 1. Touch to delete the Wi-Fi settings. Settings Back Generals Installer menu Ringtones All Wi-Fi network data will be deleted. -
Page 48: Menù Installatore
Classe 300X Installation Manual Menù installatore Settings Back Generals Installer menu Ringtones Compatible devices Display Answering machine Report a problem Quick Actions Device reset Configuration Wi-Fi reset 1. (After entering the unlock code) touch to make the answering machine and office functions available in the home page, therefore giving the user the possibility of enabling or disabling them. - Page 49 Classe 300X Installation Manual Configuration Back Answering machine Professional studio 4. Touch to make the function available in the home page. Note: Further configurations are also available in the advanced mode, which can only be used if no configurators have been connected to sockets N-P-M.
-
Page 50: Advanced Configuration
Classe 300X Installation Manual Advanced Configuration The advanced configuration gives the possibility of configuring all the basic settings, the quick actions and the camera, intercom, and activation functions, without being bound to a predefined set. First switching on After connecting the device, perform the customisations. Wait for the LEDS to stop flashing and then touch the display to switch it on. - Page 51 Classe 300X Installation Manual Time and date Back Next Set automatically date and time based on network Auto Date-Time and position 2013 5. Touch the icon for the parameter to set (date or time); the icons to increase or decrease the value appear.
- Page 52 Classe 300X Installation Manual Back Generals Intercom Camera Actuation Answering machine Professional studio 8. Enter the N configurator values to set the address device and enter the P configurator values to set the address of the EP of which you can open the Door Lock with IU idle, and to which you can send the auto-on command.
-
Page 53: Configuration
Classe 300X Installation Manual Settings Wi-Fi/Associated accounts/Time and date/Language/Information/ Generals Key tone Volume/Intercom ringtone/Entrance Panel Ringtone/Other Ringtones ringtones... Clean monitor/Background/Calibration Display Recording Mode/Welcome Message/Record Message... Answering machine For the above mentioned settings, refer to the Settings section of the physical configuration. General/Intercom/Camera/Activation/Change password Configuration Quick Actions... -
Page 54: Compatible Devices
Classe 300X Installation Manual Compatible devices This page can be used to display and enable all the devices compatible with your Classe 300X Back Settings Generals Installer menu Ringtones Compatible devices Display Answering machine Report a problem Quick Actions Device reset Configuration Wi-Fi reset 1. - Page 55 This page can be used to manage the devices that are compatible with your video internal unit NETATMO cameras 2. Touch to access NETATMO cameras and complete the authentication process. “Netatmo” login Back Confirm User: J.Smith@bticino.com Password: ?123 3. Enter your NETATMO account credentials. 4. Touch to save it.
- Page 56 Classe 300X Installation Manual NETATMO Select the home from which to recover the presence information Main home Mountain home Seaside home 5. Select the home where the Welcome NETATMO camera/s to associate to Classe 300X is/are installed Back NETATMO List of “Netatmo” cameras Entrance camera Corridor camera Playroom camera...
-
Page 57: Report A Problem
Classe 300X Installation Manual Report a problem Settings Back Generals Installer menu Ringtones Compatible devices Display Answering machine Report a problem Quick Actions Device reset Configuration Wi-Fi reset 1. Touch to point out a problem which has occurred. Note: you will not receive a direct answer, but your signal will be used by developers to improve the service. - Page 58 Classe 300X Installation Manual Report a problem Cancel Send Your suggestions will be used by our developers to improve the service Problem Report not sent. Please retry to send report A. Display of the send notification message not successful. Report a problem Cancel Send Your suggestions will be used by our developers to improve the service...
-
Page 59: Device Reset
Classe 300X Installation Manual Report a problem Cancel Send Your suggestions will be used by our developers to improve the service Describe the problem 4. Touch to return to the previous page. Device reset Settings Back Generals Installer menu Ringtones Compatible devices Display Answering machine... -
Page 60: Wi-Fi Reset
Classe 300X Installation Manual Wi-Fi reset Settings Back Generals Installer menu Ringtones Compatible devices Display Answering machine Report a problem Quick Actions Device reset Configuration Wi-Fi reset 1. Touch to delete the Wi-Fi settings. Settings Back Generals Installer menu Ringtones All Wi-Fi network data will be deleted. -
Page 61: Menù Installatore
Classe 300X Installation Manual Menù installatore Settings Back Generals Installer menu Ringtones Compatible devices Display Answering machine Report a problem Quick Actions Device reset Configuration Wi-Fi reset 1. Touch to configure the device in advanced mode. In order to access this section, the unlock code must be entered. Configuration Back Confirm... -
Page 62: General Settings
Classe 300X Installation Manual General settings Back Generals Intercom Camera Actuation Answering machine Professional studio 1. Enter the N configurator values to set the address device and enter the P configurator values to set the address of the EP of which you can open the Door Lock with IU idle, and to which you can send the auto-on command. - Page 63 Classe 300X Installation Manual Back Add intercom Generals Intercom Camera Actuation 2. Touch to add an intercom. Add intercom Back Save Type Internal intercom Description Internal intercom 0 Address 3. Select the type of intercom among: Internal: it provides communication among rooms of the same apartment (or among devices of different apartments but only if there are no apartment interfaces) External: it provides communication among rooms of different apartments (if there are apartment interfaces)
-
Page 64: Camera
Classe 300X Installation Manual Back Add intercom Generals Intercom Internal intercom 0 Camera External intercom 0 Actuation Pager 0 General intercom 0 A. Change the name of the intercom. B. Delete intercom. Camera This section can be used to configure the cameras that will give users the possibility of displaying the images from their own apartments, the apartment block area, or a CCTV surveillance system. - Page 65 Classe 300X Installation Manual Back Add camera Generals Intercom Camera Actuation 2. Touch to add a camera/entrance panel. Back Add camera Save Type Private camera Description Private camera 0 Address 3. Select the type of camera/entrance panel among: Private: it gives the possibility of displaying the images from a camera/entrance panel installed in the own apartment (if an apartment interface has been installed) Public: it gives the possibility of displaying the images from a camera/entrance panel installed in a common area, visible to all residents (if an apartment interface has been installed)
-
Page 66: Activation
Classe 300X Installation Manual 4. Change name. 5. Enter the address of the camera/entrance panel 6. Touch to save. Back Add camera Generals Intercom Private camera 0 Camera Public camera 0 Actuation TVCC 0 A. Change the name of the camera/entrance panel. B. - Page 67 Classe 300X Installation Manual Back Add actuation Generals Intercom Canera Actuation 2. Touch to add an activation. Back Add actuation Save Type Lock Description Lock 0 Address 3. Select the type of activation among: Lock: it is possible to activate a door lock actuator Note: the function configurations or modification on the Classe 300X will be automatically reported...
-
Page 68: Quick Actions
Classe 300X Installation Manual Back Add actuation Generals Intercom Lock 0 Canera Lock 1 Actuation Generic activation A. Change the name of the activation. B. Delete activation. Once the system functions have been configured, some can me made available to the users, giving them the possibility of selecting the 4 Quick Actions to display in their home page. - Page 69 Classe 300X Installation Manual Back Add quick action Cameras Private camera 0 Public camera Intercom Activations TVCC A. Available Functions. B. Function already used as quick action. 2. Touch to select the function to be used as quick action. Settings Back Generals Private camera 0...
-
Page 70: Factory Configuration
Classe 300X Installation Manual 10:36 Tuesday, 22 April Download the Door Entry App Quick Actions Private camera Answering machine Cameras Public camera Memo Internal intercom Intercom Activations Settings External intercom Now the quick actions appear in the home page. Factory configuration –... -
Page 71: Troubleshooting
Classe 300X Installation Manual TROUBLESHOOTING PROBLEM SOLUTION Check that the jumper2 is in the housing, that there The internal unit rings but does not turn are at least 18V, that the jumper1 is not inserted if it is locally supplied The internal unit does not ring and does Check that there are at least 18V, check the device not turn on... - Page 72 BTicino SpA Viale Borri, 231 21100 Varese www.bticino.com BTicino Spa reserves at any time the right to modify the contents of this booklet and to communicate, in any form and modality, the changes brought to the same.
Need help?
Do you have a question about the 344643 and is the answer not in the manual?
Questions and answers