Table of Contents

Related Manuals for Avigilon NVR5-STD-16TB-W10


Summary of Contents for Avigilon NVR5-STD-16TB-W10
- Page 1 Installation Guide Avigilon NVR5 Standard NVR5-STD-16TB-W10, NVR5-STD-16TB-S19, NVR5-STD-24TB-W10, NVR5-STD-24TB-S19, NVR5-STD-32TB-W10, NVR5-STD-32TB-S19, NVR5-STD-48TB-W10, NVR5-STD-48TB-S19, NVR5-STD-64TB-W10, NVR5-STD-64TB-S19...
- Page 2 The contents of this document and the specifications of the products discussed herein are subject to change without notice. Avigilon Corporation reserves the right to make any such changes without notice. Neither Avigilon Corporation nor any of its affiliated companies: (1) guarantees the completeness or accuracy of the information contained in this document;...
-
Page 3: Table Of Contents
Configure the Operating System Log into Windows 10 for the First Time Log into Windows Server for the First Time Activate the ACC Software and Connect to Avigilon Cloud Services Activate ACC Software and Feature Licenses Connect to Avigilon Cloud Services Reactivating a License... - Page 4 Network Link Status Indicators Hard Drive RAID Status Indicators System Health and Identification Modes Resetting the iDRAC System For More Information Product User Guides...
-
Page 5: Introduction
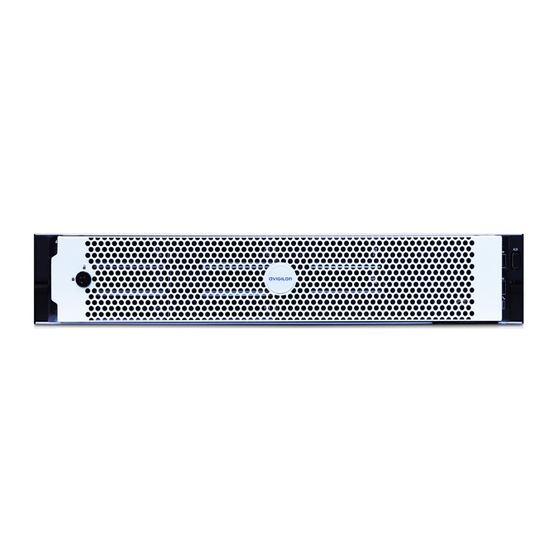
The Avigilon Network Video Recorder (NVR5 Standard) is preloaded with Avigilon Control Center (ACC) software and is configured for exceptional performance and reliability. The Network Video Recorder can be easily integrated into any existing Avigilon surveillance system or act as the base of a new site. Before You Start... - Page 6 Figure 2: Front view of NVR5 Standard 16TB - 64TB recorder with front bezel removed 1. Bezel Protects against unauthorized physical access to the hard drives. For more information, see Install the Bezel on page 10. 2. Power button Controls the power supply to the recorder. 3.
-
Page 7: Back View
Back View Figure 3: Back view of NVR5 Standard 16TB - 64TB recorder 1. Two (2) 1 Gbps Ethernet ports Accepts Ethernet connections to multiple networks and includes LED indicators of the connections. 2. Out-of-Band Management (OOBM) port Accepts an OOBM RJ-45 connection and includes an LED indicator of the connection. 3. -
Page 8: Package Contents
Package Contents Ensure the package contains the following: Avigilon NVR5 Standard Recorder Rack sliding rail assembly kit Cable management arm assembly kit Bezel and key Power cables C13 / C14 Region specific NA: NEMA 5-15P / C13 UK: BS 1363 / C13... -
Page 9: Installation
Installation Connect Cables Refer to the diagrams in the Overview section for the location of the different connectors. Make the following connections as required: 1. Connect a KVM switch or separate keyboard, mouse and monitor to the recorder. The keyboard and mouse can be connected to any USB port on the recorder. The monitor can be connected to any video connector at the front or back of the recorder. -
Page 10: Install The Bezel
Install the Bezel The bezel can be installed on the front of the recorder to help protect the hard drives against unauthorized access. 1. Align and insert the right end of the bezel until it clicks into place. 2. Push the left end of the bezel into the front of the unit until it clicks into place. Install the Bezel... -
Page 11: Configure The Operating System
Use ACC 7.x.x (recommended). Select this option to use the latest version of the ACC software. You are logged in to the Windows environment. The Avigilon Control Center Admin Tool and the ACC Client automatically start up. Note: If you are performing operating system recovery, the ACC Client does not automatically start up. -
Page 12: Log Into Windows Server For The First Time
9. Once the setup procedure is complete, the system will restart. Proceed to activate the license for the Avigilon Control Center software on your Network Video Recorder. Log into Windows Server for the First Time... -
Page 13: Activate The Acc Software And Connect To Avigilon Cloud Services
You can start to back up the system settings for your new site in the ACC Client software after it is configured. These settings include the ACC password, and the settings for the camera connections. For more information on backing up the site and server configurations, see the Avigilon ACC Client User Guide. Reactivating a License... -
Page 14: Troubleshooting
You can monitor the health of the system components in the Site Health in the ACC Client software. See the Help files provided with the ACC Client software, or the Avigilon ACC Client User Guide available from the Avigilon website for more information. - Page 15 2. On the Choose an option screen, select Use another operating system. 3. Select the OS Recovery partition. 4. On the Avigilon Recovery window, select Recover. Allow up to half an hour for the recovery to complete. 5. After system reboot, complete the Windows setup process.
-
Page 16: Operating System Recovery By External Usb
ACC software. The ACC software installation is covered in the following step. 6. Navigate to C:\Avigilon\Control Center Installation Files, and run the ACC installer for the version of ACC software in use at your site. If needed, connect to the internet and download the required ACC installers. -
Page 17: Maintenance
Maintenance Checking System Health You can check your system health through the ACC Client Site Health or with the Server Administrator software. ACC Client Site Health You can check on the health of the system components in the Site Health in the ACC Client software. See Site Health in the ACC Client User Guide for more information. -
Page 18: Replacing Hard Drives
Guide for Avigilon Systems (link). The operating system and the Avigilon Control Center software are mirrored on two hard drives at the back of the recorder. If one of the hard drives fail, you can replace the failed drive while the recorder continues to run from the other. -
Page 19: Replacing A Hard Drive Blank
CAUTION — Do not operate the system without the cover for a duration exceeding five minutes. Operating the system without the system cover can result in component damage. CAUTION — To ensure proper operation and cooling, all bays in the system and system fans must be always populated with a component or a blank. - Page 20 2. Press the release button and slide the blank out of the hard drive slot. 3. Insert the hard drive all the way into the recorder then push the handle against the hard drive to lock it into place. 4. Open the Server Administrator application and expand the System Tree. The new hard drive should be automatically added to the Physical Disks list.
-
Page 21: Replacing Front Or Back Hard Drives
Replacing Front or Back Hard Drives 1. Locate the failed hard drive at the front or back of the recorder. 2. Press the release button on the front left of the hard drive. 3. When the handle is released, pull the hard drive out of the recorder. 4. -
Page 22: Led Indicators
Blinking blue — System identification mode is active. Steady amber — The system is in fail-safe mode. Note: If the system health indicates a degraded or critical state, contact Avigilon Technical Support for assistance. System health and System ID Blinking amber — The system is experiencing a fault. Check the System Event Log. -
Page 23: Idrac Direct Led Indicators
LED Indicator Description Steady amber — A memory error has occurred. Check the System Event Log and reseat the memory module, if the error persists. Memory Steady amber — A PCIe card error has occurred. Restart the system, upgrade the device firmware and reinstall the card, if the error PCIe persists. - Page 24 LED Indicator Description Blinking amber There is a problem with the power supply. Blinking green A firmware update is being applied to the power supply unit. CAUTION — To prevent malfunction of the power supply unit, do not disconnect the power cord or unplug the power supply unit when updating firmware.
- Page 25 LED Indicator Description Link LED — green The recorder is connected to a network at the maximum port speed. Connection Activity LED — blinking green Link LED — amber The recorder is connected to a network at less than the maximum port speed. Connection Activity LED —...
- Page 26 For information about using the iDRAC web interface to perform the reset, see the Enabling iDRAC Enterprise Features Setup Guide (link). Limited Warranty Avigilon warranty terms for this product are provided at avigilon.com/warranty. System Health and Identification Modes...
- Page 27 For More Information For additional product documentation and software and firmware upgrades, visit support.avigilon.com. Technical Support Contact Avigilon Technical Support at support.avigilon.com/s/contactsupport. Product User Guides Windows Upgrade and Recovery Guide for Avigilon Systems (link) Enabling iDRAC Enterprise Features Setup Guide (link)
Need help?
Do you have a question about the NVR5-STD-16TB-W10 and is the answer not in the manual?
Questions and answers