Table of Contents
Advertisement
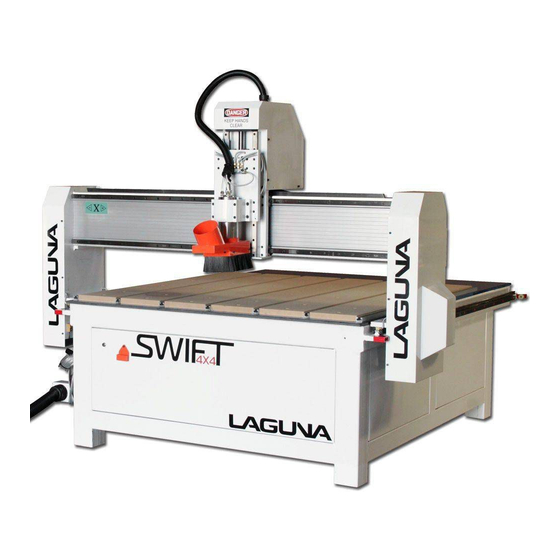
CNC Swift Series
with WinCNC Manual
LAGUNA TOOLS
2072 Alton Parkway
Irvine, California 92606
Ph: 800.234.1976
www.lagunatools.com
© 2017, Laguna Tools, Inc. LAGUNA® and the LAGUNA Logo® are the registered trademarks of Laguna Tools, Inc. All rights reserved.
Model Numbers:
MCNC Swift 48 X 96-0233
MCNC Swift 48 X 48 1000-0233
Advertisement
Table of Contents

Related Manuals for Laguna Tools CNC Swift Series


Summary of Contents for Laguna Tools CNC Swift Series
- Page 1 Irvine, California 92606 Model Numbers: MCNC Swift 48 X 96-0233 Ph: 800.234.1976 MCNC Swift 48 X 48 1000-0233 www.lagunatools.com © 2017, Laguna Tools, Inc. LAGUNA® and the LAGUNA Logo® are the registered trademarks of Laguna Tools, Inc. All rights reserved.
- Page 2 Machines sold through dealers must be registered with Laguna Tools within 30 days of purchase to be covered by this warranty. Laguna Tools guarantees all new machines and accessories sold to be free of manufacturers’...
-
Page 3: Table Of Contents
LAGUNA TOOLS TABLE OF CONTENTS General Information ............................... 5 Safety Rules ......................................5 Noise Emission ....................................... 6 Receiving your machine ..................................6 Cautionary Statement .................................... 6 Introduction to the CNC machines ......................... 7 Parts of the CNC Machine ..................................7 PC Components ...................................... - Page 4 LAGUNA TOOLS 4 Turning on the Machine .................................. 1 8 Shutting Down the Machine ................................ 1 9 Emergency Stop Options .................................. 1 9 Homing the Machine ................................... 2 0 Fitting a Routing Bit ..................................... 2 0 Spindle Operation .................................... 2 1 Measuring Tool Length (Touch Top Button) ............................ 2 2 Setting Tool Length Offset (Meas. Z Button) ............................ 2 3 From Aspire to Cutting Tutorial .......................... 24 ...
-
Page 5: General Information
LAGUNA TOOLS GENERAL INFORMATION SAFETY RULES As with all machinery there are certain hazards involved with the operation and use of this machine. Using it with caution will considerably lessen the possibility of personal injury. However, if normal safety precautions are overlooked or ignored, personal injury to the operator may result. If you have any questions relative to the installation and operation of this machine, do not use the equipment until you have contacted your supplying distributor. -
Page 6: Noise Emission
Insure that there is no visible damage to the packing, or the machine. You need to do this prior to the driver leaving. All damage must be noted on the delivery documents and signed by you, and the delivery driver. You must then contact the seller [Laguna Tools] within 24 hours. CAUTIONARY STATEMENT There is danger associated with the use of any machine. -
Page 7: Introduction To The Cnc Machines
LAGUNA TOOLS 7 INTRODUCTION TO THE CNC MACHINES The CNC is designed to give you years of safe service. Read this owner’s manual in its entirety before assembly or use. The advantage of the CNC machine is that it can, in most cases, fully machine the complete job without it being removed from the table so that you have finished parts of high accuracy that are totally repeatable. If the relevant software is purchased and installed, it can also produce intricate carvings. Nesting is also a valuable feature of CNC machining that saves on waste and costs. It is possible to reduce the amount of different machines in the shop as the CNC will perform a multitude of functions and meet the needs for cabinet makers and serious woodworkers. PARTS OF THE CNC MACHINE 1. Bed ‐ The bed of the machine consists of a heavy steel frame and a “T‐Slot” Table. The “T” slots are used to clamp the job or fixtures to the bed. 2. Gantry ‐ The gantry straddles the bed and carries the router spindle motion system. It is moved along the length of the bed by a precision pinion gear system that is controlled by the machine controller. 3. Router Spindle ‐ The router spindle is moved along the gantry by a precision ball screw system that is controlled by the machine controller. 4. Frame ‐ The frame is a heavy welded construction that supports all the other parts of the machine. ... -
Page 8: Pc Components
LAGUNA TOOLS 8 7. Water pump ‐ The water pump provides coolant for the router spindle motor. Running the router spindle without the cooling pump running can lead to spindle bearing failure. PC COMPONENTS There are circuit boards that have been installed into the PC's tower. If the PC is to be replaced the cards must be re‐installed into the new PC tower. The WinCNC software must then be re‐installed. Figure 2. PC Tower showing internal PCI cards ASSEMBLY AND SETUP WHERE TO LOCATE YOUR MACHINE Before you unpack your machine, select the area where you will use your machine. There are no hard and fast rules for its location, but, here are a few guidelines. There should be an area around the machine suitable for the length of wood that you will be machining. Adequate lighting. The better the lighting, the more accurate and safely you will be able to work. Solid floor. You should select a solid flat floor, preferably made of concrete or something similar. Close to power source and dust collection. UNPACKING THE MACHINE 1. To unpack your machine, you will need tin snips, a knife and a wrench. 2. Using the tin snips, cut the banding that is securing the machine to the pallet [if fitted]. WARNING: EXTREME CAUTION MUST BE USED BECAUSE THE BANDING WILL SPRING AND COULD CAUSE INJURY. 3. -
Page 9: Setting Up The Electrical Cabinet
LAGUNA TOOLS 9 6. Approaching the machine from the side, lift the machine on the frame taking care that there are no cables or pipes in the area of the forks. 7. Move the machine to the required position and lower gently to the floor. 8. Level the machine so that all the supporting feet are taking the weight of the machine and no rocking is taking place. SETTING UP THE ELECTRICAL CABINET 1. Position the electrical cabinet so that it is perpendicular to the machine. See figure 3. 2. Adjust the feet on the lower shelf legs until the electrical cabinet is stable. 3. Mount the monitor on the top of the cabinet. Hardware to mount the monitor includes an M8 bolt, wing nut, and washer. See figure 6. 4. Place the PC on the lower shelf on the backside of the Figure 3. Electrical cabinet positioned perpendicular to the machine machine. See figure 4. 4.1 Have the front of the PC face the machine so that the computer’s fan faces away from the machine. This is to help reduce the amount of dust that will enter the PC’s vents. 4.2 Leave a gap between the PC’s vents and the back panel of the machine. This will prevent the PC from overheating. 5. -
Page 10: Fitting The Dust Hose
LAGUNA TOOLS 10 The machine requires 220V electrical power connected to the primary power switch located on the front of the cabinet. WARNING – Contact an electrician if there is any uncertainty about how to properly connect your machine to power. 1. Connect 220V to the primary switch. 2. Route power supply through the side openings on the electrical cabinet. Figure 7. Power supply connections FITTING THE DUST HOSE 1. Fit the dust hose to the dust shroud and secure with the clamp. Ensure that it is tight as it is very inconvenient to have it fall off during production. 2. Fit the shroud to the router head. Adjust the shroud so that the brushes are even with the tip of the router bits that you will be using. If it is too low the brushes may drag on the job being cut and could be cut by the router bit. If it is too high and is not in contact with the job, suction may not be optimal. Once adjusted, clamp with the clamping Allen screw. Figure 8. Dust shroud and dust hose setup 3. Feed the dust hose through the dust hose support. 4. Fit the dust hose adaptor to the end of the dust hose and secure with the clamp. The adaptor allows a 4” hose to be connected to the machine. ... - Page 11 LAGUNA TOOLS 11 1. There are two water tubes that come out of the caterpillar track. These are used to provide cooling for the liquid‐cooled router spindle. Note: Never run the motor without the cooling being connected or the motor could be damaged. 2. Connect one water tube to the water pump and place the other in the water container for the return water. 3. It is not important which pipe is used as the return. 4. Fit the 90 degree connector to the pump. 5. Connect one of the pipes to the water pump by pushing into the 90 degree connector. Lightly pull on the pipe to ensure that it is connected correctly. 6. Fill a container about ¾ full with clean water. Figure 9. Water pump in coolant reservoir Note. You will need to provide a coolant tank with a minimum capacity of 5 gallons. If the shop temperature is high, the tank size will have to be larger. If your shop is likely to be subject to freezing temperatures, antifreeze must be added to the cooling water. 7. Lower the water pump into the container ensuring that it is the correct way up [water inlet lowest] and place the water return pipe into the container. 8.
-
Page 12: Control Panel Description
LAGUNA TOOLS 12 Note. If the spindle is run without cooling then it could be damaged and fail. CONTROL PANEL DESCRIPTION This section describes the functions of the controls located on the electrical cabinet. Figure 11. Control panel overview 1. White indicator light 1.1 ON – Machine has control power and is in the ready state. 1.2 OFF – The machine does not have control power. 2. Red indicator light 2.1 ON –Primary power supply is on, but the machine is not powered ON. 2.2 OFF – Machines primary switch is in the off position. 3. Emergency Stop Switch 3.1 ON – Machine will cease executing commands. If the spindle is “ON” the spindle will power down. 3.2 OFF – Machine is fully operational. 4. ON button – Starts the machine. After pressing the ON button the machine will be fully functional 5. GREEN indicator light 5.1 ON – Water pump is ON. 5.2 OFF – Water pump is OFF. 6. Water pump ON/OFF switch 6.1 One indicates switch is ON, green light will be ON. 6.2 Zero indicates switch is OFF, green light will be OFF. 7. Key Lock – Must be in the ON position in order to start the machine. ... -
Page 13: Controller Interface Description
LAGUNA TOOLS 13 8. Variable Frequency Drive (VFD) controller – Serves as feedback from the spindle. It is not necessary to operate the spindle from the VFD. Visit the Delta Electronics website for more information on the VFD controller. CONTROLLER INTERFACE DESCRIPTION This section briefly explains all the features of the controller interface. SCREEN DISPLAY OVERVIEW MENU BAR The menu bar contains many of the main features of the WinCNC software. It is broken down into several generalized sections, as shown below. The menu bar selections are described in the following pages. If a menu option has a shortcut key, the shortcut key combination is listed in parenthesis () after the name of the menu option. 1. File Menu ... - Page 14 LAGUNA TOOLS 14 1.1. Open (CTRL+O) ‐ Opens a file. 1.2. Edit (CTRL+E) ‐ Opens the editor. If a filename is in the command line, the editor opens that file. 1.3. Simulate (CTRL+S) ‐ Simulates a file running to check for errors and estimate run time. 1.4. View (CTRL+V) ‐ Views a file in the viewer window. 1.5. Restart (CTRL+R) ‐ Opens the file restart dialog box to restart a file. 1.6. Create Home File (CTRL+H) ‐ Creates a home file at the current machine position. 1.7. Import 1.7.1. Import => DXF ‐ Allows the user to import DXF (Drawing Exchange Format) file. 1.7.2. Import => HPGL ‐ Allows the user to import HPGL (Hewlett‐Packard Graphics Language) file. Note: The DXF and HPGL import feature is intended for cutting simple designs. WinCNC does not compensate for tool diameter when converting these files. For more complicated design, where intelligent tool pathing is important, please use a compatible CAD/CAM program. 1.8. Digitize 1.8.1. Digitize => Manual ‐ Enable/Disable the Manual Digitizing Toolbar. 1.8.2. Digitize => Automatic ‐ Automatic digitizing (L802, L803). 1.8.3. Digitize => Frame ‐ Skeletal Digitizing (L810). This scanning method scans a center line or spine, and horizontal lines or ribs of the object. 1.8.4. Digitize => Outline ‐ Creates an outline trace around an object. 1.8.5. Digitize => Laser => Run Scan ‐ Opens the laser digitization dialog box to set up laser scanning parameters. 1.8.6.
- Page 15 LAGUNA TOOLS 15 4. View Menu 4.1. Resolution ‐ Views current resolution settings for each axis. 4.2. Acceleration ‐ Views current acceleration settings for each axis. 4.3. Limits ‐ Views current limit settings for each axis. 4.4. Inputs ‐ Views real‐time input states. 4.5. Outputs ‐ Views real‐time output states. 4.6. Toolbars ‐ Enable/Disable the main toolbar. 4.6.1. Toolbars=> Size ‐ Change toolbar from small to large. 4.7. Refresh View (F5) ‐ Refreshes the screen. 4.8. Clear Screen (CTRL+C) ‐ Clears the message display window. 5. Options Menu 5.1. Soft Limits (CTRL+L) ‐ Enable/Disable the software limits. 5.2. Keyboard (CTRL+K) ‐ Enable/Disable the keyboard transit/jog control used to move the machine with the keyboard. 5.3. Buttons ‐ Used to customize buttons. 5.4. Auto Repeat ‐ Auto populate the command line with the last command executed. 5.5. Auto Run ‐ Enable/Disable the auto run feature. 5.6. Auto Preview ‐ Enable/Disable the auto preview feature. 5.7. Single Step (CTRL+P) ‐ Enable/Disable single line execution of G‐Code files. 6.
-
Page 16: Tool Bar
LAGUNA TOOLS 16 features you have enabled. If you do not have a feature enabled that you would like or need, you can contact your software vendor for an upgrade. TOOL BAR The tool bar is a collection of shortcut buttons that perform specific actions. The toolbars in WinCNC are floating and can be positioned or docked according to the user’s preference. The image below shows the standard and manual digitizing toolbars docked in the normal toolbar area. The explanation of each button on the toolbar is as follows. The explanations move sequentially from left to right along the toolbar. Figure 13. Tool bar overview 1. Start Motion ‐ This button will begin the command or job listed in the command line. 2. Restart ‐ Allows you to pick a job file and the line to start that file on. This is useful if you want to skip over lines in a job file, or if you have aborted a job and want to start back at the point where you aborted from. You can also choose to run the file in single step mode. 3. Single Step ‐ When selected, this allows you to execute one line of a G‐Code file each time you hit ENTER. 4. Abort Motion ‐ Aborts a command or job that is running. 5. Pause/Continue Motion ‐ Pauses/Continues a command or job that is running. 6. Open File ‐ Opens a browse box that is used to open a job file. 7. View History ‐ Opens the command history box, which allows a user to execute a command used previously. When an error is found in the WINCNC.INI file, the line containing the syntax error is displayed here in red when WinCNC starts. 8. Edit ‐ Opens the default editor specified in the WINCNC.INI file. WinCNC uses Notepad by default. The editor can be used to open job files, listed in the command line in the editor. 9. Simulate ‐ Simulates a file to check for errors and run‐time. 10. View ‐ Opens a file for viewing in the viewer window. 11. Soft Limits ‐ Enables/Disables Softlimit features. 12. Manual Digitize Buttons ‐ The seven buttons on the manual digitization toolbar are for use only with the Manual Digitize feature, and will only be visible after showing the manual digitize toolbar under the ... -
Page 17: Axis Window
LAGUNA TOOLS 17 12.5. Close Shape ‐ Used to close the last move in a shape without moving the machine. 12.6. Undo ‐ Used to undo previous moves. 12.7. Save ‐ Allows you to save the manual digitized file in either G‐Code or DXF file format. AXIS WINDOW The axis window is the primary display for current information about each axis on your machine. The current positions and velocities for each axis are displayed in the text boxes. Displayed above the position and velocity boxes is the current unit of measure, any currently active modes, and the current feed rate override percentage. Red triangles to the left and right of each axis label indicate low or high limit switch hits. A red triangle to the left of an axis label indicates a low limit switch hit, and to the right indicates a high limit switch hit. A green box displayed to the right of the position box indicates a temporary workspace (G92) setting, and a blue box indicates a tool length measure or workspace setting. To the far right side of the axis window is the feed rate override control slide bar. Figure 14. Axis window overview BUTTON FUNCTIONS 1. SetXY – Executes a G92XY command. Sets a local zero for the X and Y axes. 2. Set Z – Executes a G92Z command. Sets a local zero for the Z axes. 3. Clear – Executes a G92 command. Clears all local zeros set by the G92 command. 4. Seek Home – Executes a G28 command. Homes the machine and resets Machine Zero coordinates. 5. Touch Top – Measures the length of the tool mounted in the spindle. See Chapter “Basic Operations” section “Measuring tool length” ... -
Page 18: Transit Speed Buttons
LAGUNA TOOLS 18 TRANSIT SPEED BUTTONS 1. Transit/Jog Buttons 1.1. Manual transit buttons. Hold the directional button down to continuously move the machine. 2. Transit Speed Buttons 2.1. Allows the user to adjust between three predefined transit speeds. The speeds can vary for each axis. The table below shows the default settings. Transit Speed Fast Med Slow Figure 16. Controller transit/jog buttons X 400 200 in/min 50 in/min in/min Y 400 200 in/min 50 in/min in/min Z 100 50 in/min 25 in/min in/min 3. Jog increment Buttons 3.1. These buttons allow you to specify the increment of a jog move. The default unit of measure is inches. INPUT INDICATORS ... -
Page 19: Shutting Down The Machine
LAGUNA TOOLS 19 NOTE: It is important that the WinCNC application be running on the PC before the machine is powered. This is to ensure that the user will have control over the machine at all times. If the machine is powered without the WinCNC application running, the machine may be susceptible to electronic noise causing abnormal behavior. Turn the main power switch to the ON position. The switch is located on the front of the electrical cabinet. The control power light should be in the RED state. Figure 19. Primary power Turn the machine key to position 1. switch in the ON position Press the Green ON button. The machine is now powered and the white indicator light will be ON. Figure 20. (Left) Red indicator light will be on when primary power switch is in the ON position. (Right) White indicator light will be on when the machine has control power. SHUTTING DOWN THE MACHINE Turn the power key to position zero. Turn the Main power switch to the OFF position. Close the desktop WinCNC application. Shut down the PC. EMERGENCY STOP OPTIONS 1. Emergency Stop Button – There is a emergency stop switch located on the electrical cabinet. Press during any machine operation to halt the machine. 2. -
Page 20: Homing The Machine
LAGUNA TOOLS 20 HOMING THE MACHINE It is important that the machine be homed upon startup to ensure the absolute coordinates are reset. This is because a machine can lose its position when it is in the OFF state. After the machine is powered on, click the “SEEK HOME” button located in the display screen. The machine will automatically seek home and zero out the machine coordinates displayed in the Axis Window. FITTING A ROUTING BIT 1. Select a router bit and its relevant collet. Note. The collets and spindle collet hole must be cleaned regularly. Ensure that the slots in the collets are free of sawdust as sawdust builds up and will stop the collet from compressing. If the collet or spindle hole are not clean, the router bit may not run true and this will effect the performance of your machine. 2. Fit the collet into the spindle nut. Press the collet into the spindle nut until it snaps into place, as shown in the figure on the right. 3. Note. The router bit must not be fitted into the collet until the collet has been fitted into the spindle nut. With the router bit fitted into the collet, the collet cannot compress and snap into the spindle nut. The face of the collet and the face of the spindle nut will be close to flush. Note. To remove the collet hold the spindle nut and press the collet on the side. The collet will compress and pop out. Do not try to remove the collet while a cutter is fitted as the collet will not compress and pop out. 4. Fit the spindle nut and collet assembly onto the spindle thread by hand. 5. -
Page 21: Spindle Operation
LAGUNA TOOLS 21 SPINDLE OPERATION 1. The Spindle can either be controlled using commands or by the spindle control buttons in the controller interface. NOTE: There will be a 10 second delay when the spindle is initially turned ON. This is to allow the spindle to reach the correct RPM before executing any other commands. This is intended to protect the machines components and optimize the cutting process. The user will be unable to perform any actions during this time. The only way to abort this command is to press the “esc” key on the keyboard. 2. Spindle control using the command line. 2.1 M3 – Turns the spindle on. Entering M3 in the command line will power the spindle, but it may not begin rotating unless an RPM is set. 2.2 Adjust spindle RPM manually by entering the character ‘S’ followed by a number between 0‐24000. Example: S12000 Sets spindle speed at 12000RPM M3 Turn on Spindle M5 Turn off Spindle 3. Spindle control using the display screen. 5.2 Pressing the Z Spindle button will turn the Spindle ON or OFF. 5.3 The spindle speed can be adjusted while spindle is OFF or ON. NOTE: The spindle speed can be adjusted while executing code. ... -
Page 22: Measuring Tool Length (Touch Top Button)
LAGUNA TOOLS 22 Figure 21. Controller interface spindle controls MEASURING TOOL LENGTH (TOUCH TOP BUTTON) Measuring tool length is a necessary step prior to cutting. It establishes the correct Z zero plane in the work space coordinate system. 1. Manual Method 1.1 Mount the tool in the spindle 1.2 Bring the tool over the material that will serve as the Z0 plane for the application. 1.3 Using the slow transit speed setting, lower the spindle down close to the table. 1.4 Slide a sheet of paper under the tool. Figure 22. Paper test for measuring tool length manually 1.5 Lower the tool down using the 0.001 or 0.01 incremental transit setting until there is tension on the paper but enough clearance to slide the sheet of paper out. 1.6 Press the “SetZ” button in the control interface. 1.6.1 A green box will appear next to the Z coordinate in the access window. ... -
Page 23: Setting Tool Length Offset (Meas. Z Button)
LAGUNA TOOLS 23 2. Automated Method 2.1 WARNING – Make sure the touch pad is functioning properly. 2.1.1 To verify proper functionality, position the router bit away from the table and then touch the tool touch‐off pad to the router bit. At the same time look for a change from red to green on the TTO Switch indicator, as seen in the figures below. Figure 23. Testing the tool touch off pad 2.2 Fit the router bit into the router head (See Basic Operations, Fitting the router bit). 2.3 Lower probe close to the top of the material and position the touch pad under the router bit so that the bit will make contact with the switch. Shown in figure 24. Figure 24. Executing a tool touch off using 2.4 In the control screen press the Touch Top button. the touch pad 2.4.1 The spindle will automatically lower down until it makes contact with the tool touch‐off pad. After making contact the spindle will retract to the Z‐ home position. 2.4.2 Commands being executed will be visible in the message display window. A green box should be ... -
Page 24: From Aspire To Cutting Tutorial
LAGUNA TOOLS 24 2. Place the Tool touch pad on top of the table or the material that will serve as the boundary plane. 3. Press the “Meas. Z” button located in the WinCNC controller interface. 4. There now should be a blue box located in the axis window next to the Z axis as shown to the left. This indicates that a tool measure is in effect. Figure 27. Blue box indicates that the tool length measure is in effect FROM ASPIRE TO CUTTING TUTORIAL Description: This section is a tutorial on how to take a design made in computer‐aided design (CAD) software, generate post processor code, upload to the controller, and begin cutting. It is assumed the user is familiar with their preferred CAD software, so the design process in CAD software is omitted. For this tutorial a simple design will be created using Aspire 4.510 to demonstrate concepts. 1. Create your design in CAD software 2. Save tool path 2.1. Before a tool path can be saved, a post processor must be selected. The correct post processors must be added manually to the CAD software being used. This will be demonstrated next for Aspire 4.5. Note: For 3D applications, the winCNC_CUT3D.pp file must be used to generate a tool path. 2.1.1. Go to the winCNC website at http://wincnc.net/ 2.1.2. Navigate through the website and download the corresponding post processor file. Figure 28. Navigation through the winCNC.net website to locate correct post processor file ... - Page 25 LAGUNA TOOLS 25 2.1.3. Move the post processor file to the folder where all other post processor files are located for the CAD software. 2.1.4. Save tool path. Shown in figure 30. Figure 29. Downloading a post processor file Figure 30. Saving a tool path in Aspire using the winCNC.tap post processor 3. Load program into the winCNC controller 3.1. Go to FileOpen and find the post processor file. The display will be similar to the figure to the right. 4. Mount cutting material to table ...
-
Page 26: 3D Scanning Guide
LAGUNA TOOLS 26 8. Measure Tool length (See “Measuring Tool length”) 9. Set X, Y work coordinates. 9.1. Start by relocating your spindle to the XY datum position that was declared in the CAD software. 9.2. Press the “Set XY” button. Green boxes should appear in the axis window as shown. 10. Make sure spindle cooling is on, whether it is liquid cooled or fan cooled. Figure 32. Controller screen shot after pressing the Set XY button 11. Press the start button to begin executing. 11.1. Emergency stop options include the emergency stop switch, the esc button on the keyboard or the spacebar. Figure 33. Controller screen shot after setting temporary zeros, tool length measure, and loading a program. 3D SCANNING GUIDE The WinCNC controller supports 3D digitizing scanning. This feature uses a touch probe to sample points in 3D ... - Page 27 LAGUNA TOOLS 27 1. Mount touch probe into the spindle. 1.1 Using a suitable collect (3/8") and clamping nut(ER20‐A‐W). 1.2 Fasten the touch probe’s connector into the connector on the gantry. 1.3 Bundle the touch probe's wire and secure it into the clip located on the spindle mounting plate. Leave extra slack between the clip and connector Figure 34. Touch probe mounting to allow for travel along the Z‐axis. 2. Verify that the touch probe is working properly before proceeding to prevent damage to the probe. 2.1 Manually activate the touch probe and verify that the touch probe indicator in your winCNC controller changes state from Red to Green, as seen to the right 2.2 If touch probe indicator does not change state, do not proceed until fault is corrected. 3. Fasten the part to be scanned to the spoil board. 3.1 This can be done by using double‐sided tape or vacuum if your machine is equipped with a vacuum table. 3.2 For demonstration purposes, the sample part seen to the right will be used throughout this walkthrough. 4. Enter the L82Z0 command in the command window 4.1 Position the touch probe such that it can travel in the ...
- Page 28 LAGUNA TOOLS 28 5. Manually position the probe to the corner that will serve as the X0,Y0 work coordinates, in other words the negative‐most corner. The probe will travel in the positive X and Y direction. 6. Set the local zero for the X and Y axes by pressing the Figure 37. Starting location for a 3D scan "Set XY" button. Note: Step 6 is not necessary to execute a 3D‐Scan. If the probe needs to be repositioned at the same starting location, setting the local zero for X and Y will allow for accurate repositioning. 7. Open the 3D‐Scan dialog box. 7.1 Go to File DigitizeAutomatic 8. There are multiple settings that must be chosen before proceeding. 8.1 Probe Type ‐ The touch supplied will be be the Up/Down/Side option. 8.2 Axis ‐ Choose the axis for width,length and retract. The default settings are Figure 38. Navigation to 3D scan window conventional. 8.3 Area – The area dimensions that are to be scanned. 8.3.1 Retract ‐ This will need to be set if ...
-
Page 29: Edge/Outline Scanning Guide
LAGUNA TOOLS 29 8.5 False Bottom – This needs to be set if the part to be scanned has holes deeper than the length of the touch probe. Not setting a false bottom on a part with deep features may result in damage to the touch probe and the machine. 8.6 Output File – A file destination must be delcared. This is the location the output file for the scan will be saved. Note: If a scan is aborted in the middle of the scanning process, a partial file will still be generated 8.7 File Split Segments – Do not change. Defualt needs to 1. 9. After all settings have been set, the Figure 40. False bottom description scanning process will begin once the OK button in the Automatic Digitize dialog box is pressed. Note: Pressing the esc button key on your keyboard will abort any machine operation. Pressing the spacebar will pause program execution and pressing “enter”’ will resume the machine operation. 10. Upon completion of the 3D‐Scan, a notification will be present in the command console in the winCNC controller interface, as in the image below. 11. The probe will move in the positive Z direction upon completion. Figure 41. Controller screen shot after completing a 3D scan ... - Page 30 LAGUNA TOOLS 30 4. Select a starting location. 4.1 The touch probe needs to be between ¼” to 1” away. These values can vary depending on the "First Forward Move" setting located in the outline scan window. 4.2 Lower the probe on the z‐axis so that the probe stylus will make contact with the part when scanning. 4.3 Unique to the edge scan is that there is no Figure 42. Starting location for an edge scan restriction on the starting location. Note: Depending on the starting location, the X and Y scan directions will be affected. These settings can be adjusted in the outline scan dialog box. 5. Open the outline scan dialog box. 6. Adjust the necessary settings in the dialog box. 6.1 Select the output file type. DXF or CSV file. DXF File format is conventional across CAD Figure 43. Navigation to the edge scan window software. 6.2 Must click browse to select a destination for the output file. ...
- Page 31 LAGUNA TOOLS 31 6.3 General Settings 6.3.1 Scan increment –The distance between each sample point. The smaller the scan increment the more accurate the scan will be. 6.3.2 Scan Feedrate 6.3.2.1 It is recommended that the feedrate does not exceed 30 in/min 6.3.2.2 A feedrate greater than 30 in/min will negatively affect the accuracy of the scan. 6.4 Scan Size 6.4.1 360 degrees – Scans the entire perimeter of a part. 6.4.2 180 degrees – Only scans half of the part 6.5 X Scan Direction – Direction of probe movement on start in the X–direction. 6.6 Y Scan Direction – Direction of probe movement on start in the Y‐direction. 6.7 First Forward move 6.7.1 Initial Y move distance ‐ How far the probe initially travels in the Y‐direction. 6.7.2 If the probe is not triggered within the distance specified in the initial Y move distance the program will abort. This is a safety mechanism to prevent damage to the probe. 6.7.3 It is recommended that a short distance be used relative to the starting position of the probe. 6.7.4 If the probe is 1 inch away from the material, a corresponding setting would be slightly over 1 inch. ...
-
Page 32: Maintenance Recommendations
LAGUNA TOOLS 32 6.8.3.3 Using the 0.001 incremental setting, jog the probe until it is just touching the material. 6.8.3.4 Execute G92X0 command to set a local X0 coordinate. This step is not required but it will help to track the number of moves until the probe's switch is triggered. This will be used to monitor distance traveled in the x‐ direction until the probe is triggered. Figure 46. Step two in measuring probe trigger adjustment 6.8.3.5 Move in the positive x‐direction 0.001” inches at a time until the touch probe indicator is triggered, at which point the the probe trigger adjustment will be the X‐coordinate displayed in the Axis window. In this example, in the figure below the figure is 0.004”. 7. Press Run MAINTENANCE RECOMMENDATIONS 1. Daily Checks Clean the machine and lubricate unpainted surfaces with a Teflon lubricant. Wipe off any excess and buff with a dry polishing cloth. This will reduce the likelihood of rust forming. Check cutter teeth for chips and dullness. Generally inspect the machine for damage and loose or warn parts. Collets and spindle collet hole must be cleaned regularly. Ensure that the slots in the collets are free of sawdust as sawdust builds up and will stop the collet compressing. If the collet or spindle hole is not clean, the router bit may not run true and this will affect the performance of your machine. ... -
Page 33: Troubleshooting
LAGUNA TOOLS 33 3. Maintenance Tips Keep the guide rails clean. After cutting, debris will build up on the rails and collect near the bearings. Periodically lubricate guide rails using the oiler. One pump is sufficient for one lubrication Periodically do maintenance on the PC tower by removing dust buildup. This will prevent overheating issues and possible malfunctioning. TROUBLESHOOTING MACHINE WILL NOT START 1. Check that the start switch has been pressed full in. 2. Check that the red stop switch is fully out. 3. Check that the electrical power cord is plugged into the power outlet. 4. Check that the electrical supply is on [reset the breaker]. 6. With the power disconnected from the machine, check the wiring to the plug is correct. Check that the rubber insulation is stripped enough and is not causing a bad connection. Check that all the screws are tight. MACHINE WILL NOT STOP This is a very rare occurrence as the machine is designed to be fail‐safe. If it should occur and you cannot find and fix the source of the problem, seek professional assistance. The machine must be disconnected from the power and never run until the fault has been rectified. 1. Internal breaker faulty. Replace the breaker. ... -
Page 34: Motor Tries To Start But Will Not Turn
LAGUNA TOOLS 34 MOTOR TRIES TO START BUT WILL NOT TURN 1. With the power disconnected from the machine. Try to turn the spindle by hand. If the spindle will not turn, check the reason for the jamming. 2. Motor faulty. Replace the motor. 3. If the Spindle runs without coolant. Replace the motor. MOTOR OVERHEATS The motor is designed to run hot, but should it overheat it has an internal thermal overload protector that will shut it down until the motor has cooled and then it will reset automatically. If the motor overheats, wait until it has cooled and restart. If the motor shuts down consistently, check for the reason. Typical reasons are dull cutting tools, no water in the coolant tank, blockage in the coolant pipe and excessive ambient temperature. SQUEAKING NOISE 1. Check the bearings. SPINDLE SLOWS DOWN DURING A CUT 1. Dull cutting tools. Replace the tool or have it re‐sharpened. 2. Feeding the wood too fast. Slow down the feed rate. MACHINE VIBRATES 1. Machine not level on the floor. Re‐level the machine ensuring that it has no movement. KEYBOARD HOTKEYS File Menu Shortcuts Open Enter (with blank command line) CTRL+ O Edit CTRL + S Simulate CTRL + V View Create Home File CTRL + H View Menu Shortcuts Refresh View F5 ... - Page 35 LAGUNA TOOLS 35 Edit CTRL + C Options Menu Shortcuts Keyboard CTRL + K Soft Limit CTRL + L Transit Menu Shortcuts Slow F2 Medium F3 Fast F4 Jog Menu Shortcuts 0.001 F6 0.01 F7 0.1 F8 1 F9 Custom F10 ...
-
Page 36: Command Reference
LAGUNA TOOLS 36 COMMAND REFERENCE G‐CODES G0 Rapid Move - G0 X# Y# Z# W# Moves to the position specified at Rapid velocity. G0 is modal. After a G0 is executed, lines with no G-Code command are executed as a G0. Example: X1Y1 is equivalent to G0 X1Y1 if mode is G0. - Page 37 LAGUNA TOOLS 37 when turning corners. Too high a factor can result in missed steps or motor stalls. Smoothing can also be set in the WINCNC.INI file using G09=S#. S# - smoothing factor to be used. (not a specific unit of measure) A# ‐ used to change the angle used in the velocity‐matching algorithm. The A# value represents an angle. If a small ...
- Page 38 LAGUNA TOOLS 38 G53 Rapid Move - G53 X# Y# Z# W# Moves to the position specified at rapid velocity, ignoring tool measures and local coordinates. G53 alone will lift all vertical or type 3 axes. G54 G54 Workspace - Rotational: G54 X# Y# Select the Z head.
- Page 39 LAGUNA TOOLS 39 Can be specified with other G-Codes on any line. XYZW values from the current line forward are read as absolute coordinates. IJ values are always relative to the current XY position, not absolute positions regardless of G90/G91 mode. ...
-
Page 40: L-Codes
LAGUNA TOOLS 40 L‐CODES L1 Save Positions - L1 N# V# Store values is the saved positions file. Can store a value in one of the 30 existing ‘H’ registers. N# is the desired ‘H’ register number, can be 0 to 29. V# is the desired value. - Page 41 LAGUNA TOOLS 41 **A G92XY is required after the L10 Line for the cut array to work. X# is the units to move the x axis before starting the next cut. Y# is the units to move the y axis before starting the next cut. R# is the number of rows.
- Page 42 LAGUNA TOOLS 42 WINCNC.INI defaults. L23.1 Restore High Boundaries - L23.1 XYZW Restores default High boundaries to the specified axes. L28 Set Position - L28 X# Y# Z# W# Sets Machine Coordinates. Machine Coordinates specify the fixed machine zero point for your machine. L28 is normally used only to write a custom homing program.
- Page 43 LAGUNA TOOLS 43 L36.1 Auto Voltage Set Mode On. L36.2 Reset Auto Voltage Set Status. L37 Torch Height Control Off. L37.1 Auto Voltage Set Mode Off. L38 Torch On. L39 Torch Off. L40 Feed Rate Override - L40 P# Allows user to set the feed rate override by command.
- Page 44 LAGUNA TOOLS 44 L70 Re-Enter Last Command When L70 is used in a file, the last used command will automatically be re-entered on the command line after file completion. L82 Measures the Surface - L82 Z# L82 Z# measures the surface with the probe and sets the measured point to the Z value given. L82 alone will set the measured point to Z0.
- Page 45 LAGUNA TOOLS 45 L112 Test Tool Number - L112 T#. Skip next line if tool number is equal to T#. L113 Spindle Speed Conditions - L113 L# H# V# Skip the next line if the V# is not greater than the L# and less than the H#. ...
- Page 46 LAGUNA TOOLS 46 L215 Dual Axis, Select Both Axes - L215 XYZW Selects both motors on a dual motor axis. L249 Laser Power Setting - L249 S# P# D# O# M# I# Using the L249 command allows you to specify the laser power. Example: L249 P50 (sets laser power to 50).
- Page 47 LAGUNA TOOLS 47 L300 Lock Axis - L300 XYZW Locks specified axis motion. Any motion commanded to a locked axis will be ignored. L301 Unlock Axis - L301 XYZW Unlocks specified axis motion. L400 Create Home File Creates a home file at the machine’s current position. ...
- Page 48 LAGUNA TOOLS 48 L603 Store Current Adjustment and Move - L603 {NPSE} Stores the current adjustment and moves the map axis to the specified map increment. N is next, P is previous, S is start, and E is end. The default move is to the next map increment position. ...
-
Page 49: M-Codes
LAGUNA TOOLS 49 L911 Enable G-Code Line Display Enabling G-Code display when running large G-Code files can increase CPU and memory usage resulting in worse overall computer system performance. M‐CODES M11 Auxiliary Output On - M11 C# Controls auxiliary outputs. Channel specified by # is turned on. Port and bit addresses are set up in WINCNC.INI file. - Page 50 LAGUNA TOOLS 50 M18.1 Run Next if Input Off - M18.1 D# C# Run next command only if channel specified by # is off. Port and bit addresses are set up in WINCNC.INI. D# can be 0 or 1. D0 sets the simulate logic to false. D1 sets the simulate logic to true. ...
-
Page 51: Messages And Error Codes
LAGUNA TOOLS 51 M37.3 is used to shift workspace offsets for tool measures, tool measure switch heights, or individual axis. S# is the shift amount to be used for tool measures and tool measure switch positions. (usually a negative #). H# is the H register number to be shifted by the shift amount. - Page 52 LAGUNA TOOLS 52 BMP File Invalid Header Tried to open an incompatible bmp file. Boundary Exceeded Move specified would result in the head being moved outside the workspace boundaries. CNC.MAC Not Found The CNC.MAC file is not found. Command Not Implemented This command has not yet been fully implemented.
- Page 53 LAGUNA TOOLS 53 Memory Error Insufficient or bad memory. Multiple Commands Input line contains more than one command. Not a BMP File Tried to open a non-bmp file for bitmap engraving. Parameter Not Specified A required parameter is not specified. Parameter Out of Range Specified parameter is out of range.
-
Page 54: Specifications
LAGUNA TOOLS 54 SPECIFICATIONS ... - Page 55 Laguna Tools is not responsible for errors or omissions. Specifications subject to change. Machines may be shown with optional accessories. © 2017, Laguna Tools, Inc. LAGUNA® and the LAGUNA Logo® are the registered trademarks of Laguna Tools, Inc. All rights reserved.
Need help?
Do you have a question about the CNC Swift Series and is the answer not in the manual?
Questions and answers
My project is scaling up by 3.5ish from VCarve to router to swift carve. The carving path is set properly and uploaded via usb, did i accidentally scale up on the router? Table setup and Home setup appear to be correct.
If your design work envelope matches the machine's actual dimensions of 1300mm x 1300mm (51.181 in x 51.181 in) for the Laguna Swift 4 x 4, and you centered a 48” x 48” spoil board within it based on those dimensions, then you likely did not scale up the router during setup. However, if the drawn work envelope or spoil board placement does not align with these dimensions, then scaling may have occurred. You can confirm correct scaling by checking that the spoil board's corner coordinates match the expected offset from the (0,0) home position.
This answer is automatically generated