Sign In
Upload
Download
Table of Contents
Contents
Add to my manuals
Delete from my manuals
Share
URL of this page:
HTML Link:
Bookmark this page
Add
Manual will be automatically added to "My Manuals"
Print this page
×
Bookmark added
×
Added to my manuals
Manuals
Brands
Farmet Manuals
Tiller
FALCON 3
Operating manual
Farmet FALCON 3 Operating Manual
Disc sowing machine
Hide thumbs
Also See for FALCON 3
:
Operating instruction
(102 pages)
,
Operating manual
(80 pages)
1
2
Table Of Contents
3
4
5
6
7
8
9
10
11
12
13
14
15
16
17
18
19
20
21
22
23
24
25
26
27
28
29
30
31
32
33
34
35
36
37
38
39
40
41
42
43
44
45
46
47
48
49
50
51
52
53
54
55
56
57
58
59
60
61
62
63
64
65
66
67
68
69
70
71
72
73
74
75
76
77
78
79
80
81
82
83
84
85
86
87
88
89
90
91
92
93
94
95
96
97
98
99
page
of
99
Go
/
99
Contents
Table of Contents
Bookmarks
Table of Contents
Table of Contents
Quick Start
Critical Parameters of the Machine
Technical Parameters
Safety Warning
General Instructions for Use
Protective Equipment
Transporting the Machine
Manipulating the Machine by Lifting Equipment
Transporting the Machine on Ground Communications
Work Safety Labels
Description of the Machine
Working Parts of the Machine
Assembly of the Machine at the Customer's Site
Putting into Operation
Aggregation to the Tractor
Connecting the Hydraulics
Hydraulic Diagram of the Machine
Connecting the Elektronic Unit
Connecting the Hydraulic Motor of the Fan
Proper Connection to the Tractor
Electronic System of the Machine
Turning the Sowing on and off
Description of Machine Control by Müller Electronics
Description of the Basic Display
Controlling Hydraulics
Rail Lines Setting System
Reference Data
Creating an Order
Levels of Seeds in the Hopper
Setting Passage Sensors
Seeding Sensors Diagnostics
Switching off the Seed Flow System Sensor
Designation of Motors and Dosers
Unfolding and Folding Machine
Unfolding the Machine
Folding the Machine
Lowering and Lifting
Filling up the Seed/Fertilizer Container
Setting the Filled Seeds/Fertilizer
Setting of the Sowing Batch
Screw Dispecer for Side Dressing
Setting the Fine Seeds Sowing
Setting Ventilator Speed According to Seeds
Adjustment of the Working Parts of the Machine
Adjusting the Machine Work Depth
Adjusting the Machine by Tps Arms of the Tractor
Setting the Sowing Depth
Setting the down Pressure of the Sowing Bodies
Setting the Leveller Behind the Seed Boots
Adjusting the Working Depth of the Front Section
Adjusting of the Levelling
Setting of the Markers
Setting of the Deep Fertilizing Disc
Errors
Completion of Sowing
Maintenance and Repairs of the Machine
Replacement of Worn Discs
Maintenance Plan
Machine Lubrication Schedule
Manipulation with Lubricans
The Pressure in the Tyres
Recommended Tightening Torques of Bolting
Storing the Machine
Protection of Environmen
Disposal of the Machine after the End of Its Usable Life
Maintenance and Terms of Guarantee
Maintenance
Guarantee
Advertisement
Quick Links
Download this manual
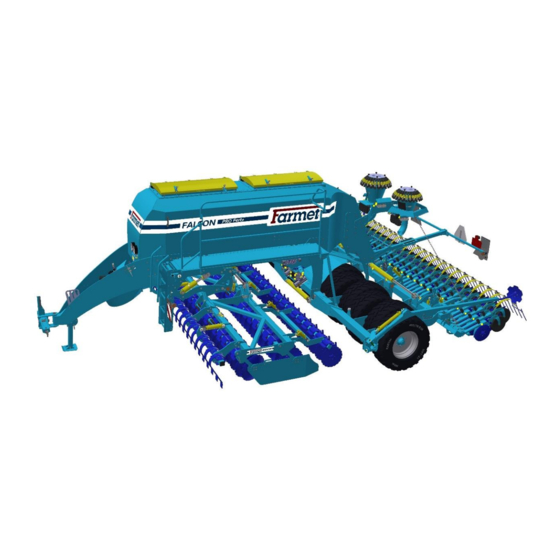
OPERATING MANUAL
Farmet a. s.
Jiřinková 276
552 03 Česká Skalice, CZ
FALCON
3
4
|
Edition: 7 | effective from: 1.7.2020
telefon:
+420 491 450 111
fax:
+420 491 450 136
GSM:
+420 774 715 738
6
8
|
|
IČ:
46504931
DIČ: CZ46504931
web:
www.farmet.cz
e-mail: farmet@farmet.cz
Table of
Contents
Previous
Page
Next
Page
1
2
3
4
5
Advertisement
Table of Contents
Need help?
Do you have a question about the FALCON 3 and is the answer not in the manual?
Ask a question
Questions and answers
Subscribe to Our Youtube Channel
Related Manuals for Farmet FALCON 3
Farm Equipment Farmet Falcon PRO Operating Instruction
(102 pages)
Farm Equipment Farmet FALCON SW Operating Manual
(80 pages)
Tiller Farmet FANTOM FX 470 NS Operating Manual
(37 pages)
Tiller Farmet FALCON 6 Operating Manual
Disc sowing machine (99 pages)
Tiller Farmet FANTOM FX 850 PS Operating Manual
(33 pages)
Tiller Farmet FANTOM 1050 PRO Operating Manual
(59 pages)
This manual is also suitable for:
Falcon 4
Falcon 6
Falcon 8
Falcon 3 compact
Falcon 4 compact
Table of Contents
Print
Rename the bookmark
Delete bookmark?
Delete from my manuals?
Login
Sign In
OR
Sign in with Facebook
Sign in with Google
Upload manual
Upload from disk
Upload from URL


Need help?
Do you have a question about the FALCON 3 and is the answer not in the manual?
Questions and answers