Table of Contents
Advertisement
Quick Links
Advertisement
Table of Contents

Related Manuals for Barco HDX 3D


Summary of Contents for Barco HDX 3D
- Page 1 HDx 3D Input Module Installation manual R5905197/01 09/10/2012...
- Page 2 Barco nv Entertainment Division Noordlaan 5, B-8520 Kuurne Phone: +32 56.36.82.11 Fax: +32 56.36.883.86 Support: www.barco.com/esupport Visit us at the web: www.barco.com Printed in Belgium...
-
Page 3: Disposal Information
Changes Barco provides this manual ’as is’ without warranty of any kind, either expressed or implied, including but not limited to the implied warranties or merchantability and fitness for a particular purpose. Barco may make im- provements and/or changes to the product(s) and/or the program(s) described in this publication at any time without notice. - Page 4 Barco. If the purchaser or a third party carries out modifications or repairs on goods delivered by Barco, or if the goods are handled incorrectly, in particular if the systems are commissioned operated incorrectly or if, after the trans- fer of risks, the goods are subject to influences not agreed upon in the contract, all guarantee claims of the...
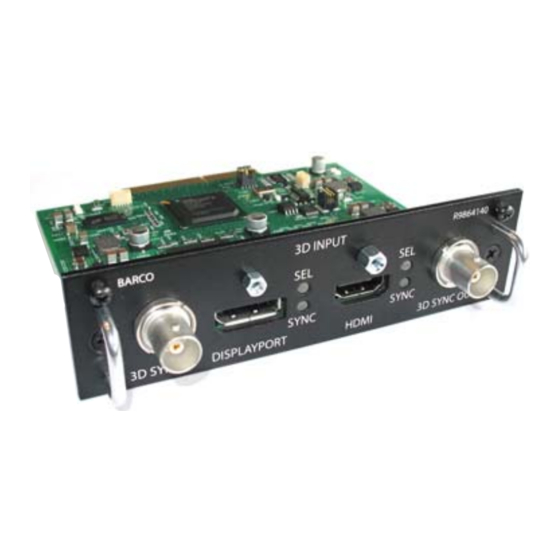
- Page 5 1. HDX 3D INPUT MODULE About the HDx 3D Input Module The HDx 3D Input Module is exclusively designed for Barco projectors based on the HDX platform, such as the HDX W12, HDX W14, ... , HDF W22, etc. Image 1-1...
-
Page 6: Input Specifications
What needs to be done? First the version of the installed projector software has to be checked. Then the HDx 3D Input Module has to be installed in one of the free slots of the Input & Communication Unit of the projector. For that the dummy cover of the free input slot has to be removed. - Page 7 1. HDx 3D Input Module 4. Insert the HDx 3D Input Module into the free input slot. Make sure the module seats in its sliders. Push in the module until the contacts are fully inserted into the connectors. (image 1-4) 5.
- Page 8 1. HDx 3D Input Module Image 1-5 R5905197 HDX 3D INPUT MODULE 09/10/2012...
- Page 9 (sequential mode). Optional an external 3D sync can be used. The external 3D sync has to be applied to the “3D SYNC INPUT” port (BNC socket at the left) of the HDx 3D Input Module. If the external 3D sync is not available an internal 3D sync is generated by the projector.
- Page 10 MENU > Input > 3D > Frame Sequential – Dual channel Possible sources: 2 x DVI , 2 x SDI. If two HDx 3D Input Modules are installed: 2 x HDMI or 2 x DisplayPort. Download the latest version of the projector manual for more detailed information about projecting 3D content.
-
Page 11: Supported Formats
A. Supported Formats A. SUPPORTED FORMATS HDx 3D Input Module Supported Formats Supported formats overview: DVI/HDMI/DP 5-cable analog DVI-analog Fpix ≤ 210MHz. Fpix ≤ 210MHz. Fpix ≤170MHz. Fpix ≤150MHz. Frame Maximum resolution: Maximum resolution: Maximum resolution: Maximum resolu- Sequential 1920x1200@60Hz or...
Need help?
Do you have a question about the HDX 3D and is the answer not in the manual?
Questions and answers