Subscribe to Our Youtube Channel
Summary of Contents for HOMCOM AA1-099
- Page 1 INabb019_DE_EN AA1-099_AA1-100 *Max. Gewicht: 100 kg. IMPORTANT, RETAIN FOR FUTURE REFERENCE: READ CAREFULLY USING INSTRUCTION...
-
Page 2: Wartung & Pflege
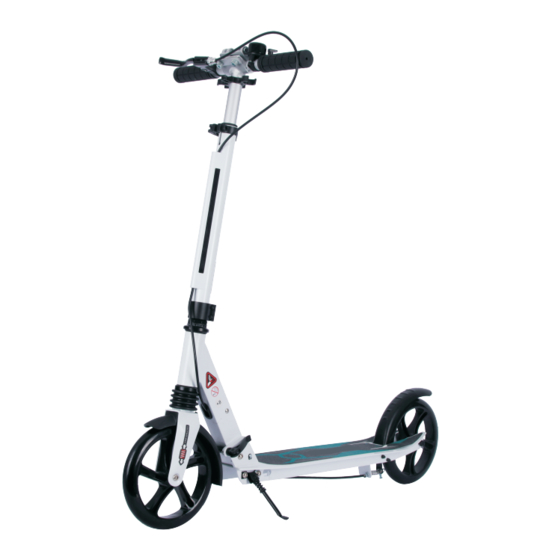
WARNUNG: 1. Beachten Sie alle in Ihrem Land geltenden Verkehrsregeln und Vorschriften für die Benutzu- ng von Scootern. 2. Fahren Sie bitte auf einer ebenen und sauberen Fläche. Niemals in der Nähe von Stufen, schrägen Auffahrten, Hügeln, Alleen, Schwimmbadbereichen, Straßen, auf Gras oder nassen Oberflächen oder anderen Gewässern verwenden. - Page 3 1. Griffe 2. Schnellspannhebel für Griffe 3. Federknopf für die Lenksäule 4. Bremse/Schutzblech 5. Verriegelungshebel für den Klappmechanismus 6. Federknopf für Handgriff 7. Lenker-Vorbau 8. Schnellspannhebel für die Lenksäule 9. Lenkradsäule 10. Faltmechanismus 11. Schnellspannhebel für den Klappmechanismus 12. Kunststoffstopper 13.
- Page 4 Montageanleitung Bitte beachten Sie die folgenden Montageanweisungen, um Unfälle beim Ein- und Ausklappen Ihres Rollers zu vermeiden (z. B.: Einklemmen der Finger). Zusammenbau des Scooters A - Entfernen Sie den Plastikstopfen Entfernen Sie mit dem Werkzeug aus der Zubehörtasche den Plastikstopfen (12), damit die Griffe (1) in die Griffverriegelung (13) eingeführt werden können.
- Page 5 Zusammenklappen Zusammenklappen des Scooters E - Herunterklappen des Lenkers Öffnen Sie den Schnellspannhebel der Lenksäule (8), drücken Sie den Federknopf der Lenksäule (3) ein, senken Sie den Lenker ab und ziehen Sie den Schnellspannhebel der Lenksäule (8) wieder fest. F - Einpacken der Griffe Drücken Sie für jeden Griff (1) den Federknopf (6) ein, nehmen Sie den Griff (1) aus seinem Platz im Vorbau (7) heraus und stecken Sie ihn in seine Plastikhülle.
- Page 6 Mechanismus der Bremse Schraube Wenn Sie feststellen, dass der Bremsmechanismus nicht richtig funktioniert, schrauben Sie ihn mit dem Schraubenschlüssel (17) aus dem Zubehörsatz heraus. Nachdem Sie (16) in eine vernünftige Position gebracht haben, verwenden Sie den Schraubenschlüssel (17) zum Festzie- hen.
-
Page 7: Using Instruction
INabb019_DE_EN AA1-099_AA1-100 *Max weight: 100 kg. IMPORTANT, RETAIN FOR FUTURE REFERENCE: READ CAREFULLY USING INSTRUCTION... -
Page 8: Maintenance And Care
WARNING: 1.Observe all applicable traffic rules and regulations regarding the use of scooters in your country. 2.Please ride on a flat and clean surface. Never use near steps, sloped driveways, hills road- ways, alleys, swimming pool areas, road, on grass or wet surfaces or other bodies of water. 3.Only one person may use this scooter at any given time. - Page 9 1.Handles 2.Rapid tightening lever for handles 3.Steering column spring button 4.Brake/mudguard 5.Locking lever for folding mechanism 6.Handle spring button 7.Handlebar stem 8.Rapid tightening lever for steering column 9.Steering column 10.Folding mechanism 11.Rapid tightening lever for folding mechanism 12.Plastic stopper 13.Handle locking mechanism 14.Brake handlebar 15.Brake mechanism 16.Brake lines...
-
Page 10: How To Assemble
How to assemble Please take note of the following assembly instructions to avoid all risk of accidents linked to the folding And unfolding operations of your scooter (for example: getting your finger stuck). Scooter assembly A-Take out the plastic plug With the tools in the accessory bag, remove the plastic stopper(12) so that the handles(1) can be inserted into Handle locking mechanism(13). -
Page 11: How To Fold
How to fold Folding the scooter E - Folding down the handlebars Open the steering column rapid tightening lever (8), press in the steering column spring button (3), lower The handlebars, then tighten the steering column rapid tightening lever (8). F - Packing away the handles For each handle (1), press in the spring button (6), take the handle(1) out from its place in the stem (7), and put it in its plastic cover. -
Page 12: Brake Mechanism
Brake mechanism Screw If you find the brake mechanism has malfunction, please use the wrench (17) in the accessory Kit to unscrew. After adjusting (16) to a reasonable position, use the wrench (17)to tighten . Please confirm the brake mechanism is normal before each using WARNING In order to prevent the stepping plate and the steering column from falling off when the product is strongly shaken or lifted, please connect the pedal and the steering column with the adhesive...


Need help?
Do you have a question about the AA1-099 and is the answer not in the manual?
Questions and answers