Table of Contents
Advertisement
Advertisement
Table of Contents

Subscribe to Our Youtube Channel
Related Manuals for Draminski Dog Ovulation Detector


Summary of Contents for Draminski Dog Ovulation Detector
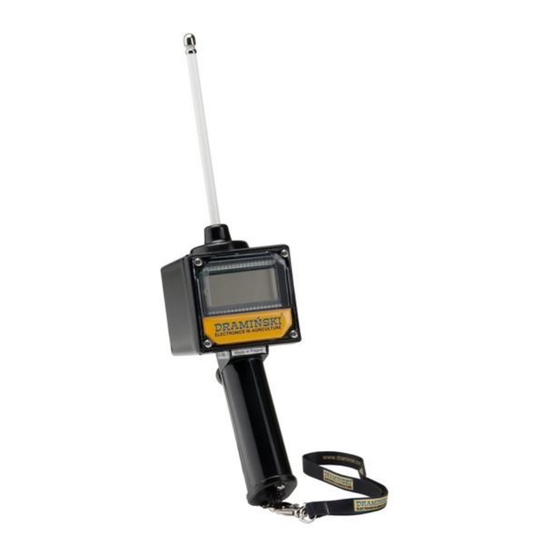
- Page 1 DRAMIŃSKI Dog Ovulation Detector OPERATION MANUAL www.draminski.com...
-
Page 3: Table Of Contents
CONTENTS INTRODUCTION............... 3 DESCRIPTION ................3 OPERATION................4 FAMILIARISATION ..............5 MEASUREMENTS ..............5 DISINFECTING ............... 10 INTERPRETATION OF RESULTS ........ 10 FINAL COMMENTS ..............11 BATTERY REPLACEMENT ..........12 TYPICAL READINGS DURING HEAT ......12 TECHNICAL DATA ..............14... -
Page 4: Introduction
INTRODUCTION One of the most essential elements in organising animal breeding is detecting the moment of ovulation. This is of utmost importance to the efficiency with which the female is served; effective mating being so closely dependant on it being done at the right moment. -
Page 5: Operation
is moisture proof, which thus enables the unit to be easily kept in a clean and hygienic condition. OPERATION While testing the apparatus in the open air i.e. with open electrodes check the following: 1. Press the ON/OFF switch. After pressing the button two dashes are displayed indicating the device readiness to work. -
Page 6: Familiarisation
FAMILIARISATION Before commencing measurements it is recommended that the first time user: 1. Do some measurements on some animals which are evidently in heat. 2. Do some measurements on some animals not in heat or pregnant. The functioning of the instrument can be checked in the following way: ... - Page 7 1. Check the electronic functioning of the DRAMIŃSKI ESTROUS DETECTOR in contact with the atmosphere, making sure there is no need to change the battery. 2. Prepare a disinfectant fluid and disinfect the probe in accordance with the steps given in the chapter on disinfection. 3.
- Page 8 Press the switch again to see another result. Remove the probe gently. Disinfect as instructed in the section “DISINFECTING” and replace in storage box. How to insert the probe: Spread the vulva gently to facilitate easy entry of the probe and insert approximately 3 to 4 inches (8 to10 cm) taking into account your specific breed type and size, until a resistance is felt at the neck of the cervix.
- Page 9 CORRECT oviducts rectum horns of the uterus cervix vagina urethra ovaries probe bladder vulvar labia INCORRECT It is IMPERATIVE to insert the probe at the correct angle of the vaginal vestibule (see diagram) which varies for each bitch, but is usually at approximately 11 o’clock direction if imagining looking...
- Page 10 at the face of a clock. (Imagine the dog entering the bitch coming up to her from underneath at an angle). This angle varies on breed type, size and individual bitches and it is not uncommon for the angle to be much steeper, with the probe being inserted almost vertical.
-
Page 11: Disinfecting
DISINFECTING Before and after each measurement, the detector must be disinfected. Careful and thorough cleaning and disinfection of the instrument is one of the most important conditions for proper usage. We recommend wiping the probe with gauze, cotton linen or even tissue paper to clean it of mucus, faeces, urine or hair, especially around the electrodes. -
Page 12: Final Comments
When readings rise above 200, daily measurements should be taken. Sometimes readings at this level may last a few days and then show a dynamic increase. When readings begin to rise, it is advisable to take readings more frequently (such as 2, 3 or 4 times a day) to accurately determine the precise point of ovulation. -
Page 13: Battery Replacement
BATTERY REPLACEMENT Low battery power is indicated by the words “LO BAT” flashing on the LCD. A new battery is required when this indicator appears. To change the battery: 1. Unscrew both screws which fix the small cover on the end of the handle. - Page 14 Examples of non-typical readings...
-
Page 15: Technical Data
TECHNICAL DATA Net weight approx. 0.3 kg Power source one 9V battery, type 6F22 Power utilisation approx. 12mA Display LCD 3.5 digits Smallest unit 10 units Range of measurement 0-1990 units Working temperature 0-50° C Max. humidity... - Page 16 DRAMIŃSKI S.A. Owocowa 17, 10-860 Olsztyn, Poland Tel. +48 89 527 11 30, fax. +48 89 527 84 44 e-mail: info@draminski.com...
Need help?
Do you have a question about the Dog Ovulation Detector and is the answer not in the manual?
Questions and answers