Table of Contents
Advertisement
Available languages
Available languages
Advertisement
Table of Contents

Related Manuals for CLIVET Versatemp EQV-X


Summary of Contents for CLIVET Versatemp EQV-X
- Page 1 VERSATEMP EQV-X 3 - 21 Climatizzatore autonomo ad espansione diretta ad alta efficienza. High efficiency direct expansion packaged air-conditioning unit. Manuale installazione uso e manutenzione Installation and use manual page 41 M07I10CA-08 07-01-2016...
- Page 2 Clivet da anni opera per proporre al mercato sistemi in grado di assicurare il massimo benessere per lungo tempo con elevata affidabilità, efficienza, qualità e sicurezza. L’obiettivo dell’azienda è quello di portare ai propri clienti sistemi evoluti, che assicurino il comfort migliore, riducano i consumi di energia, i costi di installazione e di manutenzione per l’intero ciclo di vita...
-
Page 3: Table Of Contents
INDICE Generalità Ricevimento Posizionamento Collegamenti idraulici Collegamenti elettrici Avviamento Regolazione Manutenzione Informazioni tecniche Rischi residui Dismissioni... -
Page 4: Generalità
I continui miglioramenti apportati al prodotto possono determinare variazioni dei dati indicati in questo manuale. può aumentare costi e tempi di riparazione . Consultare il sito web www.clivet.it per ottenere dati Attenersi in qualsiasi operazione alle norme di sicurezza aggiornati. locali. - Page 5 Modulo di comunicazione seriale BACNET (disponibile 1.5 DESCRIZIONE DELLA MACCHINA solo con opzioni: MOBA - MOBX) VERSATEMP EQV-X è il climatizzatore d’aria autonomo ad MOBX Kit porta seriale RS485 con protocollo MODBUS alta efficienza energetica che provvede al riscaldamento e al...
-
Page 6: Ricevimento
2 - RICEVIMENTO 2.1 INFORMAZIONI PRELIMINARI Generali Operare rispettando le normative di sicurezza in vigore. Per le informazioni di dettaglio (dimensioni, pesi, caratteristiche tecniche, etc) far riferimento al capitolo INFORMAZIONI TECNICHE. Per effettuare le operazioni usare dispositivi di protezione: guanti , occhiali ecc. Stoccaggio Rispettare le indicazioni riportate sull’esterno dell’imballo. -
Page 7: Posizionamento
3 - POSIZIONAMENTO 3.1 INFORMAZIONI PRELIMINARI 3.3 FISSAGGIO A PARETE UNITÀ INCASSO Operare rispettando le normative di sicurezza in vigore. informazioni dettaglio (dimensioni, pesi, caratteristiche tecniche, etc) far riferimento al capitolo INFORMAZIONI TECNICHE . Per effettuare le operazioni usare dispositivi di protezione: guanti, occhiali ecc. - Page 8 3 - POSIZIONAMENTO 3.6 POSIZIONAMENTO TERMOSTATO (OPZIONE) INSTALLAZIONE A PARETE IN SCATOLA DA INCASSO Opzione che consente la gestione dell’unità da posizione La scelta del punto di installazione è determinante ai fini del remota. Può essere agevolmente installata nelle principali comfort ambientale e dei consumi energetici.
- Page 9 3 - POSIZIONAMENTO 3.7 SPAZI FUNZIONALI Posizionare l’unità tenendo conto degli spazi di rispetto indicati in Gli spazi funzionali hanno lo scopo di: figura. • garantire il buon funzionamento dell’unità; • consentire le operazioni di manutenzione; • salvaguardare gli operatori autorizzati e le persone esposte. Unità...
-
Page 10: Collegamenti Idraulici
4 - COLLEGAMENTI IDRAULICI Sfiatare l’unità 4.1 INFORMAZIONI PRELIMINARI Generalità Sfiato scambiatore Per le caratteristiche di dettaglio dell’apparecchio (dimensioni, Sfiatare tramite la valvolina posta vicino alla batteria. prestazioni, ecc) far riferimento alle sezione “Informazioni Tecniche”. Operare rispettando le normative di sicurezza in vigore. Per effettuare le operazioni usare dispositivi di protezione individuale: guanti , occhiali ecc. - Page 11 4 - COLLEGAMENTI IDRAULICI 4.2 COLLEGAMENTO IMPIANTO Collegare le tubazioni agli attacchi posizionati sul lato dell’unità. Per la messa in guarnizione è consigliato utilizzare canapa e pasta verde. UNITÀ STANDARD Uscita tubo scarico condensa solo con pompa (opzionale) Scarico condensa Ø15 mm. Ingresso acqua Ø...
- Page 12 4 - COLLEGAMENTI IDRAULICI 4.5 GRUPPO IDRAULICO PER ANELLO A PORTATA COSTANTE CON VALVOLE AD AZIONAMENTO MANUALE Il gruppo idraulico per anello a portata costante comprende: 1 - Scambiatore interno con sonde temperatura, pressostato differenziale e rubinetto di sfiato; 2 - Filtro meccanico a maglia di acciaio lato acqua; 3 - rubinetti di sfiato;...
-
Page 13: Collegamenti Elettrici
5 - COLLEGAMENTI ELETTRICI 5.1 INFORMAZIONI PRELIMINARI Generalità Evitare la posa in parallelo con altri cavi, eventuali incroci con altri cavi sono ammessi solo se a 90°. Le caratteristiche delle linee devono essere determinate da personale abilitato alla progettazione di impianti Lo schermo va connesso ad una terra priva di disturbi. - Page 14 5 - COLLEGAMENTI ELETTRICI 5.3 COLLEGAMENTI A CURA CLIENTE Abilitazione ingresso heat-cool ingresso abilitato solo se 1 2 3 4 5 6 7 8 DP1-8 = ON . se DP1-8 =off modo Heat-Cool da tastiera 5.4 COLLEGAMENTO TERMOSTATO 10 Mt. Alimentazione e segnale sono prelevati direttamente dalla scheda a bordo macchina.
- Page 15 5 - COLLEGAMENTI ELETTRICI 5.6 MINIRETE DP2 : ESEMPI INDIRIZZAMENTO Massimo 15 unità: 1 master + 14 slave. Variando un’impostazione sul MASTER questa viene inviata a 1 master tutte le unità SLAVE. 1 2 3 4 5 6 7 8 Es.: Master = Cool Slave = Cool Master = Heat...
- Page 16 5 - COLLEGAMENTI ELETTRICI 5.7 SUPERVISIONE - RETE MODBUS MODULO AP5 RS 485 Effettuare l' indirizzamento tramite S3, S4 S5 ; indirizzi validi consentiti da 1 a 127 S3 imposta le decine dell' indirizzo S4 imposta le unità dell' indirizzo S5 imposta le centinaia dell'indirizzo : ON = 100, OFF = 0 Settaggio di fabbrica : S1 terminatore 485 : ON = terminazione SI...
- Page 17 5 - COLLEGAMENTI ELETTRICI 5.8 KIT GATEWAY BACNET 5.9 KIT GATEWAY LONWORKS...
-
Page 18: Avviamento
6 - AVVIAMENTO 6.1 INFORMAZIONI PRELIMINARI Il funzionamento fuori dai limiti può portare a danni irreversibili e fa decadere la garanzia. Generalità Tensioni Le operazioni indicate devono essere effettuate da tecnici Controllare che le temperature di aria e acqua siano qualificati e con formazione specifica sul prodotto. -
Page 19: Regolazione
7 - REGOLAZIONE 7.1 FUNZIONALITÀ TASTI E DISPLAY INDICAZIONI DISPLAY Modo macchina:cooling Modo macchina: heating Modo macchina: auto (cooling - heating) Velocità ventilatore : 1, 2, 3, auto Fasce orarie attive se l' orologio è visibile FUNZIONE TASTI mode cambio modo : heat, cool, auto Schedulazione fascia oraria orologio , schedulazione fasce orarie modo ECO / COMFORT... - Page 20 7 - REGOLAZIONE ON / OFF IMPOSTAZIONE ECO / COMFORT Premere per 5 secondi Premere per 5 secondi mode mode °c °c 20.3 18.5 10:00 Modalità ECO Spento Premere per aumentare o dimi- mode nuire il setpoint ECO °c mode 19.5 10:00 Premere per 5 secondi...
- Page 21 7 - REGOLAZIONE STATI (SOLO VISUALIZZAZIONE) Premere per 5 secondi più il Impostare il nuovo valore mode tasto ventilazione mode °c 20.3 23.0° 10:00 PA01 Premere OK Inserire come password un Selezionare ESC numero qualsiasi mode mode Premere OK CODE Premere OK Selezionare STAT Selezionare altri parametri o...
- Page 22 7 - REGOLAZIONE SCHEDULAZIONE FASCE ORARIE Si possono impostare 4 tipologie di schedulazione: Impostare temperatura mode 7 giorni (dal lunedì alla domenica) 20.0 Premere OK 5 giorni (dal lunedì al venerdì) 2 giorni (dal sabato alla domenica) ...
- Page 23 7 - REGOLAZIONE 7.2 STATI UNITÀ Durante il funzionamento è possibile visualizzare lo stato della macchina attraverso i valori rilevati dai sensori e dai principali parametri di lavoro dell’unità. Descrizione U.M. SetPoint Attuale °C T Ripresa operativa °C T Ripresa I/O °C T Ripresa da sensore Termostato TH-Tune °C...
- Page 24 7 - REGOLAZIONE 7.3 PARAMETRI MACCHINA I parametri protetti da password o accessibili tramite supervisione possono essere modificati solo da personale qualificato, dopo aver letto i manuali specifici del sistema elettronico e dei protocolli di supervisione. Modifiche improprie possono provocare malfunzionamenti o guasti. GRUP.
- Page 25 7 - REGOLAZIONE DESCRIZIONE U.M. GRUP. MNEMONICO PG03 SetSuperHeat Set Point di surriscaldamento in riscaldamento °C PG04 BandaSuperheat Componente proporzionale dell'algoritmo di controllo PI del surriscaldamento °C PG19 EnApManEEV Attivazione del controllo manuale della valvola termostatica elettronica PG20 ApManEEV Percentuale di apertura della valvola se pilotata in manuale PG25 SetSHCool Set Point di surriscaldamento in Cool...
-
Page 26: Manutenzione
8 - MANUTENZIONE 8.1 GENERALITÀ 8.6 SCAMBIATORE AD ACQUA La manutenzione deve essere effettuata da centri assistenza Lo scambiatore deve consentire il massimo scambio termico, autorizzati o comunque da personale specializzato. quindi le superfici interne devono essere libere da sporco e incrostazioni. - Page 27 8 - MANUTENZIONE 1 - spingere il filtro verso l’interno Per svuotare l'unità svitare il portasonda A 2 - inclinare verso il basso 3 - estrarre il filtro Unità a vista 1 - spingere il filtro verso l’interno 2 - inclinare verso il basso 3 - estrarre il filtro 8.10 FILTRO ARIA E’...
- Page 28 8 - MANUTENZIONE 8.11 ESTRAZIONE VENTILATORE Per estrarre il ventilatore: 4 - Svitare le viti D; 1 - Svitare le viti A; 2 - Rimuovere il profilo B; 5 - Ruotare leggermente il fianco E e spingerlo verso il basso; 6 - Sollevare il ventilatore F in modo da scavalcare il tubo ;...
- Page 29 8 - MANUTENZIONE 8.13 SCHEDA CONTROLLI PERIODICI CONSIGLIATI Controlli effettuati il……………………..da……………………………...……………………….della ditta………………………………………………. √ frequenza intervento (mesi) □ presenza corrosioni □ fissaggio pannellature □ fissaggio ventilatore □ pulizia batteria □ pulizia bacinella + sanificazione □ prova deflusso condensa □ ispezione / pulizia filtri aria □...
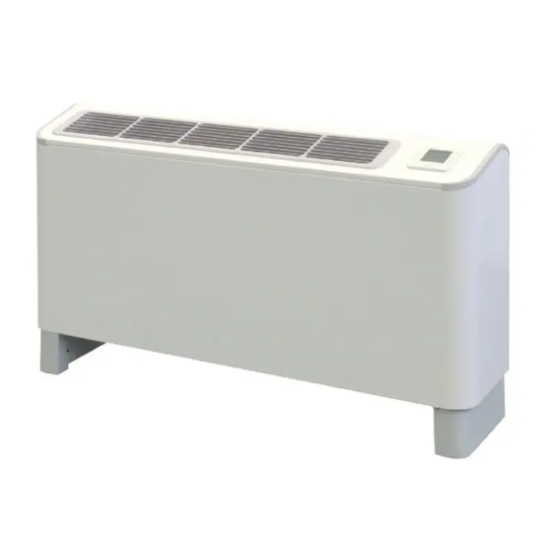
- Page 30 9 - INFORMAZIONI TECNICHE 9.1 DIMENSIONALI UNITÀ VERTICALE A VISTA (6) USCITA ACQUA UNITA’ CON MODULO IDRAULICO OPZIONALE (1) CONTROLLO AMBIENTE ELETTRONICO CON DISPLAY (OPTIONAL) (FEMMINA) (7) USCITA ACQUA UNITA’ STANDARD (FEMMINA) (2) INGRESSO LINEA ELETTRICA (3) STAFFA PER FISSAGGIO UNITA’ A PARETE (8) INGRESSO ACQUA UNITA’...
-
Page 31: Informazioni Tecniche
9 - INFORMAZIONI TECNICHE DIMENSIONI UNITA’ CON OPZIONI GRUPPI IDRAULICI O RETROFIT GRUPPI IDRAULICI GRUPPI IDRAULICI PER ANELLO CON PORTATA COSTANTE PER RETROFIT IMPIANTISTICO PER ANELLO CON PORTATA VARIABILE GRANDEZZE Attacchi acqua unità con gruppi 1/2” 1/2” 1/2” 1/2”... - Page 32 9 - INFORMAZIONI TECNICHE UNITÀ VERTICALE AD INCASSO (6) USCITA ACQUA UNITA’ STANDARD (FEMMINA) (1) INGRESSO LINEA ELETTRICA (2) STAFFA PER FISSAGGIO UNITA’ A PARETE (7) INGRESSO ACQUA UNITA’ STANDARD (FEMMINA) (3) MODULO IDRAULICO OPZIONALE (8) SCARICO CONDENSA Ø 15 mm (4) INGRESSO ACQUA UNITA’...
- Page 33 9 - INFORMAZIONI TECNICHE DIMENSIONI UNITA’ CON OPZIONI GRUPPI IDRAULICI O RETROFIT GRUPPI IDRAULICI GRUPPI IDRAULICI PER ANELLO CON PORTATA COSTANTE PER RETROFIT IMPIANTISTICO PER ANELLO CON PORTATA VARIABILE GRANDEZZE Attacchi acqua unità con 1/2” 1/2” 1/2” 1/2”...
- Page 34 9 - INFORMAZIONI TECNICHE 9.2 DATI TECNICI GENERALI GRANDEZZE RAFFREDDAMENTO A 27/19 W 30 Potenzialità frigorifera 1.37 2.08 2.39 2.88 3.38 3.75 4.11 Potenzialità sensibile 0.99 1.47 1.69 2.12 2.55 2.64 3.05 Potenza assorbita compressori 0.34 0.43 0.56 0.61 0.71 0.77 0.84 Potenza assorbita totale...
- Page 35 9 - INFORMAZIONI TECNICHE TENSIONE DI ALIMENTAZIONE: 230/1/50 GRANDEZZE F.L.A. CORRENTE ASSORBITA ALLE MASSIME CONDIZIONI AMMESSE F.L.A. - Compressore 1 2,82 4,55 5,13 5,86 F.L.A. - Singolo Ventilatore mandata 0,35 0,35 0,66 0,66 0,74 0,74 0,74 F.L.A. - Totale 2,55 3,17 4,16 4,56...
- Page 36 9 - INFORMAZIONI TECNICHE 9.4 LIVELLI SONORI VELOCITA' MINIMA VENTILATORE: Extraquiet Livello di Potenza Sonora dB Livello di Livello di Pressione Potenza Sonora Sonora Bande d'ottava (Hz) 500 1000 2000 4000 8000 dB(A) dB(A) VELOCITA' STANDARD VENTILATORE: Quiet Livello di Potenza Sonora dB Livello di Livello di Pressione...
-
Page 37: Rischi Residui
10 - RISCHI RESIDUI sonale qualificato In caso di incendio, la temperatura del refrigerante può raggiungere Sull’ unità può intervenire solo personale qualificato, come previsto dalle valori tali da portare la pressione oltre il valore di sicurezza con normative in vigore. conseguenti possibili proiezioni del refrigerante stesso o esplosioni Generalità... -
Page 38: Dismissioni
11 - DISMISSIONI 11.1 SCOLLEGAMENTO distributore, in appositi centri di raccolta. Qualora lo smaltimento avvenga in concomitanza con la Le operazioni di scollegamento devono essere effettuate da fornitura di una nuova apparecchiatura elettrica ed elettronica tecnici qualificati. destinata ad un nucleo domestico, il prodotto potrà essere ... - Page 39 NOTE...
- Page 40 NOTE...
- Page 42 Clivet is being working for years to offer systems able to assure the maxi- mum comfort for long time with high reliability, efficiency , quality and safety.
- Page 43 INDEX General Riception Positioning Water connections Electrical connections Start-up Control Maintenance Technical information Residual risks Decommissioning...
- Page 44 1 - GENERAL 1.1 MANUAL Any use other than intended does not involve the manufacturer in any commitment or obligation. The manual provides correct unit installation, use and Installation maintenance. Verify that the electrical line characteristics are in compliance Fare particolare attenzione ad : with data quotes on the unit serial number label.
- Page 45 MOBA - MOBX) 1.5 UNIT DESCRIPTION MOBX MODBUS RS485 serial port kit VERSATEMP EQV-X is the high efficiency packaged reverse MOBA MODBUS RS485 serial port, inbuilt cycle heat pump that uses water as energy source to provide CONTX Electronic room control with display, for installation on a comfort cooling or heating year round.
- Page 46 2 - RECEPTION 2.1 PRELIMINARY INFORMATION General Operate in compliance with safety regulations in force . For detailed information (dimensions, weight, technical characteristics etc.) please refer to the “Technical information” section. Use single protection devices : gloves, glasses ecc. Storing Observe external packing instructions .
- Page 47 3 - POSITIONING 3.1 PRELIMINARY INFORMATION 3.3 UNCASED UNIT WALL FIXING Operate in compliance with safety regulations in force . For detailed information (dimensions, weight, technical characteristics etc.) please refer to the “Technical information” section. Use single protection devices : gloves, glasses ecc. . During positioning consider these elements : ...
- Page 48 3 - POSITIONING 3.6 THERMOSTAT POSITIONING (OPTIONAL) WALL INSTALLATION WITH UNCASED BOX The choice of the installation point is important for the An option which enables the unit to be remotely controlled. It can be easily installed in the main square or round uncased comfort of the served area and the energy consumptions.
- Page 49 3 - POSITIONING 3.7 FUNCTIONAL SPACES Functional spaces are designed to: Position the unit taking into consideration the spaces shown. guarantee good unit operation ; carry out maintenance operations ; protect authorized operators and exposed people In-view vertical unit Vertical flush-mounted unit For visible units or with bottom return, leave a space of at least For a recessed unit, predict suitable panels that are easy to...
- Page 50 4 - WATER CONNECTIONS Vent the unit 4.1 PRELIMINARY INFORMATION General Exchanger vent Operate in compliance with safety regulations in force . Vent through the valve located near the coil For detailed information (dimensions, weight, technical characteristics etc.) please refer to the “Technical information” section.
- Page 51 4 - WATER CONNECTIONS 4.2 SYSTEM CONNECTION Connect the tubing to the attachments positioned on the side of the unit . Hemp and green paste are recommended for the sealing. STANDARD UNIT Condensate discharge pipe outlet only with pump (optional) Condensate discharge Ø15 mm.
- Page 52 4 - WATER CONNECTIONS 4.5 PLUMBING ASSEMBLY FOR LOOP WITH CONSTANT FLOW RATE WITH MANUAL VALVES The plumbing assembly for the constant flow rate loop includes: 1 - Internal exchanger with temperature probes, pressure switch and bleed bibcock 2 - Steel-mesh filter - water side 3 - bleed bibcock;...
- Page 53 5 - ELECTRICAL CONNECTIONS 5.1 PRELIMINARY INFORMATION General Do not lay the cables parallel to other cables; cable crossings are possible, only if laid at 90°. The characteristics of the electrical lines must be determined by specialized personnel able to design Connect the screen to the ground, only if there aren’t electrical installations;...
- Page 54 5 - ELECTRICAL CONNECTIONS 5.3 CUSTOMER CONNECTIONS ENABLE WINTER/SUMMER SELECTOR Enabled input only if 1 2 3 4 5 6 7 8 DP1-8 = ON . if DP1-8 =off Heat-Cool mode from keypad 5.4 THERMOSTAT CONNECTION 10 Mt. The signal and the power supply are taken directly from the built-in unit card.
- Page 55 5 - ELECTRICAL CONNECTIONS 5.6 MINI-NETWORK DP2 : ADDRESSING EXAMPLES Max 15 units: 1 master + 14 slaves Changing a setting on the MASTER, it is to all the SLAVE 1 master units. 1 2 3 4 5 6 7 8 Ex.: Master = Cool Slave = Cool Master = Heat...
- Page 56 5 - ELECTRICAL CONNECTIONS 5.7 SUPERVISION - RETE MODBUS AP5 RS 485 MODULE Perform the addressing by S3, S4 S5 ; allowed and valid addresses from 1 to 127 S3 it sets the address dozens S4 it sets the address units S5 it sets the address hundreds : ON = 100, OFF = 0 Factory setting : S1 485 terminator : ON = termination YES...
- Page 57 5 - ELECTRICAL CONNECTIONS 5.8 KIT GATEWAY BACNET 5.9 KIT GATEWAY LONWORKS...
- Page 58 6 -START-UP 6.1 PRILIMINARY INFORMATION The working out of the limits can cause irreversible damages and voids the warranty. General Voltage The indicated operations should be done by qualified Check that the air and water temperatures are included in the technician with specific training on the product.
- Page 59 7 - CONTROL 7.1 KEYS AND DISPLAY OPERATING Indicazioni display Unit Mode: cooling Unit Mode: heating Unit Mode: auto (cooling - heating) Fan speed : 1, 2, 3, auto Time band are activated if the clock is visible FUNCTION OF THE BUTTONS mode Mode change : heat, cool, auto Time band scheduling...
- Page 60 7 - CONTROL ON / OFF ECO / COMFORT SETTING Press for 5 seconds Press for 5 seconds mode mode °c °c 20.3 18.5 10:00 ECO mode Press to increase or decrease the ECO setpoint mode °c mode 19.5 10:00 Press for 5 seconds mode °c...
- Page 61 7 - CONTROL STATA (VISUALIZATION ONLY) Press for 5 seconds plus the Set the new value mode fan button mode °c 20.3 23.0° 10:00 PA01 Press OK Enter as password any number Select ESC mode mode Premere OK Press OK CODE Select STAT Select others parameters or...
- Page 62 7 - CONTROL TIME BAND SCHEDULING It Is possible to set 4 types of scheduling: Set the temperature mode 7 days (from monday to sunday) 20.0 Press OK 5 days (from monday to friday) 2 days (from saturday to sunday) ...
- Page 63 7 - CONTROL UNIT STATUS During the operation is possible to visualize the unit status by the values obtained from sensors and from the main unit operating parameters. Description U.M. Current set point °C Operative T return °C Return Temperature I/O °C Return Temperature from sensor thermostat °C...
- Page 64 7 - CONTROL UNIT PARAMETERS The parameters accessible by password or supervision system can be modified only by qualified personnel after having read the specific manuals of the electronic system and of the supervision protocols. Incorrect modifications can cause malfunctioning or damages. MNEMONICO DESCRIPTION U.M.
- Page 65 7 - CONTROL MNEMONICO DESCRIPTION U.M. GROUPE PG03 SetSuperHeat Superheating setpoint in heating °C PG04 BandaSuperheat Proportional component of the PI control algorithm of the overheating °C PG19 EnApManEEV Activation of the electronic thermostatic valve control PG20 ApManEEV Percentage of the valve opening if manually controlled PG25 SetSHCool Superheating setpoint in Cool...
- Page 66 8 - MAINTENANCE 8.1 GENERAL 8.6 WATER EXCHANGER Maintenance must be done by authorized centres or by It is very important for the exchanger to be able to provide the qualified personnel maximum thermal exchange. Therefore, it is essential for the The maintenance enables: inner surfaces to be clean of dirt and incrustations.
- Page 67 8 - MAINTENANCE 1 - push the filter inwards To discharge the unit unscrew the probe holder A. 2 - incline downwards 3 - extract the filter Cased unit 1 - push the filter inwards 2 - incline downwards 3 - extract the filter 8.10 AIR FILTER It is very important for the air treatment coil to be able to offer maximum thermal exchange.
- Page 68 8 - MAINTENANCE 4 - Unscrew the screws D; 8.11 FAN EXTRACTION To extract the fan: 1 - Unscrew the screws A; 2 - Remove the profile B; 5 - Slighty rotate the lateral panel E and push it downwards; 6 - Lift the fan F to step over the pipe;...
- Page 69 8 - MAINTENANCE 8.13 RECOMMENDED PERIODIC CHECKS Controls effected on ……………………..By……………………………...………………….of the Company ………………………………………………. √ interval check (months) □ Presence of corrosions □ Panel fixing □ Fan fixing □ Battery cleaning □ Drain pain cleaning + sanification □ condensate discharge test □...
- Page 70 9 - TECHNICAL INFORMATION 9.1 DIMENSIONS IN-VIEW VERTICAL UNIT (1) ELECTRONIC ROOM CONTROL WITH DISPLAY(OPTIONAL) (7) WATER OUTLET—STANDARD UNIT (FEMALE) (2) POWER SUPPLY INLET (8) WATER INLET—STANDARD UNIT (FEMALE) (3) BRACKET WALL UNIT (9) CONDENSING DRAIN Ø 15 mm (4) OPTIONAL HYDRAULIC MODULE (10) OUTLET OF THE DRAIN PIPE FROM THE DRAIN PUMP (OPTION) (5) WATER INLET - OPTIONAL HYDRAULIC MODULE UNIT (FEMALE) (6) WATER OUTLET - OPTIONAL HYDRAULIC MODULE UNIT...
- Page 71 9 - TECHNICAL INFORMATION DIMENSIONAL DRAWING OF THE PIPE WORK ARRANGEMENT AND RETROFIT OPTIONS PIPE WORK ARRANGEMENTS PIPE WORK ARRANGEMENTS FOR CONSTANT FLOW LOOP WITH RETROFIT SYSTEM FOR VARIABLE FLOW LOOP SIZE Water fittings with optional pipe 1/2”...
- Page 72 9 - TECHNICAL INFORMATION VERTICAL FLUSH-MOUNTED UNIT (1) POWER SUPPLY INLET (6) WATER OUTLET—STANDARD UNIT (FEMALE) (2) BRACKET WALL UNIT (7) WATER INLET—STANDARD UNIT (FEMALE) (3) OPTIONAL HYDRAULIC MODULE (8) CONDENSING DRAIN Ø 15 mm (4) WATER INLET - OPTIONAL HYDRAULIC MODULE UNIT (9) OUTLET OF THE DRAIN PIPE FROM THE DRAIN PUMP (OPTION) (FEMALE) (5) WATER OUTLET - OPTIONAL HYDRAULIC MODULE UNIT...
- Page 73 9 - TECHNICAL INFORMATION DIMENSIONAL DRAWING OF THE PIPE WORK ARRANGEMENT AND RETROFIT OPTIONS PIPE WORK ARRANGEMENTS PIPE WORK ARRANGEMENTS WITH RETROFIT SYSTEM FOR CONSTANT FLOW LOOP FOR VARIABLE FLOW LOOP SIZE Water fittings with optional 1/2” 1/2”...
- Page 74 9 - TECHNICAL INFORMATION 9.2 GENERAL TECHNICAL DATA SIZE COOLING A 27/19 W 30 Cooling capacity 1.37 2.08 2.39 2.88 3.38 3.75 4.11 Sensible capacity 0.99 1.47 1.69 2.12 2.55 2.64 3.05 Compressor power input 0.34 0.43 0.56 0.61 0.71 0.77 0.84 Total power input...
- Page 75 9 - TECHNICAL INFORMATION ELECTRICAL DATA : 230/1/50 SIZE F.L.A. - FULL LOAD CURRENT AT MAX ADMISSIBLE CONDITIONS F.L.A. - Compressor 1 2,82 4,55 5,13 5,86 F.L.A. - Single supply fan 0,35 0,35 0,66 0,66 0,74 0,74 0,74 F.L.A. - Total 2,55 3,17 4,16...
- Page 76 9 - TECHNICAL INFORMATION 9.4 SOUND LEVELS FAN MINIMUN SPEED: Extraquiet Sound Power Level (dB) Sound Sound pressure power level level Octave band (Hz) 500 1000 2000 4000 8000 dB(A) dB(A) FAN STANDARD SPEED: Quiet Sound Power Level (dB) Sound Sound pressure power...
- Page 77 10 - RESIDUAL RISKS Qualified personal increase the pressure to beyond the safety valve with the consequent possible projection of the refrigerant itself or explosion of the circuit Only qualified personnel can operate on the unit, as required by the parts that remain isolated by the closure of the tap.
- Page 78 11 - DECOMMISSIONING 11.1 standards or as instructed by the distributor. DISCONNECTION If disposal takes places at the same time as delivery of a new Only authorised personnel must disconnect the unit. electrical or electronic equipment for the same family, the ...
- Page 79 NOTES...
- Page 80 Tel. +34 91 6658280 - Fax +34 91 6657806 - info@clivet.es CLIVET GmbH Hummelsbütteler Steindamm 84, 22851 Norderstedt - Germany Tel. + 49 (0) 40 32 59 57-0 - Fax + 49 (0) 40 32 59 57-194 - info.de@clivet.com CLIVET RUSSIA Elektrozavodskaya st. 24, office 509 - 107023, Moscow, Russia Tel.
Need help?
Do you have a question about the Versatemp EQV-X and is the answer not in the manual?
Questions and answers