
Related Manuals for urmet domus Grothe CALIMA 400 Series


Summary of Contents for urmet domus Grothe CALIMA 400 Series
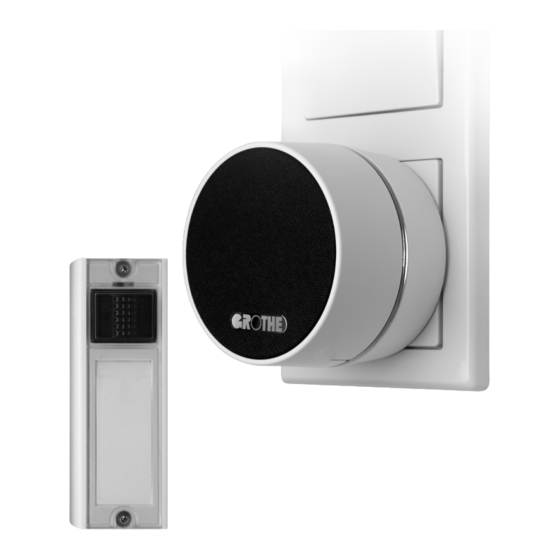
- Page 1 Installation and Operating Instructions Wireless Doorbell Set CALIMA 400 Series Wireless plug-in doorbell with LED light ring plus wireless doorbell button in set...
-
Page 2: Warranty
Warranty / package contents / materials required Dear Customer, You have purchased a high-quality product that was designed and manufactured with utmost care and to the highest standards. The statutory warranty period applies. The warranty does not cover defects that are due to improper handling or use or failure to observe the installation and operating instructions. -
Page 3: Intended Use
Safety instructions / cleaning Do not expose the wireless doorbell to water droplets or splash water! Do not place any objects filled with liquids on it! Do not cover it with objects or blankets, curtains etc. and protect it from direct sunlight and open fire sources! Do not expose the batteries in the wireless doorbell button to excessive heat (e.g. -
Page 4: Table Of Contents
Table of contents Basic information: • Warranty • Package contents • Additional tools required • Other mounting option • Intended use • Safety information • Cleaning CALIMA 400 – Overview of main features Add-on product: Information about the Calima 200 Product overview Using the wireless doorbell button for the first time •... - Page 5 Table of contents Pairing • Pairing the wireless doorbell and the wireless doorbell button • Optional: Adding additional wireless doorbell buttons / doorbells • Disconnecting the wireless doorbell and wireless doorbell button Using the alarm function • Alarm function Low batteries / keeping the settings Wireless range Combination options / networking Technical data...
-
Page 6: X C Alima 400 - Overview Of Main Features
x C ALIMA 400 – Overview of main features The set contains one wireless plug-in doorbell and one wireless doorbell button. The CALIMA 400 is a wireless plug-in doorbell that is always ready for use. It not only announces your visitors reliably, but it can also be used as a night light thanks to the integrated LED light ring. - Page 7 CALIMA 400 – Overview of main features Alarm function: You may use the included wireless doorbell button as an alarm transmitter. Additional SE03-type wireless doorbell buttons can also be purchased separately. Using this type of wireless doorbell button in combination with a wireless doorbell of the CALIMA series enables you to set up a quickly usable, flexible and, above all, mobile in-house emergency call system.
-
Page 8: Add-On Product: Information About The Calima 200
The perfect addition: CALIMA 200 Our mobile wireless doorbell! No matter where you are in the house or garden, never miss a visitor again with our wireless doorbell. No cables Menu with voice message Powerful sound Optical signal display Sleep mode Mute function... -
Page 9: Product Overview
Product overview of wireless plug-in doorbell set CALIMA 400 WIRELESS PLUG-IN DOORBELL Loudspeaker Selection Menu button button LED light ring Euro plug Screws WIRELESS DOORBELL BUTTON Button Name plate... -
Page 10: Assembly, Inserting Batteries, Labelling The Name Plate
Initial use / starting up – Wireless doorbell button Wireless doorbell button: assembly, inserting batteries, labelling the name plate Releasing the screws Release the screws of the cover of the wireless doorbell button with the Release the screws of the cover of the wireless doorbell button with the Allen key to remove the top. - Page 11 Starting up – Using the wireless doorbell button with batteries Insert two 1.5 V batteries (type AAA) in the lower part of the wireless doorbell button. Pay attention to the polarity (see markings). To write on the label, pull out the name tag to the side and push it back in afterwards.
-
Page 12: Wiring (Optional) - Use On An Existing Doorbell System
Wireless doorbell button – Battery operation / optional wiring Electrical connection to an existing doorbell system V O C T Strip the insulation from the wires to approx. 6 mm and carefully push them through the sealing grommets on the back of the wireless doorbell button. If necessary, cut off the upper tip of the sealing grommets first. - Page 13 Using the wireless doorbell button with the existing doorbell system The terminals '0'and 'C' are used for connection to a potential-free button. Use the 'C' and 'T' terminals to connect the wireless doorbell button to a doorbell system with a mechanical chime or bell (3-12 V AC/DC). When triggering with DC voltage, the minus pole (-) is connected to 'C' and the plus pole (+) to 'T'.
-
Page 14: Setting The Melody
Custom settings – Melody The wireless doorbell is configured and operated with two buttons: • Select button (left) • Menu button (right) The voice output of the wireless doorbell reports the status of the settings. Good to know: All settings are permanently stored –... - Page 15 Custom settings – Melody MELODY SELECTION You will hear the device say "melody Press the select button repeatedly selection". until the melody you want plays. SETTINGS FINISHED From now on, you will hear the last played melody when the wireless doorbell button is pressed.
-
Page 16: Setting The Led Light Ring Colour
Custom settings – LED light ring colour Press the wireless doorbell button Then press the menu button twice for which you want to set the colour in the default state. of the LED light ring. COLOUR SELECTION Good to know: You can select the colour of the LED light ring individually for each wireless doorbell button. - Page 17 Custom settings – LED light ring colour SETTINGS FINISHED Now press the select button Seven seconds after the last button repeatedly until the LED light ring was pressed, you will hear the lights up in the desired colour. device say "settings finished". Your selection is automatically The LED light ring now lights up in saved if no button is pressed for...
-
Page 18: Setting The Night Light
Custom settings – Night light colour / deactivating NIGHT LIGHT Press the menu button 3 times in the You will hear the device say "night default state. light". The LED light ring lights up in the currently set colour. Press the select button repeatedly until the LED light ring lights up in the desired colour or goes out. - Page 19 Custom settings – Night light colour / deactivating Seven seconds after the last button SETTINGS FINISHED was pressed, you will hear the device say "settings finished". The LED light ring now lights up in the set colour. Note: The wireless doorbell automatically returns to its default To confirm, the device will say state if no button is pressed for...
-
Page 20: Setting The Volume
Settings – Volume FLASHES GREEN Press the menu button 4 times in the To confirm, the LED light ring flashes default state. green. VOLUME Note: The volume of the wireless doorbell is always adjusted simultaneously for all wireless doorbell buttons. You will hear the device say "volume". - Page 21 Settings – Volume SETTINGS FINISHED Press the select button repeatedly Seven seconds after the last button until the melody plays at the desired was pressed, you will hear the volume. Your selection is device say "settings finished". automatically saved if no button is The wireless doorbell will now signal pressed for 7 seconds.
-
Page 22: Mute/Snooze Function
Mute / snooze function If you do not want to be disturbed, you can mute the wireless doorbell so that neither a melody is played nor the LED light ring flashes. The wireless doorbell will no longer send optical or acoustic signals. You have two options: •... -
Page 23: Switching Muting On / Off (Indefinitely)
Switching the mute function on / off (for an indefinite period) FLASHES GREEN When the mute function is active, Press the select button once in the the LED light ring flashes green at default state. regular intervals. Special feature with activated Mute function: When the night light is set to green the LED light ring does not shine continuously, but... -
Page 24: Switching On / Prematurely Ending The Snooze Function For 1, 3, 9 Hours
Starting / stopping the snooze function for 1, 3, 9 hours FLASHES YELLOW 2-4 TIMES In the default state, press the select The LED light ring then flashes yellow button 2, 3 or 4 times at an interval of 2 to 4 times to confirm, depending on one second to activate the snooze how often you have pressed the function for 1, 3 or 9 hours. - Page 25 Starting / stopping the snooze function for 1, 3, 9 hours FLASHES YELLOW LIGHTS UP GREEN While the snooze function is active, Press the select button to end the the LED light ring flashes yellow at snooze function early. To confirm, regular intervals or regularly goes the LED light ring lights up green out briefly when the yellow night...
-
Page 26: Pairing The Wireless Doorbell And The Wireless Doorbell Button
Pairing the wireless doorbell and the wireless doorbell button PAIRING FLASHES RED Press the menu button 5 times in the To confirm, the LED light ring flashes default state. red. You will hear the device say "pairing". PAIRING ACTIVE LIGHTS UP RED Press the select button within The LED light ring will light up red to 7 seconds. -
Page 27: Optional: Adding Additional Wireless Doorbell Buttons / Doorbells
Pairing the wireless doorbell and the wireless doorbell button 1. MELODY SET 2. SETTINGS FINISHED Press the wireless doorbell button You will hear the melody set and within 30 seconds. the device say "settings finished". The wireless doorbell button is now paired with the doorbell. -
Page 28: Disconnecting The Wireless Doorbell And Wireless Doorbell Button
Disconnecting the wireless doorbell and wireless doorbell button LED LIGHT RING GOES OUT Press the menu button 5 times in the Press the select button within default state. 7 seconds and keep it pressed for 10 seconds. To confirm, the LED light ring goes out. -
Page 29: Using The Alarm Function
Using the alarm function The alarm function can be used in combination with a wireless doorbell button type SE03 as a quickly deployable, flexible and above all mobile in-house emergency call system. In this case, the wireless doorbell is the alarm transmitter and the wireless doorbell button is the signal transmitter. -
Page 30: Low Batteries / Keeping The Settings
Low batteries / keeping the settings Keeping the settings of the wireless doorbell: Your custom settings (melody, colour of the LED light ring for the doorbell and night light, volume) are retained when you remove the wireless gong from the socket to plug it in somewhere else. -
Page 31: Wireless Range
Wireless range The wireless plug-in doorbell set has a maximum range of 500 meters in the open, provided that the wireless doorbell button is not mounted on metal. Note: Walls, doors, metal parts, etc. can significantly reduce the range. Range reduction of various materials 100%: unobstructed approx. -
Page 32: Combination Options / Networking
Combination options / networking The illustrations show some of the many possible combinations. Among other things, each wireless doorbell can be controlled individually or centrally. Central ringing A wireless doorbell button can send a signal to any number of wireless doorbells: One wireless doorbell button Mel. -
Page 33: Technical Data
Technical data Wireless plug-in doorbell Colour White Wall mounting Radio frequency 868.35 MHz Ring differentiation Volume Max. 83 dB(A) depending on the melody Dimensions Ø 60 mm x 95 mm incl. plug Power supply 100 – 240 V, 50 / 60 Hz Temperature range 5 to 40 °C In dry rooms only Wireless doorbell button... -
Page 34: Troubleshooting And Help
x Errors – Causes – Help 1. The LED of the wireless doorbell button flashes after pressing, but the wireless doorbell does not respond. 1.1 The wireless doorbell does not have adequate power supply. Check if the socket works by using another device. 2. -
Page 35: Declarations Of Conformity
Declarations of conformity / disposal and recycling Declarations of conformity We hereby declare that this product complies with the basic requirements and other relevant regulations of Directive 2014/53/EU. Depending on the device type, tested in accordance with the relevant standards EN 3000220-2, EN 301489-1, EN 62368-1:2016, EN 55022, EN 50581 o RED Directive 2014/53/EU o EMC Directive 2014/30/EU o RoHS Directive 2011/65/EU... -
Page 36: Warranty And Liability
Warranty and liability Warranty and liability GROTHE GmbH wireless doorbells are manufactured using state of the art technology and are subject to 100% quality control. If, however, a malfunction still occurs on your device, GROTHE GmbH provides a warranty to the following extent. 1.) Our warranty includes the repair or new delivery of a device if the device is demonstrably deficient in function or material. -
Page 37: Quick Guide
Quick guide Melody selection FLASHES BLUE MELODY SELECTION SETTINGS FINISHED LED light ring colour selection COLOUR SELECTION SETTINGS FINISHED... -
Page 38: Night Light
Quick guide Night light NIGHT LIGHT SETTINGS FINISHED Volume VOLUME FLASHES GREEN SETTINGS FINISHED... -
Page 39: Pairing
Quick guide Pairing PAIRING FLASHES RED 1. MELODY SET PAIRING ACTIVE 2. SETTINGS FINISHED LIGHTS UP RED Muted/snooze Overview of snooze function Pressing the button Mute Flashing of the LED light ring for 1 hour 2 x yellow for 3 hours 3 x yellow for 9 hours 4 x yellow... - Page 40 The statutory warranty period applies. Excluded from this warranty are defects that have occurred due to improper handling, improper use or disregard of the installation and operating instructions. Furthermore, the manufacturer reserves the right to change the contents of this manual without prior notification.
Need help?
Do you have a question about the Grothe CALIMA 400 Series and is the answer not in the manual?
Questions and answers