Page 1
Bedienungsanleitung Operation Manual Notice d’utilisation Instrucciones de servicio Istruzioni per l’uso 
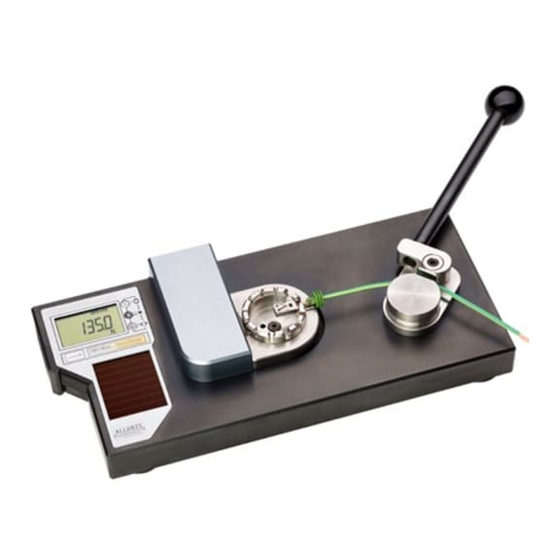
Digitales Auszugskraftmessgerät für Kabelverbindungen Digital Force Gauge For Wire Terminals Dynamomètre Numerique par Jonctions de Câbles Dinamométrico Digital Por cables con unions Adecuadas Dinamometri Digitales a di Cavi con Connettori (BDA Version 2.4)
Thank you for choosing one of our high quality instruments. Please read the entire operation manual thoroughly before using this instrument for the first time. The information contained herein will help you to achieve accurate and reproducible results and to avoid misuse or damages. This instrument is designed for measuring tensile strength of soldered or solder-free (crimped) cable joints with end sleeves, pins, solder pins or similar wire terminal components in the field of quality control or design validation.
2.4 Instrument overview I-Button turns the instrument on and off (keep pressed for > 2s) and to start the measurement. 2. S-Button to save test results, to recall statistical data and to start the setting menu (keep pressed for > 2s). 3.
3.3 Preparing the measurement Select the smallest slot suitable for the test sample diameter and rotate the fixture so the selected slot is in the 3 o’clock position, closest to the wire clamp fixture. Place the cable connection into the adapter, so that the sleeve of the cable connector stays securely inside the ring and cannot be pulled out through the slot.
3.4 Start measuring (AutoTara) with manual pull tester FMT-W30 By pressing the I-Button you start the measurement, the symbol of the measuring dimension (N) flashes and the instrument performs an AUTO-TARA to reset. >> Insert the free end of the cable using a small amount of tension in the wire clamp fixture.
3.6 Start measuring (AutoTara) with motorized pull tester FMT-W40 By pressing the I-Button you start the measurement, the symbol of the measuring dimension (N) flashes and the instrument performs an AUTO-TARA to reset. Now the motor starts with the setted pull speed. If the minimal force of the automatic break detection (activate with P18) is not reached the cable clamp rotates to its maximum...
3.8 Display statistical data After you finish the (last) measurement you can recall the statistical results by pressing the S-Button. >>> >>> (nur bei FMT-W30) Highest value of all saved tests. >>> Lowest value of all saved tests. >>> Average (arithmetic medium) of all saved tests. >>>...
You can set these values in the limit comparator function. The lower limit activates the buzzer (with FMT-W30 only if USB-cable is connected) and an interrupted peep signalizes that the limit is not reached (yet). After exceeding the upper limit, the displayed pointer changes from down to up and the continuous peep indicates that the minimum tensile strength was reached.
Add-Ins category. Near the bottom of the Excel Options dialog box, make sure that Excel Add-ins is selected in the Manage box, and then click Go. In the Add-Ins dialog box, select search and choose C:\Programme\Alluris\FMT-W_Connect\Formular.xlsx. Then exit all dialogs with OK.
Page 11
Option force gauge Select the resolution of the force measurement and switch on and off the buzzer function. If you want to change the gravitation to your local environment you influent the calculation base for the weight dimensions [lb] and [kg]. The change should be done only, if the gravitation at your place of operation significantly deviates from the setted value and if you work in other than international standard units [N].
W_Connect\“Serialnumber of device“\”Date”\. You may customize the report specifically to your company details with your own logo etc. The template is filed in C:\Alluris\FMT-W_Connect\Formular.xlsx Fields with gray background are filled by the data entered in FMT-W_Connect and the data of the testing equipment.
6. General settings (P1), Setting of memory (P2) and reset works defaults (Po) To customize the instrument to the application, some of the factory settings (defaults) can be changed. These adjustments will be saved in the microprocessor and be recalled when you switch on the force gauge the next time. In order to change the setting you press the S-Button for app. 2 second until the code P1 is displayed.
8.1 5-Years extended warranty We grant for all Alluris force gauges a 5 years extended warranty period starting with the date of purchase, subject to the registration of the device before it is taken into operation and the service and calibration at regular intervals in our calibration laboratory. Consumption material, normal wear and tear as well as damages caused by improper use are excluded from this warranty.
8.2 Register for updates In order to receive information about product changes and updates and to enjoy full warranty, please register your product at www.alluris.de/service.php.
9.0 Trouble shooting (FAQ) Does the instrument work also after a Yes. Even after a self discharging of the internal energy storage the instrument can be used immediately. A back- being stored in the dark for a longer up battery saves guaranties the basic function of the device; see chap. 2.3. period? The instrument shows already minute The electronic captures minute changes after taring and those are shown in the PEAK display (<1,5N).
Page 17
In accordance to WEEE Directive 2002/96/EC this device is categorized as “Monitoring and Control Instrument” and should not be disposed as unsorted municipal waste. You may return it to Alluris for recycling (WEEE Reg.No. DE 49318045). For more information please contact our website www.alluris.de.
Page 18
A.2 Kalibrierung (Werksprüfzeugnis DIN EN 10204, 2.1) Wir bestätigen hiermit, dass das Gerät im Produktionsprozess entsprechend den Anforderungen der DIN EN 9001:2008 geprüft wurde. Das Messgerät entspricht in allen Punkten den in den Technischen Daten beschriebenen Werten. Die zur Bestimmung der Genauigkeit benutzten Instrumente und Gewichtssätze lassen sich auf das weltweit anerkannte (ILAC) Gewichtsnormal der Physikalisch-Technischen Bundesanstalt (PTB, Braunschweig) im Rahmen des DAkkS zurückführen.
Need help?
Do you have a question about the FMT-W30C5 and is the answer not in the manual?
Questions and answers