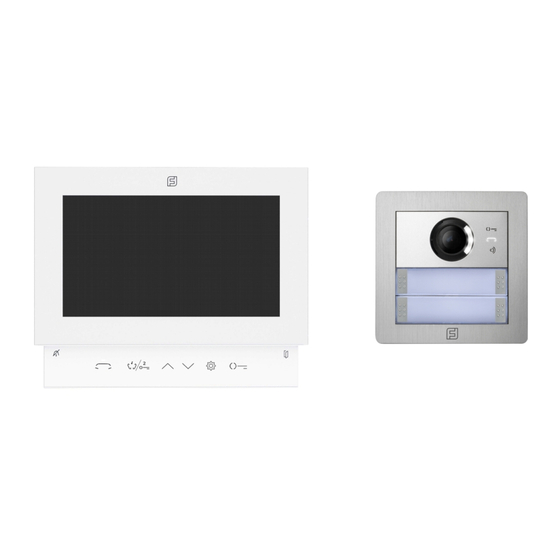

Summary of Contents for Farfisa 1SEPG
- Page 1 KIT 1SEPG IT Configurazioni utente e funzioni avanzate GB User’s config and advanced features programming ES Configuraciones de usuario y funciones avanzadas FR Configurations utilisateur et fonctions avancées...
-
Page 2: Table Of Contents
FR Réglage du mode et du temps d'activation de la sortie gâche ........30 ES Ajuste de la iluminación de los LED de la cámara ............. 33 FR Réglage de l'éclairage des LED de la caméra ..............33 ACI srl Farfisa Intercoms www.farfisa.com... -
Page 3: Configurazione Monitor - Monitor's Configuration
Call from external door panel Intercommunicating call Floor call Ring tone volume (common for all call types) This section allows to restore factory’s ring configuration These icons show, respectively, the device’s address and the internal software version ACI srl Farfisa Intercoms www.farfisa.com... -
Page 4: Regolazione Luminosità, Contrasto, Colore E Volume Di Ascolto
Note: It is recommended to do not set a too loud speaker volume to avoid to affect the external – internal communication channel. ACI srl Farfisa Intercoms www.farfisa.com... -
Page 5: Attivazione Della Funzione Intercomunicante Tra Appartamenti
IT Ripetere le stesse operazioni in tutti i monitor in è richiesta dagli utenti funzione intercomunicante tra appartamenti diversi. GB Repeat the same operations in all monitors in which the function is required by end user between different apartments. ACI srl Farfisa Intercoms www.farfisa.com... -
Page 6: Utilizzo Della Funzione Intercomunicante Tra Appartamenti
“Next” per scorrere le voci del menù sino a selezionare la schermata con le informazioni di sistema. GB Use the button “Next” to scroll the menu options until select the last one about system version. ACI srl Farfisa Intercoms www.farfisa.com... - Page 7 (con 8007 la funzione viene disabilitata). GB Use the buttons “Inc” and “Dec” to enter the programming code 8006 to enable the video displaying even the monitor is slave (by 8007 the function is disabled). ACI srl Farfisa Intercoms www.farfisa.com...
-
Page 8: Configurazione Pulsantiera - Door Panel's Configuration
“Next” to move the cursor and confirm the digit. IT Utilizzare i tasti “Inc” e “Dec” per selezionare l’opzione “DS-1” e confermare tramite il tasto “OK”. GB Use the buttons “Inc” and “Dec” to select the option “DS-1” and confirm by “OK” button. ACI srl Farfisa Intercoms www.farfisa.com... - Page 9 IT Utilizzare il tasto “Next” per scorrere le voci del menù sino a selezionare la schermata U012 “Calling Mode”. GB Use the button “Next” to scroll the menu options until select the U012 “Calling Mode”. ACI srl Farfisa Intercoms www.farfisa.com...
- Page 10 “OK”. Ad esempio, nel caso di un’applicazione bi- familiare assegnare (utilizzo a tasto doppio, montare quindi l’art.AB20 sui tasti superiori): U013 = 1 U014 = 2 In questo modo gli indirizzi associati ai tasti saranno: ACI srl Farfisa Intercoms www.farfisa.com...
- Page 11 As alternative for a 2-family application it is possible to assign (single button mode, mount both AB21): U013 = U014 = 1 U015 = U016 = 2 The addresses will be assigned to buttons as follows: ACI srl Farfisa Intercoms www.farfisa.com...
-
Page 12: Attivazione Della Sintesi Vocale
“Next” to move the cursor and confirm the digit. IT Utilizzare i tasti “Inc” e “Dec” per selezionare l’opzione “DS-1” e confermare tramite il tasto “OK”. GB Use the buttons “Inc” and “Dec” to select the option “DS-1” and confirm by “OK” button. ACI srl Farfisa Intercoms www.farfisa.com... - Page 13 GB Use buttons “Inc” and “Dec” to input value “1” and confirm with “OK”. After this change the panel will confirm the operations (ex. “Call in progress, door open”,…) by audio messages (English language only). ACI srl Farfisa Intercoms www.farfisa.com...
-
Page 14: Regolazione Della Modalità Di Funzionamento E Del Tempo Di Attivazione Dell'uscita Serratura
“Next” to move the cursor and confirm the digit. IT Utilizzare i tasti “Inc” e “Dec” per selezionare l’opzione “DS-1” e confermare tramite il tasto “OK”. GB Use the buttons “Inc” and “Dec” to select the option “DS-1” and confirm by “OK” button. ACI srl Farfisa Intercoms www.farfisa.com... - Page 15 Jumper rimosso: contatto pulito GB Use buttons “Inc” and “Dec” to input the desired value among: “0”: Normally opened “1”: Normally closed and confirm with “OK”. Note: The behaviour of the panel’s door unlock output ACI srl Farfisa Intercoms www.farfisa.com...
- Page 16 “Dec” per selezionare il tempo di attivazione desiderato (1 – 99sec.). GB Use the button “Next” to scroll the menu options until select U004 “Unlock 1 Time”. Then use the buttons “Inc” and “Dec” to input the desired activation value (1-99sec.). ACI srl Farfisa Intercoms www.farfisa.com...
-
Page 17: Regolazione Dell'accensione Dei Led Della Telecamera
“Next” to move the cursor and confirm the digit. IT Utilizzare i tasti “Inc” e “Dec” per selezionare l’opzione “DS-1” e confermare tramite il tasto “OK”. GB Use the buttons “Inc” and “Dec” to select the option “DS-1” and confirm by “OK” button. ACI srl Farfisa Intercoms www.farfisa.com... - Page 18 “1”: led sempre accesi “2”: led sempre spenti e confermare con “OK”. GB Use buttons “Inc” and “Dec” to input the desired value among: “0”: automatic “1”: always on “2”: always off and confirm with “OK”. ACI srl Farfisa Intercoms www.farfisa.com...
-
Page 19: Configuración Del Monitor - Configuration Du Moniteur
(commun à tous les types d'appels) permet de réinitialiser les sonneries selon la configuration d'usine ces icônes indiquent l'adresse de l'appareil et la version du logiciel interne ACI srl Farfisa Intercoms www.farfisa.com... -
Page 20: Ajuste De Brillo, Contraste, Color Y Volumen De Escucha
Note: Il est recommandé de ne pas régler le volume d'écoute à un niveau trop élevé pour ne pas pénaliser le canal de conversation externe - interne. ACI srl Farfisa Intercoms www.farfisa.com... -
Page 21: Activación De La Función Intercomunicante Entre Apartamentos
ES Repetir las mismas operaciones en todos los monitores donde se requiere la función de los usuarios. FR Répétez les mêmes opérations sur tous les moniteurs où la fonction est requise par les utilisateurs. ACI srl Farfisa Intercoms www.farfisa.com... -
Page 22: Uso De La Función Intercomunicante Entre Apartamentos
“Next” para desplazarse por el menú hasta que seleccione la pantalla con las informaciones del sistema. FR Utilisez la touche “Next” pour faire défiler les éléments du menu jusqu'à ce que vous sélectionniez l'écran d'informations système. ACI srl Farfisa Intercoms www.farfisa.com... - Page 23 (con 8007 la función está desactivada). FR Utilisez les touches “Inc” et “Dec” pour entrer le code de programmation 8006 pour activer l'affichage vidéo même le moniteur est esclave (par 8007, la fonction est désactivée). ACI srl Farfisa Intercoms www.farfisa.com...
-
Page 24: Configuración De La Placa De Calle - Configuration Panneau
ES Utilizar los pulsadores ”Inc” y ”Dec” para seleccionar la opción “DS-1” y confirmar con el pulsador “OK”. FR Utilisez les touches “Inc” et “Dec” pour sélectionner l'option "DS-1" et confirmez avec la touche "OK". ACI srl Farfisa Intercoms www.farfisa.com... - Page 25 ES Utilizar el pulsador “Next” desplazarse por el menú hasta que seleccione la pantalla U012 “Calling Mode”. FR Utilisez la touche "Next" pour faire défiler les éléments de menu jusqu'à sélectionner l'écran "Calling Mode" U012. ACI srl Farfisa Intercoms www.farfisa.com...
- Page 26 Por ejemplo, en el caso de una aplicación bi- familiar asignar (utilizar el doble pulsador, luego montar el art. AB20 en los pulsadores superiores): U013 = 1 U014 = 2 De esta forma las direcciones asociadas a los pulsadores serán: ACI srl Farfisa Intercoms www.farfisa.com...
- Page 27 (utilisation à un seul bouton, puis monter les deux art.AB21 sur les boutons): U013 = U014 = 1 U015 = U016 = 2 De cette façon, les adresses associées aux clés seront: ACI srl Farfisa Intercoms www.farfisa.com...
-
Page 28: Activación De La Síntesis Vocal
ES Utilizar los pulsadores ”Inc” y ”Dec” para seleccionar la opción “DS-1” y confirmar con el pulsador “OK”. FR Utilisez les touches “Inc” et “Dec” pour sélectionner l'option "DS-1" et confirmez avec la touche "OK". ACI srl Farfisa Intercoms www.farfisa.com... - Page 29 (solo en Ingles). FR Utilisez les touches “Inc” et “Dec” pour entrer la valeur souhaitée "1" et confirmez avec "OK". Après cette modification, le panneau de bouton-poussoir confirmera l'état fonctionnement avec messages audio correspondants (uniquement en anglais). ACI srl Farfisa Intercoms www.farfisa.com...
-
Page 30: Ajuste Del Modo Y Tiempo De Activación De La Salida De La Cerradura
ES Utilizar los pulsadores ”Inc” y ”Dec” para seleccionar la opción “DS-1” y confirmar con el pulsador “OK”. FR Utilisez les touches “Inc” et “Dec” pour sélectionner l'option "DS-1" et confirmez avec la touche "OK". ACI srl Farfisa Intercoms www.farfisa.com... - Page 31 Jumper eliminado: contacto limpio FR Utilisez les boutons “Inc” et “Dec” pour saisir la valeur souhaitée: “0”: normalement ouvert “1”: normalement fermé et validez par "OK". Note: Le comportement de la sortie gâche du panneau ACI srl Farfisa Intercoms www.farfisa.com...
- Page 32 FR Utilisez la touche “Next” pour faire défiler les éléments menu jusqu'à vous sélectionniez l'écran U004 “Unlock 1 Time”. Utilisez ensuite les touches “Inc” et “Dec” pour sélectionner le temps d'activation souhaité (1 - 99sec.). ACI srl Farfisa Intercoms www.farfisa.com...
-
Page 33: Ajuste De La Iluminación De Los Led De La Cámara
ES Utilizar los pulsadores ”Inc” y ”Dec” para seleccionar la opción “DS-1” y confirmar con el pulsador “OK”. FR Utilisez les touches “Inc” et “Dec” pour sélectionner l'option "DS-1" et confirmez avec la touche "OK". ACI srl Farfisa Intercoms www.farfisa.com... - Page 34 “2”: led siempre apagados y confirmar con “OK”. FR Utilisez les boutons “Inc” et “Dec” pour saisir la valeur souhaitée: “0”: allumage automatique “1”: LED toujours allumées “2”: LED toujours éteintes et validez par "OK". ACI srl Farfisa Intercoms www.farfisa.com...
Need help?
Do you have a question about the 1SEPG and is the answer not in the manual?
Questions and answers