Table of Contents
Advertisement
Quick Links
Advertisement
Table of Contents

Summary of Contents for Axminster PROFESSIONAL AP200SRG
- Page 1 Code 107671 AP200SRG Slow Running Grinder AT: 08/02/2022 VERSION: 4...
-
Page 2: Table Of Contents
INDEX OF CONTENTS Page No. Index of Contents Declaration of Conformity What’s in the Box General Instruction for the 230V Machines 04-05 Specific Safety Precautions for Grinding Machine Initial Assembly Setting up the Grinder 08-09 Specification Identification and Description of the Grinder Illustration and Parts Description of the Grinder Changing a Grinding Wheel 12-13... -
Page 3: Declaration Of Conformity
DECLARATION OF CONFORMITY Cert No: MD3220HD EU Declaration of Conformity Axminster Tool Centre Ltd This machine complies with the following directives: Axminster Devon EX13 5PH UK axminstertools.com 2006/42EC EN 61029-1:2009/A11:2010 declares that the machinery described:- EN 61029-2-4:2011 AFPS GS 2014:01 PAK... -
Page 4: What's In The Box
WHAT’S IN THE BOX Model Number: MD3220HD 8” Slow Running Grinding machine with grinding wheels and lamp fitted Spark Guards assembled complete Plastic Bag Containing, M8 Star Bolts M4 Raised Head Bolts complete with M4 Anti Vibration Washer M4 Washers M4 Nut Instruction Manual GENERAL INSTRUCTIONS FOR 230V MACHINES... - Page 5 GENERAL INSTRUCTIONS FOR 230V MACHINES Work Place/Environment The machine is designed for indoor use, do not use when or where it is liable to get wet. If the tool is to be used outside and it starts to rain (unusual though this would be in U.K.), stop work and move it inside. If tool has got wet;...
-
Page 6: Specific Safety Precautions For Grinding Machine
SPECIFIC SAFETY PRECAUTIONS FOR GRINDING MACHINES 1. DO NOT operate your machine until it is completely assembled and installed according to the instructions. 2. If you are not familiar with the operation of grinding machines obtain advice from your supervisor or instructor or another qualified person. 3. -
Page 7: Initial Assembly
INITIAL ASSEMBLY Carefully unpack the machine and all the loose items from the box. Check the contents against the “What’s in the box” list. If any items are missing please contact our technical services department using the telephone numbers that you will find in our catalogue. Having removed all the items from the box, please dispose of your unwanted packaging responsibly. -
Page 8: Setting Up The Grinder
SETTING UP THE GRINDER Please read the section entitled Identification and Description of Parts, in order for you to understand the terminology that we will use, so that you may better understand the working and capability of your grinder. Keep this manual to hand for reference for any other personnel that may be required to use the grinder. -
Page 9: Specification
SETTING UP THE GRINDER Carry out a final check e.g. start the machine, check it runs smoothly. On each side, check that the spark guard is adjusted down to the stone, check the gap between the tool rest and the stone is correct, check the stone is not badly deformed (rounded edges, grooved face, etc;... -
Page 10: Identification And Description Of The Grinder
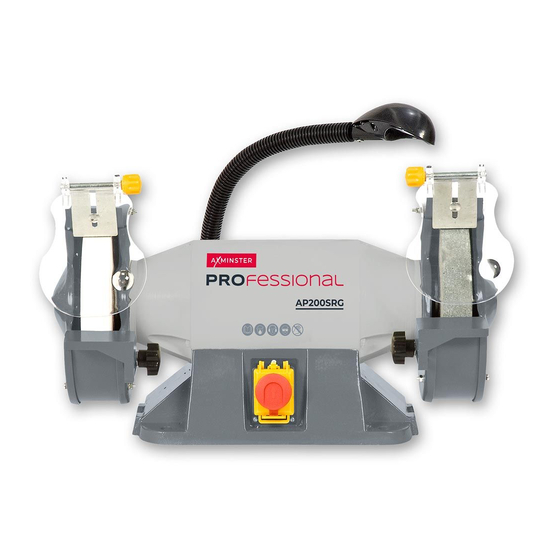
IDENTIFICATION AND DESCRIPTION OF THE GRINDER Grinding Essentially a double ended motor, with a mounting base, the motor machine flanges mount the wheel guards. The motor base contains the NVR switch and mounts the machine lamp. The base also has four 15mm holes cast into it to facilitate mounting the grinder to a stand or bolting it down to a bench. -
Page 11: Illustration And Parts Description Of The Grinder
ILLUSTRATION AND PARTS DESCRIPTION OF THE GRINDER Work light Eye sheild/spark guard Fig 5 Grinding wheel Star bolt Motor (unseen) Wheel guard Hold down holes Tool rest On/Off switch Dust extracton ducts... -
Page 12: Changing A Grinding Wheel
CHANGING A GRINDING WHEEL ENSURE THAT THE GRINDER IS DISCONNECTED FROM THE MAINS SUPPLY. Undo the nuts and bolts that secure the outer shell of the wheel guard to the inner shell. Remove the outer shell and place it and the nuts, bolts and washers carefully aside. -
Page 13: Dressing A Stone
(A selection of stone dressing tools are available in the Axminster catalogue.) Switch the grinder on and allow it to run for at least one minute. Rest the dressing tool on the tool rest and advance it to the stone until it touches the maximum diameter;... -
Page 14: Parts Breakdown For The Grinder
PARTS BREAKDOWN FOR THE GRINDER... -
Page 15: Parts List For The Grinder
PARTS LIST FOR THE GRINDER... - Page 16 The packaging is suitable for recycling. Please dispose of it in a responsible manner. EU Countries Only Do not dispose of electric tools together with household waste material. By law they must be collected and recycled separately. Axminster Tools, Axminster Devon EX13 5PH axminstertools.com...


Need help?
Do you have a question about the PROFESSIONAL AP200SRG and is the answer not in the manual?
Questions and answers