Table of Contents
Advertisement
Quick Links
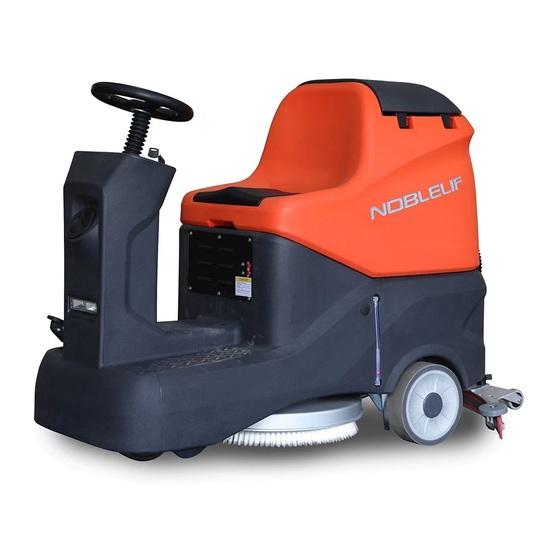
Operator Manual
NR530 Rider Scrubber
WARNING
Do not operate the rider scrubber before
reading and understanding the operator
manual.
NOTE:
• Please check product type and
parameters of your scrubber in
this manual as well as on the ID-plate.
• Keep this operator manual for future reference.
Version 05/2021
NR530-SMS-001-EN
Advertisement
Table of Contents

Related Manuals for Noblelift NR530


Summary of Contents for Noblelift NR530
- Page 1 Operator Manual NR530 Rider Scrubber WARNING Do not operate the rider scrubber before reading and understanding the operator manual. NOTE: • Please check product type and parameters of your scrubber in this manual as well as on the ID-plate. Version 05/2021 •...
-
Page 2: Table Of Contents
CONTENTS INTRODUCTION............................1 MANUAL PURPOSE AND CONTENT ....................1 HOW TO KEEP THE MANUAL ......................1 DECLARATION OF CONFORMITY ...................... 1 ACCESSORIES AND MAINTENANCE ....................1 CHANGE AND IMPROVEMENT ......................2 INTENDED USE............................2 MACHINE IDENTIFICATION ......................... 2 TRANSPORTING AND UNCRATING ....................2 SAFETY ............................... -
Page 3: Introduction
INTRODUCTION NOTE The code of related components in ( ) can be found in the chapter of machine description. MANUAL PURPOSE AND CONTENT ⚫ This manual is to provide the operator with the necessary information for the correct and safe use of the machine, which includes the technical data, safety, operation, storage, maintenance, accessories and dispose of the machine. -
Page 4: Change And Improvement
CHANGE AND IMPROVEMENT ⚫ Our company is committed to the continuous improvement of the products and reserves the right to notify the improvements and changes of the products that have been sold. INTENDED USE ⚫ This floor scrubber can be used in commercial and industrial environments, and it is suitable for cleaning smooth and hard floors (washing and sewage collecting). -
Page 5: General Safety Instructions
NOTE It indicates notes on important matters and useful functions. CONSULTATION It indicates the necessity to refer to the instructions of this manual before performing any procedures. GENERAL SAFETY INSTRUCTIONS Specific warnings and cautions for potential damages to personnel and machine are notified as follows: DANGER! ⚫... - Page 6 ⚫ When using and handling floor cleaning detergents, follow the instructions on the labels of the detergent container and wear suitable gloves for protection. ⚫ Please use the brush disk and pad driver provided with the machine and the parts specified in the user manual.
-
Page 7: Machine Setup
MACHINE SETUP MAIN COMPONENTS 1. Recovery tank lid 12. Recovery tank 2. Seat 13. Control panel 3. Steering wheel 14. Accelerator pedal 4. Fill-port lid 15. Drive unit 5. Front lamp 16. Solution tank drain valve 6. Charging socket 17. Brush deck 7. -
Page 8: Control Panel
CONTROL PANEL Description Function LCD display Display the functional status of the machine. Short press the button, the brush disk push rod drops and the brush motor works. Brush motor button Long press the button, perform automatic brush loading. Short press the button, lower the squeegee assembly, and vacuum motor works. Vacuum motor button Long press the button to enter ECO energy-saving mode. -
Page 9: Technical Data
TECHNICAL DATA Model NR530 Rated power 1500 Brush motor rated power Drive motor rated power Vacuum motor rated power Vacuum >12 Voltage (DC) 68±3 Sound pressure level at 1.5 m (ISO 3744) dB (A) Max. speed km/h Product dimensions (L*W*H) -
Page 10: Electrical Wiring Diagram
ELECTRICAL WIRING DIAGRAM M1: Drive motor M2: Vacuum motor M3: Brush motor M4: Motor for squeegee system M5: Motor for brush system... -
Page 11: Operation Instructions
OPERATION INSTRUCTIONS WARNING! If the battery is installed or wired incorrectly, the electrical components of the machine may be seriously damaged. The battery must be installed by qualified personnel. Equip the machine with correct charger according to the battery. Please check if the battery is damaged before assembling. Disconnect the battery connector and charger plug. -
Page 12: Installing And Removing Disk Brushes/Pads
INSTALLING AND REMOVING DISK BRUSHES/PADS NOTE According to the conditions of the floor to choose the appropriate brush disc or pad driver for cleaning. CAUTION! Before manually installing or uninstalling the brush disc or pad driver, ensure that all switches of the machine are off. Protective gloves must be worn during operation to avoid injury by debris. -
Page 13: Solution Tank Filling
SOLUTION TANK FILLING 1. Open the fill-port lid in the front of the machine. 2. Fill the cleaning water or suitable detergent with hose. The solution tank water level can be checked by the indicator hose on the side. When the float ball reaches "F" position, the solution water tank is full. The temperature of the filling water or detergent shall not exceed +104F (+40°C). -
Page 14: Draining Tanks
10. Press the "brush motor button" and "vacuum motor button" again, the indicator light will be off and the squeegee and the brush will be automatically lifted. The brush motor shuts down and the vacuum motor shuts down after a few seconds. 11. -
Page 15: Initial Use
INITIAL USE After the first 8 hours of use, check if the fastening and connecting parts of the machine are loose, and check for visible damage and leakage. -
Page 16: Maintenance
MAINTENANCE WARNING! The procedures must be carried out with the machine off and the battery disconnected. Moreover, read carefully the instructions in the Safety chapter before performing any maintenance procedures. REGULAR MAINTENANCE CHECKLIST CAUTION! The procedure marked with (1) must be performed when the machine is used after 8 hours for the first time. -
Page 17: Cleaning Disk Brush/ Pad
CAUTION! Keep the battery fully charged to extend the service life of the battery. CAUTION! Charge the battery as soon as possible when the battery is low, otherwise the service life of the battery will be shortened. Check the battery at least once a week. -
Page 18: Squeegee Blade Check And Replacement
It is advisable to wear protective gloves when cleaning the squeegee in case of the injury by the sharp debris. Loosen the knobs on the squeegee assembly and remove the vacuum hose from the squeegee. Clean the aluminum bracket squeegee and the vacuum hose. Check the front blade and the rear blade for integrity, cuts and tears;... -
Page 19: Read Running Data
READ RUNNING DATA Long press the "front lamp button" to enter the LCD interface, working data of the machine can be read. There are four interfaces in total. LCD Display Description Energy saving mode: 0 for off, 1 for on Brush deck push rod motor state, 1-3 is down, 4-6 is up. -
Page 20: Trouble Shooting
TROUBLE SHOOTING Trouble Possible Cause Remedy The machine doesn't The battery connector is disconnected Connect the battery connector work and the LCD display doesn't light up The batteries are completely discharged Charge the batteries 10% The machine don’t work, and the battery is Low battery Charge the batteries displayed at 10%... -
Page 21: Lcd Display Fault Code
LCD DISPLAY FAULT CODE LED Display Possible Cause Remedy 1. Charge the battery. Low battery Low voltage 2. Check the voltage detection circuit of the controller. Drive motor wire connection Check if the drive motor and electromagnetic brake are Traction error open normal. - Page 22 check the wiring of the J2 of pedal. 3. Check the wiring of J3 to J8. Drive motor wire connection Drive open Check the drive motor and related wiring. open Drive motor current is too Drive overcurr Check the drive motor and electromagnetic brake. high.
-
Page 23: Scraping And Dispose
SCRAPING AND DISPOSE 1. Have the machine scrapped by a qualified scrapper. 2. Before scrapping the machine, remove and separate the following materials, which must be properly disposed of according to relevant laws and regulations: – Battery – Brush disk/pad driver –...
Need help?
Do you have a question about the NR530 and is the answer not in the manual?
Questions and answers