Table of Contents
Advertisement
Quick Links
Advertisement
Table of Contents

Related Manuals for Edwards & Co Olive EC103


Summary of Contents for Edwards & Co Olive EC103
- Page 1 Use + Care Guide Olive EC103 NZ AU...
- Page 2 OLIVE - US E + CARE G U I D E IMPOR TANT • Keep these instructions for future reference. • Always follow the manufacturer’s instructions. • Read all instructions carefully before assembly and use of this stroller. • The correct use and maintenance of this product is essential. Suitable for children from 6 months to 22kg (Suitable from newborn to 22kg with the Newborn Insert Cushion accessory)
-
Page 3: Welcome
OLIVE - USE + CARE G UI D E Welcome Thank you for choosing Edwards & Co; your family is now part of ours. Edwards & Co started from humble beginnings in 2014 and has grown to include a team of people dedicated to bringing you the best for your baby. -
Page 4: Table Of Contents
OLIVE - US E + CARE G U I D E Contents Welcome Warnings: Australia/New Zealand General warnings and safety precautions What’s in the box Olive stroller components Using the Olive stroller Attaching the front wheels Attaching the rear wheels Removing the front wheels Removing the rear wheels Attaching the seat unit... - Page 5 OLIVE - USE + CARE G UI D E Removing the Newborn Insert Cushion Adjusting the footrest Adjusting the handlebar Using the harness buckle Adjusting the shoulder strap height Adjusting the harness straps Using the parking brake Using the front wheel swivel lock Carrying the stroller Attaching cover for lower connection points Removing cover for lower connection points...
-
Page 6: Warnings: Australia/New Zealand
OLIVE - USE + CARE G UI D E Australia/New Zealand WARNING: T O AVO ID I NJU RY OR D EA T H ALWAYS APPLY THE BRAKES WHEN THE STROLLER IS STATIONARY. • DO NOT LEAVE CHILDREN UNATTENDED. • SECURE THE CHILD IN THE HARNESS AT ALL TIMES. •... -
Page 7: General Warnings And Safety Precautions
OLIVE - US E + CARE G U I D E General warnings and safety precautions T O AVOID INJU RY O R D E A TH Maximum weight limits Child using this stroller in the main seat unit: 22kg Child using this stroller in the second seat unit (Double Kit required): 22kg Child using this stroller with the capsule attachment: 13kg Child using this stroller with the Carry Cot/bassinet attachment: 9kg... - Page 8 OLIVE - USE + CARE G UI D E Keeping the stroller stable Do not place or attach weight on the handle or side of the stroller. Doing so may make the stroller’s frame unstable. Use only approved Edwards & Co accessories. Using the stroller on surfaces Do not use this stroller on escalators, or on moving or mechanical conveyer belts.
-
Page 9: What's In The Box
OLIVE - USE + CARE G UI D E What’s in the box Use + Care Guide (this instruction manual) 2 x Rear Wheels 2 x Front Wheels 1 x Seat Unit & Canopy & Bumper Bar 1 x Stroller Frame 1 x Cover for Lower Connection Points 1 x set of Upper Adapters (for use in Sroller’s Upper... -
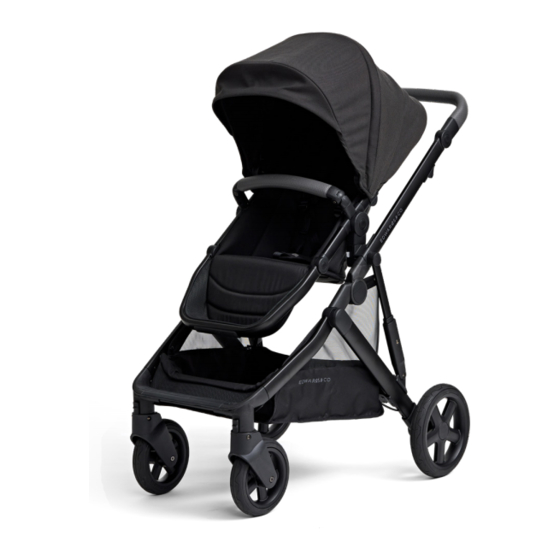
Page 10: Olive Stroller Components
OLIVE - USE + CARE G UI D E Olive stroller components Seat Canopy Handle Folding Trigger Bumper Bar Trigger Lock Release Button Harness Stroller Frame Seat/Accessory Seat Unit Release Buttons Cover for Lower Connection Points Footrest Mesh Fold Lock Latch Brake Lever Storage Basket... -
Page 11: Using The Olive Stroller
OLIVE - US E + CARE G U I D E Using Olive Stroller... -
Page 12: Attaching The Front Wheels
O L IV E - U S E + CA RE G U I D E Attaching the front wheels 1 . Locate the metal pin on the front 2 . Once installed, pull wheel. Insert this into the front the wheel to confirm wheel housing on the stroller frame. -
Page 13: Removing The Front Wheels
OLIVE - USE + CARE G UI D E Removing the front wheels 1 . Press the wheel release 2 . Pull the wheel button on the back downwards. of the front wheel housing. Removing the rear wheels 1 . Press the 2 . -
Page 14: Attaching The Seat Unit
OLIVE - US E + CARE G U I D E Attaching the seat unit 1 . Insert the connectors on the seat unit into the connection points on the stroller’s frame. Reverse position Forward position 2 . Attach the seat in the forward position or in the reverse position (with baby looking at you). -
Page 15: Removing The Seat Unit
OLIVE - USE + CARE G UI D E Removing the seat unit 1 . Locate the two seat release 2 . Push in one seat buttons on either side of the release button until stroller’s frame, just below the seat it stays in place. -
Page 16: Attaching The Bumper Bar
OLIVE - USE + CARE G UI D E Attaching the bumper bar 1 . Locate the metal pins on either end of the bumper bar. 2 . Insert the metal pins into the connection points on either side of the seat unit until they click into place. -
Page 17: Unfolding The Stroller
O L IV E - U S E + CA RE G U I D E Unfolding the stroller WARNING: To avoid damage to the handlebar lining, take care when placing the handlebar on the ground. 1 . Stand the 2 . -
Page 18: Folding The Stroller
OLIVE - USE + CARE G UI D E Folding the stroller WARNING: To avoid damage to the handlebar lining, take care when placing the handlebar on the ground. Be careful of moving parts when folding the stroller. Note: To fold the stroller, ensure the seat is in the forward facing position (with baby looking away from you), or has been removed from the stroller frame. - Page 19 O L IVE - U SE + C AR E G U ID E 3 . Press and hold the black button, 4 . Push the handlebar towards the while sliding both fold triggers up floor until the fold lock latch on the the frame towards you.
-
Page 20: Reclining The Seat Unit
OLIVE - USE + CARE G UI D E Reclining the seat unit 1 . Locate the circular buttons at the connection points on each side of the seat unit. 2 . Press both of these buttons in simultaneously to raise or lower the seat to the desired position. -
Page 21: Attaching The Carry Cot
OLIVE - US E + CARE G U I D E Attaching the Carry Cot (sold separately) 1 . Insert the Carry Cot’s connectors into the connection points on the stroller frame. Pull the Carry Cot upwards to check it is secure. You will hear a click when the Carry Cot connects correctly. - Page 22 OLIVE - US E + CARE G U I D E 3 . Push in the release button on the 4 . Lift the Carry Cot straight up. other side until it stays in place. Note: Do not lift the Carry Cot Note: The buttons do not need to on an angle.
-
Page 23: Attaching The Avery Capsule
OLIVE - USE + CARE G UI D E Attaching the Avery Capsule (sold separately) Recommendation: Attach the Avery Capsule in the reverse position (with your baby looking at you). 1 . Insert the Avery Capsule’s connectors into the connection points on the stroller frame. - Page 24 OLIVE - US E + CARE G U I D E 3 . Push in the release button on the 4 . Lift the capsule straight up. other side until it stays in place. Note: Do not lift the Note: The buttons do not need to capsule on an angle.
-
Page 25: Using The Capsule Adapters
OLIVE - USE + CARE G UI D E Using the Capsule Adapters (sold separately) Note: The stroller can be folded with the Capsule Adapters connected. The Capsule Adapters are required when using another brand’s capsule with the Olive stroller. These adapters are not required when using the Avery Capsule. Please see your Capsule Adapter instruction manual to confirm the capsule L = Left R = Right... - Page 26 OLIVE - USE + CARE G UI D E 2 . Press the 3 . Lift the release adapters buttons. out of the stroller frame. Removing the capsule from the stroller 1 . Locate the capsule release mechanism on your capsule. (For more information, please read your capsule’s instruction manual.) 2 .
-
Page 27: Attaching The Newborn Insert Cushion
OLIVE - US E + CARE G U I D E Attaching the Newborn Insert Cushion (sold separately) WARNING: This cushion is not a substitute for a bassinet or a bed. Never leave a baby asleep in the stroller unattended. The Newborn Insert Cushion converts the seat unit into a surface approved for use with newborn babies. - Page 28 OLIVE - USE + CARE G UI D E 3 . Ensure the shoulder strap height 4 . Thread the shoulder, hip and is at the lowest position. crotch straps through the liner. 5 . Guide the shoulder straps 6 . Thread each shoulder strap through the loops at the through the shoulder pads.
-
Page 29: Removing The Newborn Insert Cushion
OLIVE - USE + CARE G UI D E Removing the Newborn Insert Cushion Note: When storing the Newborn Insert Cushion, take care to keep all parts together. 1 . Remove the crotch pad from 2 . Thread the harness the harness buckle. -
Page 30: Adjusting The Footrest
O L I V E - US E + CA RE G U ID E Adusting the footrest 1 . Locate the circular buttons on both 2 . Press both buttons and sides of the footrest hinge. simultaneously raise or lower the footrest to the desired position. -
Page 31: Using The Harness Buckle
OLIVE - USE + CARE G UI D E Using the harness buckle Locking the buckle 1 . Insert one harness tongue into the 2 . Repeat step one for each of the harness buckle until you hear a click. remaining three harness tongues. -
Page 32: Adjusting The Shoulder Strap Height
OLIVE - USE + CARE G UI D E Adjusting the shoulder strap height Note: There are three height positions for the shoulder straps. As your child grows, it is necessary to move the shoulder straps according to your child’s height. -
Page 33: Adjusting The Harness Straps
OLIVE - USE + CARE G UI D E Adjusting the harness straps Note: The harness should be firm but not too tight around your child. It is adjusted correctly when you can fit two of your fingers between the harness and your child. -
Page 34: Using The Parking Brake
OLIVE - USE + CARE G UI D E Using the parking brake Note: When the brake is engaged, the brake indicator window will show red. When the brake is released, the brake indicator window will show green. Engaging the parking brake 1 . -
Page 35: Using The Front Wheel Swivel Lock
OLIVE - USE + CARE G UI D E Using the front wheel swivel lock Note: The swivel locks are used to lock the front wheels into position or to release the front wheels to enable them to swivel freely. Engaging the front wheel swivel lock 1 . - Page 36 OLIVE - USE + CARE G UI D E Unlocking the front wheel swivel lock 1 . Slide the lock lever upwards on both front wheels.
-
Page 37: Carrying The Stroller
OLIVE - USE + CARE G UI D E Carrying the stroller Recommendation: When lifting the stroller, we recommend holding the frame on both sides near the fold hinge. 1 . Hold the area near the fold hinge. Ensure the fold lock latch is secure. -
Page 38: Attaching Cover For Lower Connection Points
OLIVE - USE + CARE G UI D E Attaching cover for lower connection points 1 . Locate the 2 . Align the cover connection on top of the points located connection on the cross-bar points, keeping at the rear of the it parallel to the stroller basket. -
Page 39: Using The Olive Second Seat Kit
OLIVE - USE + CARE G UI D E Using the Olive Second Seat Kit (sold separately) The Olive Second Seat Kit is designed to convert Olive into a double stroller. For detailed instructions, please read the Olive Second Seat Kit Use & Care Guide. -
Page 40: Using The Upper Adapters
OLIVE - USE + CARE G UI D E L = Left R = Right Using the upper adapters Note: The stroller can be folded with the upper adapters connected. Installing the upper adapters 1 . Insert the upper adapters into the connection points on the stroller frame (R = Right;... - Page 41 OLIVE - US E + CARE G U I D E L = Left R = Right L = Left R = Right Removing the upper adapters 1 . Locate the adapter release buttons 2 . Press the on the stroller frame, just below release the adapters’...
-
Page 42: How To Care For And Maintain Your Stroller
OLIVE - US E + CARE G U I D E How to care for and maintain your stroller Store your stroller and accessories carefully Store inside in a well-ventilated, dry area. Do not store in a damp environment that is not well insulated (such as an unfinished basement or outdoor shed). - Page 43 OLIVE - USE + CARE G UI D E Replace damaged or worn wheels immediately Stop using the stroller if any wheel becomes damaged or worn. Replace it immediately. Check regularly for wear and tear Check regularly for wear and tear on all stroller parts. Get your stroller inspected regularly Get your stroller inspected regularly to maintain it.
-
Page 44: How To Service Your Stroller
OLIVE - US E + CARE G U I D E How to service your stroller Just like your car, regular service extends the life of your Edwards & Co stroller. Inspect your stroller at least once a month We recommend that you fully inspect your stroller at least once a month. Here are some helpful tips to inspect your stroller at home. -
Page 45: Service Your Stroller At Least Once Every 6 Months
OLIVE - USE + CARE G UI D E Inspect the metal components to help prevent rust • Wipe down the frame and wheel housing with a damp cloth if the stroller has been: • on a beach • in the rain •... -
Page 46: Warranty
OLIVE - USE + CARE G UI D E Warranty All Edwards & Co products are guaranteed for two years from the date of shipping against defects in material and workmanship. If we determine that the product has a manufacturing fault, we will repair or replace it free of charge to you. - Page 47 OLIVE - US E + CARE G U I D E This page is intentionally blank...
- Page 48 Designed with love Watch helpful Come along on instructional videos the journey youtube.com/c/EdwardsCo @edwardsandcobaby Visit our comprehensive support centre online edwardsandcobaby.zendesk.com/hc/en-us EDWARDSANDCOBABY.COM...
Need help?
Do you have a question about the Olive EC103 and is the answer not in the manual?
Questions and answers