Table of Contents
Advertisement
Quick Links
Greenfire
French Manual: https://bit.ly/2OaBzTR
Manuel en Français : https://bit.ly/2OaBzTR
P
LEASE READ THIS ENTIRE MANUAL BEFORE INSTALLATION AND USE OF THIS PELLET-
BURNING ROOM HEATER. FAILURE TO FOLLOW THESE INSTRUCTIONS COULD RESULT
IN PROPERTY DAMAGE, BODILY INJURY OR EVEN DEATH.
Contact your building or fire officials about restrictions and installation
WARNING:
I m p r o p e r i n s t a l l a t i o n , a d j u s t m e n t ,
alteration, service or maintenance can
cause injury, property damage, or loss of
life. Refer to this manual. For assistance or
additional information consult an authorized
installer or service agency.
Tested by:
4001609
920-412a
FPI FIREPLACE PRODUCTS INTERNATIONAL, LTD. 6988 Venture St., Delta, BC, Canada V4G 1H4
OWNER'S & INSTALLATION MANUAL
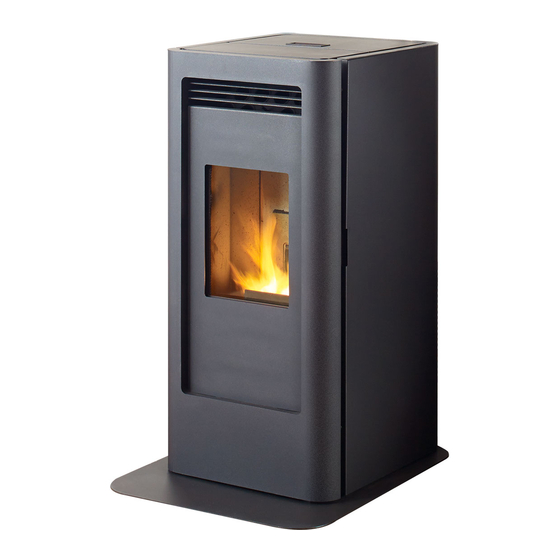
Freestanding Pellet Stove
inspection requirements in your area.
Installer: Please complete the details on the back cover and leave this
manual with the homeowner.
Homeowner: Please keep these instructions for future reference.
GF40-2
®
Do not store or use gasoline or other
flammable vapours and liquids in the vicinity
of this or any other appliance.
Installation and service must be performed
by an authorized installer or service agency.
FOR YOUR SAFETY:
07.28.22
Advertisement
Table of Contents

Subscribe to Our Youtube Channel
Related Manuals for Greenfire GF40-2


Summary of Contents for Greenfire GF40-2
- Page 1 Greenfire GF40-2 ® OWNER’S & INSTALLATION MANUAL Freestanding Pellet Stove French Manual: https://bit.ly/2OaBzTR Manuel en Français : https://bit.ly/2OaBzTR LEASE READ THIS ENTIRE MANUAL BEFORE INSTALLATION AND USE OF THIS PELLET- BURNING ROOM HEATER. FAILURE TO FOLLOW THESE INSTRUCTIONS COULD RESULT IN PROPERTY DAMAGE, BODILY INJURY OR EVEN DEATH.
- Page 2 The pride of workmanship that goes into each of our products will give you years of trouble-free enjoyment. Should you have any questions about your product that are not covered in this manual, please contact the GREENFIRE DEALER in your area. Safety Note: If this stove is not properly installed, a house fire may result.
-
Page 3: Table Of Contents
table of contents DIMENSIONS OPERATING INSTRUCTIONS Control Board Functions ...........23 Unit dimensions ............4 Automatic Safety Features ........23 Operating Your Pellet Stove ........24 SAFETY LABEL Turning Your Pellet Stove Off ........24 Damper Set-up............25 Copy of Serial No. Decal ..........4 Guidelines for Fuel Quality ........25 INSTALLATION MAINTENANCE Introduction ..............6... -
Page 4: Unit Dimensions
dimensions Weight (with full hopper): 280 lb (127 Kg) Hopper Capacity: up to 67 lb (28 Kg) Voltage: 110 - 120 V Max Current: 4.1 Amps Consumption on High: 3.1 lb/hr (1.4 Kg/hr)* Consumption on Low: 1.3 lb/hr (0.6 Kg/hr)* (Note: Consumption will vary with the type of fuel used.) | GF40 Freestanding Pellet Stove... - Page 5 safety decal This is a copy of the safety label that accompanies each GF40 . We have printed a copy of the contents here for your reference. On the GF40 the safety label is located on the underside of the hopper lid. GF40 Freestanding Pellet Stove |...
-
Page 6: Installation
installation Introduction mportant afety Please read this entire Owner’s Manual before installing or operating your Regency Pellet Stove. Failure to follow these instructions may result in property damage, bodily injury or even death. Any unauthorized modification of the appliance or use of replacement parts not recommended by the manufacturer is prohibited. -
Page 7: Safety Warnings & Recommendations
installation afety arnIngS ecommenDatIonS Caution: Do not connect to any air distribution duct or system. Do not burn garbage or flammable fluids such as gasoline, naphtha or engine oil. Unit hot while in operation. Keep children, clothing and furniture away. Contact may cause skin burns. - Page 8 installation ASHES: Disposed ashes should be placed in a metal container with a tight fitting lid. The closed container of ashes should be on a non-combustible floor on the ground, well away from all combustible materials pending final disposal. If the ashes are disposed of by burial in soil or otherwise locally dispensed, they should be retained in the closed container until all cinders have been thoroughly cooled.
-
Page 9: Copy Of The Safety Decal
installation afety ecal ocatIon The Safety Decal is located on the back of the outer door near the bottom. ellet ualIty Pellet quality is important, please read the following: Your Regency pellet stove has been designed to burn wood pellets only. Do not use any other type of fuel, as this will void any warranties stated in this manual. -
Page 10: Locating Your Pellet Stove
installation ecIDIng here to ocate your ellet pplIance 1. Check the “Clearances to Combustibles” section for proper spacing. 2. Do not obtain combustion air from an attic, garage or any unventilated space. Combustion air may be obtained from a ventilated crawl space. 3. - Page 11 installation earth nStallatIon IMPORTANT: Attach the supplied Hearth Pad (Part# GF40-025) when installing the unit on a combustible floor. The supplied hearth pad meets all the requirement of a proper hearth pad. If you do not use the supplied hearth pad a type 1 hearth pad must be used when on combustible material.
-
Page 12: Clearances To Combustibles
installation learanceS to ombuStIbleS These dimensions are minimum clearances but it is recommended that you ensure sufficient room for servicing, routine cleaning and maintenance. Note: This clearance is also required for air space between the appliance and wall/ceiling. Clearances to combustibles are for the safety of the property. To avoid overheating and damaging the appliance these clearances should be maintained for non-combustibles also. -
Page 13: Alcove Clearances
installation lcove learanceS The unit may be installed in an alcove if desired. These minimum clearances to combustibles must be maintained at all times. Be sure to leave room for servicing, routine cleaning, and maintenance. These are inside dimensions. Minimum Alcove Width 36 inches (915 mm) Minimum Alcove Height 48 inches (1220 mm) -
Page 14: Vent Termination Requirements
installation ermInatIon eQuIrementS IT IS HIGHLY RECOMMENDED THAT YOUR PELLET STOVE BE INSTALLED BY AN AUTHORIZED DEALER/INSTALLER. Table 1: Use in conjunction with Figure 6 for allowable exterior vent termination locations. Letter Minimum Clearance Description 24 in (61 cm) Above grass, top of plants, wood, or any other combustible materials. 48 in (122 cm) Beside/below any door or window that may be opened. -
Page 15: Exhaust And Intake Locations
installation utSIDe reSh onnectIon Outside fresh air is mandatory when installing this unit in airtight homes (R2000) and mobile homes. A Fresh-air intake is strongly recommended for all Outside Wall installations. Failure to install a fresh air intake may result in improper combustion as well as the unit smoking during power failures. -
Page 16: Mobile Home Installation
installation obIle nStallatIon • Secure the heater to the floor using the two holes in the base. • Ensure the unit is electrically grounded to the chassis of your home (permanently). • Do not install in a room people sleep in. •... -
Page 17: Horizontal Exhaust Through Wall Installation
installation orIzontal xhauSt hrough nStallatIon Vent installation: install vent at clearances specified by the vent manufacturer. A chimney connector shall not pass through an attic or roof space, closet or similar concealed spaces, or a floor, or ceiling. Where passage through a wall or partition of combustible construction is desired, the installation shall conform to CAN/ CSA-B365 Installation Code for Solid-Fuel-Burning Appliances and Equipment. - Page 18 installation 10. Install a vertical pipe, or if all requirements for direct venting are met, install vent termination. The stainless steel cap termination manufactured by the vent manufacturer is recommended. However, when the vent terminates several feet above ground level and there are no trees, plants, etc. within several feet, a 45° elbow can be used as termination. The elbow must be turned down to prevent rain from entering.
-
Page 19: Installation - Freestanding
installation nSIDe ertIcal nStallatIonS To accomplish a outside vertical pipe installation, follow steps 1 through 5 in the “i ” nsiDe erticaL nstaLLations reestanDing section and then finish it by performing the following (refer to Figure 15). 1. Choose a stove location that is ideal. See the section “D .”... -
Page 20: Hearth Mount Installation
Steel Plate or Flashing installation Flexible or Rigid 6" Stainless Steel Liner earth ount nStallatIon Refer to Figures 16 and 17. 1. Install the hearth pad. Damper Removed or Fastened Open 2. Lock the fireplace damper in the open 10" (25.4 cm) Mantel position. -
Page 21: Top Vent Adaptor Kit & 3'' To 6'' Flue Adaptor
installation & 3” (76 6” (152 Daptor Daptor approveD for vertIcal InStallatIonS only *In order to achieve the maximum 3PVP-X6 rated efficiency of 80.2% HHV purchase of a top vent adaptor kit (GF40-920) is required. 3" (76 mm) pipe Use the sheet metal screws lengths to class A provided to attach the kit to the chimney... - Page 22 installation hermoStat nStallatIon 1. Remove the outer door and the right side cabinet for easy access to screws securing unit to pallet, there are four T-20 screws at the front and three at the back of each cabinet side. 2. Loosen four T-20 screws securing Bottom Back Grill, once loose, slide down and remove.
-
Page 23: Operating Instructions
operating instructions ontrol oarD unctIonS 1. AUGER LIGHT: This green light will flash in conjunction with the auger pulse. 2. MODE LIGHT: AUGER Responsible for signaling the state of the control board. When the light is flashing the stove is in an automatic start mode or the thermostat has control of the unit. MODE When the light is solid, the Heat Level Setting can be altered. -
Page 24: Operating Your Pellet Stove
operating instructions C. The unit is equipped with a vacuum switch to monitor the venting pressure; if it becomes blocked or the combustion fan fails the vacuum switch will turn off the auger and there will be an #2 flashing error code. peratIon ellet tove... -
Page 25: Damper Set-Up
operating instructions lIDer amper THE SLIDER/DAMPER HAS BEEN SET AT THE FACTORY. This is used to regulate the airflow through the pellet stove.This slider damper is located inside the stove on the left hand cabinet side (Not shown).. The slider damper factory setting has been set for peak efficiency operation (see figure 30). -
Page 26: Routine Cleaning & Maintenance
operating instructions Routine Cleaning and Maintenance The following list of components should be inspected and maintained routinely to ensure that the appliance is operating at its optimum and giving you excellent heat value: 2-3 Days / Weekly Semi-annually or 2 Tons of Fuel Burn Pot Liner Burn Pot and Liner Exhaust Vent... - Page 27 maintenance Routine Cleaning and Maintenance DOOR GLASS CLEANING (2-3 days) Cleaning of the glass must only be done when stove is cold. Open the door. The glass can be cleaned by wiping down the outside and inside of the glass with a soft dry cloth.
- Page 28 maintenance Routine Cleaning and Maintenance • Remove and rotate the side covers to open them. • Vacuum out all three 3 chambers. • Close all the clean-out covers heat exchanger tubeS (2-3 days) • The heat exchanger tubes are located behind the Louver assembly.
- Page 29 maintenance Routine Cleaning and Maintenance FIREBOX (weekly) The paint on the steel firebox panels may peel. This is due to extreme conditions applied to the paint and is in no way covered by warranty. Brush and vacuum up all soot and flyash from firebox. AIR WASH (semi-annually) Vacuum out the air wash passages at the top of the glass (see Figure 33).
-
Page 30: Troubleshooting
maintenance Troubleshooting DO NOT: • Service the stove with wet hands. The stove is an electrical appliance, which may pose a shock hazard if handled improperly. Only qualified technicians should deal with possible internal electrical failures. • Do not remove from the firebox any screws without penetrating oil lubrication. WHAT TO DO IF: 1. - Page 31 maintenance Troubleshooting • Blocked Hose Barb on Exhaust Channel - Use a paper clip to clean out Hose Barb or remove the Vacuum Hose from the Vacuum Switch and blow into the hose to remove blockage. • Blocked exhaust / venting system - Have stove and venting cleaned and inspected. •...
- Page 32 maintenance Troubleshooting • Call your local dealer for service. 9. The stove keeps going out. If the stove goes out and leaves fresh unburned pellets or cigarette-like ashes in the burn pot liner, the fire is going out before the stove shuts off. •...
-
Page 33: Wiring Diagram
maintenance Wiring Diagram Armor Cable Supplied Grey Optional Exterior Vacuum Exhaust Blower Grey Switch Black White White Combustion Blue Brown Blower Exhaust Temperature Sensor Power Cord Brown Ground Black 115V 115V White Black Black White 220V 220V Brown Blue Thermostat Common 5 Amp Fuse... -
Page 34: Parts List
parts list Ref. # Part # Description GF55-009 120°F EXHAUST TEMP SENSOR GF55-001 AUGER MOTOR 115 VOLT GF55-011 200 DEGREE F. HIGH LIMIT SENSOR MANUAL RESET GF55-012 VACUUM SWITCH GF55-013 SILICONE HOSE GF40-006 SS ASH PAN LATCH GF40-007 DOMESTIC POWER CORD GF40-008 400 WATT IGNITOR GF40-009... - Page 35 parts list Ref. # Part # Description GF40-040 MACHINED DOOR NUT LATCH GF40-041 ALUMINUM HOSE BARB (VACUUM LINE) GF55-045 AUGER BRASS BUSHINGS (SET OF 2) GF55-006 CIRCUIT BOARD FUSE (2 PCS) GF55-047 5/8” ID AUGER COLLAR WITH SCREW GF40-045 WIRE HARNESS GC60-004 AUGER STOPS (CLEAR TUBE) GF55-023...
-
Page 36: Parts
parts list GF40 - STEEL 36 | GF40 Freestanding Pellet Stove... - Page 37 parts list GF40 - COMPONENTS GF40 - Components GF40 Freestanding Pellet Stove |...
-
Page 38: Warranty
warranty Limited Lifetime Warranty FPI Fireplace Products International Ltd. (for Canadian customers) and Fireplace Products U.S., Inc. (for U.S. customers) (collectively referred to herein as “FPI”) extends this Limited Lifetime Warranty to the original purchaser of this appliance provided the product remains in the original place of installation. The items covered by this limited warranty and the period of such coverage is set forth in the table below. - Page 39 warranty Replacement units are limited to one per warranty term. Airtube and baffle replacements are limited to one replacement per term. Unit must be installed according to all manufacturers’ instructions as per the manual. All Local and National required codes must be met. The installer is responsible to ensure the unit is operating as designed at the time of installation.
- Page 40 warranty Limitations of Liability: The original purchaser’s exclusive remedy under this warranty, and FPI’s sole obligation under this warranty, express or implied, in contract or in tort, shall be limited to replacement, repair, or refund, as outlined above. IN NO EVENT WILL FPI BE LIABLE UNDER THIS WARRANTY FOR ANY INCIDENTAL OR CONSEQUENTIAL COMMERCIAL DAMAGES OR DAMAGES TO PROPERTY.
- Page 41 warranty Product Registration and Customer Support: Thank you for choosing a Regency Fireplace. Regency strives to be a world leader in the design, manufacture, and marketing of hearth products. To provide the best support for your product, we request that you complete a product registration form found on our Web Site under Customer Care within ninety (90) days of purchase.
- Page 42 warranty 42 | GF40 Freestanding Pellet Stove...
- Page 44 Installer: Please complete the following information Dealer Name & Address: ____________________________________________________ _________________________________________________________________________ Installer: _________________________________________________________________ Phone #: _________________________________________________________________ Date Installed: ____________________________________________________________ Serial #:__________________________________________________________________ Greeenfire ® is a trademark of Fireplace Products International Ltd. © Copyright 2022, Regency Fireplace Products. All rights reserved. Printed in Canada...
Need help?
Do you have a question about the GF40-2 and is the answer not in the manual?
Questions and answers