
Subscribe to Our Youtube Channel
Related Manuals for HuddleCamHD HUD-HC20X-SIMPL2


Summary of Contents for HuddleCamHD HUD-HC20X-SIMPL2
- Page 1 HuddleCamHD SimplTrack2 Auto Tracking Camera Installation & Operation Manual Ver. 1.4 – 6-21...
-
Page 2: Table Of Contents
Table of Contents Precautions……………..……………..………..……………..……………..…………………..…………………………………………….. Page ii Safety Tips…………………..……………..……………..……………..……………..……………..……………......Page ii What’s in the Box……………..……………..………..…..……………..……………..……………..……………………………………. Page ii Supplied Hardware………………………………………………………………………………………………………………………… Page ii Technical Specifications……………………………………………………………………………………………………………………… Page 1 Physical Descriptions……………..……………..………..……………..……………..…………………..………………………………. Page 2 Front View of Camera……………..……………..……………..……………..……………..……………………………………….. Page 3 Rear View of Camera……………..……………..……………..……………..……………..…………………………………………. Page 4 Basic Connection Instructions……………..……………..………..……………..……………..…………………..…………………... -
Page 3: Precautions
Precautions Safety Tips • Please read this manual carefully before using the camera. • Avoid damage from stress, violent vibration or liquid intrusion during transportation, storage, or installation. • Take care of the camera during installation to prevent damage to the camera case, ports, lens, or PTZ mechanism. -
Page 4: Technical Specifications
Technical Specifications Main Features 1080p-60/50/30/25 1080i-60/50 720p-60/50/30 704x480-30 320x240-30 Resolutions (RTSP & RTMP streams limited to 30 FPS) Image Sensor 1/2.8” EXMOR, 2.14 Mega Pixel Lens 20X Optical, f=4.7-94mm Digital Zoom 1x ~ 11x Minimal Illumination 0.5 lux Shutter 1/1 ~ 1/10000 White Balance Auto, ATW, One Push, Indoor, Outdoor, Manual, Sodium Lamp, Fluo Lamp Tracking Horizontal FoV... - Page 5 Software Specifications Windows 8.1 / 10 OS, P4 / 128M RAM / 40GHD / Support for scaled PC Requirements graphics card, support for DirectX8.0 or more advanced version. Storage Requirements 50MB Network Requirements 10/100M Wired or Wireless connectivity to a LAN Minimum Resolution 1920x1080 General Specifications...
-
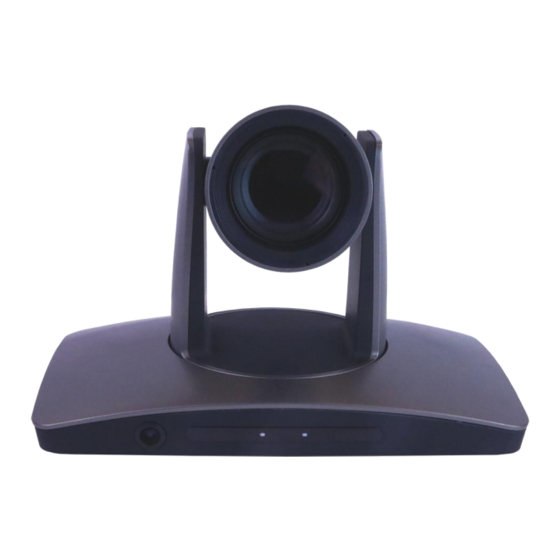
Page 6: Physical Descriptions
Physical Descriptions Front View of Camera 1. Tracking Camera Lens a. 20X Optical Zoom b. Field of View: 3° (tele) to 59° (wide) 2. Reference Camera Lens a. 86° (Horizontal) x 52° (Vertical) Ver. 1.4 – 6-21... -
Page 7: Rear View Of Camera
Rear View of Camera 1. 3.5mm Audio Input (Embeds over RTSP or RTMP) 2. Micro SD Card Slot (Allows for Photobooth functionality) 3. RJ45 - Ethernet Port (Allows for setup & RTSP/RTMP video feed) 4. DVI-D Video Output (Includes DVI to HDMI converter for HDMI output) 5. -
Page 8: Basic Connection Instructions
Basic Connection Instructions Network Connection 1. Connect a live network connection, from a network with a DHCP server, to the camera. 2. Connect the included Power Supply to the camera. 3. Wait for camera to come to Home Position. 4. Install the SimplTrack software on your Windows PC on the same network as the camera 5. -
Page 9: Setting Up The Camera
Setting up the Camera _____ Connect Camera Begin by physically connecting the camera to power, a Local Area Network (LAN), and USB, SDI, or DVI if you plan on utilizing them. View page 6 for more information. Now that your camera is connected to a LAN, open the tracking software to connect to your camera. 1. -
Page 10: Configure Tracking
_____ Configure Tracking Now that you have a camera connected, you can select an empty cell and right-click the camera to select a video feed for that cell, as shown below. • Teacher-close-up: Main RTSP feed (PTZ camera) • Teacher-panorama: Sub RTSP feed (Reference camera) •... - Page 11 _ _____ Configure Tracking (Continued) 2. From here, open “Settings” from the bottom left of the tracking software. This will open the Basic 1 menu. 3. Set the tracking zone and blocking zones for your environment. a. Note: As shown above, the tracking zone encompasses anywhere that may include a face.
- Page 12 _ _____ Configure Tracking (Continued) 4. Click “Save” to save the Tracking & Blocking zones. 5. Click “Basic 2” along the top left of the software to open the secondary page of tracking parameters. 6. In Basic 2, you can adjust the Tracking limitations of the camera. a.
-
Page 13: Interface Descriptions
Interface Descriptions Tracking Software Device Management Interface *Selected* device within Device Device Management interface Management Add selected camera from Online Device Video configuration interface section View & download video and/or photos. Modify network settings of selected Online *Micro SD card required Device Manually add device using IP address, Port 10 Refresh Online Device list... -
Page 14: Video Configuration Interface
Video Configuration Interface Cameras connected to Device Management Preset control Camera video feed Enable/Disable tracking & Tracking Status PC performance & time Open tracking settings Pan, Tilt, & OSD Menu control 10 Connected camera resolution & frame rate Snapshot, Enable/Disable recording, Lens control Enable/Disable audio OSD Menu enter/return... -
Page 15: Remote Playback
Remote Playback__________________________________________ To utilize Remote Playback you will need to install a Micro SD card into the Micro SD Card slot on the back of the camera. Device list Pause/Play video feed Video feed of recording Currently selected time (in hours) for video feed Video feed playback speed Recorded video (in hours) -
Page 16: Connect Camera
Connect Camera To add a camera to the Device Management list, you can go about this by searching in the Online Device section, or manually by using the + Add Device button in the Device Management section. When utilizing the Online Device section, you can simply click Search, and the Tracking Software will automatically search the subnet your network for any HuddleView &... -
Page 17: Network Configuration
Network Configuration To configure the network settings, select the camera from the Online Device list and click Modify Netinfo. You can also adjust the network settings of a connected camera by selecting it from the Device Management list and clicking Remote Configuration, then traversing to the Network section. Remote Configuration Remote Configuration includes: Streaming, Network, RTMP, Protocol, Upgrade, Username/Password, &... - Page 18 Remote Configuration (Continued) • Video Rate Type: Adjust the video rate type o Options include: CBR (Constant Bit Rate) & VBR (Variable Bit Rate) • Max Rate (Kbps): Sets the maximum kilobytes per second of the Video Rate Type. o Range: 0 - 16383 •...
- Page 19 Remote Configuration (Continued) • Mask: Adjust the Subnet Mask of your camera o Default value: 255.255.255.0 • Gateway: Adjust the gateway of your camera o Default value: 192.168.1.1 • DNS 1: Adjust the DNS 1 (Dynamic Name System) o Default value: 0.0.0.0 •...
- Page 20 Remote Configuration (Continued) The Protocol category allows you to set the control parameters of the camera. • Enable: Enable or disable 3rd party control to the camera o Options include: Enable & Disable • Protocol: Adjust the control protocol method o Options include: TCP &...
- Page 21 Remote Configuration (Continued) The Username/Password category allows you to change the device name, password, and adjust the time format. • Old Password: Input the old password in order to change the login credentials o Default value: “admin” • New Password: Input the new password in order to change the login credentials •...
-
Page 22: Remove Camera
Remote Configuration (Continued) The Record category allows you to set up and view the status of the Photobooth recording. Note: A Micro SD card is required for use with the Photobooth feature. • SD Card Record: Enable or disable recording to the Micro SD card o Default value: Unchecked (Off) •... -
Page 23: Configure Video Settings
Configure Video Settings In the Video Interface you can view and control up to four cameras simultaneously. You have full control over Pan, Tilt, Zoom, Focus, Iris, OSD Menu, Presets & Tracking Settings. Device List: List of added cameras from the Device Management section •... -
Page 24: Configure Tracking Settings
Configure Tracking Settings ________________ Basic 1 To adjust the Tracking Parameters of the selected camera, you must click the Settings button in the tracking control area. Once opened, you’ll be greeted with the Basic 1 parameters. From here, you have control over Video Format, Baud Rate, Control Protocol, Device Address, Position Correct, Face Height, Debug mode, Tracking Zones, Blocking Zones &... -
Page 25: Basic
Configure Tracking Settings (Continued) • Track Area: The area at which the camera tracks individuals. o Allows for designation of the tracking zone. • Blocking Zones: Designate the area you do not wish to track, such as monitors, doorways, etc. o Allows for up to 8 Blocking Zones. - Page 26 ▪ _______________ Basic 2 (Continued) • Tilt Motion: Enable/Disable tilting while tracking. • Auto Zoom: Enable/Disable zooming while tracking. • Permanent Track: Enable/Disable tracking any moving object. • Outside Platform: Enable/Disable tracking outside the Tracking Zone. • Tracking Parameters Reset: Resets the tracking settings to default values. •...
-
Page 27: Senior 1
_______________ Senior 1 The Senior 1 tab allows for control of the Preset Zone Triggers, Tracking Resumes, & Dynamic Blocking Zones. To use this tab, you will first need to define the Preset Zone(s). • Preset Zone # Checkbox: Enable/Disable the corresponding Preset Zone Trigger. These Preset Zones are used o Protocol: Define control protocol. -
Page 28: Senior
o Alternatively, you may want to enable/disable Blocking Zones while the subject is outside of the Preset Zones. To do so, use the commands below. ▪ 81 0b 0d 00 05 01 ff – Turn ON Blocking Zone 5 ▪ 81 0b 0d 00 05 00 ff –... -
Page 29: Photobooth Functionality
Photobooth Functionality ___________________________ The Photobooth functionality allows you to take photos and record videos directly to the camera. To do so you will need a Micro SD card plugged into the Micro SD Slot on the back of the camera. For best results, we suggest formatting the Micro SD card to NTFS. -
Page 30: Taking Photos
7. From there, name your file and browse your PC for a storage location. Taking Photos You have two methods of taking photos using the SimplTrack2. Option 1 allows you to take live photos from the Main View, and option 2 allows for snapshots of recorded video. 1. - Page 31 1. Alternatively, follow steps 1 – 4 of “Recording Video” to record video to the SD card. 2. Select your camera and use the date dropdown and sliders to find the timeline you’re looking for. 3. Click the “Snapshot” button to take a photo of the selected scene. Ver.
-
Page 32: On Screen Display (Osd)
On Screen Display (OSD) ___________________________ Video Option Options Include Default Sharpness 0 – 15 Brightness 0 – 14 Contrast 0 – 14 Gamma Mode 0 – 4 0 – 14 2DNR OFF, 1 – 5 Video 3DNR OFF, 1 – 5 Wide Dynamic OFF, 1 –... -
Page 33: Color
On Screen Display (OSD) __________________ (Continued) Color Option Field Options Include Default R. Gain -7 – +7 G. Gain -7 – +7 Auto B. Gain -7 – +7 Saturation 0 – 14 0 – 14 R. Gain -7 – +7 G. -
Page 34: Using The Ir Remote
Using the IR Remote 1. HOME Button Press the HOME Button to send the camera to the initial position where pan and tilt is 0. 2. Camera Selection Button Use to switch between IR channels for multiple camera control. For example, 4 is address 4. 3. -
Page 35: Ir Remote Shortcuts
Using the IR Remote (Continued) 16. Direction/Menu Operation In OSD Menu: traverse OSD Menu Out of OSD Menu: pan & tilt camera 17. Preset Settings Use the Number Keys to input a preset number, then press call, store, clear to perform the corresponding command. -
Page 36: Visca Commands
VISCA Commands ACK/Completion Messages Command Messages Comments z0 4y FF Returned when the command is accepted. (y:Socket No.) Returned when the command has been executed. Completion z0 5y FF (y:Socket No.) Error Messages Comments Command Messages Returned when the command format is different or when a Syntax Error z0 60 02 FF command with illegal... -
Page 37: Commands
Commands Command Set Command Command Packet Comments AddressSet Broadcast 88 30 01 FF Address setting IF_Clear Broadcast 88 01 00 01 FF I/F Clear CommandCancel 8x 2p FF p: Socket No.(=1or2) CAM_Power 8x 01 04 00 02 FF Power ON/OFF 8x 01 04 00 03 FF CAM_Zoom Stop... - Page 38 Commands (Continued) Command Set Command Command Packet Comments CAM_AE Full Auto 8x 01 04 39 00 FF Automatic Exposure mode Manual 8x 01 04 39 03 FF Manual Control mode Shutter Priority 8x 01 04 39 0A FF Shutter Priority Automatic Exposure mode Iris Priority 8x 01 04 39 0B FF...
- Page 39 Commands (Continued) Command Set Command Command Packet Comments CAM_IDWrite 8x 01 04 22 0p 0q 0r 0s FF pqrs: Camera ID (=0000 to FFFF) IR_Receive 8x 01 06 08 02 FF IR(remote commander) receive ON/OFF 8x 01 06 08 03 FF Information Display 8x 01 7E 01 18 02 FF ON/OFF of the Operation status...
-
Page 40: Inquiry Commands
Inquiry Commands Inquiry Command Command Packet Inquiry Packet Comments CAM_PowerInq 8x 09 04 00 FF y0 50 02 FF y0 50 03 FF Off (Standby) y0 50 04 FF Internal power circuit error CAM_ZoomPosInq 8x 09 04 47 FF y0 50 0p 0q 0r 0s FF pqrs: Zoom Position CAM_FocusModeInq 8x 09 04 38 FF... - Page 41 Inquiry Commands (Continued) Inquiry Command Command Packet Inquiry Packet Comments CAM_VersionInq 8x 09 00 02 FF y0 50 00 01 mnpq: Model Code (0504) mn pq rs tu vw FF rstu: ROM version vw: Socket Number (=02) Information Display 8x 09 7E 01 18 FF y0 50 02 FF y0 50 03 FF VideoSystemInq...
-
Page 42: Tips & Tricks
Tips and Tricks The “Stage”: Imagine your subject moving around within the available presentation space and take note of the extremes, left or right and up or down, your presenter may happen to present from. The area you have just noted is what we will call our stage and is what you want to ensure is captured by the reference camera. -
Page 43: Troubleshooting
Troubleshooting Problem Possible Cause Solution Power supply failure Check power supply No movement or Power adapter damaged Replace power adapter image after power on Power cable connection is loose Check & reconnect Check & reconnect power cable No self-testing after Not enough power connection powered on, or with... -
Page 44: Notes
Notes Ver. 1.4 – 6-21...
Need help?
Do you have a question about the HUD-HC20X-SIMPL2 and is the answer not in the manual?
Questions and answers