Table of Contents
Advertisement
Quick Links
BEFORE STARTING
Your vehicle must be raised a minimum of 36 inches. A floor hoist is ideal. If no hoist is available we strongly urge the use of axle stands as a
safety measure.
WARNING! Breaking in an engine with ceramic-coated headers WILL result in damage to the coating and will VOID all warranties.
Ceramic-coated headers require several heat cycles to fully cure before they will withstand extreme heat. Flowtech™ recommends
using cast iron exhaust manifolds or old headers to break in new engines to avoid coating damage. Please call tech service at 270-
781-9741 for additional information regarding ceramic-coated exhaust products.
CAUTION! Your car should not be supported on a bumper jack prior to installing headers, take the time to make a careful and complete
inspection of both engine and transmission mounts. Replace them if they look worn or damaged, otherwise this may affect the
header fitting into your vehicle properly.
HELPFUL HINTS FOR HEADER INSTALLATION AND MAINTENANCE
1.
Verify the header part number with the part number on the box and invoice.
2.
Unless otherwise noted, Flowtech™ Headers are designed to fit without modifying the header (denting, cutting). DO NOT modify the
header. Call the Technical Department at (270) 781-9741.
3.
Unless other wise noted, Flowtech™ Headers are designed to fit with original equipment (i.e. Oil pan, cylinder heads, mounts, bell
housings, starters, etc.).
4.
When using Flowtech™ Headers, it is recommended to use Flowtech™ gaskets for correct port match. When using other than the
recommended Flowtech™ gaskets, match the gaskets to the head ports for a good seal.
5.
Heat wrapping is not recommended, because it will prematurely fatigue the header.
6.
We recommend high-temperature, red RTV silicone (sensor-safe) on both sides of the gasket to further ensure a proper seal.
7.
Headers that are subject to extreme conditions (mud, road salt, etc.) should be cleaned on a regular basis to help prevent corrosion.
8.
When installing headers, use anti-seize on header bolts and Y-pipe bolts.
HEADER INSTALLATION PROCEDURE/ DISASSEMBLY & ASSEMBLY INSTRUCTIONS
SPECIAL COMPONENTS NEEDED FOR ASSEMBLY
1.
Oxygen Sensor Simulator: May be purchased from the following: SLP/ Part # 31036/ Phone # 732-349-2109
2.
Oxygen Sensor Wire Extension(s) 2 each -------- 28" Long (Included with Header)
:
NOTE
These Oxygen Sensor Wire Extensions are made long enough to use either the Oxygen Sensor with the 8" wire length or the Oxygen
Sensor with the 12" wire length. Any excess wire length after installation should be looped and secured into a non-used and non-
heated cavity or pocket.
DISASSEMBLY
1.
Disconnect the battery.
2.
Raise the car and support it with jack stands
3.
Disconnect and remove the four (4) oxygen sensors. Mark them for their location, so they may reinstalled in their proper location
accordingly.
4.
Remove the drive-shaft safety brace.
5.
Remove the Y-pipe from the vehicle.
IMPORTANT! DO NOT DISMOUNT THE MOTOR AND DO NOT REMOVE THE STARTER.
THE HEADERS WILL INSTALL WITH THESE TWO (2) ITEMS BOLTED IN LOCATION.
DISASSEMBLY OF THE LEFT SIDE
1.
From below, remove the left-side catalytic converter.
2.
Remove the oil passage diverter plate that is located just above the oil filter. Approximately ½ pint of oil will drain. This plate may now be
removed or just prior to the actual installation of the left-side header. Take care not to let any dirt or foreign matter enter the open oil
passages.
3.
Disconnect and remove the left-side A.I.R. tube assembly.
4.
Disconnect and remove the spark plug wires.
5.
Remove the spark plugs.
6.
Remove the left-side exhaust manifold.
7.
Point the steering wheel straightforward and turn the key to the lock position and remove the key. Remove the steering shaft. Please take
note of G.M. Pt. Notice # 26068010 which states: To help avoid damage and possible malfunction of the air bag, do not rotate the
steering shaft with the steering shaft disconnected. See the G.M. service manual before disconnecting.
8.
Remove the small left-side heat shield / deflector.
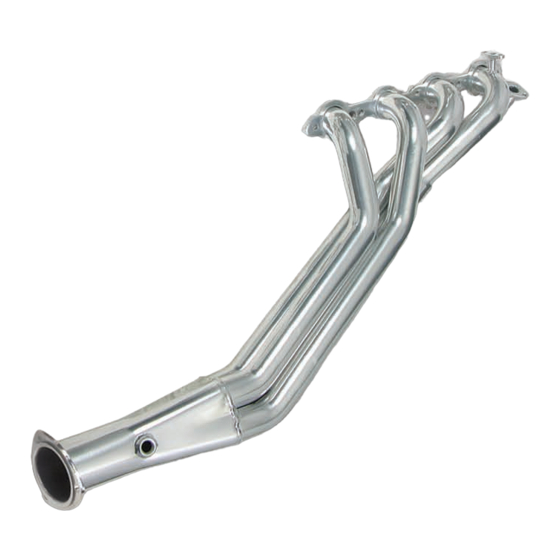
11133FLT & 11133-1FLT Instruction Sheet
To Complete (Off Highway) System
Use Part # 11133YFLT or 11133Y-1FLT Y-Pipe
PLEASE READ THOROUGHLY & CAREFULLY
Mid-America Designs Inc./ Part # 609132/ Phone # 217-347-5591
Advertisement
Table of Contents

Related Manuals for Holley FLOWTECH 11133FLT


Summary of Contents for Holley FLOWTECH 11133FLT
- Page 1 11133FLT & 11133-1FLT Instruction Sheet To Complete (Off Highway) System Use Part # 11133YFLT or 11133Y-1FLT Y-Pipe BEFORE STARTING Your vehicle must be raised a minimum of 36 inches. A floor hoist is ideal. If no hoist is available we strongly urge the use of axle stands as a safety measure.
- Page 2 DISASSEMBLY OF THE RIGHT SIDE Disconnect and remove the right-side A.I.R. tube assembly. Unbolt and remove the oil dipstick. Disconnect and remove the spark plug wires. Disconnect the EGR tube by removing the (2) two 8mm bolts. DO NOT try to remove the tube. Remove the spark plugs.
Need help?
Do you have a question about the FLOWTECH 11133FLT and is the answer not in the manual?
Questions and answers