
Related Manuals for Zephyr Essentials Genova ZGE-E30AS


Summary of Contents for Zephyr Essentials Genova ZGE-E30AS
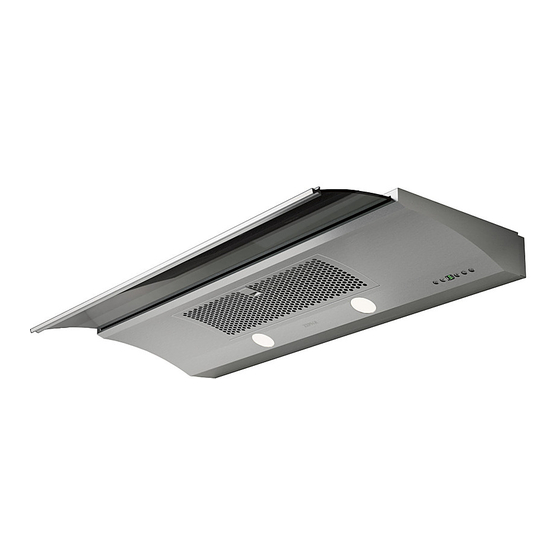
- Page 1 www.zephyronline.com Genova ZGE-E30AS ZGE-E36AS ZGE-E30AS290 ZGE-E36AS290 Model number: Serial Number: APR14.0401 © Zephyr Corporation...
- Page 2 www.zephyronline.com...
- Page 3 SAFETY NOTICE ..............LIST OF MATERIALS ............INSTALLATION Ducting Calculation Sheet ........Mounting Height & Clearance ........ Ducting Options ......................Preparing the Cabinet ..........Installing the Hood 10 - 12 ............Ductless Recirculation ..........FEATURES & CONTROLS Touch Controls 14-15 ..............
- Page 4 www.zephyronline.com READ AND SAVE THESE INSTRUCTIONS WARNING TO REDUCE THE RISK OF FIRE OR ELECTRIC SHOCK, DO NOT USE THIS FAN WITH ANY SOLID-STATE CONTROL DEVICE. WARNING TO REDUCE THE RISK OF FIRE ELECTRIC SHOCK, OR INJURY TO PERSONS, OBSERVE THE FOLLOWING: a.
- Page 5 WARNING TO REDUCE THE RISK OF FIRE, USE ONLY METAL DUCTWORK. CAUTION attics, crawl spaces or garages. Hood not intended for installation over an outdoor grill. OPERATION and loose clothing. The manufacturer declines all responsibility in the event of failure to observe the instructions given here for installation, maintenance and suitable use of the product.
- Page 6 www.zephyronline.com MODELS: ZGE-E30AS, ZGE-E30AS290, ZGE-E36AS, ZGE-E36AS290 PARTS SUPPLIED (1) 6” round damper (pre-installed) (1) hood body with sliding glass (2) upper installation brackets (2) lower installation brackets (1) filler panel (pre-installed) (2) halogen lights, GU-10 50W (1) decorative mesh filter (1) hardware package HARDWARE PACKAGE CONTENTS (4) 3/16 x 3/8”...
- Page 7 Equivalent number Equivalent number Duct pieces Duct pieces length x used T otal length x used T otal 3- 1/ 4” x 10” 1 Ft. 6”- 8” Round 30 Ft. Rect., wall cap straight with damper 7” Round, 1 Ft. 6”- 8”...
- Page 8 www.zephyronline.com Mounting height from top of cooking surface to bottom of hood should be no less than 24” and no more than 32”. It is important to install the hood at the proper mounting height. Hoods mounted too low could mounted too high will be hard to reach and will If available, also refer to range manufacturer’s height clearance requirements and recommended...
- Page 9 WARNING FIRE HAZARD NEVER exhaust air or terminate duct work into spaces between walls, crawl spaces, ceiling, attics or garages. All exhaust must be ducted to the outside, unless using the recirculating option. Use single wall rigid Metal ductwork only. Ducting Options Example roof pitch w/ flashing &...
- Page 10 www.zephyronline.com front of hood side of hood 2 " 16 " 242mm 500mm 16 " 8 " 6 " 4 " 760mm 912mm 153mm 286mm 4 " 8 " 35mm top of hood 16 " 180mm junction box blower outlet...
- Page 11 7” ” 7/8” Fig.1 front edge glass handle Fig.2 1. Determine and mark center line on wall and cabinet bottom with a pencil. 2. If the cabinet bottom is recessed, wood blocking must be installed to ensure proper within cabinet bottom. 3.
- Page 12 www.zephyronline.com WARNING: Electrical wiring must be done by a qualified person(s) in accordance with all applicable codes and standards. This range hood must be properly grounded. Turn off electrical power at service entrance before wiring. 1) Prepare electrical wiring and ducting in cabinet. Location of junction box and blower outlet can be found on page 8. Fig.3 Fig.4 2) Unscrew the (10) screws from front panel and place...
- Page 13 Fig.7 Fig.8 6) Place lower installation brackets under upper installation 7) From inside the hood, secure (1) M4x8 screw into brackets located on left and right sides of hood body, each lower installation bracket. The position of this Fig.7. Note: The wider portion of the lower installation screw is adjustable to accomodate various cabinet bracket should be at the bottom.
- Page 14 www.zephyronline.com Fig.11 Fig.12A 10) Place 6” round ducting over blower collar and secure 11) Secure (2) 1” wood screws (A) into the screw holes on with aluminum duct tape. If using hood in ductless recirculating mode turn to page 13. the hood body to the cabinet base and prevent the hood from shifting after installation.
- Page 15 Ductless recirculation is intended for applications where an exhaust duct work is not possible to be installed. When converted, the hood functions as a recirculating hood rather than an exhaust hood. Fumes and exhaust within the home. We recommend to ALWAYS exhaust air outside of the home by employing existing or installing new duct is not possible should you recourse to converting the hood into a recirculating hood.
- Page 16 www.zephyronline.com Display (speed level, delay of f, filter clean/replace) Blower On/Off Lights Normal/Dim/Off Speed Selection 5 Min Delay Off NOTE: Blower and lights will automatically shut off when the glass is closed. The hood also has a built in memory function that will automatically turn the blower and lights on at the last setting when the glass is pulled open.
- Page 17 Decorative Mesh Filter Clean Reminder (metal mesh filter) Whether your hood is installed as an exhaust or purifying unit, a decorative mesh filter is fitted by the factory. This mesh filter is intended to filter out residue from cooking. It need not be replaced on a regular basis but is required to be kept clean.
- Page 18 www.zephyronline.com FCC Caution: responsible for compliance could void the user’s authority to operate this equipment. This device complies with Part 15 of the FCC Rules. Operation is subject to the following two conditions. (1) This device may not cause harmful interference, and (2) This device must accept any interference received, including interference that may cause undesired operation.
- Page 19 SURFACE MAINTENANCE: Periodically clean with hot soapy water and clean cotton cloth. Do not use corrosive or abrasive detergent steel wool or scouring pads which will scratch and damage surface. For heavier soil use liquid degreaser. After cleaning it is recommended that you use non-abrasive stainless steel polish/cleaners to polish and buff out the stainless luster and grain.
- Page 20 www.zephyronline.com REPLACING LIGHT BULBS CAUTION: Light bulb becomes extremely hot when turned on. DO NOT touch bulb until switched off and cooled. Touching hot bulbs could cause serious burns. Make sure all power is turned off and bulbs are not hot. Remove by turning bulb counter-clockwise.
- Page 21 3.5A 3.5A 370W 270W...
- Page 22 www.zephyronline.com TROUBLESHOOTING PROCEDURES FOR GENOVA Issue Cause What to do After installation, 1. The power source is not turned ON. 1. Make sure the circuit breaker and the unit’s the unit doesn’t power is ON. work. 2. The power line and the cable locking connector 2.
- Page 23 DESCRIPTION PART# Replacement Parts Light Bulb GU10 50W (each) Z0B0020 Decorative Mesh Filter 50200036 Optional Accessories Recirculating Kit ZRC-00GE Replacement Charcoal Filter (each) Z0F-C0GE RF Remote Control 14000005 To order parts, visit us online at http://store.zephyronline.com or call us at 1.888.880.8368...
- Page 24 STAPLE YOUR RECEIPT HERE Proof of the original purchase date is needed to obtain Limited Warranty service under warranty TO OBTAIN SERVICE UNDER WARRANTY OR FOR ANY SERVICE RELATED QUESTIONS, please call: 1-888-880-8368 Zephyr Corporation (referred to herein as “we” or “us”) warrants to the original consumer purchaser (referred to herein as “you”...
- Page 25 www.zephyronline.com Genova ZGE-E30AS ZGE-E36AS ZGE-E30AS290 ZGE-E36AS290 Numéro de modèle : Numéro de série : APR14.0401 © Zephyr Corporation...
- Page 26 www.zephyronline.com...
- Page 27 MISE EN GARDE DE SÉCURITÉ ......LISTE DU MATÉRIEL ............INSTALLATION Feuille de calcul pour le conduit ......Espace libre et hauteur de montage ....Options d’installation pour le conduit ............Préparation de l’armoire ........... Installation de la hotte........10-12 Reprise d’air sans conduit ........
- Page 28 www.zephyronline.com LISEZ ET CONSERVEZ CES INSTRUCTIONS AVERTISSEMENT POUR RÉDUIRE LES RISQUES D’INCENDIE OU DE DÉCHARGE ÉLECTRIQUE, N’UTILISEZ PAS CET APPAREIL AVEC UN TABLEAU DE COMMANDE À SEMI-CONDUCTEURS. AVERTISSEMENT POUR RÉDUIRE LES RISQUES D’INCENDIE, DE DÉCHARGE ÉLECTRIQUE OU DE BLESSURE, RESPECTEZ CES CONSIGNES : a.
- Page 29 ATTENTION POUR RÉDUIRE LES RISQUES D’INCENDIE, N’UTILISEZ QUE DES CONDUITS D’AÉRATION EN MÉTAL. ATTENTION Pour réduire les risques d’incendie et pour évacuer l’air convenablement, assurez-vous de canaliser l’air à l’extérieur de la maison. N’installez pas l’échappement du conduit dans les espaces entre les murs, le plafond, le grenier, les vides sanitaires ou le garage.
- Page 30 www.zephyronline.com (2) M4 x 1”...
- Page 31 Longueur x Longueur x Pièces de conduit Pièces de conduit Total Total Nombre utilisé Nombre utilisé 3-1/ 4” x 10” 1 pi 6” 30 pi rect., droit embout mural circ./registre 6” circ., droit 1 pi 6” 30 pi chapeau de toiture circ.
- Page 32 www.zephyronline.com Il est important d’installer la hotte à la hauteur de montage adéquate. Les hottes installées trop basses pourraient être endommagées par la chaleur en plus de présenter des risques d’incendie plus élevés tandis que les hottes Si elles sont disponibles, consultez les exigences de hauteur d’espace libre requise par le fabricant de la cuisinière ainsi que la hauteur recommandée de montage de la hotte au-dessus de la surface...
- Page 33 AVERTISSEMENT DE RISQUE D’INCENDIE N’évacuez ou ne terminez JAMAIS l’échappement du conduit dans les espaces entre les murs, les vides sanitaires, le plafond, le grenier, ou le garage. Tous les échappements doivent être dirigés à l’extérieur de la maison, à moins que l’option de reprise d’air ne soit utilisée. N’utilisez que des conduits en métal pour cloison simple.
- Page 34 www.zephyronline.com...
- Page 35 7” ” 7/8” Fig.1 Fig.2 1. Calculez et marquez la ligne centrale sur le mur et sur le bas de l’armoire avec un crayon. 2. Si le bas de l’armoire est enfoncé, vous devrez installer des blocs de bois pour aligner correctement le bas de l’armoire avec la hotte.
- Page 36 www.zephyronline.com 1) Préparez le câblage électrique et le conduit dans l’armoire. Les emplacements de la boîte de connexion et l’ouverture de refoulement de ventilateur sont indiqués à la page 8. Fig.3 Fig.4 2) Dévissez les (10) vis du panneau avant et laissez le 3) Ouvrez les portes de l’armoire.
- Page 37 Fig.7 Fig.8 6) Placez les supports d’installation inférieurs sous les supports d’installation supérieurs situés sur les côtés chaque support d’installation inférieur. La position de ces gauche et droit du boîtier de la hotte, Fig.7. Note : La partie vis est ajustable et s’adapte à différentes épaisseurs de plus large des supports d’installation inférieurs devrait se dessous d’armoire, Fig.8.
- Page 38 www.zephyronline.com Fig.11 Fig.12A 10) Placez le conduit circulaire de 6” par-dessus le collier 11) Secure (2) 1 “vis à bois (A) dans les trous de vis sur les aluminium. Si vous utilisez la hotte en mode de reprise le corps de la hotte à la base du cabinet et de prévenir le d’air, allez à...
- Page 39 d’aération. Lorsque transformée, la hotte fonctionne comme une hotte de reprise d’air plutôt que comme un système Nous recommandons de TOUJOURS évacuer l’air à l’extérieur de la maison en utilisant le conduit en place ou, s’il y a d’air. ENSEMBLE DE REPRISE D’AIR (REQUIS SI AUCUN CONDUIT N’EST UTILISÉ) Modèle de hotte Numéro de pièce Filtres par paquet...
- Page 40 www.zephyronline.com...
- Page 42 www.zephyronline.com...
- Page 43 Mise en garde de la Commission fédérale des communications: Dans le but d’assurer une conformité l’autorisation de l’utilisateur de faire fonctionner cet appareil. Cet appareil respecte l’article 15 des réglementations FCC. Le fonctionnement doit respecter les deux réglementations suivantes : (1) cet appareil ne doit pas causer de brouillage nuisible et (2) cet appareil doit pouvoir recevoir tout type d’interférence, dont des interférences qui pourraient causer un fonctionnement involontaire.
- Page 44 www.zephyronline.com ENTRETIEN DES SURFACES Nettoyez régulièrement les surfaces de la hotte avec de l’eau savonneuse chaude et un chiffon de coton propre. N’utilisez pas de détergent abrasif ou corrosif, de laines d’acier ou de tampons à récurer; ils égratigneront et endommageront les surfaces. Pour les taches plus tenaces, utilisez du produit dégraissant liquide.
- Page 45 Remplacement des ampoules Attention : Les ampoules deviennent extrêmement chaudes lorsqu’allumées. Veuillez NE PAS les toucher avant de les avoir éteintes et laissées refroidir. Le contact avec les ampoules chaudes pourrait causer de sérieuses brûlures. Assurez-vous que l’alimentation électrique est coupée et que les ampoules ne sont pas chaudes. Enlevez les ampoules en les dévissant dans le sens contraire des aiguilles d’une montre.
- Page 46 www.zephyronline.com 3.5A 3.5A...
- Page 47 PROCÉDURES DE DÉPANNAGE POUR LA HOTTE GENOVA Problème Cause Solution Après 1. Le bloc d’alimentation n’est pas allumé 1. Assurez-vous que l’alimentation du disjoncteur l’installation, et de l’appareil est allumée l’appareil ne 2. La ligne électrique et le raccord de câble ne sont fonctionne pas.
- Page 48 www.zephyronline.com DESCRIPTION DE PIÈCE Pièces de remplacement Ampoule GU10 50W (chaque) Z0B-0020S Filtre à tamis décoratif 50200036 Accessoires optionnels Ensemble de reprise d’air ZRC-00GE Filtres à charbon de remplacement (chaque) Z0F-C0GE Commande à distance radioélectrique 14000005 Pour commander des pièces, visitez-nous en ligne au www.zephyronline.com ou communiquez avec nous par téléphone au 1-888-880-8368...
- Page 49 AGRAFEZ VOTRE REÇU ICI Une preuve de la date d’achat originale est nécessaire pour obtenir du service Garantie limitée lorsque le produit est sous garantie POUR OBTENIR DU SERVICE SOUS GARANTIE OU POUR TOUTE QUESTION LIÉE À L’ENTRETIEN, veuillez communiquer avec nous au 1-888-880-8368 Zephyr Corporation (désigné...
Need help?
Do you have a question about the Genova ZGE-E30AS and is the answer not in the manual?
Questions and answers