Subscribe to Our Youtube Channel
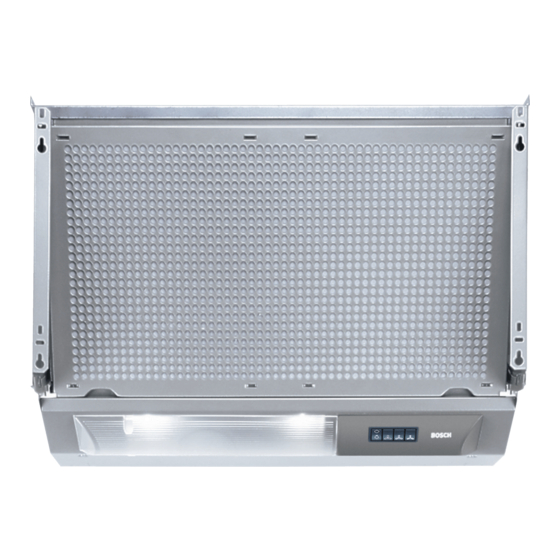
Summary of Contents for Bosch DHE645MGB Installation Instructions
- Page 1 DHE 635... / DHE 645... Internet: http://www.bosch-hausgeraete.de Bosch Info-Team: de Tel. 01 80/5 30 40 50 (E 0,12/Min. DTAG) Operating and Installation instructions...
- Page 2 min. min. ELECTR. min. min.
-
Page 3: Appliance Description
Instructions for Use Appliance description filter screen lighting/fan switches alighting door Operating modes Exhaust-air mode: The extractor-hood fan extracts the kitchen vapours and conveys them through the grease filter into the atmosphere. The grease filter absorbs the solid particles in the kitchen vapours. The kitchen is kept almost free of grease and odours. -
Page 4: Before Using For The First Time
Before using for the first time Important notes: The Instructions for Use apply to several versions of this appliance. Accordingly, you may find descriptions of individual features that do not apply to your specific appliance. This extractor hood complies with all relevant safety regulations. -
Page 5: Using The Extractor Hood
Using the extractor hood Kitchen vapour is most effectively eliminated by: Light Light Light 1 2 3 Light Fan speed 1 2 3 4 Switching on the extractor hood when you start cooking. Switching off the extractor hood few minutes after you have finished cooking. -
Page 6: Filters And Maintenance
Filters and maintenance Different grease filters can be used to absorb the grease particles in kitchen vapour. Fleece grease filter: The filter mat consists of highly flameresistant material. Attention: A build up of greasy residue increases flammability, and the function of the extractor hood may be impaired. - Page 7 Filters and maintenance Removal the grease filter: Open door as far as it will go. 2. Push the filter screen up slightly, lift it towards you over the brackets and take it out downwards.. 3. Remove the wire grid. 4. Fleece grease filter Remove saturated filter mat, clean the filter grid and insert new filter mat.
-
Page 8: Activated Carbon Filter
Filters and maintenance Activated carbon filter: For binding odours in recirculating air mode. Fitting and removal: Open door to the stop. 2. Push the filter screen up slightly, lift it towards you over the brackets and take it out downwards. 3. -
Page 9: Cleaning And Care
Cleaning and care Isolate the extractor hood by pulling out the mains plug or switching off the fuse. When cleaning the grease filters, remove grease deposits from accessible parts of the housing. This prevents the risk of fire and ensures that the extractor hood continues operating at maximum efficiency. -
Page 10: Before Installation
Installation instructions Important information Old appliances are not worthless rubbish. Valuable raw materials can be reclaimed by recycling old appliances. Before disposing of your old appliance, render it unusable. You received your new appliance in a protective shipping carton. All packaging materials are environmentally friendly and recyclable. -
Page 11: Exhaust-Air Mode
Before installation Exhaust-air mode The exhaust air is discharged upwards through a ventilation shaft or directly through the outside wall into the open. Exhaust air must not be discharged via a smoke or exhaust gas flue which is already in use or via a shaft which is used for ventilating rooms in which fireplaces are located. -
Page 12: Circulating-Air Mode
Before installation With exhaust mode , a backwash valve should be installed unless it is already in- corporated in the exhaust pipe or wall box. If a backwash valve is not included with your appliance, your dealer can supply you with one (see accessories). -
Page 13: Electrical Connection
Electrical connection WARNING: THIS APPLIANCE MUST BE EARTHED IMPORTANT: Fitting a Different Plug: The wires in the power cord are colourcoded as follows: Green and Yellow Blue Brown If you fit your own plug, the colours of these wires may not correspond with the identifying marks on the plug terminals. -
Page 14: Mounting The Door
Installation The extractor hood can also be installed slightly lower, depending on the height of the wall cupboards. Position the template correspondingly lower. Observe the minimum distance from hob to 650 mm extractor hood of screws at least 1040 must be fitted mm above the hob 3. - Page 15 Installation 2. Mark the fixing points on the door. For dimensions of vertical screw fixings, see: If the top edge of the door is not flush with the top edge of the cabinet, amend the dimensions accordingly. If the tops of the cabinets are not installed flush with each other, the door must be mounted correspondingly higher.
- Page 16 Robert Bosch Hausgeräte GmbH DHZ2100 DHZ6201 DSZ11AF 086244 088208 DHZ6501 9000 022729 Printed in Germany 1006 Hi.


Need help?
Do you have a question about the DHE645MGB Installation Instructions and is the answer not in the manual?
Questions and answers