Advertisement
Table of Contents
DHI 645 F / DHI 655 F
Internet: http://www.bosch-hausgeraete.de
Bosch Info-Team: de Tel. 01 80/5 30 40 50 (E 0,12/Min. DTAG)
de Gebrauchs- und
Montageanleitung
en Operating and
installation instructions
fr Mode d'emploi et
notice de montage
nl Gebruiksaanwijzing en
montagevoorschrift
it Istruzioni d'uso
e per il montaggio
es Instrucciones de uso
y de montaje
pt Instruções de serviçio
e de montagem
a
Advertisement
Table of Contents

Related Manuals for Bosch DHI 645 F


Summary of Contents for Bosch DHI 645 F
- Page 1 Gebruiksaanwijzing en montagevoorschrift it Istruzioni d’uso e per il montaggio es Instrucciones de uso y de montaje pt Instruções de serviçio e de montagem Internet: http://www.bosch-hausgeraete.de Bosch Info-Team: de Tel. 01 80/5 30 40 50 (E 0,12/Min. DTAG)
- Page 2 Seite 03 – 15 pagina 55 – 67 page 16 – 28 página 68 – 80 page 29 – 41 página 81 – 93 pagina 42 – 54 Abb. 1 ELEKTRO ELECTR. KAASU ELETT. GASS...
-
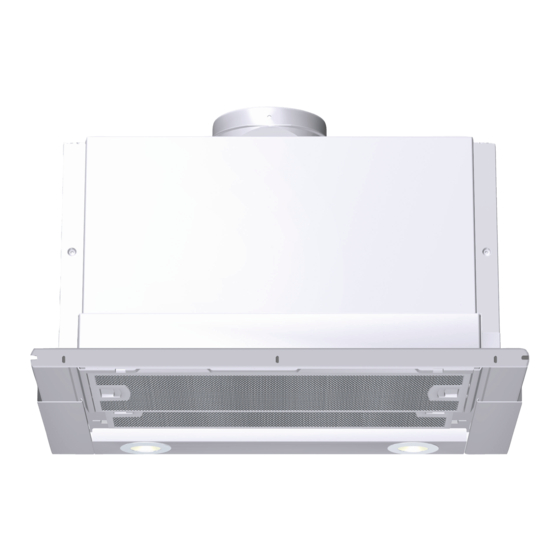
Page 3: Description Of Appliance
Operating instructions: Description of appliance Operating modes This can be achieved if the combustion air is able to flow through non-lockable openings, e.g. in doors, windows and in conjunction with an air supply/air-intake wall box or by other technical procedures such as reciprocal interlocking. -
Page 4: Before Using For The First Time
Before using for the first time Important notes: Before using your appliance for the first The Instructions for Use apply to several time, please read these Instructions for versions of this appliance. Accordingly, Use carefully. They contain important you may find descriptions of individual information concerning your personal features that do not apply to your safety as well as on use and care of the... - Page 5 Operating the extractor hood Switching off: Cooking vapours are best eliminated The extractor hood can be switched off in various ways. Switching on the extractor hood when Switch-off 1: you start cooking. Sliding switch to 0 – switch off fans. Only switching off the extractor hood a few minutes after you have finished Switch-off 2:...
-
Page 6: Filters And Maintenance
Filters and maintenance Grease filters: Removing and inserting the metal-mesh grease filters: Metal-mesh filters are used to trap the Warning: The halogen bulbs must be grease particles in the cooking vapours. switched off and cool. The filter mats are made from non- 1. - Page 7 Filters and maintenance Activated carbon filter: 3. Engage the catches at both sides. 4. Insert the metal-mesh grease filters (see For neutralizing odours in recirculating ”Removing and inserting the metal-mesh mode. grease filters”). Caution: As the filter becomes more and more Removing the filter: saturated with grease, there is an increased risk of fire and the function of the extractor...
-
Page 8: Cleaning And Care
Cleaning and care Replacing the light bulbs Isolate the extractor hood by pulling out 1. Switch off the extractor hood and pull the mains plug or switching off the fuse. out the mains plug or switch off the electricity supply at the fuse box. When cleaning the grease filters, remove grease deposits from accessible parts of When switched on, the halogen bulbs... -
Page 9: Installation Instructions
Installation Instructions: Important information The installation of the extractor hood Old appliances are not worthless above gas cooking devices, at a rubbish. Valuable raw materials can be minimum height of 650 mm – Fig. 1 – is reclaimed by recycling old appliances. permitted provided that the following Before disposing of your old appliance, nominal heat loads (Hs) are not exceeded:... -
Page 10: Prior To Installation
Prior to installation Exhaust-air mode The exhaust air is discharged upwards This can be achieved if the combustion air through a ventilation shaft or directly is able to flow through non-lockable through the outside wall into the open. openings, e.g. in doors, windows and in conjunction with an air supply/air-intake wall Exhaust air must not be discharged via box or by other technical procedures such... -
Page 11: Before Installation
Before installation Exhaust air directed upwards: Optimum efficiency of the extractor hood: Ø133/170 Short, smooth exhaust pipe. 28 7 31 3 2 9 3 m i n . As few bends as possible. Pipe diameter as large as possible (ideally 150 mm dia.) and wide pipe m in . - Page 12 Preparing the wall cupboard This extractor hood is designed to be 1. Mark two attachment points on both the installed in a wall cupboard with the follo- right and left inside faces of the cup- wing dimensions: board and make holes with a bradawl. width: 600 mm depth: 293 to 350 mm height: min.
- Page 13 Fitting into wall cupboard Check door alignment and readjust if 4. If required, shorten the wall cover to the necessary. required dimension (e.g. saw off). Attach the wall cover with the enclosed 1. Remove grease filter clips. (see Operating instructions). Screw the wall cover to the wall 2.
- Page 14 Fitting into wall cupboard If the extractor hood is to be installed Attaching the handle moulding: further back in the cupboard, the stops A handle moulding must be attached to for the filter drawer can be moved the filter drawer. forwards.
-
Page 15: Electrical Connection
Electrical connection If permanent connection is required: WARNING: THIS APPLIANCE MUST BE EARTHED The extractor hood may only be connected by an electrician registered with the local IMPORTANT: Fitting a Different Plug: electricity board. The wires in the power cord are colour- A disconnecting device must be provided coded as follows: on the installation side. - Page 16 Notes...
- Page 17 Notes...
- Page 18 DHZ 4505 5 3x 434229 Aluminium: DHZ 4670 Metall: DHZ 4650 Absenkrahmen Lowering frame Du cadre d’abaissement DHZ 4600 Befestigingsframe Dei telai per l’abbassamento Bastidor para bajar...
- Page 19 5750 203 748 Robert Bosch Hausgeräte GmbH Printed in Germany 0704 Es.
Need help?
Do you have a question about the DHI 645 F and is the answer not in the manual?
Questions and answers