Philips RQ1200 Series User Manual
Hide thumbs
Also See for RQ1200 Series:
- User manual (394 pages) ,
- Instruction manual (70 pages) ,
- User manual (80 pages)

Subscribe to Our Youtube Channel
Related Manuals for Philips RQ1200 Series


Summary of Contents for Philips RQ1200 Series
- Page 1 Always here to help you Register your product and get support at www.philips.com/welcome RQ1200 series User manual...
- Page 5 ENGLISH 6...
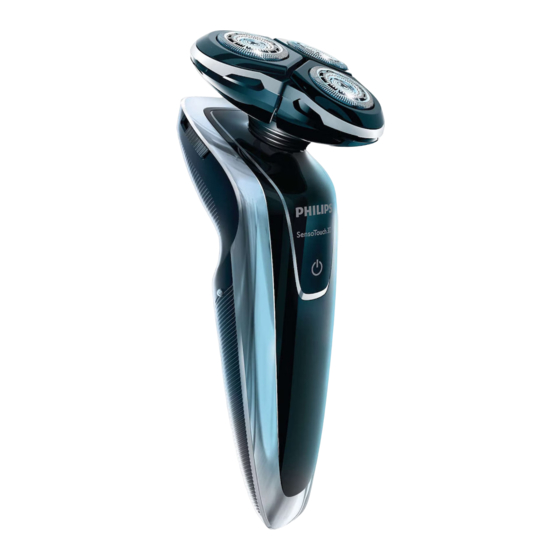
- Page 6 ENGLISH General description (Fig. 1) A Shaver Display Shaver on/off button Protection cap RQ12 Shaving unit Trimmer Trimmer on/off slide B Foldable charger ’Cleaning chamber empty’ symbol Cleaning symbol Drying symbol Jet Clean System on/off button (RQ1008 only: up/down button Cleaning chamber release button Shaver holder D Cleaning brush...
- Page 7 ENGLISH RQ1290/RQ1280 Quick charge: When the shaver contains enough energy for one shave, RQ1260/RQ1250 then the second charging light, and so on until the shaver is fully Quick charge: When the shaver contains enough energy for one shave, RQ1290/RQ1280 When the battery is fully charged, the minutes indication lights up RQ1260/RQ1250 When the battery is fully charged, all charging lights light up RQ1290/RQ1280...
- Page 8 ENGLISH RQ1260/RQ1250 When the battery is almost empty (when there are only 5 or fewer When you switch off the shaver, the bottom charging light continues to RQ1290/RQ1280 The remaining battery capacity is indicated by the number of shaving RQ1260/RQ1250 For optimal shaving performance, we advise you to clean the shaver after MINUTES LEFT For maximum shaving performance, we advise you to replace the shaving...
- Page 9 ENGLISH Press the on/off button for 3 seconds to enter the travel lock mode. RQ1280: The display starts to count down from 3. At 1, the appliance beeps to indicate that it is locked. The lock symbol lights up on the display. After a few seconds it goes out.
- Page 10 ENGLISH After the shaver has charged for 5 minutes, it contains enough energy for Insert the small plug into the charger. Unfold the charger (‘click’). Put the adapter in the wall socket. Put the shaver in the charger. The display shows that the shaver is charging (see chapter ‘The display’).
- Page 11 ENGLISH Move the shaving heads over your skin in circular movements. Press the on/off button once to switch off the shaver. The display lights up for a few seconds and then shows the remaining battery capacity. To shave with shaving foam or shaving gel, follow the steps below: Apply some water to your skin.
- Page 12 ENGLISH Insert the lug of the shaving unit into the slot in the top of the shaver (1). Then press down the shaving unit (2) to attach it to the shaver (‘click’). Cleaning and maintenance Never use scouring pads, abrasive cleaning agents or aggressive liquids such as petrol or acetone to clean the shaver, its accessories and the Jet The best and most hygienic way to clean the shaver is in the Jet Clean Be careful with hot water.
- Page 13 ENGLISH Rinse all three shaving heads and all three hair chambers under a hot tap for 30 seconds. Be careful with hot water. Always check if the water is not too hot, to prevent your hands from getting burnt. Carefully shake off excess water and leave the shaving heads open to let the shaving unit dry completely.
- Page 14 ENGLISH Hold the shaver upside down above the holder with the back of the shaver pointing towards the holder. Place the shaver body in the holder behind the two clips (1) and press it down until it locks into place (2). The display shows that the shaver is charging (see chapter ‘The display’).
- Page 15 ENGLISH If you use the Jet Clean System to clean your shaver every day, you Simultaneously press the release buttons on both sides of the Jet Clean System (1). Then lift the Jet Clean System off the cleaning chamber (2). The cleaning chamber remains behind.
- Page 16 ENGLISH Remove the cutter from the shaving guard. Clean the cutter with the cleaning brush supplied. Clean the inside of the shaving guard. After cleaning, place the cutter back into the shaving guard with the cutter legs pointing downwards. Press down the retainer over the cutter. Close the shaving heads.
- Page 17 ENGLISH Insert the lug of the shaving unit into the slot in the top of the shaver (1). Then press the shaving unit downwards (2) to attach it to the shaver (‘click’). Slide the trimmer slide forwards to slide out the trimmer. Rinse the trimmer under a hot tap for some time.
- Page 18 MINUTES LEFT RQ1290, RQ1280 RQ1260 RQ1250...
- Page 19 RQ1290, RQ1280 RQ1260, RQ1250 RQ1290, RQ1280 RQ1260, RQ1250 RQ1290, RQ1280...
- Page 20 RQ1260, RQ1250 RQ1290, RQ1280 RQ1260, RQ1250 MINUTES LEFT MINUTES LEFT RQ1250)
- Page 21 MINUTES LEFT...
- Page 30 MINUTES LEFT...
- Page 31 Všeobecný popis (Obr. 1) A Holicí strojek Displej Ochranný kryt Holicí jednotka RQ12 G Adaptér Displej RQ1290/RQ1280 MINUTES LEFT RQ1260 RQ1250...
- Page 32 Nabíjení RQ1290/RQ1280 RQ1260/RQ1250 RQ1290/RQ1280 RQ1260/RQ1250 RQ1290/RQ1280 RQ1260/RQ1250...
- Page 33 RQ1290/RQ1280 RQ1260/RQ1250 MINUTES LEFT MINUTES LEFT...
- Page 34 MINUTES LEFT Nabíjení...
- Page 35 Holení...
- Page 37 aceton. vodou.
- Page 40 do konce programu.
- Page 42 vodou. MINUTES LEFT...
- Page 44 A Pardel Ekraan Pardli sisse/välja lülitamise nupp Kaitsekate RQ12 Raseerimispea Piirel Piirli sisse/välja lülitamise liuglüliti B Kokkupandav laadija Puhastamissümbol Kuivatamissümbol Jet Clean süsteemi sisse-/väljalülitamise nupp (ainult mudelil RQ1008; Puhastuskambri vabastusnupp Pardlihoidja D Puhastusharjake HQ200 Puhastusvedelik Kott G Adapter Erinevatel pardlitüüpidel on erinevad ekraanid, mis on näha allpool olevatel RQ1290/RQ1280 MINUTES LEFT RQ1260...
- Page 45 Laadimine RQ1290/RQ1280 Kiirlaadimine: kui pardlis on üheks raseerimiskorraks piisavalt energiat, RQ1260/RQ1250 Pardli laadimise ajal hakkab esmalt vilkuma alumine laadimistuli, seejärel Kiirlaadimine: kui pardlil on piisavalt laengut üheks raseerimiskorraks, RQ1290/RQ1280 RQ1260/RQ1250 Kui aku on täiesti täis laetud, hakkavad kõik laadimistuled pidevalt RQ1290/RQ1280 Kui aku on peaaegu tühjaks saanud (kui järgi on jäänud viis või vähem Kui lülitate pardli välja, jääb raseerimisminutite näidik mõneks sekundiks...
- Page 46 RQ1290/RQ1280 RQ1260/RQ1250 Optimaalse raseerimisjõudluse tagamiseks soovitame pardlit pärast igat MINUTES LEFT Raseerimispea asendamine Maksimaalse raseerimisjõudluse saavutamiseks soovitame pardlipea välja MINUTES LEFT Et tuletada teile meelde raseerimispea väljavahetamist, on seade varustatud meeldetuletusfunktsiooniga, mis aktiveerub automaatselt RQ1280: ekraanil algab minutite lugemine alates number kolmest. abil.
- Page 47 Reisiluku deaktiveerimise tähistamiseks hakkab mootor tööle. Kui seade on välja lülitatud, ent tuvastab liikumise 5 minuti vältel Lõikepeade blokeerimise korral hakkavad raseerimispea sümbol, MINUTES LEFT Kui see peaks juhtuma, siis peaksite raseerimispea puhastama või Raseerimispea sümbol, veekraani sümbol ja hüüumärk jätkavad vilkumist Laadimine RQ1290/RQ1280/RQ1260: täislaetud pardli raseerimisaeg on kuni 60 Laadige pardlit enne esmakasutust ja siis, kui ekraan näitab, et aku on...
- Page 48 Laadijaga laadimine Sisestage adapter seinakontakti. Sisestage adapter seinakontakti. suunatud aluse poole. Raseerimine Esimeste raseerimistega ei pruugi te oodatud tulemust saavutada ja nahk...
- Page 49 Seda pardlit saate kasutada ka märjal näol, raseerides raseerimisvahu või...
- Page 50 Parim ja hügieenilisem viis on puhastada pardlit Jet Clean süsteemis Optimaalse raseerimisjõudluse tagamiseks puhastage pardlit pärast igat Olge tulise veega ettevaatlik. Kontrollige alati, et vesi ei oleks liiga tuline,...
- Page 51 kraani all kuuma veega. Olge tulise veega ettevaatlik. Kontrollige alati, et vesi ei oleks liiga tuline, raseerimispea on täiesti kuiv. Mudelil RQ1008 on kolm puhastusprogrammi: ökonoomne nupu vajutamisel hakkab Jet Clean süsteem puhastama automaatses Sisestage adapter seinakontakti.
- Page 52 suunatud aluse poole. automaatselt puhastusvedelikku. kestab paar minutit.
- Page 53 Kui puhastusvedeliku tase langeb miinimumtasemest allapoole, hakkab Kui kasutate pardli igapäevaseks puhastamiseks Jet Clean süsteemi,...
- Page 55 Maksimaalse raseerimisjõudluse saavutamiseks soovitame pardlipea välja MINUTES LEFT...
- Page 56 Zaslon Trimer Torbica G Adapter Zaslon MINUTES LEFT RQ1290/RQ1280 RQ1260 RQ1250...
- Page 57 RQ1290/RQ1280 RQ1260/RQ1250 RQ1290/RQ1280 RQ1260/RQ1250 RQ1290/RQ1280...
- Page 58 RQ1260/RQ1250 RQ1290/RQ1280 RQ1260/RQ1250 MINUTES LEFT MINUTES LEFT...
- Page 59 MINUTES LEFT...
- Page 61 Brijanje...
- Page 62 acetona.
- Page 63 modeli) Postoje dvije vrste sustava Jet Clean:...
- Page 64 (2).
- Page 65 nekoliko minuta.
- Page 68 MINUTES LEFT RQ128x/RQ127x/RQ126x/RQ125x: kako biste ponovo postavili...
- Page 69 A Borotva A borotva be- és kikapcsológombja RQ12 borotvaegység Borotvatartó G Adapter RQ1290/RQ1280 MINUTES LEFT RQ1260 RQ1250...
- Page 70 RQ1290/RQ1280 RQ1260/RQ1250 RQ1290/RQ1280 RQ1260/RQ1250 RQ1290/RQ1280...
- Page 71 RQ1260/RQ1250 RQ1290/RQ1280 RQ1260/RQ1250 MINUTES LEFT MINUTES LEFT...
- Page 72 MINUTES LEFT...
- Page 80 Csere MINUTES LEFT...
- Page 81 gombot.
- Page 82 MINUTES LEFT...
- Page 84 MINUTES LEFT MINUTES LEFT...
- Page 85 MINUTES LEFT...
- Page 94 MINUTES LEFT...
- Page 95 Ekranas Apsauginis dangtelis Kirptuvas HQ200 valymo skystis G Adapteris MINUTES LEFT RQ1290/RQ1280 RQ1260 RQ1250...
- Page 96 RQ1290/RQ1280 RQ1260/RQ1250 RQ1290/RQ1280 RQ1260/RQ1250 RQ1290/RQ1280...
- Page 97 RQ1260/RQ1250 RQ1290/RQ1280 RQ1260/RQ1250 MINUTES LEFT MINUTES LEFT...
- Page 98 MINUTES LEFT...
- Page 102 pakenkti skutimo galvutei.
- Page 103 (2). pasirinkti.
- Page 107 MINUTES LEFT...
- Page 108 A Skuveklis Displejs Trimmeris G Adapteris Displejs MINUTES LEFT RQ1290/RQ1280 RQ1260 RQ1250...
- Page 109 RQ1290/RQ1280 RQ1260/RQ1250 RQ1290/RQ1280 RQ1260/RQ1250 RQ1290/RQ1280 RQ1260/RQ1250...
- Page 110 RQ1290/RQ1280 RQ1260/RQ1250 MINUTES LEFT MINUTES LEFT...
- Page 111 MINUTES LEFT...
- Page 116 programmu.
- Page 119 MINUTES LEFT...
- Page 120 A Golarka Trymer Suwak trymera Uchwyt golarki Etui MINUTES LEFT RQ1290/RQ1280 RQ1260 RQ1250...
- Page 121 RQ1290/RQ1280 RQ1260/RQ1250 RQ1290/RQ1280 RQ1260/RQ1250 RQ1290/RQ1280...
- Page 122 RQ1260/RQ1250 RQ1290/RQ1280 RQ1260/RQ1250 MINUTES LEFT MINUTES LEFT...
- Page 123 MINUTES LEFT...
- Page 124 modele) (2). Golenie...
- Page 128 (2). trwa kilka minut.
- Page 129 (2).
- Page 131 RQ128x). MINUTES LEFT...
- Page 132 A Aparat de ras Buton de pornire/oprire aparat de ras Unitatea de radere RQ12 Simbol de uscare Buton pornit/oprit pentru sistemul Jet Clean (numai pentru RQ1008: Suport aparat de ras G Adaptor MINUTES LEFT RQ1290/RQ1280 RQ1260 RQ1250...
- Page 133 RQ1290/RQ1280 RQ1260/RQ1250 RQ1290/RQ1280 RQ1260/RQ1250 RQ1290/RQ1280...
- Page 134 RQ1260/RQ1250 RQ1290/RQ1280 RQ1260/RQ1250 MINUTES LEFT MINUTES LEFT RQ1260/RQ1250)
- Page 135 stinge. Capetele de ras blocate MINUTES LEFT...
- Page 137 Radere pielii. pielii.
- Page 138 tuns.
- Page 139 putea deteriora capetele.
- Page 143 tuns.
- Page 144 MINUTES LEFT RQ128x/RQ127x/RQ126x/RQ125x: Pentru a reseta aparatul de ras, 10 secunde.
- Page 145 MINUTES LEFT RQ1290/RQ1280 RQ1260 RQ1250...
- Page 146 RQ1290/RQ1280 RQ1260/RQ1250 RQ1290/RQ1280 RQ1260/RQ1250...
- Page 147 RQ1290/RQ1280 RQ1260/RQ1250 RQ1290/RQ1280 RQ1260/RQ1250 MINUTES LEFT...
- Page 148 MINUTES LEFT...
- Page 149 MINUTES LEFT...
- Page 156 (2).
- Page 158 MINUTES LEFT...
- Page 159 Displej Ochranný kryt Holiaca jednotka RQ12 G Adaptér Displej MINUTES LEFT RQ1290/RQ1280 RQ1260 RQ1250...
- Page 160 Nabíjanie RQ1290/RQ1280 RQ1260/RQ1250 RQ1290/RQ1280 RQ1260/RQ1250 RQ1290/RQ1280...
- Page 161 RQ1260/RQ1250 RQ1290/RQ1280 RQ1260/RQ1250 MINUTES LEFT MINUTES LEFT...
- Page 162 úspory energie. MINUTES LEFT Nabíjanie...
- Page 163 Holenie...
- Page 165 vysuniete. kapacita batérie.
- Page 167 (2).
- Page 168 konca programu.
- Page 170 Zatvorte holiace hlavy. vysuniete.
- Page 171 Výmena MINUTES LEFT...
- Page 172 Splošni opis (Sl. 1) A Brivnik Zaslon Brivna enota RQ12 Nosilec brivnika Torbica G Adapter Zaslon RQ1290/RQ1280 MINUTES LEFT RQ1260 RQ1250...
- Page 173 Polnjenje RQ1290/RQ1280 RQ1260/RQ1250 nato drugi indikator polnjenja in tako naprej, dokler ni brivnik Baterija napolnjena RQ1290/RQ1280 Ko je baterija popolnoma napolnjena, indikator polnjenja neprekinjeno RQ1260/RQ1250 Ko je baterija popolnoma napolnjena, vsi indikatorji polnjenja RQ1290/RQ1280...
- Page 174 RQ1260/RQ1250 RQ1290/RQ1280 RQ1260/RQ1250 MINUTES LEFT MINUTES LEFT...
- Page 175 MINUTES LEFT Simbol brivne enote, simbol pipe in klicaj utripajo, dokler brivnih glav ne...
- Page 176 Polnjenje Hitro polnjenje Brivnik postavite v polnilnik.
- Page 177 Britje...
- Page 178 ali aceton.
- Page 179 da se brivna enota popolnoma posuši. S sistemom Jet Clean sta opremljena dva modela:...
- Page 180 Jet Clean. minut.
- Page 183 Zaprite brivne glave. MINUTES LEFT...
- Page 185 Opšti opis (Sl. 1) Displej Trimer Torbica G Adapter MINUTES LEFT RQ1290/RQ1280 RQ1260 RQ1250...
- Page 186 RQ1290/RQ1280 RQ1260/RQ1250 RQ1290/RQ1280 RQ1260/RQ1250 RQ1290/RQ1280...
- Page 187 RQ1260/RQ1250 RQ1290/RQ1280 RQ1260/RQ1250 MINUTES LEFT MINUTES LEFT RQ1250)
- Page 188 MINUTES LEFT...
- Page 189 ga pritisnite nadole sve dok ne legne na mesto (2). Brijanje...
- Page 190 brijanje:...
- Page 192 Postoje dva tipa Jet Clean sistema:...
- Page 193 ga pritisnite nadole sve dok ne legne na mesto (2).
- Page 195 otvori (2).
- Page 196 okrenute nadole.
- Page 197 Zamena MINUTES LEFT...
- Page 198 MINUTES LEFT RQ1290/RQ1280 RQ1260 RQ1250...
- Page 199 RQ1290/RQ1280 RQ1260/RQ1250 RQ1290/RQ1280 RQ1260/RQ1250 RQ1290/RQ1280...
- Page 200 RQ1260/RQ1250 RQ1290/RQ1280 RQ1260/RQ1250 MINUTES LEFT MINUTES LEFT RQ1250)
- Page 201 MINUTES LEFT...
- Page 210 MINUTES LEFT...
- Page 214 8222.002.0015.1...
Need help?
Do you have a question about the RQ1200 Series and is the answer not in the manual?
Questions and answers