Table of Contents
Advertisement
Available languages
Available languages
Quick Links
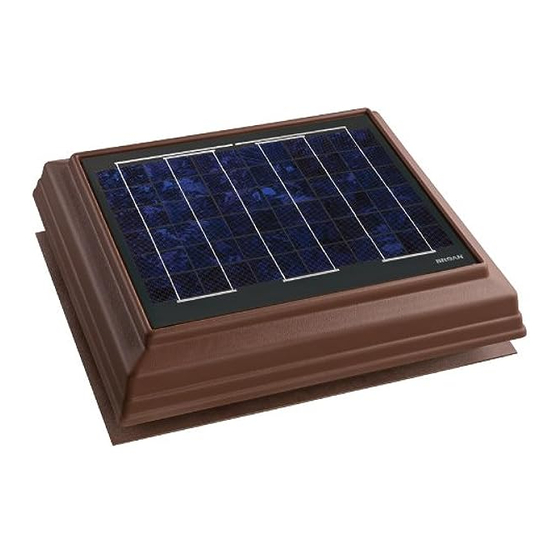
ROOF-MOUNT
SOLAR POWERED
ATTIC VENTILATOR
READ AND SAVE THESE INSTRUCTIONS
WARNING
TO REDUCE THE RISK OF FIRE, ELECTRIC SHOCK, OR INJURY
TO PERSONS, OBSERVE THE FOLLOWING:
1. Use this unit only in the manner intended by the manufacturer.
If you have questions, contact the manufacturer at the address
or telephone number listed in the warranty.
2. Before servicing or cleaning unit, disable the ventilator by cover-
ing the solar panel with cardboard or disconnecting the wires
from the motor terminals (note wire locations when disconnect-
ing).
3. Installation work must be done by a qualified person(s) in ac-
cordance with all applicable codes and standards, including
fire-rated construction codes and standards.
4. If removing an existing 120 VAC powered attic ventilator, use
only a qualified person(s) to remove any electrical wiring in
accordance with all applicable codes and standards.
5. Sufficient air is needed for proper combustion and exhausting
of gases through the flue (chimney) of fuel burning equipment
to prevent backdrafting. Follow the heating equipment manufac-
turer's guidelines and safety standards such as those published
by the National Fire Protection Association (NFPA), and the
American Society for Heating, Refrigeration and Air Condition-
ing Engineers (ASHRAE), and the local code authorities.
6. When cutting or drilling into wall or ceiling, do not damage
electrical wiring and other hidden utilities.
TOOLS AND MATERIALS REQUIRED
r
Drill
r
1/4" Drill Bit
r
Sabre Saw or Keyhole Saw
r
Hammer
r
Ruler / Tape Measure
r
Pencil, Marker or Scribe
r
Utility Knife
r
Pry Bar (to remove roofing nails)
r
5/16" Socket and Extension
r
Roofing Cement
r
Galvanized Roofing Nails (1¾" min.)
MODELS 355SOBK • 355SOBR • 355SOWW
CAUTION
1. For general ventilating use only. Do not use to exhaust hazard-
ous or explosive materials and vapors.
2. To avoid motor bearing damage and noisy and/or unbalanced
impellers, keep drywall spray, construction dust, etc. off power
unit.
3. This unit has an unguarded impeller. Do not use in locations
readily accessible to people or animals.
4. This ventilator operates when the solar panel is exposed to
sun light. To reduce risk of injury while installing, servicing or
cleaning unit, cover the solar panel with cardboard or discon-
nect the wires from the motor terminals (note wire locations
when disconnecting).
5. The recommended open air inlet for this ventilator is 4.25
square feet. The best location for these air intake vents are
under the eaves with direct access to the attic. Failure to pro-
vide these intakes could cause natural-draft gas appliances to
backdraft.
6. Your attic fan installation will create a screened opening into
your attic space. During a heavy rain storm there could be a
light spray of rain into this attic space. This is a normal condi-
tion with all attic ventilators and will not cause any damage to
the structure. We recommend that you do not store any valu-
able articles directly under the fan opening in the roof.
7. This ventilator is intended for roof installation. Broan Models
353 & 353SOBK Gable Mount Ventilators are available for
side wall applications.
8. The plastic ventilator dome and base may be painted with
high quality paint. Follow the paint manufacturer's recommen-
dations for acrylic and ABS plastic as appropriate. Take care
to avoid getting paint on the solar panel.
9. Please read specification label on product for further informa-
tion and requirements.
10. The installation instructions contained in this document are
only a recommendation and individual professionals may
have their own methods of installation. If your roof has an
existing warranty, installation of this product by anyone other
than those who installed the roof may jeopardize any future
warranty claim. Please check with the original installer of your
roof if this is a concern.
11. When working with asphalt shingles in cold weather (below
40
F), take care to avoid damage to the shingle edges and
0
corners.
Register your product online at:
www.broan.com/register
Page 1
Advertisement
Table of Contents

Subscribe to Our Youtube Channel
Related Manuals for Broan 355SOBK


Summary of Contents for Broan 355SOBK
- Page 1 MODELS 355SOBK • 355SOBR • 355SOWW Page 1 ROOF-MOUNT SOLAR POWERED ATTIC VENTILATOR READ AND SAVE THESE INSTRUCTIONS WARNING CAUTION TO REDUCE THE RISK OF FIRE, ELECTRIC SHOCK, OR INJURY 1. For general ventilating use only. Do not use to exhaust hazard- TO PERSONS, OBSERVE THE FOLLOWING: ous or explosive materials and vapors. 1. Use this unit only in the manner intended by the manufacturer.
-
Page 2: Installation
MODELS 355SOBK • 355SOBR • 355SOWW Page 2 INSTALLATION Note: This ventilator is capable of replacing an existing 120 volt powered attic ventilator. Only a qualified per- son should remove any electrical wiring in accordance with local codes and standards. - Page 3 MODELS 355SOBK • 355SOBR • 355SOWW Page 3 6. From the roof side, using the guide hole as the center point, use a nail and string to scribe a 16-1/2” diameter 9. Drill a large starting hole for the sabre saw just inside of circle on the shingles. Note: If replacing an existing the line or the 14" circle created in Step 8. ventilator, the hole diameter may be larger than 16-1/2” . This is acceptable provided the roofing material overlaps the ventilator by at least 1” on all sides. 10. Cut out the roof board(s) inside of the line. 7. Cut out the shingles inside of the circle. 8. Using the same nail and string shown in step 6, scribe a 14” diameter circle on the black paper or roof decking. 11. For proper removal of roofing nails, draw a 26" square, Note: if replacing an existing ventilator the hole diameter centered around the hole. Remove nails holding shingles may be larger than 14” . This is acceptable provided the down from top two-thirds of square.
- Page 4 MODELS 355SOBK • 355SOBR • 355SOWW Page 4 12. Apply a large bead of roofing cement in the molded 14. Using a good grade of roofing cement material, seal groove on the bottom side of ventilator base. Making shingles and all nail heads. DO NOT seal the bottom sure the arrow on the ventilator base is pointed toward edge of the ventilator base.
-
Page 5: Service Parts
MODELS 355SOBK • 355SOBR • 355SOWW Page 5 SERVICE PARTS Replacement parts can now be ordered on our website. Please visit us at www.Broan.com Model Model Model 355SOBK 355SOBR 355SOWW Description (Black) (Brown) (Weather Wood) S99527247 S99527248 S99527249 Solar Panel Assembly (Dome) S99527261... -
Page 6: Warranty
BROAN-NUTONE LLC – Exclusive Limited Warranty – The Exclusive Limited Warranty Agreement (the “Warranty”) is entered into by and between Customer and Broan-NuTone LLC (“Broan”). Customer has carefully reviewed this Warranty and agrees that Broan’s performance of its obligations hereunder will provide Customer with an adequate remedy which will serve the essential purpose of the parties’ agreement relating to the products... -
Page 7: Outils Et Matériel Requis
MODÈLES 355SOBK 355SOBR • 355SOWW Page 7 VENTILATEUR DE GRENIER À ÉNERGIE SOLAIRE MONTÉ SUR LE TOIT LIRE CES DIRECTIVES ET LES CONSERVER ATTENTION AVERTISSEMENT 1. Pour ventilation générale uniquement. Ne pas utiliser A F I N D E D I M I N U E R L E S R I S QU E S D ' I N C E N D I E , cet appareil pour évacuer des matières ou des vapeurs... - Page 8 MODÈLES 355SOBK 355SOBR • 355SOWW Page 8 INSTALLATION Remarque : Ce ventilateur peut remplacer un ventilateur électrique de 120 volts pour grenier. Seule une personne qualifiée peut enlever le câblage conformément aux codes et aux normes en vigueur. 3. Séparez le dôme du ventilateur de sa base en enlevant les quatre (4) vis à tôle de 5/16 po en acier inoxydable.
- Page 9 MODÈLES 355SOBK 355SOBR • 355SOWW Page 9 6. En travaillant du côté extérieur du toit et en utilisant l’avant-trou comme point central, à l’aide d’un clou et d’une corde, tracez un cercle de 42 cm (16-1/2 po) 9. Percez un grand trou de départ pour la scie sauteuse de diamètre sur les bardeaux. Remarque : Si vous juste à l'intérieur de la ligne du cercle de 35,6 cm...
- Page 10 MODÈLES 355SOBK 355SOBR • 355SOWW Page 10 12. Appliquez un gros cordon de silicone dans la rainure du 14. Imperméabilisez les bardeaux et les têtes de clou dessous de la base du ventilateur. Tout en vous assurant à l'aide d'un enduit à toiture de bonne qualité. que la flèche sur la base du ventilateur est pointée vers N'IMPERMÉABILISEZ PAS le bord inférieur de la base le faîte du toit, glissez la base du ventilateur sous les du ventilateur. bardeaux des deux tiers supérieurs du carré de 66 cm (26 po). Ne pliez pas les bardeaux plus que nécessaire. Centrez la base du ventilateur sur l’ouverture. CLOUS SOUS LES BARDEAUX 15. Installez le dôme du ventilateur sur la base du ventilateur à l’aide des quatre (4) vise à tôle de...
-
Page 11: Pièces De Rechange
MODÈLES 355SOBK 355SOBR • 355SOWW Page 11 PIÈCES DE RECHANGE Les pièces de rechange peuvent être commandées sur notre site Web. Visitez notre site à www.Broan.com Modèle Modèle Modèle Repère Description 355SOBK 355SOBR 355SOWW (noir) (brun) (bois patiné) S99527247 S99527248 S99527249 Ensemble de panneau solaire (dôme) - Page 12 LE CLIENT RENONCE EXPRESSÉMENT IL N’Y A AUCUNE GARANTIE DÉPASSANT LA DESCRIPTION QUI SUIT. LA RESPONSABILITÉ DE BROAN NE SAURAIT EN AUCUN CAS DÉPASSER LA VALEUR DU PRIX D’ACHAT DU PRODUIT. DE PLUS, BROAN DÉCLINE TOUTE RESPONSABILITÉ QUANT AUX DOMMAGES SPÉCIAUX, INDIRECTS, ACCESSOIRES OU CONSÉCUTIFS, DE QUELQUE NATURE QUE CE SOIT.
-
Page 13: Herramientas Y Materiales Requeridos
Protección contra Incendios (National Fire Protection debajo de la abertura del ventilador en el techo. Association, NFPA), y la Sociedad Americana de Ingenieros en Calefacción, Refrigeración y Aire Acondicionado (American 7. Este ventilador está diseñado para instalarse en el techo. Los Society for Heating, Refrigeration and Air Conditioning ventiladores para montaje en hastial Broan Modelos 353 y Engineers, ASHRAE), y las autoridades de los códigos locales. 353SOBK están disponibles para aplicaciones de muros laterales. 6. Al cortar o perforar a través de la pared o del techo, tenga cuidado 8. El domo del ventilador y la base de plástico se pueden pintar de no dañar el cableado eléctrico ni otros servicios ocultos. con pintura de alta calidad. Siga las recomendaciones del fabricante de pintura para el acrílico y el plástico ABS, según... -
Page 14: Instalación
MODELOS 355SOBK 355SOBR • 355SOWW Página 14 INSTALACIÓN Nota: Este ventilador tiene capacidad para reemplazar un ventilador para ático existente de 120 voltios. Sólo el personal calificado debe quitar el cableado eléctrico de acuerdo con los códigos y las normas locales. - Page 15 MODELOS 355SOBK 355SOBR • 355SOWW Página 15 6. Desde el lado del techo, usando el orificio guía como punto central, use un clavo y un cordón para marcar 9. Perfore un orificio iniciador grande para la sierra de un círculo de 16 1/2 pulg. (42 cm) de diámetro sobre vaivén, justo dentro de la línea o del círculo de 14 pulg. las tejas. Nota: Si reemplaza un ventilador existente, (35.6 cm) creado en el paso 8.
- Page 16 MODELOS 355SOBK 355SOBR • 355SOWW Página 16 12. Aplique un cordón grande de silicona en la ranura 14. Con un buen cemento con grado para techo selle todas moldeada en la parte inferior de la base del ventilador. las tejas y las cabezas de los clavos. NO selle el borde Asegurándose de que la flecha en la base del ventilador inferior de la base del ventilador. apunte hacia la saliente del techo, inicie en los dos tercios inferiores del cuadrado de 26 pulg. (66 cm) y deslice la base del ventilador debajo de las tejas. No...
-
Page 17: Piezas De Servicio
MODELOS 355SOBK 355SOBR • 355SOWW Página 17 PIEZAS DE SERVICIO Ahora se puede hacer los pedidos de las piezas de repuesto en nuestro sitio Web. Visítenos en www.Broan.com Modelo Modelo Modelo Clave Descripción 355SOBK 355SOBR 355SOWW (negro) (café) (madera curtida) - Page 18 EL CLIENTE SE EXIME EXPRESAMENTE. NO HAY GARANTÍAS QUE SE EXTIENDAN MÁS ALLÁ DE LA DESCRIPCIÓN DEL TEXTO DE LA PRESENTE. EN NINGÚN CASO, LA RESPONSABILIDAD DE BROAN AL AMPARO DE LA PRESENTE EXCEDERÁ EL PRECIO DE COMPRA DE LOS PRODUCTOS. ADEMÁS, BROAN NO SERÁ RESPONSABLE DE DAÑOS ESPECIALES, INDIRECTOS, INCIDENTALES O DE CONSECUENCIA DE NINGUNA NATURALEZA EN LO ABSOLUTO.
- Page 19 MODELOS 355SOBK 355SOBR • 355SOWW Página 19...
- Page 20 MODELOS 355SOBK 355SOBR • 355SOWW Página 20 99527232B...
Need help?
Do you have a question about the 355SOBK and is the answer not in the manual?
Questions and answers