Advertisement
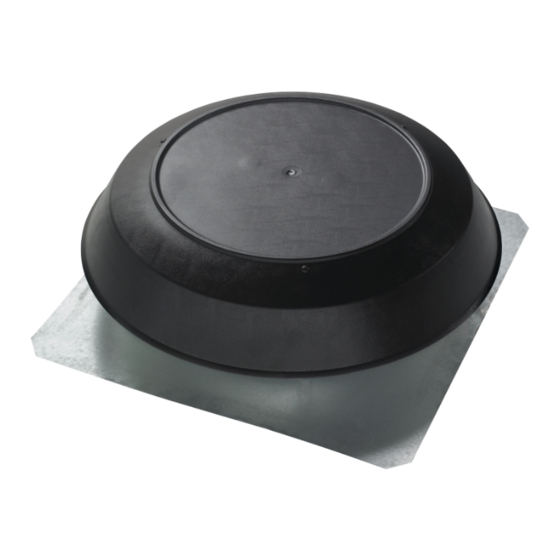
ROOF-MOUNT REMOTE
SOLAR POWERED
ATTIC VENTILATOR
READ AND SAVE THESE INSTRUCTIONS
WARNING
TO REDUCE THE RISK OF FIRE, ELECTRIC SHOCK, OR INJURY
TO PERSONS, OBSERVE THE FOLLOWING:
1. Use this unit only in the manner intended by the manufacturer.
If you have questions, contact the manufacturer at the address
or telephone number listed in the warranty.
2. Before servicing or cleaning unit, disable the ventilator by cover-
ing the solar panel with cardboard or disconnecting the wires
from the motor terminals (note wire locations when disconnect-
ing).
3. Installation work must be done by a qualified person(s) in ac-
cordance with all applicable codes and standards, including
fire-rated construction codes and standards.
4. If removing an existing 120 VAC powered attic ventilator, use
only a qualified person(s) to remove any electrical wiring in
accordance with all applicable codes and standards.
5. Sufficient air is needed for proper combustion and exhausting
of gases through the flue (chimney) of fuel burning equipment
to prevent backdrafting. Follow the heating equipment manufac-
turer's guidelines and safety standards such as those published
by the National Fire Protection Association (NFPA), and the
American Society for Heating, Refrigeration and Air Condition-
ing Engineers (ASHRAE), and the local code authorities.
6. When cutting or drilling into wall or ceiling, do not damage
electrical wiring and other hidden utilities.
TOOLS AND MATERIALS REQUIRED
r
Slotted Screwdriver
r
Drill
r
1/4" Drill Bit
r
Sabre Saw or Keyhole Saw
r
Hammer
r
Ruler / Tape Measure
r
Pencil, Marker or Scribe
r
Utility Knife
r
Pry Bar (to remove roofing nails)
r
5/16" Socket and Extension
r
Roofing Cement
r
Galvanized Roofing Nails (1¾" min.)
MODELS 355RSOBK • 355RSOBR
CAUTION
1. For general ventilating use only. Do not use to exhaust hazard-
ous or explosive materials and vapors.
2. To avoid motor bearing damage and noisy and/or unbalanced
impellers, keep drywall spray, construction dust, etc. off power
unit.
3. This unit has an unguarded impeller. Do not use in locations
readily accessible to people or animals.
4. This ventilator operates when the solar panel is exposed to
sun light. To reduce risk of injury while installing, servicing or
cleaning unit, cover the solar panel with cardboard or discon-
nect the wires from the motor terminals (note wire locations
when disconnecting).
5. The recommended open air inlet for this ventilator is 4.25
square feet. The best location for these air intake vents are
under the eaves with direct access to the attic. Failure to pro-
vide these intakes could cause natural-draft gas appliances to
backdraft.
6. Your attic fan installation will create a screened opening into
your attic space. During a heavy rain storm there could be a
light spray of rain into this attic space. This is a normal condi-
tion with all attic ventilators and will not cause any damage to
the structure. We recommend that you do not store any valu-
able articles directly under the fan opening in the roof.
7. This ventilator is intended for roof installation. Broan Models
353 & 353SOBK Gable Mount Ventilators are available for
side wall applications.
8. The plastic ventilator dome and base may be painted with
high quality paint. Follow the paint manufacturer's recommen-
dations for acrylic and ABS plastic as appropriate. Take care
to avoid getting paint on the solar panel.
9. Please read specification label on product for further informa-
tion and requirements.
10. The installation instructions contained in this document are
only a recommendation and individual professionals may
have their own methods of installation. If your roof has an
existing warranty, installation of this product by anyone other
than those who installed the roof may jeopardize any future
Warranty claim. Please check with the original installer of your
roof if this is a concern.
11. When working with asphalt shingles in cold weather (below
40
F), take care to avoid damage to the shingle edges and
0
corners.
Register your product online at:
www.broan.com/register
Page 1
Advertisement
Table of Contents

Related Manuals for Broan 355RSOBK


Summary of Contents for Broan 355RSOBK
- Page 1 MODELS 355RSOBK • 355RSOBR Page 1 ROOF-MOUNT REMOTE SOLAR POWERED ATTIC VENTILATOR READ AND SAVE THESE INSTRUCTIONS WARNING CAUTION TO REDUCE THE RISK OF FIRE, ELECTRIC SHOCK, OR INJURY 1. For general ventilating use only. Do not use to exhaust hazard- TO PERSONS, OBSERVE THE FOLLOWING: ous or explosive materials and vapors. 1. Use this unit only in the manner intended by the manufacturer. 2. To avoid motor bearing damage and noisy and/or unbalanced If you have questions, contact the manufacturer at the address impellers, keep drywall spray, construction dust, etc. off power...
- Page 2 MODELS 355RSOBK • 355RSOBR Page 2 INSTALLATION Note: This ventilator is capable of replacing an existing 120 volt powered attic ventilator. Only a qualified per- son should remove any electrical wiring in accordance with local codes and standards. 4. Separate the ventilator dome from the ventilator base by removing the four (4) stainless steel 5/16” sheet metal...
- Page 3 MODELS 355RSOBK • 355RSOBR Page 3 7. From the roof side, using the guide hole as the center point, use a nail and string to scribe a 16-1/2” diameter 10. Drill a large starting hole for the sabre saw just inside of circle on the shingles. Note: If replacing an existing the line or the 14" circle created in Step 8. ventilator, the hole diameter may be larger than 16-1/2” . This is acceptable provided the roofing material overlaps the ventilator by at least 1” on all sides. 11. Cut out the roof board(s) inside of the line. 8. Cut out the shingles inside of the circle. 9. Using the same nail and string shown in step 6, scribe a 14” diameter circle on the black paper or roof decking. 12. For proper removal of roofing nails, draw a 26" square, Note: if replacing an existing ventilator the hole diameter centered around the hole. Remove nails holding shingles may be larger than 14” . This is acceptable provided down from top two-thirds of square.
- Page 4 MODELS 355RSOBK • 355RSOBR Page 4 13. Apply a large bead of roofing cement in the molded 15. Using a good grade of roofing cement material, seal groove on the bottom side of ventilator base. Making shingles and all nail heads. DO NOT seal the bottom sure the arrow on the ventilator base is pointed toward edge of the ventilator base. the roof ridge, start two-thirds of the way down from the top of the 26” square and slide the ventilator base under the shingles. Do not bend the shingles any more than necessary. Center the ventilator base over the hole. NAIL UNDER SHINGLES 16. Install the ventilator dome to the ventilator base using the four (4) stainless steel 5/16” sheet metal screws removed during step 4. 14. Make sure the ventilator base is parallel to the roof ridge, carefully lift shingles and nail or screw base securely to the roof using galvanized roofing nails or screws. Nail all...
- Page 5 MODELS 355RSOBK • 355RSOBR Page 5 REMOTE SOLAR PANEL INSTALLATION 17. Working from inside the attic, find the center of the selected solar panel location identified in step 2, drill a small hole in the roof decking large enough for the solar panel wire to fit through. 18. Feed the solar panel wire through the hole into the attic. 19. Run a bead of silicone or roof cement around the perimeter of the underside of the solar panel and secure to the roof using nails or screws. Nail or screw all corners and perimeter of base every 6 inches. Seal the fastener heads with silicone or roof cement. 20. From inside the attic, apply silicone around the wire where it enters the roof.
- Page 6 MODELS 355RSOBK • 355RSOBR Page 6 SERVICE PARTS Replacement parts can now be ordered on our website. Please visit us at www.Broan.com Model Model 355RSOBK 355RSOBR Description (Black) (Brown) S99527255 S99527256 Solar Panel Assembly S99527273 S99527274 Dome Assembly S99527261 S99527261 Fan Blade w/ Set Screw S99527257 S99527257...
- Page 7 BROAN-NUTONE LLC – Exclusive Limited Warranty – The Exclusive Limited Warranty Agreement (the “Warranty”) is entered into by and between Customer and Broan-NuTone LLC (“Broan”). Customer has carefully reviewed this Warranty and agrees that Broan’s performance of its obligations hereunder will provide Customer with an adequate remedy which will serve the essential purpose of the parties’ agreement relating to the products...
- Page 8 MODELS 355RSOBK • 355RSOBR Page 8 99527270B...
Need help?
Do you have a question about the 355RSOBK and is the answer not in the manual?
Questions and answers