LG D1452WLF Owner's Manual
Hide thumbs
Also See for D1452WLF:
- Owner's manual (36 pages) ,
- Owner's manual (36 pages) ,
- Owner's manual (32 pages)
Table of Contents
Advertisement
Quick Links
OWNER'S MANUAL
DISH WA SHER
OWNER'S MANUAL
WASHING MACHINE
Before beginning installation, read these instructions carefully.
This will simplify installation and ensure that the dishwasher is installed
correctly and safely. Leave these instructions near the dishwasher
Please read this manual carefully before operating
after installation for future reference.
your set and retain it for future reference.
WM0642H*
D1452W(L,M, T ,B,C,D,A)F(B,U)
D1462W(L,M, T ,B,C,D,A)F(B,U)
P/No. : MFL66281432
P/NO : MFL31245123
www.lg.com
Advertisement
Table of Contents

Related Manuals for LG D1452WLF


Summary of Contents for LG D1452WLF
- Page 1 Leave these instructions near the dishwasher Please read this manual carefully before operating after installation for future reference. your set and retain it for future reference. WM0642H* D1452W(L,M, T ,B,C,D,A)F(B,U) D1462W(L,M, T ,B,C,D,A)F(B,U) www.lg.com P/No. : MFL66281432 P/NO : MFL31245123...
-
Page 2: Table Of Contents
CONTENTS CONTENTS ........2 Thank you for buying a LG Dishwasher. IMPORTANT SAFETY INSTRUCTIONS Please read your owner’s manual Important safety instructions ....3 carefully, it provides instruction on safe Read all instructions before use ..4 installation, use and maintenance. -
Page 3: Important Safety Instructions
IMPORTANT SAFETY INSTRUCTIONS READ ALL INSTRUCTIONS AND EXPLANATION OF THE INSTALLATION BEFORE USE WARNING For your safety, the information in this manual must be followed to minimize the risk of fire or explosion, electric shock, or to prevent property damage, injury to persons, or death. Your Safety and the safety of others are very important. -
Page 4: Read All Instructions Before Use
IMPORTANT SAFETY INSTRUCTIONS Read all instructions before use WARNING To reduce the risk of fire, electric shock, or injury to persons when using the dishwasher, follow basic precautions, including the following: household and similar applications such - Staff kitchen areas in shops, offices and regarding the installation, use and other working environments;... -
Page 5: Save These Instructions
IMPORTANT SAFETY INSTRUCTIONS Read all instructions before use WARNING To reduce the risk of fire, electric shock, or injury to persons when using the dishwasher, follow basic precautions, including the following: function that automatically stops the operation of the dishwasher when it is exposed to heavy disturbance on its mains. - Page 6 IMPORTANT SAFETY INSTRUCTIONS WARNING Improper connection of the equipment-grounding conductor can result in electric shock. Check with a qualified electrician or serviceman if you are in doubt as to whether the appliance is properly grounded. Do not modify the plug provided with the appliance - if it does not fit the outlet, have a proper outlet installed by a qualified electrician.
-
Page 7: Installation Instructions
INSTALLATION INSTRUCTIONS WARNING Prepare cupboard opening Preparation for electrical wiring 1. This dishwasher is designed to fit the size CAUTION shown as below. 2. Select a location as close to sink as possible for ease of connection to the water and drain pipes. -
Page 8: Preparing The Dishwasher For Installation
INSTALLATION INSTRUCTIONS Installing the dishwasher in Preparing the dishwasher for installation cupboard 1. Lay the dishwasher on its back. 1. Before sliding the dishwasher into the cupboard opening, all necessary height 2. Adjust the legs to the required height and balancing adjustments should be as shown in below figure. -
Page 9: Installation Of Drain Hose
INSTALLATION INSTRUCTIONS Installation of drain hose 1. If the end of drain hose does not fit to the When the drain hose is connected to a separate standpipe, it is essential that an drain line, use a rubber connector(not airtight connection be made. supplied) that is resistant to heat and Refer to Fig.B detergent. -
Page 10: Installation Of Water Inlet Hose
INSTALLATION INSTRUCTIONS Installation of water inlet hose How to level the dishwasher After installing the dishwasher, you may notice a Connect the water supply hose to the water tap. (Fig. A) slight sticking of the door to the dishwasher, when you open or close the door. If this does Some models consist of an inlet valve and hose. -
Page 11: Parts Name
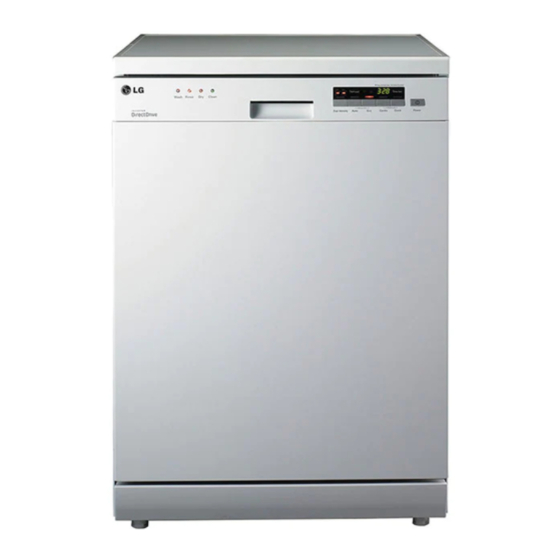
PARTS NAME 1. Control Panel 11. Upper Rack 2. Door Handle 12. Cutlery Basket 3. Front Cover 13. Detergent And Rinse Aid Dispenser 4. Lower Cover 14. Vapor Vent Cover 5. Display Window 15. Upper Spray Arm 6. Power Button 16. -
Page 12: Function Of Control Button
FUNCTION OF CONTROL BUTTON MODEL : D1452W(L,M,T,B,C,D,A)F(B,U) MODEL : D1462W(L,M,T,B,C,D,A)F(B,U) - Page 13 ™ function is available only for SMARTDIAGNOSIS ™ the products with a mark. SMARTDIAGNOSIS (Refer to Page 31.)
- Page 14 FUNCTION OF CONTROL BUTTON Process Indicator Indicates current program phase. lamps twinkle while each phase of washing process. lamp turns on after all procedure is ended for 4minutes. Salt & Rinse Refill Indicator : Refill with special salt when the lamp turns on. : Refill with rinse aid when the lamp turns on.
-
Page 15: Before Using For The First Time
BEFORE USING FOR THE FIRST TIME Hardness setting You have to check your water hardness and set the softening system level before operating your dishwasher. < Water hardness level > Step 1. Check and find water hardness level Method 1 1) Check the water hardness in your area. -
Page 16: Salt Filling
BEFORE USING FOR THE FIRST TIME Step 3. Salt Filling In order to provide satisfactory rinsing results, the dishwasher requires soft water, i.e., containing little or no lime, otherwise water stains will be left behind on the dishes and interior containers. If the tap water exceeds a certain level of hardness, it must be softened, I.e.,decalcified. -
Page 17: Information For Energy Test
INFORMATION FOR ENERGY TEST(EN50242) 2. Upper Rack Appliance loaded in accordance with standard specifications. the inside surface of the door. into the uppermost position. 1. Cutlery Basket Milk Meat Spinach Margarine 1 2 3 4 5 6 7 8 3. Lower Rack Milk Meat Spinach... -
Page 18: How To Use And Operate
HOW TO USE AND OPERATE Daily use load 2. Upper Rack 1. Cutlery Basket 3. Lower Rack CAUTION Do not use the pot and pan with plastic handle. Poor washing for smudges of waterproof or long lasting lipsticks on the glass. -
Page 19: Cutlery Basket
HOW TO USE AND OPERATE For better washing performance, always load 1. Cutlery Basket the dishwasher according to the instructions. Place forks and spoons in the cutlery basket with their handles downwards. Before loading items into the dishwasher. particular insoluble items such as bones, pips etc. -
Page 20: Lower Rack
HOW TO USE AND OPERATE 2. Lower Rack 3. Upper Rack The lower rack is suitable for dinner plates, The upper rack is suitable for delicate items soup bowls, dishes, pots, pans, lids and even such as, small plates, long cutlery, cups, the grill tray. -
Page 21: Adding Detergent
HOW TO USE AND OPERATE Adjusting the height of the upper 4. Adding Detergent rack The height of the upper rack can be adjusted chamber before starting every programme. when you load glasses with long stems or tall crockery items. within the manual, when determining the correct amount of detergent to use. - Page 22 HOW TO USE AND OPERATE WARNING Push button to open The detergent used is a special Dishwasher detergent and like all household chemicals it should be treated as harmful and kept out of reach of children. CAUTION Place proper detergent into this compartment Some products integrated with rinse aid work best with specific programmes only.
- Page 23 HOW TO USE AND OPERATE 5. Refilling For refilling Rinse Aid For refilling Salt When the salt container is empty, the salt refill Depending on the dosage setting and the lamp will automatically turn on during number of washes, the chamber may need to be topped up, approximately once a month.
-
Page 24: Drying
HOW TO USE AND OPERATE 6. Drying To assist drying, we recommend that the door be partially opened after the cycle. The display will indicate Cd(cool dry) for a further 60 minutes after the end of the cycle time. It can be interrupted or terminated by simply opening the door. -
Page 25: Operating Sequence
OPERATING SEQUENCE After starting, the display window shows 1. Press the Power button the remaining time. The time in the display window will start to 2. Check there is rinse aid and decrease minute by minute. salt If the door is opened during the programme a safety device ensures that the machine The corresponding indicator lights will stops. -
Page 26: Programme
PROGRAMME Running time may vary according to the water temperature, water pressure and voltage. Running time doesn’t include Cool Dry - 60min. WASH RINSE COOL The programme sequence is optimised and adapted in accordance with how dirty the dishes are. Dual Spray This cycle washes the upper and lower racks at This programme offers efficient energy and... -
Page 27: User Maintenance Instructions
USER MAINTENANCE INSTRUCTIONS To prevent trouble and poor operating, it is important to check filters and spray arms at regular intervals. Keeping the dishwasher Upper Spray Arm time, run a Care cycle without detergent. When the cycle is finished, clean the dishwasher according to the USER MAINTENANCE unscrewing the nut. -
Page 28: Trouble Shooting Guide
TROUBLE SHOOTING GUIDE If a problem occurs check below to see whether this can be solved. In the unlikely event that the problem cannot be rectified, please contact a service engineer. Before calling for service Problem Possible Causes Solution the socket. No lights come on when the power is turned on. - Page 29 TROUBLE SHOOTING GUIDE Before calling for service Problem Possible Causes Solution The display shows OE code. (Water is not pumped away.) (Washing motor or Drain motor) problem, call for service. The display shows IE code. problem, call for service. The display shows EI connections.
- Page 30 TROUBLE SHOOTING GUIDE These are not error codes indicating a malfunction. Before calling for service Code Description This indicates there was a power failure. This function protects The display shows the dishwasher in the event that the power goes out or the power PF code to the unit is disrupted.
-
Page 31: Using Smartdiagnosis
TROUBLE SHOOTING GUIDE NOTE SMARTDIAGNOSIS function is available only for the products with a SMARTDIAGNOSIS mark. In case of a mobile phone with static option, the smart diagnosis function might not operate. Using SMARTDIAGNOSIS Only use this feature when instructed to do so by the call centre. The transmission sounds similar to a fax machine, and so has no meaning except to the call centre. -
Page 32: Specification
SPECIFICATION Capacity 14 Place settings Weight See rating label Power Supply See rating label Power Consumption See rating label Water Feed Pressure 50 ~ 800 kPa... - Page 33 MEMO...
- Page 34 MEMO...
- Page 35 MEMO...
- Page 36 CUSTOMER SERVICES Tel. : +44-(0) 844 847 LGLG(5454) Fax. : +44-(0) 844 847 1413 : http://www.lg.com LGEUK SERVICE WEB-SITE For U.K. Customer You may also find owner's manual in video version at following link www.lg.com/steamdishwasher...
Need help?
Do you have a question about the D1452WLF and is the answer not in the manual?
Questions and answers