
Subscribe to Our Youtube Channel
Related Manuals for Marantz CR401N


Summary of Contents for Marantz CR401N
- Page 1 All manuals and user guides at all-guides.com CR401N DFU cover 05.11.18 4:33 PM ページ5 Model CR401 User Guide CD Receiver CLASS 1 LASER PRODUCT KLASSE 1 LASER PRODUKT I.H.T. IEC 825...
- Page 2 Marantz. Angaben für Versicherungswecke oder bei como referencia cuando tenga que hacer uso del Marantz. Korrespondenz mit Marantz angeführt werden seguro o se ponga en contacto con Marantz. IMPORTANT VIKTIGT müssen. When seeking warranty service, it is the IMPORTANTE Fö...
- Page 3 All manuals and user guides at all-guides.com CR401N DFU cover 05.11.18 4:33 PM ページ2 CE MARKING English Deutsch WARNINGS WARNHINWEISE - Do not expose the equipment to rain or moisture. - Das Gerät nicht Regen oder Feuchtigkeit English aussetzen. - Do not remove the cover from the equipment.
- Page 4 All manuals and user guides at all-guides.com CR401N DFU cover 05.11.18 4:33 PM ページ3 Español Svenska ADVERTENCIAS VARNINGAR - No exponga el equipo a la lluvia ni a la - Utsätt inte utrustningen för regn eller fukt. humedad. - Ta inte bort utrustningens hölje. - No extraiga la tapa del equipo.
-
Page 5: Table Of Contents
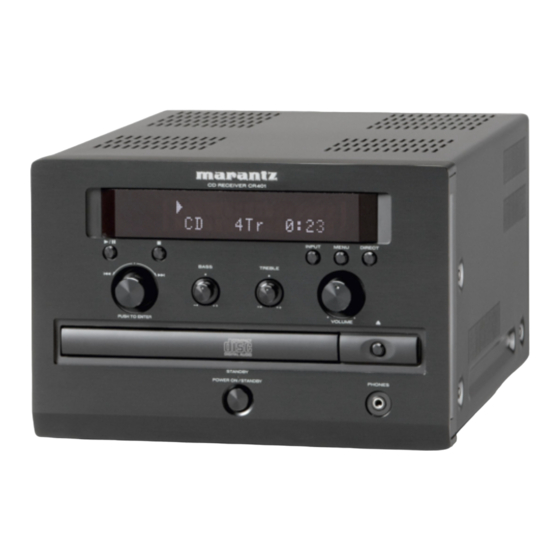
All manuals and user guides at all-guides.com CR401N̲01 Eng 05.11.18 4:55 PM ページ1 TABLE OF CONTENTS FEATURES FEATURES.......................1 • 30W/Ch into 6 ohms (1kHz, 10%) BEFORE USE....................2 • Tone Direct PART NAME AND FUNCTIONS ..............5 • Tone Control for Treble and Bass FRONT PANEL ......................5 •... -
Page 6: Before Use
7 Accessories 0.2 m 0.2 m CD RECEIVER CR401 CD RECEIVER CR401 CD-R/CD-RW Your Marantz product has been prepared to or more or more Finalized CD-R and CD-RW discs INPUT INPUT MENU MENU DIRECT DIRECT... - Page 7 All manuals and user guides at all-guides.com CR401N̲01 Eng 05.11.18 4:55 PM ページ3 7 Notes about the discs MP3 compatibility * Use discs which satisfy the CD standards such as those with the “CD logo” or “ ” • MP3 discs must be ISO 9660 Level 1 or Level 2, * Handle the discs carefully so as not to mark on their disc label surfaces.
- Page 8 All manuals and user guides at all-guides.com CR401N̲01 Eng 05.11.18 4:55 PM ページ4 7 Loading batteries 7 Operating range of the remote control unit Before using the supplied remote control unit for the first time, load the batteries in the remote • Point the remote control unit at the remote control unit.
-
Page 9: Part Name And Functions
All manuals and user guides at all-guides.com CR401N̲01 Eng 05.11.18 4:55 PM ページ5 !4 PLAY/PAUSE 6 button q POWER ON/STANDBY button PART NAME AND FUNCTIONS Press to turn power ON and press again to This is used to start CD playback or pause CD switch to STANDBY mode. -
Page 10: Rear Panel
All manuals and user guides at all-guides.com CR401N̲01 Eng 05.11.18 4:55 PM ページ6 a Antenna Terminal for FM Tuner PART NAME AND FUNCTIONS (75 ohms) Connect an external FM antenna with a coaxial cable, or a cable network FM source. REAR PANEL b Antenna Terminal for AM Tuner (AM, GND) Connect the supplied AM loop antenna. -
Page 11: Remote Control
All manuals and user guides at all-guides.com CR401N̲01 Eng 05.11.18 4:55 PM ページ7 ¤4 PAUSE 8 button ⁄3 DIMM button PART NAME AND FUNCTIONS The display’s brightness switches (in three Used to pause CD playback. levels) each time this button is pressed. ¤5 PLAY 2 button... -
Page 12: Connections
All manuals and user guides at all-guides.com CR401N̲01 Eng 05.11.18 4:55 PM ページ8 7 AM loop antenna assembly 7 Connection of AM antennas CONNECTIONS Remove the vinyl tie and take out the connection Push the lever. CONNECTING THE ANTENNA TERMINALS line. Connect to the AM antenna Insert the conductor. -
Page 13: Connecting Speakers
All manuals and user guides at all-guides.com CR401N̲01 Eng 05.11.18 4:55 PM ページ9 7 Connecting a subwoofer Before you connect your speakers, read the CONNECTIONS following: Use the PRE OUT SUBWOOFER jack to connect • Disconnect the mains cord from the wall outlet. a powered subwoofer (the power amplifier is built •... -
Page 14: Connecting Analog / Digital Components
All manuals and user guides at all-guides.com CR401N̲01 Eng 05.11.18 4:55 PM ページ10 7 Before Making Any CONNECTIONS Connections • Read the manuals supplied with your components. CONNECTING ANALOG / DIGITAL COMPONENTS • Don’t connect the mains cord until you’ve completed and double-checked all connections. -
Page 15: Basic Operation
All manuals and user guides at all-guides.com CR401N̲01 Eng 05.11.18 4:55 PM ページ11 BASIC OPERATION CD RECEIVER CR401 CD RECEIVER CR401 7 Power Up the CR401 7 Adjusting the Volume INPUT INPUT MENU MENU DIRECT DIRECT Before connecting the mains cord, complete all To adjust the volume, use the Master VOLUME... -
Page 16: Cd Operation
All manuals and user guides at all-guides.com CR401N̲01 Eng 05.11.18 4:55 PM ページ12 • To enter a track number greater than or equal to CD OPERATION 100, press --/--- button v twice. For example, to enter tranck number 123, press --/--- button v twice, 1, 2 and 3. - Page 17 All manuals and user guides at all-guides.com CR401N̲01 Eng 05.11.18 4:55 PM ページ13 7 To Stop Memory Playback CD OPERATION • Press the STOP 7 button !2 or ⁄0 . 7 Random Playback 7 Memory Playback 7 To Remove the Last Track in CD RECEIVER CR401...
-
Page 18: Displaying Information
All manuals and user guides at all-guides.com CR401N̲01 Eng 05.11.18 4:55 PM ページ14 CD OPERATION 7 MP3 Disc DISPLAYING INFORMATION CLOCK CALL Elapsed track time: This section explains how to display various information, including the remaining track time, The length of time that the current track has TIMER remaining disc time, and ID3 tag for MP3 tracks. -
Page 19: Tuner Operation
All manuals and user guides at all-guides.com CR401N̲01 Eng 05.11.18 4:55 PM ページ15 Either turn the Easy JOG 4/¢ knob !5 or Press the Easy JOG 4/¢ knob !5 or ENTER TUNER OPERATION press the 1 button ⁄1 or ¡ button ⁄2 . button b to set the manual tuning mode. - Page 20 All manuals and user guides at all-guides.com CR401N̲01 Eng 05.11.18 4:55 PM ページ16 7 RDS (Radio Data System) • This allows you to easily find out the latest TUNER OPERATION traffic conditions in your area before you • RDS (works only on the FM band) is a leaving home.
- Page 21 All manuals and user guides at all-guides.com CR401N̲01 Eng 05.11.18 4:55 PM ページ17 Either turn the Easy JOG 4/¢ knob !5 or • The station name is displayed on the display press the 5 or ∞ button c. The RDS search TUNER OPERATION after searching stops.
- Page 22 All manuals and user guides at all-guides.com CR401N̲01 Eng 05.11.18 4:55 PM ページ18 7 Switching RDS information TUNER OPERATION display CD RECEIVER CR401 CD RECEIVER CR401 Use the procedure described at “Auto tuning”, 7 RT (Radio Text) 7 CT (Clock Time) “Manual tuning” or “Recalling preset stations” to tune in a frequency with an RDS station.
-
Page 23: Other Operation
All manuals and user guides at all-guides.com CR401N̲01 Eng 05.11.18 4:55 PM ページ19 Press the 5 or ∞ button c to set the minutes, OTHER OPERATION and press the ENTER button b. The display flashes. CD RECEIVER CR401 CD RECEIVER CR401 7 Muting the CR401... -
Page 24: Timer Programs
All manuals and user guides at all-guides.com CR401N̲01 Eng 05.11.18 4:55 PM ページ20 The display indicate “TIMER PROGRAM x Set the On time. FM/AM”. Either turn the Easy JOG 4/¢ OTHER OPERATION knob !5 or press the 5 or ∞ button c, the display changes “TIMER PROGRAM x FM/AM”. -
Page 25: Last Function Memory
All manuals and user guides at all-guides.com CR401N̲01 Eng 05.11.18 4:55 PM ページ21 LAST FUNCTION MEMORY OTHER OPERATION • This unit is equipped with a last function memory CD RECEIVER CR401 CD RECEIVER CR401 which stores the input and output setting 7 Confirm and change timer... -
Page 26: Troubleshooting
All manuals and user guides at all-guides.com CR401N̲01 Eng 05.11.18 4:55 PM ページ22 Symptom Cause Measures Page TROUBLESHOOTING • A strong light source is • Make sure that the CR401 is interfering with the CR401’s not subjected to direct sunshine If a problem should arise, first check the following. - Page 27 All manuals and user guides at all-guides.com CR401N̲01 Eng 05.11.18 4:55 PM ページ23 Symptom Cause Measures Page Can’t play a CD? • The disc is upside down. • Load the disc with the label- side facing up. • The disc is dirty. • Remove the disc and clean it.
-
Page 28: Specifications & Dimensional Drawings
In the event of difficulty, refer to your dealer or write directly to the nearest location to you that is listed on * Specifications subject to change without prior the Marantz Authorized Service Station list. If writing, please include the model and serial number of the notice. - Page 29 All manuals and user guides at all-guides.com CR401N DFU cover 05.11.18 4:33 PM ページ4 www.marantz.com You can find your nearest authorized distributor or dealer on our website. U.S.A. Marantz America, Inc. 1100 Maplewood Drive, Itasca, IL 60143, U.S.A. EUROPE Marantz Europe B.V. P.O. Box 8744, 5605 LS Eindhoven, The Netherlands is a registered trademark.
Need help?
Do you have a question about the CR401N and is the answer not in the manual?
Questions and answers