Table of Contents
Advertisement
Quick Links
Advertisement
Table of Contents

Related Manuals for Teac SR80iDABp


Summary of Contents for Teac SR80iDABp
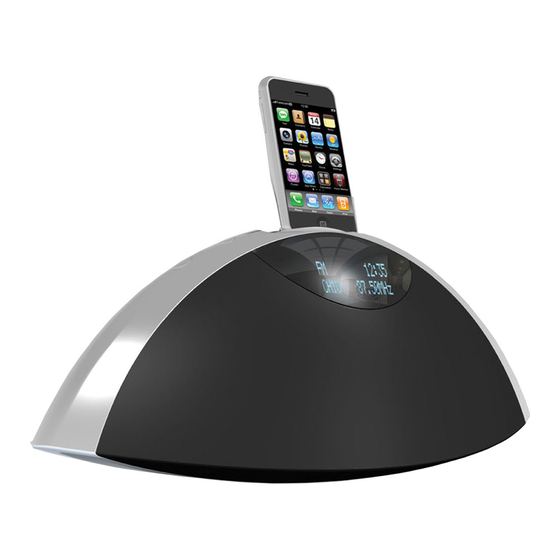
- Page 1 7202-100600200 SR-80iDAB STEREO COMPACT RADIO OWNER’S MANUAL...
- Page 2 10) Protect the power cord from being walked on or pinched particularly at plugs, convenience receptacles, and the point where they exit from the apparatus. 11) Only use attachments/accessories specified by the CAUTION: TO REDUCE THE RISK OF ELECTRIC SHOCK, DO NOT REMOVE COVER (OR BACK).
- Page 3 TO EXPOSE THE ELECTRONICS. NO USER SERVICEABLE PARTS ARE WITHIN! < IF YOU ARE EXPERIENCING PROBLEMS WITH THIS PRODUCT, CONTACT TEAC FOR A SERVICE REFERRAL. DO NOT USE THE PRODUCT UNTIL IT HAS BEEN REPAIRED. MPEG Layer-3 audio coding technology licensed from Fraunhofer IIS and Thomson.
-
Page 4: Table Of Contents
Contents Thank you for choosing TEAC. Read this manual carefully to get the best performance from this unit. Before Using the Unit ........5 Connections . -
Page 5: Before Using The Unit
Before Using the Unit What’s in the box CAUTION Confirm the supplied standard accessories. < The voltage supplied to the unit should match the Remote control unit (RC-1274) x 1 voltage as printed on the AC adapter. If you are in any doubt regarding this matter, consult an electrician. -
Page 6: Connections
Connections After all connections are complete, connect the power cord’s plug to the AC wall socket. < Read the instructions of each device that you intend to use with this unit. < Be sure to connect each plug securely. To avoid hum and noise, do not bundle the connection cords. Back VIDEO IN... - Page 7 USB port AUDIO jacks Connect an external USB flash memory to this port. Analog 2-channel audio signal is input from these jacks. Connect a portable audio player using the supplied RCA pin-stereo mini plug cable. VIDEO OUT jack Make sure to connect: This terminal outputs video signal from an iPod/ White plug e White jack (L: left channel) iPhone connected to the dock of the SR-80iDAB.
-
Page 8: Remote Control Unit
Remote Control Unit The provided remote control unit allows the unit to be Battery Precautions operated from a distance. Misuse of batteries could cause them to rupture or leak When operating the remote control unit, point it towards leading to fire, injury or the staining of nearby things. Please the remote sensor on the front panel of the unit. -
Page 9: Identifying The Parts (Main Unit)
Identifying the Parts (Main Unit) Standby/On ( ¤ FUNCTION Press this button to turn the unit on and put it into Press this button to select a source. standby. VOLUME ( – / + ) ECO POWER mode Press these buttons to adjust the volume level. To save energy, the unit turns to the ECO POWER mode in the following cases: iPod/iPhone dock... -
Page 10: Identifying The Parts (Remote Control Unit)
Identifying the Parts (Remote Control Unit) a STANDBY/ON ( ¤ Press this button to turn the unit on and put it into standby. ECO POWER mode To save energy, the unit turns to the ECO POWER mode in the following cases: <... - Page 11 n BAND f AUTO SCAN/Repeat ( ¼ When the source is “iPod” or “USB”, press this button to Press this button to select “DAB” or “FM”. change the repeat setting. FM MODE When the source is “DAB” press this button for more When the source is “FM”, press this button to select than 2 seconds to preset stations automatically.
-
Page 12: Setting The Clock
Setting the Clock Set the clock when you connect the power cord into the Repeat step to set “minute”, “year”, “month” wall socket and turn on the unit for the first time. and “day”. After “day” is set, the clock starts from 00 seconds. If the unit is on, press the STANDBY/ON (¤... -
Page 13: Basic Operation
Basic Operation (1) This chapter describes the basic operation which is Play the source, and adjust the volume using available in every sound source. the VOLUME ( + / – ) buttons. Press the Standby/On (¤ ) button to turn the unit on. -
Page 14: Ipod/Iphone
Basic Operation (2) iPod/iPhone Tone Control iPod/iPhone compatibility You can change the bass and treble sound between “–4” The following iPod/iPhone models can be connected to to “+4”. and used with this unit: iPhone 4 iPhone 3GS Press the BASS or TREBLE button. iPhone 3G iPhone iPod touch (1st, 2nd and 3rd generation) -
Page 15: Listening To An Ipod/Iphone
Listening to an iPod/iPhone (1) Stopping playback temporarily Press the FUNCTION button repeatedly to (Pause mode) select “iPod”. Press the Play/Pause (y/9 ) button during playback. Connect an iPod/iPhone to the dock. Playback stops at the current position. To resume playback, press the Play/Pause (y/9) button again. - Page 16 Listening to an iPod/iPhone (2) Activating the repeat mode Returning to the previous iPod/iPhone menu Press the Repeat ( ) button to change the repeat the MENU button. Press mode. Each time the Repeat ( ) button is pressed, the repeat This button has the same functions as its iPod setting of iPod/iPhone is changed as follows: counterpart.
-
Page 17: Usb Flash Memory
USB Flash Memory MP3/WMA This unit can play MP3/WMA files recorded on a USB flash CAUTION memory. Refer the instruction manual of the software Never turn the unit off or disconnect a USB flash when making an MP3 or a WMA file using a PC. memory when it is being accessed. -
Page 18: Listening To A Usb Flash Memory
Listening to a USB Flash Memory (1) Do not use a high-capacity USB hard discs. Only Display during playback USB flash memory can be used. Example: File number File type Press the FUNCTION button repeatedly to select “USB”. Folder number Elapsed time of the current file Display when playback is stopped <... - Page 19 Skipping to the next or previous file Displaying MP3 information During playback, press the Skip (.//) button During playback of an MP3 file, press the DISPLAY repeatedly until you find the desired file. button. The information about the current file is The selected file will be played from the beginning.
- Page 20 Listening to a USB Flash Memory (2) Activating the repeat mode Activating the random mode Press the Repeat ( ) button to change the repeat Press the Shuffle ( ) button to turn the random mode. mode on and off. Each time the Repeat ( ) button is pressed, the repeat setting is changed as follows:...
-
Page 21: Usb Programmed Playback
USB Programmed Playback (1) Up to 32 files can be programmed in the desired order. Press the FUNCTION button repeatedly to select “USB”. Press the MEMORY button again. Press the MEMORY button when playback stops. The selected file is programmed. <... - Page 22 USB Programmed Playback (2) Overwriting part of the program Select the file you want to add using the Skip ( . / / ) but tons, and then press the MEMORY button. When playback is stopped, press the MEMORY button to enter programming mode. Press the MEMORY button again.
- Page 23 Select the folder that contains the file you want Press the Skip ( . / / ) buttons repeatedly to to add using the SCROLL ( j / k ) buttons, and display programme order. then press the MEMORY button. The folder/file number and program number will be shown one by one.
-
Page 24: Listening To The Dab Radio
Listening to the DAB Radio When the unit is switched to DAB mode for the first Select the station you want to listen to using time, the automatic tuning process will start and create a the TUNIING ( . / / ) buttons. channel list. -
Page 25: Setting The Dab Display
Setting the DAB Display (1) You can choose the type of information displayed in the second line of the display while listening to DAB. The Dynamic Label Segment (DLS) is a scrolling text label supplied by the radio station. It may be Each time the INFO button is pressed the information about music titles or details regarding the information changes as follows. -
Page 26: Using The Dab Menu
Setting the DAB Display (2) Using the DAB Menu (1) In DAB mode, use the DAB menu to access various Bitrate functions. The bitrate and sound mode of the broadcast currently being received is displayed. In DAB mode, press the DISPLAY button. Signal error rate This displays the digital bit error rate (0-100) of the currently tuned channel. - Page 27 Press the SELECT button. Press the SELECT button to cancel manual tune and resume normal reception. Select the station you want to listen to using the TUNING buttons (.//). Full scan(Auto scan) The unit will scan the DAB bands between 5A to 13F and add the channels found to the channel list.
- Page 28 Using the DAB Menu (2) Select the desired level of DRC using the TUNING buttons (.//) and then press the Use this option to set the Dynamic Range Control (DRC) SELECT button. value to be applied to received broadcasts. DRC is used to reduce the range between high and low volumes of audio and is sometimes applied at the broadcast source.
-
Page 29: Listening To The Fm Radio
Listening to the FM Radio FM Mode Press the FUNCTION button repeatedly to select “FM”. When the source is “FM”, pressing the FM MODE < You can also select “FM” by pressing the BAND button button alternates between stereo mode and mono once or twice. -
Page 30: Rds (Radio Data System)
RDS (Radio Data System) The Radio Data System (RDS) is a broadcasting service that PTY (Programme Type) allows stations to send additional information along with When you select PTY, the programme type will be the regular radio programme signal. displayed. If there is no PTY data, “NO PTY”... -
Page 31: Preset Tuning
Preset Tuning You can store up to 30 DAB and 30 FM stations. Press the MEMORY button for longer than 2 seconds. Saving presets manually Tune in to the station you want to store (see previous page). The tuned station is stored in the selected preset number. -
Page 32: Wake Up Timer
Listening to an External Source Wake Up Timer See pages 6 - 7 “Connections”. The unit can be programmed to turn on and standby at a specified time. You can set the unit to play an iPod/iPhone, DAB/FM radio Connect a portable audio player to the AUDIO or a USB flash memory. - Page 33 Using the snooze function Repeat step to set “on time (minute)”, “off time (hour)”, and “off time (minute)”. The sound source blinks. Press the Skip ( . / / ) buttons to select a source (“iPod”, “DAB”, “FM” or “USB”), and then press the ALARM 1 button.
-
Page 34: Sleep Timer
If you a have problem with your system, read this page and after a specified amount of time. try to solve the problem yourself before calling your dealer or a TEAC service Center. General No power e Check the connection to the AC power supply. Check whether or not the AC source is a switched socket. - Page 35 USB Player FM Radio Will not play. Cannot listen to any station, or signal is too weak. e Confirm that there are MP3/WMA files on the USB e Tune in the station properly. e Reposition the DAB/FM antenna for the best reception flash memory.
-
Page 36: Specifications
Specifications Tuner Section Standard Accessories Remote control unit (RC-1274) x 1 FM Frequency Range ... 87.5 MHz to 108.0 MHz Battery (CR2025) for the remote control unit x 1 DAB Frequency Range ....Band III: 5A to 13F AC adapter (PS-M1628) x 1 (174.928 MHz to 239.200 MHz) Power cord set for the AC adapter x 1... - Page 40 7733 Telegraph Road, Montebello, California 90640 U.S.A. Phone: (323) 726-0303 TEAC CANADA LTD. 5939 Wallace Street, Mississauga, Ontario L4Z 1Z8, Canada Phone: (905) 890-8008 TEAC MEXICO, S.A. DE C.V. Río Churubusco 364, Colonia Del Carmen, Delegación Coyoacàn, CP 04100, México DF, México Phone: (5255)5010-6000 TEAC UK LTD.
Need help?
Do you have a question about the SR80iDABp and is the answer not in the manual?
Questions and answers