Table of Contents
Advertisement
Quick Links
Advertisement
Table of Contents

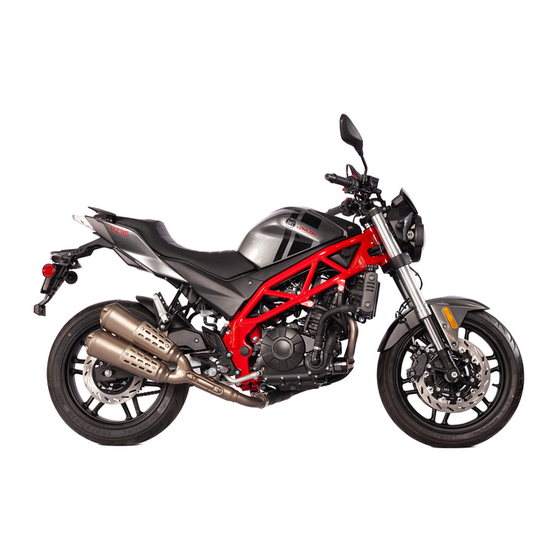
Related Manuals for CSC RZ3S


Summary of Contents for CSC RZ3S
- Page 1 RZ3S Owner’s Manual https://www.motomanuals.net/...
- Page 2 Thank you for purchasing this CSC RZ3S motorcycle. The RZ3S is a great motorcycle and we are proud of it. The RZ3S is easy to maintain, it’s reliable, and it’s fun. You have made a wise purchase decision. I want you to know that we value the trust and confidence you have in CSC.
-
Page 3: Table Of Contents
Contents Caution and Warning Symbols ....................4 Section 1: Owner’s Manual ......................5 VIN and Engine Numbers ......................5 Motorcycle Components ......................6 Ignition Lock ..........................9 Instruments ..........................10 Left Handlebar Controls ......................11 Right Handlebar Controls ......................12 Fuel Tank ........................... - Page 4 Component Cleaning ......................... 36 Parts Inspection ......................... 37 Maintenance Adjustments ......................37 Recommended Tools ......................... 38 Adjustment Specifications ......................39 Maintenance Schedule ......................40 Cleaning Your Motorcycle ......................41 Checking Your Oil ........................42 Changing Your Oil ........................43 Changing Your Oil Filter ......................44 Air Cleaner Maintenance ......................
-
Page 5: Caution And Warning Symbols
Owner’s Manual are based on the latest data available at publication. We reserve the right to modify this Manual at any time without prior notice. Please purchase parts and consumables for your motorcycle only from CSC Motorcycles. You can reach us at www.CSCMotorcycles.com... -
Page 6: Section 1: Owner's Manual
Section 1: Owner’s Manual VIN and Engine Numbers VIN and engine numbers are located as shown below: The VIN is printed on the The vehicle nameplate is The engine number is on right side of the frame. attached to the right side the upper left side of the of the frame. -
Page 7: Motorcycle Components
Motorcycle Components 1. Rearview Mirrors 5. Ignition Lock 2. Left Handgrip 6. Kill Switch and Starter 3. Turn Signals, Horn, Button Emergency Flashers 7. Throttle 4. Instrument Pod 8. Fuel Cap and Lock https://www.motomanuals.net/... - Page 8 Motorcycle Components (continued) 1. Headlight 5. Gearshift 2. Front Suspension 6. Left Front Footrest 3. Seat 7. Left Rear Footrest 4. Seat Lock https://www.motomanuals.net/...
- Page 9 Motorcycle Components (continued) 1. Rear Wheel 4. Right Front Footrest 2. Muffler 5. Rear Brake Lever 3. Right Rear Footrest 6. Front Wheel https://www.motomanuals.net/...
-
Page 10: Ignition Lock
Ignition Lock Position 1: Engine run. Turn the key to this position and press the start button to start the motorcycle. Position 2: Engine off. Turn the key to this position to turn off the motorcycle. Position 3: Motorcycle fork locked. Turn the forks all the way to the left and push down on Caution! Park the motorcycle in a safe place and lock... -
Page 11: Instruments
Instruments Item 1 is the LCD reset button. Press it to cycle between the tripmeter and the odometer. Holding this down for several seconds in the trip mode will reset the trip meter to 0.0. To switch between English and metric units, turn off the ignition, hold the button down, turn on the ignition with button depressed for 5 seconds. -
Page 12: Left Handlebar Controls
Left Handlebar Controls Item 1 is the high beam flash switch. Item 2 is the high beam/low beam control switch. Item 3 is the horn switch. Item 4 is the turn signal switch. The turn signals are not self-cancelling; you should press this switch after making a turn. -
Page 13: Right Handlebar Controls
Right Handlebar Controls Item 1 is the kill switch. Use it to kill the engine in an emergency. Caution! Do not use the kill switch to routinely turn off the engine. Use the ignition key instead. Item 2 is the headlight switch. Use it to turn the headlights on. -
Page 14: Fuel Tank
Fuel Tank Warning! Turn off the engine when refilling. Caution! Do not use fuel with ethanol exceeding 15%. Caution! Wipe up any fuel that spills outside the fuel tank. Item 1 is the fuel tank lock. It uses the motorcycle’s ignition key. -
Page 15: Motorcycle Controls
Motorcycle Controls Item 1 is the front brake lever. Its stroke is 10 to 20 mm. Item 2 is the rear brake lever. Its stroke is 20 to 30mm. Warning! Check your motorcycle’s front and rear brake operation prior to every ride. Warning! Service the front and rear brakes at the intervals... - Page 16 Motorcycle Controls (continued) Item 3 is the starter button. Item 4 is the gear shift lever. Depress it to downshift while actuating the clutch. Raise it to upshift while actuating the clutch. Neutral is between first and second gear. Caution! Do not attempt to shift the motorcycle without using the clutch.
-
Page 17: Tool Kit
Tool Kit Item 6 is the motorcycle tool kit. It includes the tools shown for simple motorcycle maintenance https://www.motomanuals.net/... -
Page 18: Motorcycle Load Limits
Motorcycle Load Limits The motorcycle is designed to carry the rider and one passenger. You should never exceed a total load on the motorcycle in excess of 330 lbs. Warning! Do not exceed a combined load of 330 lbs. Warning! Do not load the motorcycle asymmetrically;... -
Page 19: Break-In Procedure
Caution! Never use any oils intended for automotive use, or any oil that contains friction reducing additives (use of these oils will induce clutch slippage not covered by the CSC warranty). Caution! Use only non-synthetic oils during the first 1000 miles of use. After that, you may wish to change to synthetic motorcycle oil. -
Page 20: Efi System
EFI System The motorcycle is fuel injected. The fuel injection system includes the ECU, the nozzle, the throttle, the intake sensor, the pressure sensor, the engine temperature sensor, the ignition coil, the crankshaft position sensor, the fuel pump, and the O2 sensor. - Page 21 EFI Schematic https://www.motomanuals.net/...
- Page 22 EFI System (continued) https://www.motomanuals.net/...
- Page 23 EFI System (continued) https://www.motomanuals.net/...
- Page 24 EFI System (continued) Warning! The fuel system is pressurized. When breaking fuel connections, use a cloth to prevent fuel spray. Eliminate all ignition sources. Caution! Do not attempt to maintain the EFI system with the ignition on. Caution! Lubricate EFI components when installing to prevent seal damage. Caution! Do not apply additional electrical energy to any EFI component.
-
Page 25: General Motorcycle Safety Guidance
General Motorcycle Safety Guidance Warning! Do not attempt to ride this motorcycle on public roads if you do not • have a motorcycle license. Warning! Do not attempt to ride this motorcycle if you do not know how to • ride a motorcycle. - Page 26 Warning! Replace worn tires promptly. • Warning! • Never attempt to lubricate the chain by running the engine, putting the motorcycle in gear, and lifting the rear of the motorcycle. Lubricate the chain with the engine off. Warning! Do not attempt to reach under the tank to open or close the choke •...
-
Page 27: Inspections Before Riding
Inspections Before Riding Before riding your motorcycle, you should check the following: • Both tires are appropriately inflated. Neither tire has nails nor other foreign objects embedded in the tread or • the sidewall. • The fuel tank contains adequate fuel. •... - Page 28 • The front and rear brakes operate. • The forks turn freely from side to side. • The rear-view mirrors are adjusted appropriately. • The engine kill switch is in the RUN position. • The chain has appropriate slack. • Major threaded fasteners are tight.
-
Page 29: Starting Your Motorcycle
Starting Your Motorcycle Turn the ignition lock to the run position, as shown in the photo to the left. Wait until you hear the fuel pump pressurize the fuel system. Hold the front brake lever in (denoted by Item 2 in the photo to the left). https://www.motomanuals.net/... - Page 30 Press the starter button, shown as Item 3 in the photo to the left. After the engine starts, allow it to warm up at idle for approximately 3 minutes. Caution! Do not hold the starter button on for more than 5 seconds. Caution! Do not race the engine while it is warming.
-
Page 31: Riding Your Motorcycle
Riding Your Motorcycle Warning! Wear all required safety gear prior to riding the motorcycle. After putting on all required safety gear and allowing the engine to warm, straddle the motorcycle, lift it and retract the stand, and pull in the clutch lever (Item 1 in the photo to the left). - Page 32 • As the motorcycle accelerates, pull in the clutch, pull up on the gearshift lever, and engage second gear. Repeat the above process to engage third, fourth, and fifth gear. When you need to stop, allow the throttle to close and apply both the front and •...
-
Page 33: Safe Riding
when the engine is not running. This will run down the battery. Deploy the sidestand and lean the motorcycle to the left. Make sure the • sidestand is fully forward prior to leaning the motorcycle to the left. Caution! Do not park the motorcycle with the front end angled downward; it could roll forward (off the sidestand) and fall. - Page 34 • Never race another car or motorcycle on a public road. • Never exceed the speed limit. In conditions of limited visibility, drive below the speed limit. Never drive at a • speed such that you cannot stop within the limits of your visibility. •...
- Page 35 • Never attempt to beat a train through an intersection. • Recognize that as your speed increases, so does your stopping distance, and ride accordingly. • Never ride your brakes constantly, as they will overheat and lose stopping power. • Never ride the clutch constantly, as it will wear out.
-
Page 36: Section 2: Maintenance
When you maintain or repair the motorcycle, please use original components and parts, accessories, lubricating oil and other materials that are made or recognized by CSC Motorcycles. Caution! If you use any parts or components other than those recommended by CSC, it may adversely affect the performance, reliability, stability, or warranty of your motorcycle. -
Page 37: Component Cleaning
Component Cleaning After parts are disassembled, they may need to be cleaned. Cleaning methods vary according to the characteristics of the parts. • To remove oil or grease contamination, CSC recommends using Simple Green or other similar degreasing agents. https://www.motomanuals.net/... -
Page 38: Parts Inspection
Parts should be inspected after they are cleaned. The purpose of inspection is to check if the parts need to be repaired or replaced. Maintenance Adjustments The RZ3S motorcycle requires adjustments in the following areas: • The clutch must be adjusted according to the maintenance instructions included in this manual. -
Page 39: Recommended Tools
Tire pressure should be maintained as specified in this manual. • Recommended Tools The RZ3S motorcycle includes a basic tool kit. These tools are suitable for emergency repairs only. CSC sells custom tool kits with professional grade tools; please contact us at 909 445 0900 to order tools. -
Page 40: Adjustment Specifications
Adjustment Specifications Item Adjustment Limits Clutch lever free play (at tip) ¼ to ½ inch Throttle free travel 2-5 degrees Drive chain 3/5 inch Valve gap (at TDC) 0.04 to 0.08 mm Tire pressure (front/rear) 36 psi https://www.motomanuals.net/... -
Page 41: Maintenance Schedule
Maintenance Schedule https://www.motomanuals.net/... -
Page 42: Cleaning Your Motorcycle
When riding the motorcycle after cleaning it, actuate the brakes to make sure they have not been degraded as a result of cleaning the motorcycle. CSC stocks numerous cleaning and lubrication products; please call us at 909 445 0900 to order these items. -
Page 43: Checking Your Oil
Checking Your Oil When the engine is warm, hold the motorcycle in the vertical position (off the sidestand). Oil should be visible in the Item 1 viewport. You should check the oil before every ride. Warning! Take care not to let the motorcycle fall when you are holding it in the vertical position and... -
Page 44: Changing Your Oil
Changing Your Oil To change your oil, first warm the engine. Place a suitable oil container beneath the motorcycle. Unscrew the oil drain plug (Item 2 in the photo to the left). Allow the old oil to drain completely into the oil tray. Hold the motorcycle vertically to drain all oil. -
Page 45: Changing Your Oil Filter
Changing Your Oil Filter The oil filter is a screw-on unit as shown as Item 1 in the photo to the left. Unscrew the old filter. Caution! If the engine has been running, the oil filter will be hot. Replace the oil filter every 10,000 km or 250 hours of operation. -
Page 46: Air Cleaner Maintenance
Air Cleaner Maintenance The air cleaner is located under the seat, as shown in the photo to the left. The air filter should be inspected and cleaned or replaced regularly. You can wipe down the exterior portions with a dry cloth. Use compressed air directed opposite normal air flow to blow out the air cleaner. -
Page 47: Spark Plug Maintenance
Spark Plug Maintenance The spark plugs are accessible on the side of the cylinder head. Clean or replace the spark plugs as necessary. Use JH9RC spark plug with a gap of 0.6 to 0.7 mm. Torque the spark plugs to 17.5 Nm. Caution! If the engine has been running, the spark plugs and the engine will be hot. -
Page 48: Throttle Cable Maintenance And Adjustment
Throttle Cable Maintenance and Adjustment The throttle (Item 1 in the photo to the left) should have 2 to 5 degrees of free play in The throttle cable slack can be adjusted with the Item 2 barrel nut and lock shown in the photograph to the left. -
Page 49: Front Brake Inspection
Front Brake Inspection The front brake lever (Item 1) should have a stroke of 10-20mm. The brake fluid reservoir has a viewport (Item 2 in the photo to the left). It shows the brake fluid level. Use only DOT 3 or DOT 4 brake fluid. Warning! Do not mix brake fluid with other fluids. -
Page 50: Rear Brake Inspection
Rear Brake Inspection The rear brake pedal has a stroke of 20 to 30mm. Pedal actuation slack can be adjusted with the Item 1 adjustor shown in the photo to the left. The rear brake pad thickness (Item 2 in the photo to the left) should be no less than 2mm. -
Page 51: Wheel And Tire Inspection
Wheel And Tire Inspection Warning! Wheels and tires should be inspected before each ride. https://www.motomanuals.net/... -
Page 52: Battery Maintenance
Battery Maintenance The battery is located beneath the seat. We recommend using a battery tender to keep the battery charged between rides. Please call us at 909 445 0900 if you wish to purchase a battery tender. Warning! If you spill battery acid on yourself, flush immediately with copious amounts of water. -
Page 53: Fuse Replacement
Fuse Replacement The fuse is located in front of the battery. Warning! Never replace the fuse Your motorcycle uses a 20A fuse. with anything but another fuse. Warning! Never replace the fuse with a higher amperage fuse. Caution! If the fuse opens, do not simply replace it. -
Page 54: Motorcycle Horn
Motorcycle Horn The horn is located in front of the engine. If the mounting screw loosens the horn may rattle. If the horn sound weakens, it may be adjusted using the white adjusting nut shown in the photo to the left. If the horn cannot be adjusted, it must be replaced. -
Page 55: Troubleshooting Guidelines
Troubleshooting Guidelines The EFI system should be cleared for troubleshooting by turning the ignition key on for 15 seconds, then turn the key on and off five times at 0.5-second intervals. If the motorcycle does not start after several attempts, to clear away unburnt fuel in the cylinder fully open the throttle and press the start button for 3 to 5 seconds. -
Page 56: Storing Your Motorcycle
Storing Your Motorcycle For storage longer than 60 days, store the motorcycle as outlined below: • Drain the fuel from the fuel tank and the fuel lines. Close the fuel tank cap. Remove the spark plugs and add 5cc of motor oil into each cylinder. Reinstall •... - Page 57 Motorcycle Specifications https://www.motomanuals.net/...
- Page 58 Wiring Schematic https://www.motomanuals.net/...
Need help?
Do you have a question about the RZ3S and is the answer not in the manual?
Questions and answers