Advertisement
Available languages
Available languages
Quick Links
Advertisement

Subscribe to Our Youtube Channel
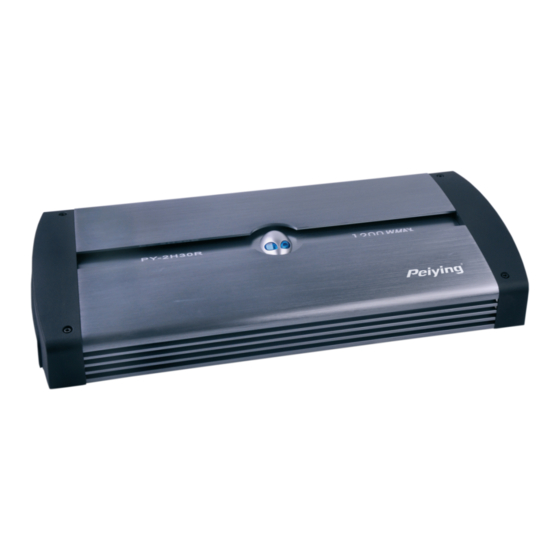
Summary of Contents for Peiying PY-2H30R
- Page 1 OWNER(S) MANUAL CAR POWER AMPLIFIER PY-2H30R...
- Page 2 INSTRUCTIONS FOR FUNCTIONS AND CONTROLS LOW INPUT Left and right channels inputs of the amplifier system. Preamplifier outputs of a source ( head unit,CD player,DAT,etc. ) or of an external electronic crossover must be connected to them. HIGH INPUT High level input terminals. GAIN Knob for volume adjustment.
-
Page 3: Electrical Connection
Connect to remote turn-on lead of Connect to chassis source unit. ground of vehicle* SPECIFICATIONS Model PY-2H30R RMS Power@13.8VDC Power @ 4 Ohms 200W x 2 Power @ 2 Ohms 300W x 2 Bridged Power @ 4 Ohm 500W x 1 Min. - Page 4 YSTEM IRING 2 CHANNEL STEREO CONFIGURATION Connect to remote turn-on lead of source unit. Connect to chassis SPEAKER IMPEDANCE 2~ 4 Ohm ground of vehicle*...
- Page 5 YSTEM IRING BRIDGED MODE CONFIGURATION Connect to remote turn-on lead of source unit. Connect to chassis SPEAKER IMPEDANCE 4~8 Ohm ground of vehicle*...
-
Page 6: Troubleshooting
ROUBLESHOOTING Before removing your amplifier ,refer to the list below and follow the suggested procedures. Always test the speakers and their wires first. AMPLIFIER WILL NOT POWER UP. Check for good ground connection. Check that remote DC terminal has at least 7V DC. Check that there is battery power on the + terminal. - Page 7 INSTRUKCJA OBS£UGI WZMACNIACZ SAMOCHODOWY PY-2H30R...
-
Page 8: Opis Funkcji
OPIS FUNKCJI LOW INPUT Gniazda wejœciowe dla lewego i prawego kana³u. W to miejsce pod³¹czamy sygna³ wyjœciowy z przedwzmacniacza (radio, odtwarzacz CD, DAT, etc.) lub sygna³ pochodz¹cy z innego Ÿród³a. HIGH INPUT Gniazda wejœciowe wysokiego poziomu dla lewego i prawego kana³u. GAIN Pokrêt³o regulacji g³oœnoœci. - Page 9 POD£¥CZENIE ZASILANIA +12V Pod³¹cz gniazdo +12V z dodatnim biegunem w akumulatorze. Gniazdo do pod³¹czenia zdalnego sterowania, które bêdzie sterowa³o w³¹czaniem i wy³¹czaniem wzmacniacza np. radio z wyjœciem REMOTE. Napiêcie sygna³u steruj¹cego musi zawieraæ siê w przedziale od 7 do 15VDC. Uziemienie.
- Page 10 POD£¥CZENIE DWU KANA£OWE Impedancja g³oœników 2~ 4 Ohm Impedancja g³oœników 2~ 4 Ohm...
- Page 11 POD£¥CZENIE POMOSTOWE Impedancja g³oœników 4~ 8 Ohm...
- Page 12 RZWI¥ZYWANIE PROBLEMÓW Przeczytaj przed pod³¹czeniem, postêpuj zgodnie z procedurami. Zawsze sprawdzaj najpierw g³oœniki i przewody Nie mo¿na w³¹czyæ wzmacniacza. SprawdŸ czy dobrze pod³¹czy³eœ uziemienie GND. SprawdŸ czy sygna³ steruj¹cy wzmacniaczem ma odpowiednie napiêcie w granicach 7-15 V DV. SprawdŸ czy dobrze pod³¹czy³eœ przewód zasilaj¹cy. SprawdŸ...
- Page 13 MANUAL DE UTILIZARE PY-2H30R...
- Page 14 FUNCTII SI COMENZI INTRARE Canalele de intrare Stanga (S) si Dreapta (D) ale sistemului de amplificare. Aici se conecteaza iesirile pre-amplificate ale unei surse (CD player, DAT, etc.). INTRARE DE SEMNAL MARE Terminale de intrare pentru semnal de nivel ridicat. CASTIG Buton pentru reglarea volumului.
- Page 15 CONEXIUNEA ELECTRICA +12V Alimentare +12 V DC (de la bateria masinii). Terminalul care controleaza pornirea amplificatorului. Tensiunea aplicata trebuie sa fie intre +7 si +15V DC. Terminal de masa. Conectati la sasiul caroseriei. Pastrati lungimea cablului de de conectare la masa cat mai scurt posibil. Conectati la + 12V, printr-o siguranta adecvata.
- Page 16 CONEXIUNI POSIBILE ALE SISTEMULUI CONEXIUNE STEREO Conectati la alimentarea sursei de semnal Conectati la sasiul masinii Impedanta difuzor 2 ~ 4 Ohmi...
- Page 17 CONEXIUNE IN PUNTE Conectati la alimentarea sursei de semnal Conectati la sasiul masinii Impedanta difuzor 4 ~ 8 Ohmi...
- Page 18 DEPANARE In cazul aparitiei unei anomalii de functionare, consultati lista de mai jos si urmati procedurile sugerate. Testati intotdeauna difuzoarele si cablurile acestora. AMPLIFICATORUL NU PORNESTE Verificati pentru o buna conectare la masa. Verificati ca terminalul de alimentare +12 V DC sa aiba cel putin 7V DC. Verificati ca terminalul + al bateriei sa aiba suficienta tensiune.
- Page 19 RECYCLING Correct Disposal of This Product (Waste Electrical & Electronic Equipment) (Applicable in the European Union and othor European countries with separate collection systems) This marking shown on the product or Its literature, indicates that It should not be disposed with other household wastes at the end of its working life.


Need help?
Do you have a question about the PY-2H30R and is the answer not in the manual?
Questions and answers