Table of Contents
Advertisement
Quick Links
For a Spanish version of this
manual, visit our Website at
GEAppliances.com.
Para consultar una version
en español de este manual de
instrucciones, visite nuestro sitio
de internet GEAppliances.com.
In Canada contact us at:
www.GEAppliances.ca
GEAppliances.com
. . . . . . . . .
Operating Instructions
Clock and Timer . . . . . . . . . . . . . . . . . . . 17
Control Lock Out . . . . . . . . . . . . . . . . . . 18
Energy Saver Mode . . . . . . . . . . . . . . . 18
Oven . . . . . . . . . . . . . . . . . . . . . . . . . . 11-20
Controls . . . . . . . . . . . . . . . . . . . . . . . . . . 11
Power Outage . . . . . . . . . . . . . . . . . . . 12
Aluminum Foil . . . . . . . . . . . . . . . . . . . 13
Broiling Guide . . . . . . . . . . . . . . . . . . . 14
Clock and Timer . . . . . . . . . . . . . 15-16
Adjust the Oven Thermostat . . . . . 17
Special Features . . . . . . . . . . . . . . . . . 17
Sabbath Feature . . . . . . . . . . . . . . . . . 18
Self-Cleaning. . . . . . . . . . . . . . . . . 19, 20
Surface Units . . . . . . . . . . . . . . . . . . . . . .7,8
Glass Cooktop . . . . . . . . . . . . . . . . . . 9,10
Control Knobs . . . . . . . . . . . . . . . . . . . . 21
Coil Surface Units . . . . . . . . . . . . . . . . . 22
Drip Pans . . . . . . . . . . . . . . . . . . . . . . . . 22
Lift-Up Cooktop . . . . . . . . . . . . . . . . . . . 22
Standard-Clean Oven Interior . . . . 23
Oven Vent . . . . . . . . . . . . . . . . . . . . . . . . 23
Porcelain Oven Interior . . . . . . . . . . . 23
Lift-Off Oven Door . . . . . . . . . . . . . . . . 24
Oven Heating Elements . . . . . . . . . . . 24
Oven Racks . . . . . . . . . . . . . . . . . . . . . . 24
Storage Drawer Removal . . . . . . . . 24
Light . . . . . . . . . . . . . . . . . . . . . . . . . . . . . 25
Stainless Steel Handles . . . . . . . . . . 25
Glass Cooktop . . . . . . . . . . . . . . . . 26, 27
. . . . . 28-31
. . . . . . . . . . . . . . . . . . . 32
Consumer Support
Consumer Support . . . . . . Back Cover
Warranty . . . . . . . . . . . . . . . . . . . . . . . . . 35
Write the model and serial
numbers here:
Model # ________________
Serial # ________________
You can find them on a label
behind the drawer or behind the
lower oven door on the front of
the range frame.
2-6
Recycled Paper
49-88056-1 07-13 GE
Owner's Manual
Printed on
Advertisement
Table of Contents

Subscribe to Our Youtube Channel
Related Manuals for GE JBS10 Series


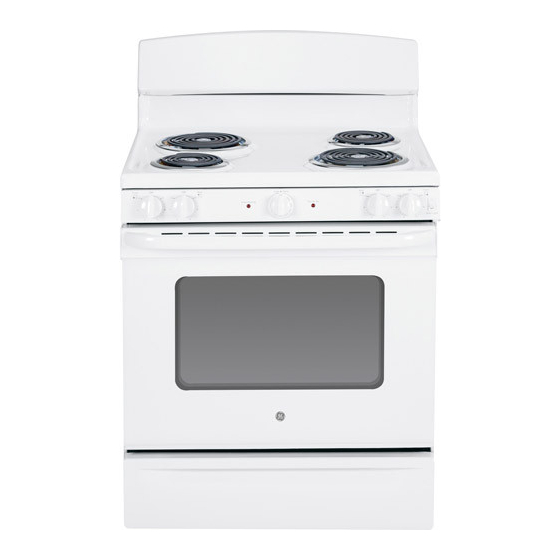
Summary of Contents for GE JBS10 Series
-
Page 1: Table Of Contents
Printed on You can find them on a label de internet GEAppliances.com. Recycled Paper behind the drawer or behind the In Canada contact us at: lower oven door on the front of 49-88056-1 07-13 GE www.GEAppliances.ca the range frame. - Page 2 IMPORTANT SAFETY INFORMATION. READ ALL INSTRUCTIONS BEFORE USING. WARNING Read all safety instructions before using the product. Failure to follow these instructions may result in fire, electric shock, serious injury or death. ANTI-TIP DEVICE WARNING To reduce the risk of tipping the range, the range must be secured by a properly installed anti-tip Tip-Over Hazard...
- Page 3 GEAppliances.com WARNING GENERAL SAFETY INSTRUCTIONS Use this appliance for its intended purpose as described Do not touch the surface units, the heating elements or the interior surface of the oven. These surfaces may in this Owner’s Manual. be hot enough to burn even though they are dark in Be sure your appliance is properly installed and color.
- Page 4 IMPORTANT SAFETY INFORMATION. READ ALL INSTRUCTIONS BEFORE USING. WARNING IN THE EVENT OF A FIRE, TAKE THE FOLLOWING STEPS TO PREVENT THE FIRE FROM SPREADING: Do not use water on grease fires. Never pick up a If there is a fire in the oven during self-clean, turn the flaming pan.
-
Page 5: Safety Instructions
GEAppliances.com WARNING RADIANT COOKTOP SAFETY INSTRUCTIONS (Some models) Use care when touching the cooktop. The glass surface Heat from the cooktop or oven vent after it is turned off of the cooktop will retain heat after the controls have may cause them to ignite also. been turned off. - Page 6 IMPORTANT SAFETY INFORMATION. READ ALL INSTRUCTIONS BEFORE USING. WARNING SELF-CLEANING OVEN SAFETY INSTRUCTIONS (Some models) The self-cleaning feature operates the oven at temperatures high enough to burn away food soils in the oven. Follow these instructions for safe operation. Do not touch oven surfaces during self-clean operation. If the self-cleaning mode malfunctions, turn the oven off Keep children away from the oven during self-cleaning.
- Page 7 Using the surface units. (on some models) GEAppliances.com FIRE HAZARD: Never leave the range unattended with the cooktop on medium or high WARNING settings. Keep flammable items away from the cooktop. Turn off all controls when done cooking. Failure to follow these instructions can result in fire, serious injury or death.
- Page 8 Using the surface units. Throughout this manual, features and appearance may vary from your model. Home Canning Tips Be sure the canner is centered over the surface Use recipes and procedures from reputable unit. sources. These are available from manufacturers such as Ball and Kerr and the ®...
- Page 9 GEAppliances.com The following information will help you choose cookware which will give good performance on glass cooktops. For Models With a Radiant Glass Cooktop The radiant cooktop features heating units beneath a smooth glass surface. NOTE: A slight odor is normal when a new cooktop is used for the first time.
- Page 10 Selecting types of cookware for radiant glass cooktop models. The following information will help you choose cookware which will give good performance on glass cooktops. Stainless Steel: Porcelain Enamel on Cast Iron: Recommended Recommended if bottom of pan is coated Aluminum: Porcelain Enamel on Steel: Heavy weight recommended...
- Page 11 Using the oven control, clock and timer features and settings. GEAppliances.com Throughout this manual, features and appearance may vary from your model. Bake/Temp Recall Pad Automatic Oven Light Touch this pad to select the bake function. See the This lights anytime the oven has been How to Set the Oven for Baking section.
- Page 12 Using the oven control, clock and timer features and settings. Throughout this manual, features and appearance may vary from your model. Flashing Display - Power Outage If a flashing time is in the display, you have experienced If your oven was set for a timed oven operation and a a power failure.
- Page 13 Using the oven. GEAppliances.com How to Set the Oven for Baking To change the oven temperature during BAKE cycle, Touch the Bake pad. touch the Bake pad and then the + or – pads to get Touch the + or – pads until the desired the new temperature.
- Page 14 Using the oven. How to Set the Oven for Broiling Door Positioning During Broiling: Use Lo Broil to cook foods such as poultry or thick cuts of meat thoroughly without over browning them. Place the food on a broiler grid in a broiler pan designed for broiling.
-
Page 15: Clock And Timer
Using the clock and timer. GEAppliances.com Not all features are on all models. Clock (on some models) The clock on your range is powered by the range itself. No batteries are necessary. The time is displayed with no timer or audible alarm. To set the clock, turn the stem left or right. - Page 16 Using the clock and timer. To Set the Timer The timer does not control oven operations. If you make a mistake, touch the Kitchen Timer The maximum setting on the timer is 9 hours On/Off pad and begin again. and 59 minutes. Touch the Start/On pad.
-
Page 17: Control Lockout
Special features of your oven control. GEAppliances.com Energy Saver Mode Press and hold the + and – pads at the same (on some models) time to enable or disable this feature. This will To save energy, you can turn off the time of turn the display on or off. - Page 18 Using the Sabbath feature. (on some models) (Designed for use on the Jewish Sabbath and Holidays) The Sabbath feature can be used for baking only. It cannot be used for broiling, self-cleaning, convection baking, steam cleaning or delay start cooking. NOTE: The oven light comes on automatically (on some models) when the door is opened and goes off when the door is closed.
-
Page 19: Self-Cleaning
Using the self-cleaning oven. (on some models) GEAppliances.com FIRE HAZARD: Wipe grease and heavy soil from oven before self-cleaning. Failure to do so CAUTION may result in an oven fire. CAUTION OVEN TEMP If your range has this knob, it has a self-cleaning oven. Follow these instructions. - Page 20 Using the self-cleaning oven. (on some models) To Stop a Self-Clean Cycle Turn knob to off position and wait for self clean light to go off. Wait until the oven has cooled below the locking temperature to unlatch the door. You will not be able to open the door right away unless the oven has cooled below the locking temperature.
- Page 21 Care and cleaning of the range. GEAppliances.com Be sure all controls are off and all surfaces are cool before cleaning any part of the range. If your range is removed for cleaning, servicing or any reason, be WARNING sure the anti-tip device is reengaged properly when the range is replaced.
-
Page 22: Surface Units
Care and cleaning of the range. Be sure the controls are turned to OFF and the surface units are cool before attempting to remove them. Surface Units Surface Drip unit To clean the surface units, turn the control to the To replace a surface unit: highest setting for a minute. - Page 23 Care and cleaning of the range. GEAppliances.com Porcelain Oven Interior (on standard-clean models) With proper care, the porcelain enamel finish on fumes will help loosen the burned-on grease and food. If necessary, you may use an oven cleaner. Follow years. the package directions.
-
Page 24: Lift-Off Oven Door
Care and cleaning of the range. Lift-Off Oven Door The door is very heavy. Be careful when To replace the door: removing and lifting the door. Do not lift door Firmly grasp both sides of the door near by the handle. the top. -
Page 25: Stainless Steel Handles
Care and cleaning of the range. GEAppliances.com SHOCK OR BURN HAZARD: Before replacing oven light bulb, disconnect WARNING the electrical power to the range at the main fuse or circuit breaker panel. Failure to do so may result in electric shock or burn. BURN HAZARD: The glass cover and bulb should be removed when cool. - Page 26 Cleaning the glass cooktop. (on some models) Normal Daily Use Cleaning ONLY use CERAMA BRYTE Ceramic Cooktop ® Shake the cleaning cream well. Apply a Cleaner on the glass cooktop. Other creams few drops of CERAMA BRYTE Ceramic ® may not be as effective. Cooktop Cleaner directly to the cooktop.
- Page 27 Cleaning the glass cooktop. (on some models) GEAppliances.com Metal Marks and Scratches Be careful not to slide pots and pans This should be removed immediately across your cooktop. It will leave metal before heating again or the markings on the cooktop surface. discoloration may be permanent.
-
Page 28: Troubleshooting Tips
Before you call for service… Troubleshooting Tips Save time and money! Review the charts on the following pages first and you may not need to call for service. Problem Possible Causes What To Do Surface units will not Improper cookware •... - Page 29 Before you call for service… GEAppliances.com Troubleshooting Tips Save time and money! Review the charts on the following pages first and you may not need to call for service. Problem Possible Causes What To Do Food does not bake Oven controls improperly set. •...
- Page 30 Before you call for service… Troubleshooting Tips Save time and money! Review the charts on the following pages first and you may not need to call for service. Problem Possible Causes What To Do Storage drawer Rear drawer support is •...
- Page 31 Before you call for service… GEAppliances.com Troubleshooting Tips Save time and money! Review the charts on the following pages first and you may not need to call for service. Problem Possible Causes What To Do “F –” and a number You have a function •...
-
Page 32: Accessories
To place your order, call 800.626.2002 (U.S.), 800.661.1616 (Canada) or mail this form to: In the U.S.: GE Parts, P.O. Box 221027, Memphis, TN 38122-1027. In Canada: GE Parts, 1 Factory Lane, Moncton, N.B. E1C 9M3 _ _ _ _ _ _ _ _ _ _ _ _ _ _ _ _ _ _ _ _ _ _ _ _ _ _ _ _ _ _ _ _ _ _ _ _ _ _ _ _ _ _ _ _ _ _ _ _ _... - Page 33 Notes. GEAppliances.com...
- Page 34 Notes.
- Page 35 GE at the time of service. For the period of one year from the date of the original purchase. GE will provide any part of the range which fails due to a defect in materials or workmanship. During this limited one-year warranty, GE will also provide, free of charge, all labor and in-home service to replace the defective part.
-
Page 36: Consumer Support
Contact Us GEAppliances.com If you are not satisfied with the service you receive from GE, contact us on our Website with all the details including your phone number, or write to: General Manager, Customer Relations...
Need help?
Do you have a question about the JBS10 Series and is the answer not in the manual?
Questions and answers