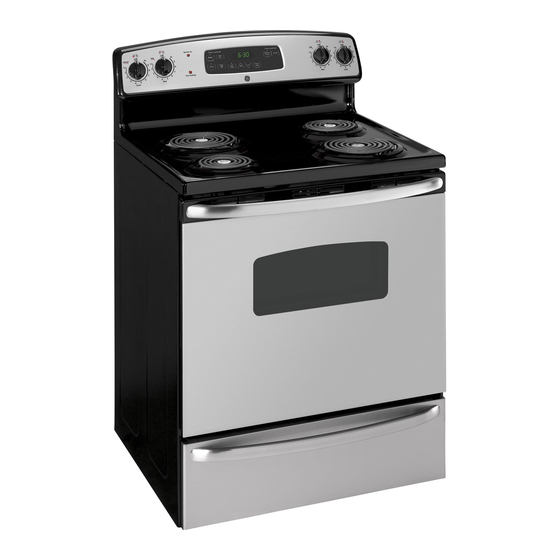
GE JBS27 Owner's Manual And Installation Instructions
Electric coil & radiant ranges
Hide thumbs
Also See for JBS27:
- Use and care manual (80 pages) ,
- Owner's manual (80 pages) ,
- Owner's manual and installation instructions (53 pages)
Table of Contents
Advertisement
Quick Links
www.GEAppliances.com
. . . . . . . . . . 2-6
Operating Instructions
Adjust the Oven
Thermostat . . . . . . . . . . . . . . . . . . .21
Clock and Timer . . . . . . . . . . .15, 16
Oven . . . . . . . . . . . . . . . . . . . . .12-14
Oven Controls . . . . . . . . . . . . .10, 11
Sabbath Feature . . . . . . . . . . . .19, 20
Selecting Types of Cookware . . . . .9
Self-Cleaning . . . . . . . . . . . . . .24, 25
Special Features . . . . . . . . . . . . . . .18
Surface Units . . . . . . . . . . . . . . . . 7, 8
Timed Baking and Roasting . . . . .17
Warming Drawer . . . . . . . . . . . 22, 23
. . . . . . . . 24-33
Glass Cooktop . . . . . . . . . . . . .32, 33
Self-Cleaning Oven . . . . . . . . .24, 25
Anti-Tip Device . . . . . . . . . . . .34, 40
Before You Begin . . . . . . . . . . . . . 34
Electrical Connections . . . . . . .36-39
Leveling . . . . . . . . . . . . . . . . . .40, 41
. . . . . . 42-46
. . . . . . . . . . . . . . . . . . 47
Consumer Support
Consumer Support . . . . .Back Cover
Product Registration . . . . . . . . 49, 50
Warranty . . . . . . . . . . . . . . . . . . . . 51
Write the model and serial
numbers here:
Model # __________________
Serial #____________________
You can find them on a label,
behind the open oven door or
drawer, on the front face.
Owner's Manual and
Installation Instructions
Coil Top and
Radiant Top Models
Standard
Clean Models
JBS03
JBS07
JBS15
JBS27
RB525
RB526
RB536
RB540
183D6379P022
49-88015 04-04 JR
Self-Clean
Models
JBP21
JBP60
RB740
RB757
RB787
RB790
RB800
Advertisement
Table of Contents

Subscribe to Our Youtube Channel
Related Manuals for GE JBS27


Summary of Contents for GE JBS27
-
Page 1: Table Of Contents
RB740 Special Features ....18 JBS27 RB757 Surface Units ....7, 8... -
Page 2: Safety Information
IMPORTANT SAFETY INFORMATION. READ ALL INSTRUCTIONS BEFORE USING. WARNING! For your safety, the information in this manual must be followed to minimize the risk of fire or explosion, electric shock, or to prevent property damage, personal injury, or loss of life. WARNING ANTI-TIP DEVICE All ranges can tip and injury could result. - Page 3 GEAppliances.com COOK MEAT AND POULTRY THOROUGHLY… Cook meat and poultry thoroughly—meat to at least an INTERNAL temperature of 160°F and poultry to at least an INTERNAL temperature of 180°F. Cooking to these temperatures usually protects against foodborne illness. WARNING! SAFETY PRECAUTIONS Never wear loose-fitting or hanging garments Do not touch the surface units, the heating while using the appliance.
- Page 4 IMPORTANT SAFETY INFORMATION. READ ALL INSTRUCTIONS BEFORE USING. OVEN Stand away from the range when opening Pulling out the shelf to the stop-lock is a convenience in lifting heavy foods. It is also the oven door. Hot air or steam which escapes can cause burns to hands, face a precaution against burns from touching hot surfaces of the door or oven walls.
- Page 5 GEAppliances.com WARMING DRAWER (on some models) The purpose of the warming drawer is Do not touch the heating element or the interior to hold hot cooked foods at serving surface of the warming drawer. These surfaces temperature. Always start with hot food; may be hot enough to burn.
- Page 6 IMPORTANT SAFETY INFORMATION. READ ALL INSTRUCTIONS BEFORE USING. WARNING! RADIANT SURFACE UNITS (on some models) Use care when touching the cooktop. The glass surface of the cooktop will retain heat after the controls have been turned off. Avoid scratching the glass cooktop. The Clean the cooktop with caution.
-
Page 7: Surface Units
Using the surface units. GEAppliances.com Throughout this manual, features and appearance may vary from your model. How to Set Push the knob in and turn in either At both OFF and HI the control clicks into direction to the setting you want. position. - Page 8 Using the radiant surface units. (on some models) About the radiant surface units… SURFACE The radiant cooktop features heating units Water stains (mineral deposits) are removable COOKING using the cleaning cream or full-strength white beneath a smooth glass surface. vinegar. NOTE: A slight odor is normal when a new cooktop Use of window cleaner may leave an iridescent is used for the first time.
-
Page 9: Selecting Types Of Cookware
Selecting types of cookware. GEAppliances.com The following information will help you choose cookware which will give good performance on glass cooktops. Stainless Steel: Glass-ceramic: recommended usable, but not recommended Poor performance. May scratch the surface. Aluminum: heavy weight recommended Stoneware: usable, but not recommended Good conductivity. -
Page 10: Oven Controls
Using the oven controls. (on some models) Throughout this manual, features and appearance may vary from your model. Oven Control, Clock and Timer Features and Settings BAKE/TEMP RECALL Pad KITCHEN TIMER ON/OFF or TIMER ON/OFF Pad Touch this pad to select the bake function. Touch this pad to select the timer feature. - Page 11 GEAppliances.com Oven Control, Clock and Timer Features and Settings AUTOMATIC OVEN Light (on some models) Indicator Lights (on some pads) EDIT mode lasts several seconds after the last This lights anytime the oven has been programmed using the COOKING TIME or pad press.
-
Page 12: Oven
Using the oven. Clock and Kitchen Timer (on some models) KITCHEN TIMER ON/OFF Pad Touch this pad to select the timer feature. CLOCK Pad Touch this pad before setting the clock. Display Shows the time of day and the time set for the timer, cook time or start time. SET +/- Pads Appearance may vary. - Page 13 GEAppliances.com Preheating and Pan Placement Preheat the oven if the recipe calls for it. Baking results will be better if baking pans To preheat, set the oven at the correct are centered in the oven as much as temperature. Preheating is necessary for possible.
- Page 14 Using the oven. Broiling Guide The size, weight, thickness, Quantity and/ Shelf* First Side Second Side starting temperature Food or Thickness Position Time (min.) Time (min.) Comments and your preference of Ground Beef 1 lb. (4 patties) 7–10 Space evenly. doneness will affect ″...
-
Page 15: Clock And Timer
Using the clock and timer. (on some models) GEAppliances.com Not all features are on all models. To Set the Clock The clock must be set to the correct time Touch the START/ON pad until the of day for the automatic oven timing time of day shows in the display. - Page 16 Using the clock and timer. (on some models) Not all features are on all models. To Reset the Timer If the display is still showing the time If the remaining time is not in the display remaining, you may change it by touching (clock, delay start or cooking time are in the KITCHEN TIMER ON/OFF or TIMER the display), recall the remaining time by...
-
Page 17: Timed Baking And Roasting
Using the timed baking and roasting features. (on some models) GEAppliances.com Do not lock the oven door with the latch during timed cooking. The latch is used for self-cleaning only. NOTE: Foods that spoil easily—such as milk, eggs, fish, stuffings, poultry and pork—should not be allowed to sit for more than 1 hour before or after cooking. -
Page 18: Special Features
Special features of your oven control. Your new touch pad control has additional features that you may choose to use. The following are the features and how you may activate them. The special feature modes can only be activated while the display is showing the time of day. They remain in the control’s memory until the steps are repeated. -
Page 19: Sabbath Feature
Using the Sabbath Feature. (on some models) (Designed for use on the Jewish Sabbath and Holidays) GEAppliances.com The Sabbath feature can be used for baking/roasting only. It cannot be used for broiling, self-cleaning or Delay Start cooking. NOTE: The oven light comes on automatically (on some models) when the door is opened and goes off when the door is closed. - Page 20 Using the Sabbath Feature. (on some models) (Designed for use on the Jewish Sabbath and Holidays) How to Exit the Sabbath Feature Touch the CLEAR/OFF pad. Tap the CLOCK pad until ON or OFF appears in the display. ON indicates If the oven is cooking, wait for a that the oven will automatically turn random delay period of approximately...
-
Page 21: Thermostat
Adjust the oven thermostat—Easy to do yourself! GEAppliances.com You may find that your new oven cooks differently than the one it replaced. Use your new oven for a few weeks to become more familiar with it. If you still think your new oven is too hot or too cold, you can adjust the thermostat yourself. Do not use thermometers, such as those found in grocery stores, to check the temperature setting of your oven. -
Page 22: Warming Drawer
Using the warming drawer. (on some models) Control Knob (on models equipped with a knob) Warming Drawer Push and turn the control knob to any ON Signal Light desired setting. The ON signal light is located above the NOTE: The warming drawer should not control knob and glows when the knob is in be used during a self-clean cycle. - Page 23 www.GEAppliances.com Rack (on some models) For use in the warming drawer only. Do not use in the oven. Preheat with the rack in place. Using the rack allows for double stacking of items. Temperature Selection Chart To keep several different foods hot, set the control to the food needing the highest setting. Place the items needing the highest setting on the bottom of the drawer and items needing less heat on the rack.
-
Page 24: Self-Cleaning
Using the self-cleaning oven. (on some models) Never force the latch handle. Forcing the handle will damage the door lock mechanism. The oven door must be closed and all controls set correctly for the cycle to work properly. Before a Clean Cycle For the first self-clean cycle, we recommend Do not clean the gasket. - Page 25 GEAppliances.com The oven door must be closed and all controls set correctly for the cycle to work properly. How to Delay the Start of Cleaning You can set the oven control to delay-start the oven, Change the Start Time by touching the + or – pads. The start time will appear in the display.
- Page 26 Care and cleaning of the range. Be sure electrical power is off and all surfaces are cool before cleaning any part of the range. If your range is removed for cleaning, when the range is replaced. Failure servicing or any reason, be sure the to take this precaution could result in anti-tip device is re-engaged properly tipping of the range and cause injury.
- Page 27 GEAppliances.com Oven Heating Elements Do not clean the bake element or the broil element. Any soil will burn off when the elements are heated. To clean the oven floor, gently lift the bake element. Clean with warm soapy water. Oven Shelves Clean the oven shelves with an abrasive To make the shelves slide more easily, apply cleanser or scouring pad.
-
Page 28: Self-Cleaning Oven
Care and cleaning of the range. Broiler Pan & Grid Do not clean the broiler pan or grid in a The broiler pan may be cleaned with a self-cleaning oven. commercial oven cleaner. If the grid is grey After broiling, remove the broiler pan enamel, it can also be cleaned with an oven After broiling, remove the broiler pan from from the oven. - Page 29 GEAppliances.com Warming Drawer Rack (on some models) Clean the rack with detergent and water. After cleaning, rinse the rack with clean water and dry with a clean cloth. Removable Warming Drawer (on some models) To replace the warming drawer: NOTE: For models with an electric warming Place the left drawer rail around the drawer, before performing any adjustments, inner left rail guide and slide it in...
- Page 30 Care and cleaning of the range. Porcelain Enamel Cooktop (on some models) The porcelain enamel finish is sturdy If acids spill on the cooktop while it is hot, but breakable if misused. This finish is use a dry paper towel or cloth to wipe it up acid-resistant.
- Page 31 GEAppliances.com Oven Vent On glass cooktop models, the oven is vented Never cover the opening with aluminum foil or through an opening at the rear of the any other material. cooktop. On coil cooktop models, the oven is vented through an opening under the right rear surface unit.
-
Page 32: Glass Cooktop
Cleaning the glass cooktop. (on some models) Normal Daily Use Cleaning ONLY use CERAMA BRYTE ® Ceramic Shake the cleaning cream well. Apply Cooktop Cleaner on the glass cooktop. a few drops of CERAMA BRYTE ® Other creams may not be as effective. Ceramic Cooktop Cleaner directly to the cooktop. - Page 33 GEAppliances.com Metal Marks and Scratches Be careful not to slide pots and pans If pots with a thin overlay of across your cooktop. It will leave aluminum or copper are allowed to metal markings on the cooktop boil dry, the overlay may leave black surface.
-
Page 34: Installation Instructions
Installation Free-Standing Instructions Electric Ranges Questions? Call 800.GE.CARES (800.432.2737) or Visit our Website at: GEAppliances.com BEFORE YOU BEGIN FOR YOUR SAFETY: Read these instructions completely All rough-in and spacing dimensions must be and carefully. met for safe use of your range. Electricity to... - Page 35 Installation Instructions PREPARE TO INSTALL THE RANGE MATERIALS YOU MAY NEED PREPARE THE OPENING ″ spacing from the range to adjacent Allow 1 ⁄ vertical walls above the cooktop surface. Allow 30″ minimum clearance between Tin Snips Lag Bolts Anchor Sleeves the surface units and the bottom of (For Anti-Tip Bracket Mounted on Concrete Floors Only) unprotected wood or metal top cabinet,...
-
Page 36: Electrical Connections
Installation Instructions ELECTRICAL CONNECTIONS ELECTRICAL REQUIREMENTS ALL NEW CONSTRUCTIONS, MOBILE HOMES AND CAUTION: For personal safety, INSTALLATIONS WHERE do not use an extension cord with this LOCAL CODES DO NOT appliance. Remove house fuse or open circuit breaker before beginning installation. ALLOW GROUNDING THROUGH NEUTRAL This appliance must be supplied with the... - Page 37 Installation Instructions POWER CORD AND STRAIN For power cord installations only (see the next step if using conduit), assemble RELIEF INSTALLATION the strain relief in the hole. Insert the power cord through the strain relief and Remove the wire cover (on the lower tighten.
- Page 38 Installation Instructions ELECTRICAL CONNECTIONS (CONT.) 3-WIRE POWER CORD 4-WIRE POWER CORD INSTALLATION INSTALLATION WARNING: WARNING: The neutral or ground The neutral wire of wire of the power cord must be connected the supply circuit must be connected to the to the neutral terminal located in the neutral terminal located in the lower center center of the terminal block.
- Page 39 Installation Instructions 3-WIRE CONDUIT INSTALLATION 4-WIRE CONDUIT INSTALLATION Loosen the 3 lower terminal screws from Loosen the three lower terminal screws the terminal block. Insert the center bare from the terminal block. Remove the ground wire (white/neutral) tip through the bottom screw and ground plate and retain them.
-
Page 40: Leveling
Installation Instructions INSTALL THE RANGE REPLACE THE WIRE COVER LEVEL THE RANGE Replace the wire cover on the range back Install the oven shelves in the oven and by sliding its right edge under the retaining position the range where it will be installed. tab and replacing the two screws removed Check for levelness by earlier. - Page 41 Installation Instructions LEVEL THE RANGE (CONT.) OPERATION CHECKLIST On all warming drawer models, the rear • Turn on one of the surface units to observe leveling legs must be adjusted prior to that the element glows within 60 seconds. moving the range into position. They can Turn the unit off when glow is detected.
-
Page 42: Troubleshooting Tips
Before you call for service… Troubleshooting Tips Save time and money! Review the charts on the following pages first and you may not need to call for service. Problem Possible Causes What To Do Radiant Cooktops Surface units will not Improper cookware •Use pans which are flat and match the diameter maintain a rolling boil... - Page 43 GEAppliances.com Problem Possible Causes What To Do Coil Cooktops Surface units The surface units are not •With the controls off, check to make sure the surface not functioning plugged in solidly. unit is plugged completely into the receptacle. properly The surface unit controls •Check to see the correct control is set for the surface improperly set.
- Page 44 Before you call for service… Troubleshooting Tips Problem Possible Causes What To Do Food does not Oven is not set to BROIL. •On models with a temperature knob, make sure you turn broil properly it all the way to the BROIL position. On models with a BROIL HI/LO pad, make sure it is turned on.
- Page 45 GEAppliances.com Problem Possible Causes What To Do Oven temperature too •See the Adjust the oven thermostat–Easy to do Oven thermostat hot or too cold yourself! section. needs adjustment. Clock and timer do • Make sure electrical plug is plugged into a live, properly Plug on range is not completely not work grounded outlet.
- Page 46 Before you call for service… Troubleshooting Tips Problem Possible Causes What To Do “Burning” or “oily” • To speed the process, set a self-clean cycle for a This is normal in a new oven odor emitting from the minimum of 3 hours. See the Using the self-cleaning and will disappear in time.
-
Page 47: Accessories
Cleaning Pads Scraper Tired of discolored racks? Wishing you had extra-heavy-duty oven racks? NOW AVAILABLE for your range: GE’s innovative, self-cleanable porcelain-coated oven racks! • Heavy Duty • Durable • Able to be cleaned in a self-cleaning oven Visit www.GEAppliances.com for more information. - Page 48 Notes.
-
Page 49: Product Registration
You can rest easy, knowing that all your valuable household products are protected against expensive repairs. 800.626.2224 Place your confidence in GE and call us in the U.S. toll-free at for more information. *All brands covered, up to 20 years old, in the continental U.S. - Page 50 Year * Please provide your e-mail address to receive, via e-mail, discounts, special offers and other important communications from GE Appliances (GEA). Check here if you do not want to receive communications from GEA’s carefully selected partners. FAILURE TO COMPLETE AND RETURN THIS CARD DOES NOT DIMINISH YOUR GE Appliances WARRANTY RIGHTS.
- Page 51 Any part of the range which fails due to a defect in materials or workmanship. From the date of the During this full one-year warranty, GE will also provide, free of charge, all labor original purchase and in-home service to replace the defective part.
-
Page 52: Consumer Support
Contact Us GEAppliances.com If you are not satisfied with the service you receive from GE, contact us on our Website with all the details including your phone number, or write to: General Manager, Customer Relations GE Appliances, Appliance Park...
Need help?
Do you have a question about the JBS27 and is the answer not in the manual?
Questions and answers