Table of Contents
Advertisement
Available languages
Available languages
Quick Links
Advertisement
Chapters
Table of Contents

Related Manuals for GreenWorks Pro ST80L02


Summary of Contents for GreenWorks Pro ST80L02
- Page 1 ST80L02 www.greenworktools.com STB460...
-
Page 3: Table Of Contents
English Stop the machine..........8 Description......... 4 Adjust the length of the cutting line....8 Purpose.............. 4 Adjust the cutting diameter........9 Overview............4 Line cut-off blade..........9 Packing list............4 Attach machine to shoulder strap...... 9 Important safety instructions...4 Operation tips............ 9 Symbols on the machine.... -
Page 4: Description
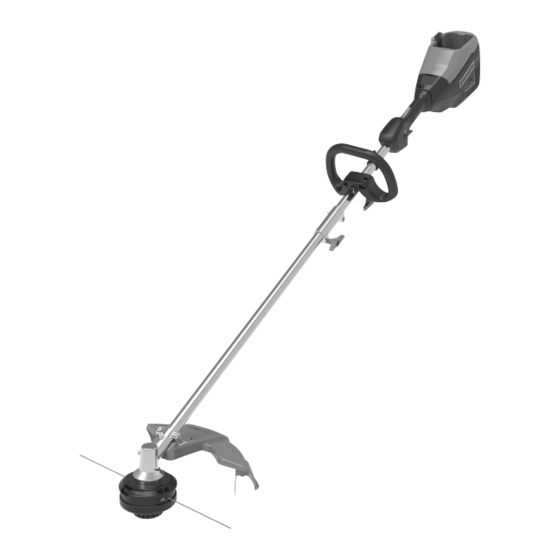
English DESCRIPTION PACKING LIST 1 String trimmer bare 4 Allen key PURPOSE tool 5 Manual 2 Auxiliary handle This machine is used to cut grass, light weeds, and other 6 Shoulder strap similar vegetation at or around ground level. The cutting 3 Guard plane must be approximately parallel to the ground surface. -
Page 5: Symbols On The Machine
English and to reduce the risk of injury. Follow instructions for • Follow all charging instructions and do not charge the lubricating and changing accessories. Inspect appliance battery pack or appliance outside of the temperature range cord periodically, and if damaged, have it repaired by an specified in the instructions. -
Page 6: Risk Levels
English WARNING Symbol Explanation Discard all toxic materials in a specified manner to prevent Do not install or use any type of blade on contamination of the environment. Before discarding the machine or displaying this symbol. damaged or worn out Li-ion battery, contact your local waste disposal agency, or the local Environmental Thrown objects can ricochet and result in Protection Agency for information and specific instructions. -
Page 7: Installation
English INSTALLATION UNPACK THE MACHINE WARNING Make sure that you correctly assemble the machine before use. WARNING • If parts of the machine are damaged, do not use the machine. ASSEMBLE THE SHAFT • If you do not have all the parts, do not operate the machine. -
Page 8: Install The Battery Pack
English INSTALL THE BATTERY PACK WARNING OPERATION • If the battery pack or charger is damaged, replace the battery pack or the charger. IMPORTANT • Stop the machine and wait until the motor stops before Before you operate the machine, read and understand the you install or remove the battery pack. -
Page 9: Adjust The Cutting Diameter
English ATTACH MACHINE TO SHOULDER STRAP ② ① ① ② ADJUST THE CUTTING DIAMETER NOTE 1. Attach the carabiner to the carrying ring on the drive The machine is set at a 14 in. (35.6 cm) cutting diameter. tube. You can adjust to a 16 in. (40.6 cm) cutting diameter. Set the cutting diameter to 14 in. -
Page 10: Cutting Tips
English • Remove the battery pack. IMPORTANT • Remove the grass. Make sure that all nuts, bolts and screws are tight. Examine regularly that you install the handles tightly. IMPORTANT Use only the replacement parts and accessories of the initial manufacturer. -
Page 11: Install The Cutting Line
English 4. Pull the cutting line through until there is an equal quantity of cutting line on each side. 4. Clean dirt and debris from all parts. Replace spool (d) if it is worn or damaged. 5. Align the spool tabs (a) with the tab openings in the base of the spool (e). -
Page 12: Assemble The Trimmer Head
English TRANSPORTATION AND STORAGE WARNING Remove the battery pack from the machine before transportation and storage. 11.1 MOVE THE MACHINE When you move the machine, you must: • Stop the machine. • Remove the battery pack. 11.2 STORE THE MACHINE •... -
Page 13: Troubleshooting
English Item Temperature Problem Possible Cause Solution Charger operation tempera- 39°F (4°C) - 104°F (40°C) The ma- The guard is not Remove the battery pack ture range chine stops attached to the ma- and attach the guard to when you chine. -
Page 14: Limited Warranty
English 5. Normal deterioration of the exterior finish due to use or Problem Possible Cause Solution exposure. The line The machine is 1. Cut with the tip of the keeps used incorrectly. line, avoid stones, walls HELPLINE: breaking. and other hard objects. Warranty service is available by calling our toll-free helpline, 2. -
Page 15: Replacement Parts
English REPLACEMENT PARTS No. Part No. Description No. Part No. Qty Description R0201836-00 Auxiliary handle assembly R0201784-00 Coupler knob R0201826-00 Bolt R0201770-00 Allen key R0201827-00 Auxiliary handle RB37902144 Shouler strap R0201828-00 Lower clamp R0201835-00 Guard assembly R0201833-00 Knob R0202143-00 Trimmer head assembly... - Page 16 Français Arrêter la machine........... 22 Description........17 Réglez la longueur de la ligne de coupe..22 But..............17 Réglez le diamètre de coupe......22 Aperçu............. 17 Lame de coupe de la ligne....... 22 Liste du contenu de l’emballage...... 17 Attachez la machine à la bandoulière....22 Important safety instructions..17 Conseils sur l'utilisation........23 Symboles figurant sur la...
-
Page 17: 1 Description
Français DESCRIPTION LISTE DU CONTENU DE L’EMBALLAGE 1 Taille-bordures (outil 4 Clé Allen seulement) Cette machine est utilisée pour couper l'herbe, les mauvaises 5 Manuel herbes légères et d'autres végétaux similaires au niveau du sol 2 Poignée auxiliaire 6 Bandoulière ou à... -
Page 18: Symboles Figurant Sur La Machine
Français Keep cutting edge sharp and clean for best performance • Follow all charging instructions and do not charge the and to reduce the risk of injury. Follow instructions for battery pack or appliance outside of the temperature range lubricating and changing accessories. Inspect appliance specified in the instructions. -
Page 19: Niveaux De Risques
Français ÉLIMINATION DES Symbole Explication BATTERIES SANS DANGER Tenez tous les curieux à une distance d'au POUR L'ENVIRONNEMENT moins 15 m (50 pi). N'installez ou n'utilisez aucun type de lame sur une machine qui affiche ce sym- bole. Les objets projetés peuvent ricocher et causer des blessures corporelles ou des dommages matériels. -
Page 20: Proposition 65
Français PROPOSITION 65 1. Retirez les vis de la tête de coupe à l'aide d'un tournevis cruciforme (non fourni). AVERTISSEMENT Ce produit contient un produit chimique connu dans l'état de Californie comme étant une cause de cancer, de malformations congénitales ou d'autres problèmes de reproduction. -
Page 21: Attachez La Poignée Auxiliaire
Français ATTACHEZ LA POIGNÉE AUXILIAIRE 1. Retirez le bouton (16) de la poignée. 2. Attachez la poignée auxiliaire et abaissez la bride (15) sur le manche. RETIRER LE BLOC-BATTERIE 3. Placez la poignée auxiliaire dans une position 1. Poussez et maintenez enfoncé le bouton de déblocage de confortable. -
Page 22: Arrêter La Machine
Français 3. Tournez la lame de coupe de 180°. 4. Serrez les vis de la lame avec une clé Allen. 2. Poussez l’interrupteur de vitesse (5) sur la vitesse de fonctionnement désirée. Poussez l’interrupteur de vitesse en position 1 pour la vitesse lente ou en position 2 pour la vitesse élevée. -
Page 23: Conseils Sur L'utilisation
Français ① ② 2. Enfilez la bandoulière. 3. Ajustez la longueur de la bandoulière de façon à ce que le mousqueton ait à peu près la largeur d'une main sous votre hanche droite. CONSEILS DE COUPE CONSEILS SUR L'UTILISATION • Inclinez la machine vers la zone à... -
Page 24: Informations Générales
Français 2. Tirez et démontez le couvercle de la bobine (b). IMPORTANT 3. Retirez toute ligne restante. Assurez-vous que tous les écrous, les boulons et les vis sont bien serrés. Vérifiez régulièrement que les poignées sont bien serrées. IMPORTANT Utilisez uniquement les pièces de rechange et les accessoires du fabricant initial. -
Page 25: Retirez La Tête De Coupe
Français 10.5 RETIREZ LA TÊTE DE COUPE 1. Insérez la tige métallique (a) dans le trou de transmission angulaire spécifié (b) pour fixer la tête de coupe. 3. Passez l’extrémité de la ligne de coupe à travers le trou. Poussez la ligne de coupe jusqu'à ce qu'elle sorte par le trou opposé. -
Page 26: Transport Et Entreposage
Français 4. Retirez la tige métallique. Article Température IMPORTANT Plage de température d’en- 32°F (0°C) - 113°F (45°C) treposage du coupe-herbe Vous devez installer la lame de coupe lorsque vous utilisez la tête de coupe. Plage de température de 32°F (0°C) - 113°F (45°C) fonctionnement du coupe- herbe TRANSPORT ET... -
Page 27: Garantie Limitée
Français Problème Cause possible Solution Problème Cause possible Solution La machine La garde protec- Retirez la batterie et in- La ligne Les lignes sont Lubrifiez avec du silicone s’arrête trice n’est pas atta- stallez la garde protec- n'avance soudées entre el- en vaporisateur. - Page 28 Français normales d'utilisation, sans frais pour le client. Cette garantie n'est valable que pour les appareils qui ont été utilisés à des fins personnelles, qui n'ont pas été loués à des fins industrielles ou commerciales et qui ont été entretenus conformément aux instructions du manuel du propriétaire fourni avec le produit neuf.
-
Page 29: Pièce De Rechange
Français PIÈCE DE RECHANGE No de pièce Qté Description No de pièce Qté Description R0201836-00 Ensemble de poignée auxili- R0201784-00 Bouton de coupleur aire R0201826-00 Boulon R0201770-00 Clé allen R0201827-00 Poignée auxiliaire RB37902144 Bandoulière R0201828-00 Abaissez la bride R0201834-00 Ensemble de la tête de taille- haie R0201833-00 Bouton... - Page 30 Español Detención de la máquina......... 36 Descripción........31 Ajuste de la longitud del hilo de corte..... 36 Finalidad............31 Ajuste del diámetro de corte......36 Perspectiva general.......... 31 Cuchilla de corte de hilo........36 Lista de embalaje..........31 Fijación de la máquina a la correa de Instrucciones importantes de hombro.............37 seguridad..........
-
Page 31: Descripción
Español DESCRIPCIÓN LISTA DE EMBALAJE 1 Herramienta desnuda 4 Llave Allen FINALIDAD cortabordes 5 Manual 2 Asa auxiliar Esta máquina se utiliza para cortar hierba, maleza ligera y 6 Correa de hombro otra vegetación similar a nivel del suelo. El plano de corte 3 Protección debe estar aproximadamente paralelo a la superficie del suelo. -
Page 32: Símbolos En La Máquina
Español • Almacene siempre las herramientas eléctricas inactivas en impredecible que puede dar lugar a un incendio, una interior – Cuando no estén en uso, las herramientas explosión o un riesgo de lesiones. eléctricas deben almacenarse en interior, en un lugar seco, •... -
Page 33: Niveles De Riesgo
Español SERVICIO Símbolo Explicación Revoluciones, carreras, velocidad de su- Las tareas de servicio exigen un cuidado extremo así como /min perficie, órbitas, etc., por minuto conocimientos y deben ser realizadas únicamente por un técnico de servicio cualificado. Para cuestiones de servicio, le Corriente continua recomendamos que devuelva la máquina al CENTRO DE Precauciones que afectan a su seguridad. -
Page 34: Propuesta 65
Español AVISO AVISO Si la batería se agrieta o se rompe, con o sin fugas, no la • Si las piezas de la máquina presentan daños, no utilice recargue ni la utilice. Deséchela y sustitúyala por una la máquina. batería nueva. ¡NO INTENTE REPARARLA! Para evitar •... -
Page 35: Fijación Del Asa Auxiliar
Español INSTALACIÓN DE LA BATERÍA AVISO • Si la batería o el cargador ha sufrido daños, sustituya la Botón de batería o el cargador. desbloqueo • Detenga la máquina y espere hasta que el motor se pare antes de instalar o retirar la batería. •... -
Page 36: Funcionamiento
Español FUNCIONAMIENTO AJUSTE DEL DIÁMETRO DE CORTE IMPORTANTE NOTA Antes de utilizar la máquina, debe leer y entender las normas de seguridad y las instrucciones de funcionamiento. La máquina está ajustada a un diámetro de corte de 14 in. (35.6 cm). Puede ajustarla a un diámetro de corte de 16 in. (40.6 cm). -
Page 37: Fijación De La Máquina A La Correa De Hombro
Español FIJACIÓN DE LA MÁQUINA A LA • Corte la hierba alta de arriba a abajo. CORREA DE HOMBRO Si se enrolla hierba alrededor del cabezal de corte: • Retire la batería. • Quite la hierba. ② ① ① ② 1. -
Page 38: Mantenimiento
Español MANTENIMIENTO IMPORTANTE Debe leer y entender los reglamentos de seguridad y las instrucciones de mantenimiento antes de limpiar, reparar o realizar tareas de mantenimiento en la máquina. IMPORTANTE Asegúrese de que todas las tuercas, los pernos y los tornillos estén apretados. -
Page 39: Retirada Del Cabezal De Corte
Español 10.5 RETIRADA DEL CABEZAL DE 2. Alinee las ranuras de la tapa del carrete con las ranuras del cabezal de corte. CORTE 1. Coloque la varilla metálica (a) en el orificio de transmisión del ángulo especificado (b) para fijar el cabezal de corte. -
Page 40: Transporte Yalmacenamiento
Español Tipo de alimentación Avance por sacudida Peso (sin batería) 9.15Ibs (4.15kg) Modelo de batería GBA80250/BAB723/ GBA80200 y otras series Modelo de cargador GCH8040 y otras series El intervalo de temperatura ambiente recomendado: Elemento Temperatura Intervalo de temperatura de 32°F (0°C) - 113°F (45°C) 4. -
Page 41: Garantía Limitada
Español Problema Posible causa Solución Problema Posible causa Solución La máquina La protección no Retire la batería y fije la El hilo se La máquina se está 1. Corte con la punta del se detiene está fijada a la má- protección a la máquina. -
Page 42: Piezas De Repuesto
Español 3. Desgaste normal, excepto en lo indicado a continuación; 4. Artículos de mantenimiento de rutina tales como lubricantes, afilado de cuchillas; 5. Deterioro normal del acabado exterior debido al uso o la exposición. LÍNEA DE ASISTENCIA TELEFÓNICA: Puede contactar con el servicio de garantía llamando a nuestra línea de asistencia telefónica gratuita, a 1-855-345-3934.
Need help?
Do you have a question about the ST80L02 and is the answer not in the manual?
Questions and answers