
Related Manuals for LENCO DAB-11


Summary of Contents for LENCO DAB-11
- Page 1 Model : DAB-11 USER MANUAL DAB+ FM Radio HANDLEIDING DAB+ FM Radio BEDIENUNGSANLEITUNG DAB+ FM Radio MODE D’EMPLOI Radio FM DAB+ MANUAL DEL USUARIO Radio FM DAB+ Version: 1.0...
-
Page 2: Table Of Contents
Index: English ..............................3 Nederlands ............................14 Deutsch ..............................25 Français ..............................36 Español ..............................47 Version: 1.0... -
Page 3: English
English DAB-11 CAUTION: Usage of controls or adjustments or performance of procedures other than those specified herein may resulte in hazardous radiation exposure. This unit should not be adjusted or repaired by anyone except qualified service personnel. PRECAUTIONS BEFORE USE KEEP THESE INSTRUCTIONS IN MIND: Do not use this device near water. - Page 4 18. Devices with class 1 construction should be connected to a main socket outlet with a protective earthed connection. 19. Devices with class 2 construction do not require a earthed connection. 20. Keep away from rodents. Rodents enjoy biting on power cords. 21.
- Page 5 41. Make sure the unit is adjusted to a stable position. Damage caused by using this product in an unstable position or by failure to follow any other warning or precaution contained within this user manual will not be covered by warranty. 42.
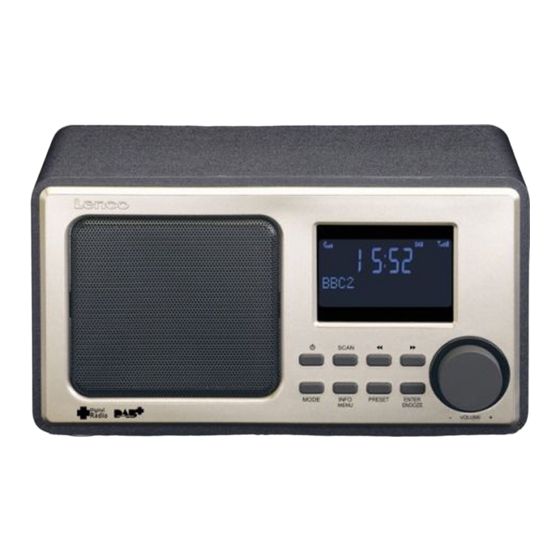
- Page 6 Product Overview...
- Page 7 1. LCD Display 2. Mode Button 3. Power/Standby Button 4. Info/Menu Button 5. Scan Button 6. Preset Button 7. Prev Button 8. Enter/Snooze Button 9. Next Button 10. Vol+/Vol- 11. Aerial 12. ON/OFF Switch 13. DC IN Socket 14. Earphone Socket 15.
- Page 8 Selecting the modes When the radio is turned on, press the Mode button repeatedly to switch between DAB + and FM modes. DAB+ operation When you first select DAB+ radio, it will search for and store all available DAB+ stations.Once Auto search is completed, your radio will select the first station tuned.
- Page 9 Playing stations saved as presets To play a preset station: Select the band (DAB+ or FM) of the station by pressing the Mode button. Press the Preset button to recall the preset station, then using the Prev or Next button to browse through your presets and press the Enter/Snooze button to confirm.
- Page 10 Using the alarm Alarm Setting With radio on, press and hold the Info/Menu button. Then press the Prev or Next button to choose Alarm 1 to ON position, press Enter/Snooze button to confirm. The hours will flash, use the Prev or Next button to select hour. Press Enter/Snooze button to confirm. The mins will flash, use the Prev or Next button to select the minutes.
- Page 11 Program Type (PTY): Shows the type and description of the program provided by the DAB station. Time& Date: Displays the time and date information provided by the broadcaster. Bit Rate: The date rate of which the signal is being transmitted. Station information on FM mode Every time you press the Info/Menu button in the FM mode, the display will cycle through the following display modes:...
- Page 12 Guarantee Lenco offers service and warranty in accordance with the European law, which means that in case of repairs (both during and after the warranty period) you should contact your local dealer. Important note: It is not possible to send products that need repairs to Lenco directly.
- Page 13 In so doing, you will help to conserve natural resources and improve standards of environmental protection in treatment and disposal of electrical waste (Waste Electrical and Electronic Equipment Directive). Service For more information and helpdesk support, please visit www.lenco.com Lenco Benelux BV, Thermiekstraat 1a, 6361 HB Nuth, The Netherlands.
-
Page 14: Nederlands
Nederlands DAB-11 LET OP: Gebruik van bedieningen of afstellingen of uitvoer van procedures anders dan gespecificeerd in deze handleiding kan leiden tot blootstelling aan schadelijke straling. Dit apparaat dient uitsluitend te worden aangepast of gerepareerd door gekwalificeerd onderhoudspersoneel. VOORZORGSMAATREGELEN VOOR GEBRUIK ONTHOUD DE VOLGENDE INSTRUCTIES: Gebruik dit apparaat niet in de buurt van water. - Page 15 15. Dit apparaat moet aangedreven worden door een voedingsbron, zoals aangegeven op het specificatieplaatje. Als u twijfelt over het type voeding dat gebruikt wordt in uw huis, raadpleeg dan a.u.b. uw dealer of plaatselijk energiebedrijf. 16. Het stopcontact moet in de buurt van de apparatuur zijn geï nstalleerd en eenvoudig te bereiken zijn.
- Page 16 36. Aandacht voor het milieu is nodig bij het verwijderen van de batterijen. 37. Het apparaat kan alleen worden gebruikt in gematigde klimaten. Extreem koude of warme omgevingen moeten worden vermeden. 38. Het nominale specificatielabel is te vinden op het paneel aan de onderkant van het apparaat. 39.
- Page 17 INSTALLATIE • Pak alle onderdelen uit en verwijder de beschermende materialen. • Sluit het apparaat niet aan op het stopcontact, voordat u de netspanning hebt gecontroleerd en voordat alle andere aansluitingen zijn gemaakt. • Bedek geen van de ventilatieopeningen en zorg voor enkele centimeters vrije ruimte rondom het apparaat voor ventilatie.
- Page 18 1. LCD-Scherm 2. Modus-toets 3. Aan/Uit/Stand-by-toets 4. Info/Menu-toets 5. Scantoets 6. Voorkeuzetoets 7. Vorige-toets 8. Selecteer/Sluimer-toets 9. Volgende-toets 10. Vol+/Vol- 11. Antenne 12. Aan/uit-schakelaar 13. DC IN Aansluiting 14. Aansluiting oortelefoon 15. SW Update Aansluiting Instructies Basishandelingen Uw radio voor de eerste keer gebruiken Verbind uw radio met de meegeleverde stroomadapter.
- Page 19 Druk op de Aan/Uit/Stand-by-toets om het apparaat aan te zetten. Modus selecteren Druk herhaaldelijk op de Mode-toets wanneer de radio aan staat om te schakelen tussen DAB+ en FM modi. DAB+ bediening Wanneer u voor de eerste keer DAB+ selecteert, dan zal de radio alle beschikbare DAB+ stations opzoeken en opslaan.
- Page 20 Wanneer u de radio voor de eerste keer aanzet, zal hij automatisch synchroniseren met de lokale tijd tijdens het zoeken naar DAB+ stations. Probeer de locatie van het apparaat te veranderen als de tijd niet vanzelf ingesteld is, zodat u een beter signaal krijgt. Systeeminstellingen Houd de Info/Menu-toets ingedrukt terwijl het apparaat aan staat.
- Page 21 Het alarm gebruiken Alarminstelling Houd de Info/Menu-toets ingedrukt terwijl de radio aan staat. Druk vervolgens op de Vorige- of Volgende-toets om Alarm 1 op ON (AAN) te zetten en druk op de Enter/Snooze-toets om uw keuze te bevestigen. De uren zullen knipperen, gebruik de Vorige- of Volgende-toets om de uren te selecteren. Druk op de Enter/Snooze-toets om te bevestigen.
- Page 22 Kanaalfrequentie: Geeft het nummer en de frequentie van het transmissiekanaal weer. Soort programma (PTY): Geeft het type en de beschrijving weer van het programma op de DAB-zender. Tijd/datum: Geeft de tijd en datum weer die door de zender wordt gegeven. Bitsnelheid: De datasnelheid waar het signaal mee verstuurd wordt.
- Page 23 Gebruik uitsluitend de voeding die op de gebruiksaanwijzing is aangegeven Garantie Lenco biedt service en garantie aan overeenkomstig met de Europese wetgeving. Dit houdt in dat u, in het geval van reparaties (zowel tijdens als na de garantieperiode), uw lokale handelaar moet contacteren.
- Page 24 (Afgedankte Elektrische en Elektronische Apparatuur). Service Bezoek voor meer informatie en helpdeskondersteuning www.lenco.com Lenco Benelux BV, Thermiekstraat 1a, 6361 HB, Nuth, Nederland.
-
Page 25: Deutsch
Deutsch DAB-11 ACHTUNG: Die zweckentfremdete Bedienung, Benutzung oder Einstellung der Prozeduren kann zu gefährlichen Unfällen durch Strahlen führen. Dieses Gerät darf außer von qualifizierten Fachleuten von niemand anderem repariert oder eingestellt werden. VORSICHTSMASSNAHMEN VOR DER BENUTZUNG BEFOLGEN SIE IMMER FOLGENDE ANWEISUNGEN: Benutzen Sie das Gerät nicht in der Nähe von Wasser. - Page 26 15. Dieses Gerät ist durch eine Stromquelle wie auf dem Typenschild angegeben zu betreiben. Halten Sie bei Unsicherheiten über die Art Ihrer Stromversorgung in Ihrer Wohnung Rücksprache mit Ihrem Händler oder Ihrer Stromzuliefererfirma. 16. Die Wandsteckdose muss sich in der Nähe des Geräts befinden und einfach zu erreichen sein. 17.
- Page 27 37. Das Gerät kann nur bei moderaten Temperaturen verwendet werden. Eine Nutzung in extrem kalten oder heißen Umgebungen sollte vermieden werden. 38. Das Typenschild befindet sich an der Unterseite des Geräts. 39. Dieses Gerät ist nicht zur Benutzung durch Personen (auch Kinder) mit physischen, sensorischen oder mentalen Beeinträchtigungen oder ohne ausreichender Erfahrung vorgesehen, es sei denn, sie werden durch eine verantwortliche Person beaufsichtigt oder wurden in die ordnungsgemäße Bedienung des Gerätes durch eine für ihre Sicherheit verantwortlichen Person...
- Page 28 AUFBAU • Packen Sie alle Teile aus und entfernen Sie danach die Schutzmaterialien. • Schließen Sie das Gerät erst an eine Steckdose an, nachdem Sie die Netzspannung überprüft und alle anderen Anschlüsse vorgenommen haben. • Bedecken Sie die Lüftungsschlitze nicht und vergewissern Sie sich, dass um das Gerät herum einige cm Platz für die Kühlung gelassen wurden.
- Page 29 1. LCD-Display 2. Modus-Taste 3. Ein/Aus/Standby-Taste 4. Info/Menü-Taste 5. Scannen-Taste 6. Speicherplatz-Taste 7. Zurück-Taste 8. Enter/Schlummer-Taste 9. Vor-Taste 10. Lautstärke+/Lautstärke– 11. Antenne 12. Netzschalter 13. DC-Eingangsbuchse 14. Kopfhörer-Buchse 15. USB-Port für Softwareupdates Anleitungen Grundbedienung Bei der Erstinbetriebnahme Ihres Radios Schließen Sie den mitgelieferten Netzadapter am Radio an. Stecken Sie den Netzstecker des Netzadapters in eine Netzsteckdose.
- Page 30 Drücken Sie die Taste EIN/AUS/STANDBY, um das Radio einzuschalten. Auswahl der Modi Drücken Sie bei eingeschaltetem Radio mehrfach die Taste MODE, um zwischen DAB+ und UKW- Modus hin und her zu schalten. DAB+ Bedienung Wenn Sie das erste Mal das DAB+ Radio auswählen, sucht es nach allen verfügbaren DAB+ Radiosendern und speichert diese ab.
- Page 31 Wiedergabe eines Speicherplatz-Radiosenders Um einen auf einem Speicherplatz gespeicherten Radiosender wiederzugeben: Wählen Sie das Band (DAB+ oder UKW) des Radiosenders aus, indem Sie die Taste MODE drücken. Drücken Sie die Taste PRESET, um die Speicherplätze abzurufen. Drücken Sie die Taste PREV oder NEXT, um sich durch die Liste zu bewegen und bestätigen Sie Ihre Auswahl anschließend mit der Taste ENTER/SNOOZE.
- Page 32 Einstellung Schlafautomatik Halten Sie die Taste INFO/MENU gedrückt. Drücken Sie die Taste PREV oder NEXT solange, bis auf dem Display <Sleep Set> (Schlafautomatik einstellen) angezeigt wird. Drücken Sie anschließend die Taste ENTER/SNOOZE. Drücken Sie die Taste PREV oder NEXT, um entweder AUS, 120, 90, 60, 45, 30, 15 oder 5 Minuten auszuwählen.
- Page 33 Wenn der Wecksound ertönt, dann drücken Sie die Taste ENTER/SNOOZE, um den Wecksound vorübergehend auszuschalten. Der Wecksound ertönt nach 9 Minuten erneut. Senderinformationen im DAB-Modus Bei jedem Druck der Taste INFO/MENU erscheinen im DAB-Modus auf dem Display nacheinander folgende Informationen: Dynamisches Etikettensegment (DLS) : Anzeige einer durch den Radiosender bereitgestellten Laufbandinformation.
- Page 34 Verwenden Sie nur die im Handbuch angegebene Stromversorgung Garantie Lenco bietet Leistungen und Garantien im Einklang mit Europäischem Recht. Im Falle von Reparaturen (sowohl während als auch nach Ablauf der Garantiezeit) sollten Sie deshalb Ihren Einzelhändler kontaktieren. Wichtiger Hinweis: Es ist nicht möglich, Geräte für Reparaturen direkt an Lenco zu schicken.
- Page 35 Dabei helfen Sie, natürliche Ressourcen zu schonen und Umweltschutzstandards zur Verwertung und Entsorgung von Altgeräten aufrecht zu halten (Waste Electrical and Electronic Equipment Directive). Service Besuchen Sie bitte für weitere Informationen und unseren Kundendienst unsere Homepage www.lenco.com Lenco Benelux BV, Thermiekstraat 1a, 6361 HB Nuth, The Netherlands.
-
Page 36: Français
Français DAB-11 ATTENTION : L’utilisation de commandes ou de réglages ou l’exécution de procédures autres que ceux spécifiés dans ce manuel peut entraî ner une exposition à des rayonnements dangereux. Cet appareil ne doit pas être réglé ou réparé par quiconque d’autre que du personnel qualifié. - Page 37 16. La prise secteur doit être installée près de l’appareil et doit être facilement accessible. 17. Ne surchargez pas les prises secteur ou les prolongateurs. Une surcharge peut entraî ner un incendie ou une électrocution. 18. Les appareils à la norme de construction de classe 1 doivent être branchés à une prise de courant disposant d’une connexion protectrice à...
- Page 38 38. La plaque signalétique se situe sous l’appareil. 39. Cet appareil n’est pas destiné à être utilisé par des personnes (enfants compris) souffrant de handicaps physiques, sensoriels ou mentaux, ou manquant d’expérience et de connaissances, sauf si elles sont sous surveillance ou ont reçu des instructions sur l’utilisation correcte de l’appareil par la personne qui est responsable de leur sécurité.
- Page 39 Présentation du produit...
- Page 40 1. Afficheur LCD 2. Bouton Mode 3. Bouton Marche-arrêt/veille 4. Bouton Info/menu 5. Bouton Recherche 6. Bouton Présélection 7. Bouton Préc 8. Bouton Entrée/rappel d'alarme 9. Bouton Suiv 10. Vol+/Vol- 11. Antenne 12. Interrupteur marche/arrêt 13. Prise DC IN (entrée CC) 14.
- Page 41 Appuyez sur le bouton marche-arrêt/veille pour mettre en marche l'appareil. Sélection des modes Quand la radio est en marche, appuyez sur le bouton Mode plusieurs fois pour basculer entre les modes DAB + et FM. Fonctionnement DAB+ Quand vous sélectionnez la radio DAB+ pour la première fois, elle recherchera et mémorisera toutes les DAB+ disponibles.
- Page 42 Quand vous mettez en marche la radio pour la première fois, elle se synchronisera automatiquement avec l’heure locale tout en recherchant des stations DAB+. Si l’heure ne s’est pas été réglée toute seule, essayez de changer l’emplacement de l'appareil pour améliorer le signal. Réglages système Quand l'appareil est en marche, maintenez enfoncé...
- Page 43 Utilisation de l’alarme Réglage d'alarme Quand la radio est en marche, maintenez enfoncé le bouton Info/Menu. Ensuite, appuyez sur le bouton Préc ou Suiv pour choisir Alarm 1 (alarme 1) en position ON (activé), puis appuyez sur le bouton Enter/Snooze pour confirmer. Les heures clignotent, utilisez le bouton Préc ou Suiv pour sélectionner les heures.
- Page 44 Fréquence des stations : Affiche le numéro et la fréquence du canal de transmission de la station. Type de programme (PTY): Affiche le type et la description du programme fourni par la station DAB. Heure/date: Affiche les informations sur l’heure et la date fournies par le diffuseur. Débit binaire : Le débit de données auquel le signal est transmis.
- Page 45 Garantie Lenco propose un service et une garantie conformément à la législation européenne, ce qui signifie qu’en cas de besoin de réparation (aussi bien pendant et après la période de garantie), vous pouvez contacter votre revendeur le plus proche.
- Page 46 électriques (directive sur les déchets des équipements électriques et électroniques). Service après-vente Pour en savoir plus et obtenir de l’assistance, visitez www.lenco.com Lenco Benelux BV, Thermiekstraat 1a, 6361 HB, Nuth, Pays-Bas...
-
Page 47: Español
Español DAB-11 ¡PRECAUCIÓ N! El uso de los controles o ajustes o el funcionamiento de los procedimientos excepto a aquellos especificados aquí pueden provocar una exposición peligrosa a la radiación. Esta unidad no debe ajustarse o repararse por ninguna persona salvo personal de servicio cualificado. - Page 48 16. La salida de la toma debe instalarse cerca del equipo y debe ser fácilmente accesible. 17. No sobrecargue las tomas CA o los cables de extensión. La sobrecarga puede provocar un incendio o una descarga eléctrica. 18. Los dispositivos con construcción Clase 1 deben estar conectados a una toma de corriente con una conexión a tierra protegida.
- Page 49 38. La placa identificativa está marcada en el panel inferior del aparato. 39. Este aparato no está diseñado para su uso por personas (incluyendo niños) con discapacidades fí sicas, sensoriales o mentales o con falta de experiencia o conocimientos, salvo que estén bajo la supervisión o hayan recibido formación sobre el uso correcto del dispositivo por parte de una persona responsable de su seguridad.
- Page 50 Descripción general del producto...
- Page 51 1. Pantalla LCD 2. Botón de Modo 3. Botón Alimentación/En espera 4. Botón Info/Menú 5. Botón de Búsqueda de emisoras 6. Botón de Presintoní a 7. Botón anterior 8. Botón Intro/Retardo 9. Botón Siguiente 10. Volumen+/Volumen- 11. Antena aérea 12. Interruptor de Encendido/Apagado 13.
- Page 52 Seleccionar los modos Cuando se encienda la radio, pulse el botón Mode de forma reiterada para cambiar entre los modos DAB + y FM. Funcionamiento de DAB Cuando seleccione por primera vez la radio DAB+, buscará y guardará todas las emisoras DAB+ disponibles.
- Page 53 Reproducir emisoras guardadas como presintoní as Para reproducir una emisora presintonizada: Seleccione la banda (DAB+ o FM) de la emisora pulsando el botón Mode. Pulse el botón Preset para recordar la emisora presintonizada; posteriormente, use el botón Prev o Next para navegar por las presintoní as y pulse el botón Enter/Snooze para confirmarlo. Configurar la hora automáticamente Cuando encienda la radio por primera vez, se sincronizará...
- Page 54 Uso de la alarma Ajustar la alarma Con la radio encendida, mantenga pulsado el botón Info/Menu. Posteriormente, pulse el botón Prev o Next para cambiar Alarma 1 a la posición ON; pulse el botón Enter/Snooze para confirmarlo. Las horas parpadearán; use el botón Prev o Next para seleccionar la hora. Pulse el botón Enter/Snooze para confirmarlo.
- Page 55 Tipo de programa (PTY): Muestra el tipo y la descripción del programa proporcionado por la emisora DAB. Hora/Fecha: Muestra la información de hora y fecha proporcionada por la emisora. Vel bits: La tasa de fecha en la cual se transmite la señal. Información de emisora en modo FM Cada vez que pulse el botón Info/Menu en el modo FM, la pantalla cambiará...
- Page 56 Garantí a Lenco ofrece servicio y garantí a en cumplimiento con las leyes de la Unión Europea, lo cual implica que, en caso de que su producto precise ser reparado (tanto durante como después del periodo de garantí...
- Page 57 (Directiva sobre la Eliminación de Equipos Eléctricos y Electrónicos). Servicio Para obtener más información y soporte del departamento técnico, por favor, visite la página web www.lenco.com Lenco Benelux BV, Thermiekstraat 1a, 6361 HB, Nuth, Paí ses Bajos.
Need help?
Do you have a question about the DAB-11 and is the answer not in the manual?
Questions and answers