Table of Contents
Advertisement
Quick Links
Built -in M ode ls:
CL2 4 WC2 :
CLFD2 4 WC :
CL2 4 1 BV :
CL1 5 WC :
ALL SAFETY RULES AND OPERATING INSTRUCTIONS
Write Model & Serial Number here:
Owner's Manual
Manuel du propriétaire
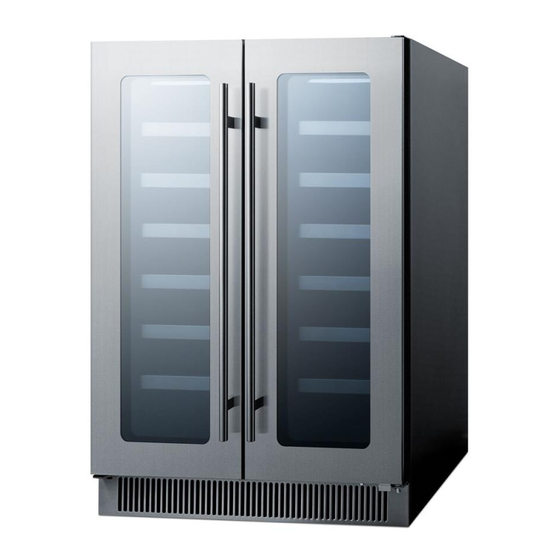
4 6 -Bot t le Wine Coole r
4 2 -Bot t le Wine Coole r
Wine Coole r & Be ve ra ge Ce nt e r
3 4 -Bot t le Wine Coole r
BEFORE USE, PLEASE READ AND FOLLOW
Felix Storch, Inc.
Summit Appliance Division
770 Garrison Avenue
Bronx, NY 10474
www.summitappliance.com
Advertisement
Table of Contents

Related Manuals for Summit Classic Collection CLFD24WC


Summary of Contents for Summit Classic Collection CLFD24WC
- Page 1 Owner’s Manual Manuel du propriétaire Built -in M ode ls: CL2 4 WC2 : 4 6 -Bot t le Wine Coole r CLFD2 4 WC : 4 2 -Bot t le Wine Coole r CL2 4 1 BV : Wine Coole r & Be ve ra ge Ce nt e r CL1 5 WC : 3 4 -Bot t le Wine Coole r BEFORE USE, PLEASE READ AND FOLLOW...
-
Page 2: Table Of Contents
T a ble of c ont e nt s Safety instructions and warnings ............. 2 – 3 Transportation and unpacking ................ 4 Installation instructions ................4 – 6 Before installation of your appliance ............4 Tools you will need ................... 5 Installation dimensions (built-in) ............ -
Page 3: Safety Instructions And Warnings
Sa fe t y inst ruc t ions a nd w a rnings IMPORTANT SAFETY INSTRUCTIONS WARNING: Before the appliance is used, it must be properly positioned and installed as described in this manual. So read the manual carefully. To reduce the risk of fire, electric shock or injury when using the appliance, follow basic precautions, including the following: ... - Page 4 Sa fe t y inst ruc t ions a nd w a rnings Children in the household Grounding instructions DANGER, RISK OF CHILD ENTRAPMENT! Before you throw away your old appliance: Take off the door. Leave the shelves in place so that children may not easily climb inside.
-
Page 5: Transportation And Unpacking
I nst a lla t ion inst ruc t ions NOTE: Models CL24WC2, CLFD24WC, CL241BV and CL15WC can be installed as either built-in or free-standing units. For free-standing installation, allow at least 4” of clearance at the back, sides and top of the unit to permit the proper air circulation to cool the compressor and condenser. -
Page 6: Tools You Will Need
I nst a lla t ion inst ruc t ions FOR YOUR SAFETY While performing installations described in this section, gloves and safety glasses or goggles should be worn. Tools you will need: Installation dimensions (mm/in) If your appliance is to be built-in, follow the diagram and chart below for appropriate dimensions. -
Page 7: Electrical Requirements
I nst a lla t ion inst ruc t ions Model CL15WC CL24WC2 CLFD24WC CL241BV 660mm (26″) 660mm (26″) 660mm (26″) 660mm (26″) 387mm (15¼″) 610mm (24″) 610mm (24″) 610mm (24″) 883mm (34 ¾″) 883mm (34 ¾″) 883mm (34 ¾″) 883mm (34 ¾″) -
Page 8: Operation
For Models CLFD24WC, CL241BV and ON.) CL15WC: 9) LED display Shows the temperature of the internal Control elements cabinet. - Page 9 Ope ra t ion For Model CL24WC2: 9) “ ” button (right) Control elements Pressing this button will increase (warm) the temperature of the lower chamber in steps of 1°F (or 1°C). 10) “ ” button (right) Pressing this button will lower (cool) the temperature of the lower chamber in steps of 1) “...
-
Page 10: Functions
Ope ra t ion Functions Temperature Memory Function It is normal that the cabinet shows “HI” or If the power is suddenly lost, the set “LO” from time to time. If it occurs frequently temperature will be saved by the unit. Once or lasts for a long time, you can restart the the power is back on, the unit will be at the unit by unplugging it, then re-plugging after... -
Page 11: Shelves
Shelves (Models:CLFD24WC,CL15WC) (Model:CL24WC2) Do not cover racks with aluminum To prevent damaging the door gasket, make foil or any other material that will sure to have the door all the way opened prevent adequate air circulation within the cabinet. -
Page 12: Reversing The Door
Ope ra t ion Reversing the door ( for Models CL24WC2 & CL15WC) This operation requires two persons. -
Page 13: Wine Storage
Operation Wine storage If you are storing wine for long periods of time, it should be stored at a temperature of between 10°C and 14°C (50°F and 57°F). This is the range of temperatures wine coolers are kept at, and it is just right to allow wine to mature properly. -
Page 14: Cleaning And Care
Cle a ning a nd c a re Cleaning the appliance Wipe the internal surface of the appliance or rubber parts. Never use paper towels or window with a soft sponge lightly dipped in a table salt solution. Add 2 tablespoons of table salt cleaners on the plastic parts. -
Page 15: Problems With Your Appliance
Proble m s w it h your a pplia nc e ? You can solve many common appliance problems easily, saving you the cost of a possible service call. Try the suggestions below to see if you can solve the problem before calling the servicer. Troubleshooting guide Problem Possible cause... -
Page 16: Limited Warranty
Lim it e d Wa rra nt y PARTS AND LABOR WARRANTY INFORMATION SUMMIT Appliances are manufactured to provide outstanding value, and your satisfaction is our goal on every product. All SUMMIT major appliances carry a one-year limited warranty on both parts and labor. All refrigerators and freezers carry an additional four years on the compressor. - Page 17 Lim it e d Wa rra nt y c ont ’d • IMPROPER ELECTRICAL CONNECTIONS: Summit is not responsible for the repair or replacement of failed or damaged components resulting from electrical power failure, the use of extension cords, low voltage, or voltage drops to the unit.
Need help?
Do you have a question about the CLFD24WC and is the answer not in the manual?
Questions and answers