Table of Contents
Advertisement
Available languages
Available languages
Quick Links
Built-in Models:
CL24WC2 :
CLFD24WC :
CL242WBV :
CL15WC :
CL151WBV :
ALL SAFETY RULES AND OPERATING INSTRUCTIONS
Write Model & Serial Number here:
Owner's Manual
Manuel du propriétaire
46-Bottle Wine Cooler
42-Bottle Wine Cooler
Wine Cooler & Beverage Center
34-Bottle Wine Cooler
Wine Cooler & Beverage Center
BEFORE USE, PLEASE READ AND FOLLOW
Felix Storch, Inc.
Summit Appliance Division
770 Garrison Avenue
Bronx, NY 10474
www.summitappliance.com
Advertisement
Chapters
Table of Contents

Subscribe to Our Youtube Channel
Related Manuals for Summit Classic Collection CL24WC2


Summary of Contents for Summit Classic Collection CL24WC2
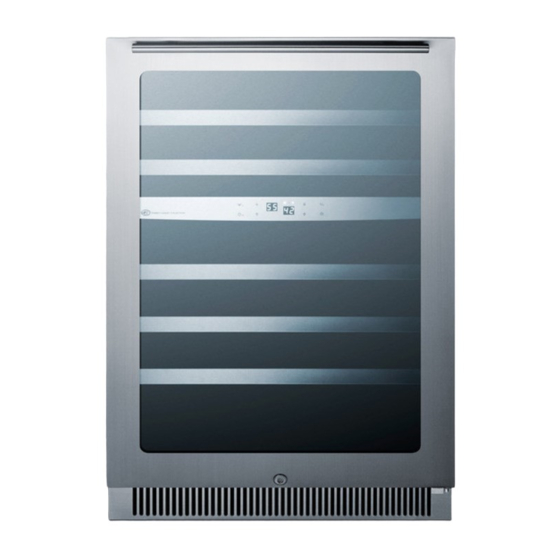
- Page 1 Owner’s Manual Manuel du propriétaire Built-in Models: CL24WC2 : 46-Bottle Wine Cooler CLFD24WC : 42-Bottle Wine Cooler CL242WBV : Wine Cooler & Beverage Center CL15WC : 34-Bottle Wine Cooler CL151WBV : Wine Cooler & Beverage Center BEFORE USE, PLEASE READ AND FOLLOW ALL SAFETY RULES AND OPERATING INSTRUCTIONS Felix Storch, Inc.
-
Page 2: Table Of Contents
Table of contents Safety instructions and warnings ............. 2 – 5 Transportation and unpacking ................ 6 Installation instructions ................6 – Before installation of your appliance ............6 Tools you will need ................... 7 Installation dimensions (built-in) ............7 – 8 Electrical requirements ................ -
Page 3: Safety Instructions And Warnings
Safety instructions and warnings IMPORTANT SAFETY INSTRUCTIONS WARNING: Before the appliance is used, it must be properly positioned and installed as described in this manual. So read the manual carefully. To reduce the risk of fire, electric shock or injury when using the appliance, follow basic precautions, including the following: ... - Page 4 Safety instructions and warnings Children in the household Grounding instructions DANGER, RISK OF CHILD ENTRAPMENT! Before you throw away your old appliance: Take off the door. Leave the shelves in place so that children may not easily climb inside. Never leave packaging material with ...
- Page 5 IMPORTANT SAFETY INFORMATION Improper handling can cause serious damage to the appliance and/or injury to the user. This unit is designed for domestic indoor use only. Do not use the unit for industrial use. Any other use may invalidate the warranty. Please review the rating label located on the rear panel of the unit for electrical and other technical data related to this unit.
- Page 6 Do not allow flames or sources of ignition to enter the appliance. When transporting and cleaning the appliance, ensure that the refrigerant circuit is off. In the event of damage, make sure that there are no ignition sources nearby. This appliance is not intended for use by persons (including children) with reduced ...
-
Page 7: Transportation And Unpacking
Installation instructions NOTE: Models CL24WC2, CLFD24WC, CL242WBV, CL15WC and CL151WBV can be installed as either built-in or free-standing units. For free-standing installation, allow at least 4” of clearance at the back, sides and top of the unit to permit the proper air circulation to cool the compressor and condenser. -
Page 8: Tools You Will Need
Installation instructions FOR YOUR SAFETY While performing installations described in this section, gloves and safety glasses or goggles should be worn. Tools you will need: Installation dimensions (mm/in) If your appliance is to be built-in, follow the diagram and chart below for appropriate dimensions. -
Page 9: Electrical Requirements
Installation instructions Model CL24WC2 CLFD24WC CL242WBV CL15WC/CL151WBV 660mm (26″) 660mm (26″) 660mm (26″) 660mm (26″) 387mm (15¼″) 610mm (24″) 610mm (24″) 610mm (24″) 883mm (34 ¾″) 883mm (34 ¾″) 883mm (34 ¾″) 883mm (34 ¾″) 152mm (6″) 152mm (6″) 152mm (6″) 152mm (6″) -
Page 10: Operation
Operation Operating conditions Proper operation of the appliance is conservation mode ON or OFF. In this guaranteed only if the following conditions are mode, the LED light and display will turn met: off, and the C/F light will be on. ... - Page 11 Operation For Model CL24WC2: 9) “ ” button (right) Control elements Pressing this button will increase (warm) the temperature of the lower chamber in steps of 1F (or 1C). 10) “ ” button (right) Pressing this button will lower (cool) the temperature of the lower chamber in steps of 1) “...
-
Page 12: Functions
Operation Functions Temperature Memory Function It is normal that the cabinet shows “HI” or If the power is suddenly lost, the set “LO” from time to time. If it occurs frequently temperature will be saved by the unit. Once or lasts for a long time, you can restart the the power is back on, the unit will be at the unit by unplugging it, then re-plugging after... -
Page 13: Shelves
Shelves (Models:CLFD24WC, CL15WC , CL151WBV) (Model:CL24WC2) Do not cover racks with aluminum To prevent damaging the door gasket, make foil or any other material that will prevent adequate air circulation sure to have the door all the way opened within the cabinet. -
Page 14: Reversing The Door
Operation Reversing the door ( for Models CL24WC2 & CL15WC & CL151WBV ) Note: Only for CL15WC/CL151WBV unscrew 2 screws at bottom and remove the Reed switch (6),then This operating requires two persons. install (6) att op of door frame, Unscrew the screw located underneath the door frame and the limit device (5), and relocate it att he leftend side oft he door frame.The door revolves 180 degrees. -
Page 15: Installing The Handle
Operation INSTALLING THE HANDLE To install the handle please follow the below instructions: 1. Pull away the door gasket in the area where the handle is to be installed on the left side as shown below in Fig .1 . The gasket is easily displaced by hand, no tools are necessary. 2. -
Page 16: Wine Storage
Operation Wine storage If you are storing wine for long periods of time, it should be stored at a temperature of between 10°C and 14°C (50°F and 57°F). This is the range of temperatures wine coolers are kept at, and it is just right to allow wine to mature properly. -
Page 17: Cleaning And Care
Cleaning and care Cleaning the appliance Wipe the internal surface of the appliance or rubber parts. Never use paper towels or window with a soft sponge lightly dipped in a table salt solution. Add 2 tablespoons of table salt cleaners on the plastic parts. -
Page 18: Problems With Your Appliance
Problems with your appliance? You can solve many common appliance problems easily, saving you the cost of a possible service call. Try the suggestions below to see if you can solve the problem before calling the servicer. Troubleshooting guide Problem Possible cause Appliance does not operate. -
Page 19: Limited Warranty
Limited Warranty PARTS AND LABOR WARRANTY INFORMATION SUMMIT Appliances are manufactured to provide outstanding value, and your satisfaction is our goal on every product. All SUMMIT major appliances carry a one-year limited warranty on both parts and labor. All refrigerators and freezers carry an additional four years on the compressor. - Page 20 Limited Warranty cont’d IMPROPER ELECTRICAL CONNECTIONS: Summit is not responsible for the repair or replacement of failed or damaged components resulting from electrical power failure, the use of extension cords, low voltage, or voltage drops to the unit. NO IMPLIED WARRANTY OF MERCHANTABILITY OR FITNESS FOR A PARTICULAR PURPOSE: There are no other warranties, expressed, implied or statutory, except the parts &...
- Page 21 Manuel du propriétaire Modèles encastrés CL24WC2 : Cabinet-cellier de 46 bouteilles CLFD24WC : Cabinet-cellier de 42 bouteilles CL242WBV : Cabinet-cellier et centre de boissons CL15WC : Cabinet-cellier de 34 bouteilles CL151WBV : Cabinet-cellier et centre de boissons AVANT D’UTILISER CET APPAREIL, VEUILLEZ LIRE ET RESPECTER TOUTES LES RÈGLES DE SÉCURITÉ...
- Page 22 Table des matières Consignes de sécurité et avertissements ............2 - 5 Transport et déballage ....................6 Instructions d’installation ..................6- Avant d’installer votre appareil ................6 Outils nécessaires ....................7 Dimensions d’installation (encastré) ..............7-8 Exigences électriques ..................8 Utilisation .......................
-
Page 23: Consignes De Sécurité Et Avertissements
Consignes de sécurité et avertissements CONSIGNES IMPORTANTES DE SÉCURITÉ AVERTISSEMENT : Avant d’utiliser l’appareil, positionnez-le et installez-le adéquatement, conformément aux instructions fournies dans le présent manuel. Par conséquent, veuillez lire attentivement ce manuel. Afin de diminuer les risques d’incendie, de décharge électrique ou de blessure lors de l’utilisation de cet appareil, appliquez des mesures de sécurité de base, notamment : ... - Page 24 Consignes de sécurité et avertissements Enfants au foyer Instructions de mise à la terre DANGER, UN ENFANT POURRAIT RESTER COINCER DANS L’APPAREIL! Avant de jeter votre vieil appareil : Démontez la porte. Laissez les tablettes en place pour éviter qu’un enfant puisse entrer ...
- Page 25 MISE EN GARDE DE SÉCURITÉ Une utilisation impropre de votre appareil peut causer des dommages sérieux è l’unité et/ou des blessures à l’utilisateur. Cet appareil est conçu pour usage domestique intérieur uniquement. N’utilisez pas l’appareil pour usage industriel. Toute autre utilisation peut annuler la garantie.
- Page 26 Installer en position verticale sur une surface plane et de niveau et assurerez-vous d’avoir une ventilation suffisante. Ne placez pas l’appareil près de sources de chaleur comme les fours, grils ou encore face à la lumière directe du soleil. ...
-
Page 27: Transport Et Déballage
Instructions d’installation REMARQUE : Les modèles CL24WC2, CLFD24WC, CL242WBV, CL15WC et CL151WBV peuvent être installés soit de manière encastrée ou sur pied. Pour une installation sur pied, prévoyez au moins 4 po d’espace libre à l’arrière, sur les côtés et au-dessus de l’appareil afin d’obtenir une circulation adéquate pour le refroidissement du compresseur et du condensateur. -
Page 28: Outils Nécessaires
Instructions d’installation Instructions d’installation POUR VOTRE SÉCURITÉ POUR VOTRE SÉCURITÉ Les personnes qui réalisent le travail d’installation décrit dans cette section Les personnes qui réalisent le travail d’installation décrit dans cette section Les personnes qui réalisent le travail d’installation décrit dans cette section doivent porter des gants et des lunettes de protection. - Page 29 Instructions d’installation Modèle CL24WC2 CLFD24WC CL242WBV CL15WC/CL151WBV 660 mm (26 po) 660 mm (26 po) 660 mm (26 po) 660 mm (26 po) 387 mm (15¼ po) 610 mm (24 po) 610 mm (24 po) 610 mm (24 po) 883 mm 883 mm (34¾...
-
Page 30: Utilisation
Utilisation Conditions d’utilisation désactiver la fonction d’économie d’énergie. Le bon fonctionnement de cet appareil est Lorsque cette fonction est activée, le voyant DEL garanti uniquement si les conditions suivantes et l’écran s’éteignent, et le voyant C/F ’allume. sont respectées : »... - Page 31 Utilisation Pour le modèle CL24WC2 : Commandes 9) Bouton « » (droite) Appuyez sur ce bouton pour augmenter la température du compartiment inférieur, un degré à la fois (1°F ou 1°C). 1) Bouton « » 10) Bouton « » (droite) Pour mettre en marche et arrêter l’appareil (ON et OFF,...
-
Page 32: Fonctions
Utilisation Fonctions Fonction de mémorisation de la température Il est normal que l’appareil affiche « HI » ou « LO » à En cas de panne de courant, l’appareil conserve en l’occasion. Si cet affichage est fréquent ou persiste, mémoire le réglage de température. -
Page 33: Tablettes
Utilisation :CLFD24WC, CL15WC) CL15WC,CL151WBV) Modèles :CL24WC2 CL24WC2) Modèle Pour éviter d’endommager le coupe éviter d’endommager le coupe-froid de la porte, faites attention à laisser la porte bien porte, faites attention à laisser la porte bien ouverte quand vous retirez une tablette. Pour ouverte quand vous retirez une tablette. -
Page 34: Inverser La Porte
Utilisation Inverser la porte pour les modèles CL24WC2 et CL15WC et CL151WBV Pour CL15WC/CL151WBV seulement... -
Page 35: Installation De La Poignée
Utilisation INSTALLATION DE LA POIGNÉE Pour installer la poignée veuillez suivre les instructions ci-dessous : 1. Tirer le joint d’étanchéité de la porte ①, puis le dégager-le partiellement tel qu’indiqué à l’Illustration # 1. Le joint peut être enlevé facilement, à la main, aucun outil n'est nécessaire. 2. -
Page 36: Rangement Du Vin
Utilisation Rangement du vin Si vous conservez des bouteilles de vin pour Modèle : CL24WC2 une longue période, nous vous conseillons de les conserver à une température entre 10°C et 14°C (50°F et 57°F). Les cabinets-celliers sont habituellement programmés pour conserver cette échelle... -
Page 37: Nettoyage Et Entretien
Nettoyage Nettoyage et entretien ■ N’utilisez jamais de serviette en papier ou N’utilisez jamais de serviette en papier ou Nettoyer l’appareil de nettoyant pour fenêtre sur le de nettoyant pour fenêtre sur les pièces en plastique. ■ Essuyez les surfaces intérieures avec une Essuyez les surfaces intérieures avec une éponge douce légèrement trempée da éponge douce légèrement trempée dans une... -
Page 38: Un Problème Avec Votre Appareil
Un problème avec votre appareil? Vous pouvez résoudre un grand nombre de problèmes courants facilement, ce qui vous fait économiser sur les services d’un technicien. Essayez les suggestions ci-dessous avant d’avoir recours à un technicien. Guide de dépannage Problème Cause possible L’appareil ne fonctionne pas. -
Page 39: Garantie Limitée
Garantie limitée INFORMATION SUR LA GARANTIE DES PIÈCES ET DE LA MAIN-D’ŒUVRE Les appareils SUMMIT sont fabriqués dans l’optique d’offrir une valeur exceptionnelle, et en visant votre entière satisfaction, et ce, pour chaque produit. Tous les grands produits SUMMIT sont couverts d’une garantie limitée d’un an, valable sur les pièces et la main-d’œuvre. - Page 40 Garantie limitée, suite AUCUN DOMMAGE INDIRECT : SUMMIT n’est aucunement responsable des pertes économiques, de profit ou des dommages directs ou indirects, y compris, sans s’y limiter, aux pertes ou aux dommages causés par une réclamation pour détérioration d’aliments ou de produits, que cette détérioration soit causée ou non par un défaut de réfrigération.
Need help?
Do you have a question about the CL24WC2 and is the answer not in the manual?
Questions and answers