Table of Contents
Advertisement
Quick Links
BEFORE USE, PLEASE READ AND FOLLOW ALL SAFETY RULES AND OPERATING INSTRUCTIONS.
Write Serial No. (on lower left corner of
inside cabinet) here:
___________________________________________
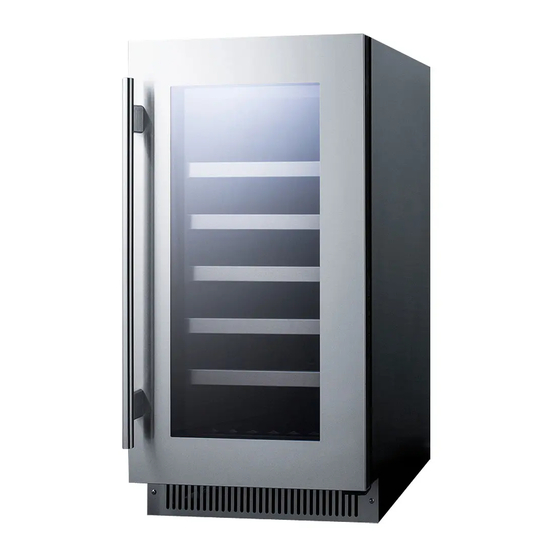
WINE CELLAR
Model No.: CL18WC
Instruction Manual
Felix Storch, Inc.
An ISO 9001:2015 registered company
770 Garrison Avenue
Bronx, NY10474
www.summitappliance.com
Advertisement
Table of Contents

Summary of Contents for Summit Classic Collection CL18WC
- Page 1 WINE CELLAR Model No.: CL18WC Instruction Manual BEFORE USE, PLEASE READ AND FOLLOW ALL SAFETY RULES AND OPERATING INSTRUCTIONS. Felix Storch, Inc. Write Serial No. (on lower left corner of An ISO 9001:2015 registered company inside cabinet) here: 770 Garrison Avenue...
-
Page 2: Table Of Contents
TABLE OF CONTENTS Appliance Safety Important Safeguards Disposal Location of Parts Installation Instructions 7- 9 Before Using Your Appliance Installation of Your Appliance Electrical Connection Extension Cord Reversing the Door Swing of Your Appliance 8- 9 Installing the Stainless Steel Handle Operating Your Appliance 9- 12 Recommended Temperature Settings... -
Page 3: Appliance Safety
APPLIANCE SAFETY Your safety and the safety of others are very important. We have provided many important safety messages in this manual and on your appliance. Always read and obey all safety messages. This is the Safety Alert Symbol. The symbol alerts you to potential hazards that can kill or injure you and others. - Page 4 - Avoid open flames and anything that creates a spark, - Disconnect from the electrical power line, - Air the room in which the appliance is located for several minutes, and - Contact the Service Department for advice. The more coolant there is in an appliance, the larger the room it should be installed in. In the event of a leakage, if the appliance is in a small room, there is the danger of combustible gases building up.
-
Page 5: Disposal
Risk of child entrapment! Child entrapment and suffocation are not problems of the past. Junked or abandoned appliances are still dangerous, even if they will “just sit for a few days”. Before discarding your old refrigerator: Take off the doors ... -
Page 6: Location Of Parts
LOCATION OF PARTS Digital Control Panel Handle Shelves(5) Door Ventilation Grille Adjustable Cabinet... -
Page 7: Installation Instructions
INSTALLATION INSTRUCTIONS BEFORE USING YOUR APPLIANCE Remove the exterior and interior packing. Before connecting the appliance to the power source, let it stand upright for approximately 2 hours. This will reduce the possibility of a malfunction in the cooling system from handling during transportation. -
Page 8: Extension Cord
the wall outlet and circuit checked by a qualified electrician to make sure the outlet is properly grounded. When a standard 2-prong wall outlet is encountered, it is your responsibility and obligation to have it replaced with a properly grounded 3-prong wall outlet. To prevent accidental injury, the cord should be secured behind the appliance and not left exposed or dangling. -
Page 9: Installing The Stainless Steel Handle
3. Screw the bottom hinge 3 on the left designated position but don’t tighten it. (Fig. 2) 4. Pop out the cover caps on the left side of cabinet and use them to cover the screw holes on the right hand side. - Page 10 ON/OFF Power To turn the appliance off, press and hold the key for 5 seconds until the temperature display goes out. To turn the appliance on, press and hold the key for 1 second until the temperature display lights up. NOTE: Pressing the POWER key once can switch off the audible alarm when the alarm is on.
-
Page 11: Interior Light
SABBATH MODE Sabbath mode is available for the observance of certain religious holidays. This mode turns off the displays, interior light and audible alarms and prevents them from turning on again. Normal cooling operations will still take place. To initiate Sabbath mode, press the POWER and LIGHT keys at the same time for at least 5 seconds. The indicator light will flash four times to confirm the Sabbath mode is ON. -
Page 12: Storage
However, frost may accumulate on the evaporator if the unit is repeatedly opened in a high heat or high humidity location. If this frost pattern does not clear within 24 hours, your unit will require manual defrosting. STORAGE Bottles can differ in size. Accordingly, the actual number of bottles you can store may vary. The approximate maximum bottle capacity can be achieved when storing traditional 750 ml Bordeaux bottles in bulk storage. -
Page 13: Care And Maintenance
CARE AND MAINTENANCE CLEANING YOUR WINE CELLAR Turn off the power, unplug the appliance, and remove all items, including shelves. Wash the inside surfaces with a solution of warm water and baking soda (about 2 tablespoons of baking soda to a quart of water). ... -
Page 14: Troubleshooting
TROUBLESHOOTING You can solve many common problems easily, saving you the cost of a possible service call. Try the suggestions below to see if you can solve the problem before calling the servicer. Troubleshooting Guide PROBLEM POSSIBLE CAUSE REMEDY Appliance is not connected to a power ... - Page 15 The appliance is not properly leveled. Level the appliance with the adjustable feet. The door will Check the door hinge and reassemble The door was reversed and not properly not close correctly. re-installed. properly. Clean the door gasket. ...
-
Page 16: Limited Warranty
LIMITED WARRANTY ONE-YEAR LIMITED WARRANTY Within the 48 contiguous United States, for one year from the date of purchase, when this appliance is operated and maintained according to instructions attached to or furnished with the product, warrantor will pay for factory-specified parts and repair labor to correct defects in materials or workmanship. Service must be provided by a designated service company.


Need help?
Do you have a question about the CL18WC and is the answer not in the manual?
Questions and answers