Table of Contents
Advertisement
Quick Links
Advertisement
Table of Contents

Subscribe to Our Youtube Channel
Related Manuals for NextBase A26X Series


Summary of Contents for NextBase A26X Series
- Page 1 Instruction Manual English A26X Series Professional High Definition Car DVR...
-
Page 2: Table Of Contents
Contents PRECAUTIONS ................................2 PRODUCT SPECIFICATIONS ............................3 PACKAGE CONTENTS ..............................5 PRODUCT FEATURES ..............................6 CONTROLS ...................................7 INSTALLATION ................................8 INSERTING THE MEMORY CARD ........................8 INSTALLING IN VEHICLES ...........................9 VIDEO MODE ................................13 NORMAL RECORDING ............................14 EMERGENCY RECORDING (FILE PROTECTED) .....................14 AUTO REPAIR ..............................14 PLAYBACK MODE ..............................15 PLAYING VIDEOS ...............................15 VIEWING PHOTOS..............................16 MENU AND SETTINGS ...............................17... -
Page 3: Product Specifications
PRODUCT SPECIFICATIONS • A263(W)-NT96670 Chip • A262(W)-NT96670 • A26R-NT96671 • A263(W): IMX415 8M CMOS Sensor • A262(W): IMX335 5M • A26R: IMX307 2M • A263(W): Single Channel Dual Channel 4K/30fps 4K/30fps+1080P/30fps 2K/30fps 2K/30fps+1080P/30fps 1080P/60fps 1080P/30fps+1080P/30fps 1080P/30fps 720P/60fps 720P/30fps • A262(W): Single Channel Dual Channel Video Resolution... - Page 4 External Power Supply 5V 1.5A • A263 (without Wi-Fi): Single Channel Dual Channel Voltage: 5V Voltage: 5V Current: 430~490mA Current: 800~850mA • A263W (with Wi-Fi): Single Channel Dual Channel Voltage: 5V Voltage: 5V Current: 570~640mA Current: 950~1010mA Voltage / Current •...
-
Page 5: Package Contents
Dash Cam Car charger with Type-C USB data cable Quick start guide (Front camera) adapter A26X Series Quick Start Guide GPS bracket with attached Window Stickers (x2) 3M Adhesive Sticker 3M adhesive sticker NOTE: •... -
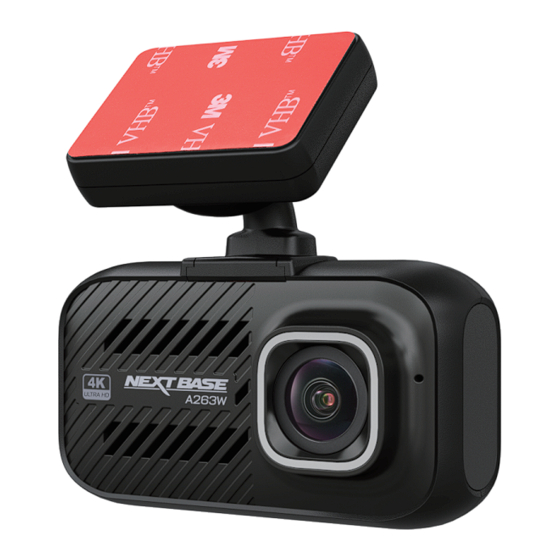
Page 6: Product Features
PRODUCT FEATURES Thank you for purchasing this Nextbase™ Dash Cam product. In this section, we will outline some of the features available with this camera. 2.0” LCD Colour Screen Large screen for ease of use for the camera configurations and viewing the playback of both videos and photos. -
Page 7: Controls
CONTROLS 1. MICROPHONE 8. DOWN ( Integrated microphone for audio recording. • Recording Mode: Take a snapshot. • Playback Mode: Move to the previous file. 2. CAMERA LENS • Video Playback Mode: Fast forward playback. Wide angle 140º. • In the Menus: Navigate down within menus. 3. -
Page 8: Installation
INSTALLATION INSERTING THE MEMORY CARD Remove the dust cover. Then insert the memory card with the gold contacts facing to the front of the camera. Make sure to push the memory card until it clicks into place. NOTE: • Do not remove or insert the memory card when the camera is turned on. This may damage the memory card, or recordings within. -
Page 9: Installing In Vehicles
INSTALLING IN VEHICLES To securely mount the camera on the windshield, do the following: 1 Attach the GPS bracket to the camera. Slide it into the mounting socket until you hear a click. 2 Wipe clean the chosen area of the windshield with a dry cloth. Then attach the window sticker onto the windshield. - Page 10 Installing the Rear View Camera NOTE: A26X dash cam can only work with A26R. 1 Wipe clean the chosen area of the rear window with a dry cloth. Then attach the window sticker onto the rear window. 2 Peel off the adhesive cover layer from the mounting bracket. Then place and press down the bracket firmly onto the attached window sticker.
- Page 11 Connecting to Power Use only the supplied NEXTBASE car adapter to turn on the camera. 1 Connect one end of the car adapter to the USB port of the GPS bracket. 2 Route the car adapter around the windshield to the 12-24Vdc socket, ensuring that your view is not obstructed, and that the adapter is not a distraction.
- Page 12 Powering On/Off the Camera Manually To manually turn on/off the power, press and hold the button for at least 3 seconds. NOTE: • Your Dash Cam is shipped with the Screen Saver function set to Default OFF. This is for ease of initial setup. Once setup is complete, the screen saver should be set to 15 seconds, in order to blank the screen completely whilst driving.
-
Page 13: Video Mode
VIDEO MODE The key below explains the various information displayed on the screen when the camera is in Video mode. Some icons will only be displayed once the relevant function has been selected within the OSD menu, as described below. 00:01:57 4KP30+1080P30 30/10/2021... -
Page 14: Normal Recording
NORMAL RECORDING When the vehicle engine starts up, the camera automatically turns on and starts recording. Recording will automatically stop when the engine is switched off. Or, long press the button to stop recording manually. Taking Snapshots During video recording, long press the button to take snapshot of the current scene. -
Page 15: Playback Mode
PLAYBACK MODE During video recording, press the button to enter the Playback mode. Then press the button to select the file category that you want to browse and press the button. File Type Normal File Emergency Photo File PLAYING VIDEOS Press the button to browse the desired video file. -
Page 16: Viewing Photos
Playback Mode 20211017144755_000029A 1080P30 00:00:05 • Press the button to rewind the video playback. Press the button again to toggle the playback speed. • Press the button to fast forward the video playback. Press the button again to toggle the playback speed. •... -
Page 17: Menu And Settings
MENU AND SETTINGS Press the button to enter the OSD menu. Setup 1/5 Resolution Loop Recording Video Format Exposure In general, use the button to select an option and press the button to confirm. To return to the previous page, press the button. - Page 18 GPS Info Stamp Turn on/off the GPS co-ordinates and speed stamp shown on the recorded files. When a recording is viewed using the third party GPS players, both the GPS co-ordinates and speed information remain available. Record Audio Turn on/off the microphone for video recording. Screen Saver Turn on the Screen Saver function to turn off the screen after a chosen period of inactivity.
-
Page 19: Updating The Firmware
UPDATING THE FIRMWARE For A263(W)/A262(W) 1 Download the latest firmware from NEXTBASE website (www.next-base.com), and prepare a microSD card. 2 Upzip the zipped file and store the firmware (“FWA262.bin” or “FWA263.bin”) into the root directory of the memory card. 3 Turn off the camera and insert the memory card into its slot. -
Page 20: Pc Connection
PC CONNECTION To view the recorded files on your computer, you can do either of the following: • Remove the memory card from the camera. Then, insert the memory card to the computer memory card slot (if applicable). You can also use a card reader and plug it to the computer USB port. •... - Page 21 Video Playback and Viewing GPS Log From the top panel, click File > Open. Then select the video that you want to view. Playback Length Video length Recording Data (Date & Time, Speed, Location) Driving direction on the map File name Volume adjustment Current Speed and...
-
Page 22: My_Nb App (Ios)
My_NB APP (iOS) INITIAL SETUP Minimum System Requirement (Mobile Device): iOS 11 Installing the APP Use the “my_NB” keyword to search for the My_NB app from App Store. Then follow the on-screen instructions to download and install the App to your mobile device. Connecting the Device to the App 1 On the camera, press and hold the button for 3 seconds to switch to the Wi-Fi mode. - Page 23 Once the connection is established, the Wi-Fi icon ( ) turns green. The SSID and password will disappear from the screen. 00:00:13 4KP30+1080P30 30/10/2021 13:30:25 USING THE APP Overview 1 On your mobile device, tap the icon to launch the My_NB app. 2 Tap CONNECT YOUR CAMERA to enter the main screen.
- Page 24 Viewing the Recorded Files NOTE: Before accessing the files, make sure to stop the video recording first. Otherwise, the reminder message will appear on the screen. Tap OK to dismiss the message. To view the recorded videos: 1 On the bottom panel, tap 2 Select the video category (Video or Emergency tab) that you want to view.
- Page 25 To view the recorded photos: 1 On the bottom panel, tap . Then select the Photo tab. 2 Select the desired photo that you want to view.
- Page 26 Managing the Recorded Files NOTE: Before accessing the files, make sure to stop the video recording first. Otherwise, the reminder message will appear on the screen. Tap OK to dismiss the message. To save the file(s) to your mobile device: 1 On the bottom panel, tap .
- Page 27 4 After the saving process is complete, a “Success” message will appear on the screen. Tap Ok to return to the selection page. NOTE: You can also directly save the file while viewing the photo/video. Simply tap to save the file. To save all files to your mobile device: 1 On the bottom panel, tap .
- Page 28 To browse the downloaded files: 1 On the bottom panel, tap . Then tap (on the top-right panel). 2 Select the video category (Video or Emergency tab) or Photo tab. 3 Select the file that you want to view. NOTE: To delete the file, tap .
- Page 29 To delete the file(s): 1 On the bottom panel, tap . Then select the video category (Video or Emergency tab) or Photo tab. 2 Tap and select the file(s) that you want to delete. Then tap to delete the selected file(s). 3 A confirmation message will appear on the screen.
- Page 30 Configuring the Device Settings NOTE: Before configuring the device settings, make sure to stop the video recording first. Otherwise, the reminder message will appear on the screen. Tap OK to dismiss the message. To configure the video or system related settings: On the bottom panel, tap .
- Page 31 Menu Option Description Wi-Fi Setting Change the Wi-Fi network name (SSID) and the password. Available Memory View the remaining storage space on the microSD card. Space Format SD Card Format the inserted microSD card. Reset Camera Reset the camera to the factory default settings. Setting App Version Display the app version number.
-
Page 32: My_Nb App (Android)
My_NB APP (Android) INITIAL SETUP Minimum System Requirement (Mobile Device): Android 4 Installing the APP Use the “my_NB” keyword to search for the My_NB app from Google Play Store. Then follow the on-screen instructions to download and install the App to your mobile device. Connecting the Device to the App 1 On the camera, press and hold the button for 3 seconds to switch to the Wi-Fi mode. - Page 33 Once the connection is established, the Wi-Fi icon ( ) turns green. The SSID and password will disappear from the screen. 00:00:13 4KP30+1080P30 30/10/2021 13:30:25 USING THE APP Overview 1 On your mobile device, tap the icon to launch the My_NB app. 2 Tap CONNECT YOUR CAMERA to enter the main screen.
- Page 34 Viewing the Recorded Files NOTE: Before accessing the files, make sure to stop the video recording first. Otherwise, the reminder message will appear shortly on the screen. To view the recorded videos: 1 On the bottom panel, tap 2 Select the video category (Video or Emergency tab) that you want to view. 3 Select the desired video.
- Page 35 To view the recorded photos: 1 On the bottom panel, tap . Then select the Photo tab. 2 Select the desired photo that you want to view.
- Page 36 Managing the Recorded Files NOTE: Before accessing the files, make sure to stop the video recording first. Otherwise, the reminder message will appear shortly on the screen. To save the file(s) to your mobile device: 1 On the bottom panel, tap .
- Page 37 To save all files to your mobile device: 1 On the bottom panel, tap . Then select the video category (Video or Emergency tab) or Photo tab. 2 Tap . Then tap to select all files. NOTE: To deselect the files, tap again.
- Page 38 To browse the downloaded files: 1 On the bottom panel, tap . Then tap (on the top-right panel). 2 Select the video category (Video or Emergency tab) or Photo tab. 3 Select the file that you want to view. NOTE: .
- Page 39 To delete the file(s): 1 On the bottom panel, tap . Then select the video category (Video or Emergency tab) or Photo tab. 2 Tap and select the file(s) that you want to delete. Then tap to delete the selected file(s). 3 A confirmation message will appear on the screen.
- Page 40 Configuring the Device Settings NOTE: Before configuring the device settings, make sure to stop the video recording first. Otherwise, the reminder message will appear shortly on the screen. To configure the video or system related settings: On the bottom panel, tap .
- Page 41 Menu Option Description Wi-Fi Setting Change the Wi-Fi network name (SSID) and the password. Available Memory View the remaining storage space on the microSD card. Space Format SD Card Format the inserted microSD card. Reset Camera Reset the camera to the factory default settings. Setting App Version Display the app version number.
-
Page 42: Troubleshooting
TROUBLESHOOTING Common troubleshooting tips that you may encounter while using the camera are listed in the table below. Problem Solution The camera does not record. • Be sure to use a microSD card with the size of at least 8GB, Class 10. •...
Need help?
Do you have a question about the A26X Series and is the answer not in the manual?
Questions and answers