Table of Contents
Advertisement
Quick Links
Advertisement
Table of Contents

Related Manuals for Euromaid EMFS60DOINDSS


Summary of Contents for Euromaid EMFS60DOINDSS
- Page 1 Double Oven / User Manual EMFS60DOINDSS...
- Page 2 Thank you for choosing this product. This User Manual contains important safety information and instructions on the operation and maintenance of your appliance. Please take the time to read this User Manual before using your appliance and keep this book for future reference. Icon Type Meaning...
-
Page 3: Table Of Contents
CONTENTS 1.SAFETY INSTRUCTIONS ....................4 1.1 General Safety Warnings ....................4 1.2 Installation Warnings ......................7 1.3 During Use ........................8 1.4 During Cleaning and Maintenance .................9 2.INSTALLATION AND PREPARATION FOR USE ............11 2.1 Instructions for the Installer ..................11 2.2 Electrical Connection and Safety..................12 2.3 Safety Chain .........................13 2.4 Adjusting the feet ......................13 3.PRODUCT FEATURES ....................14... -
Page 4: Safety Instructions
1. SAFETY INSTRUCTIONS • Carefully read all instructions before using your appliance and keep them in a convenient place for reference when necessary. • This manual has been prepared for more than one model therefore your appliance may not have some of the features described within. - Page 5 WARNING: Danger of fire: Do not store items on the cooking surfaces. WARNING: If the surface is cracked, switch off the appliance to avoid the possibility of electric shock. • For induction hobs, metallic objects such as knives, forks, spoons and lids should not be placed on the hob surface because they can get hot.
- Page 6 before replacing the lamp. CAUTION: Accessible parts may be hot when cooking or grilling. Keep young children away from the appliance when it is in use. • Your appliance is produced in accordance with all applicable local and international standards and regulations.
-
Page 7: Installation Warnings
its service agent or similarly qualified persons in order to prevent a danger. • Do not let children climb on the oven door or sit on it while it is open. • Please keep children and animals away from this appliance. -
Page 8: During Use
decorative door, in order to avoid overheating. 1.3 During Use • When you first use your oven you may notice a slight smell. This is perfectly normal and is caused by the insulation materials on the heater elements. We suggest that, before using your oven for the first time, you leave it empty and operate it at maximum temperature for 45 minutes. -
Page 9: During Cleaning And Maintenance
valve off when gas appliances are not in use. • Make sure the appliance control knobs are always in the “0” (stop) position when it is not used. • The trays incline when pulled out. Take care not to spill or drop hot food while removing them from the oven. - Page 10 Disposal of your old machine This symbol on the product or on its packaging indicates that this product should not be treated as household waste. Instead it should be handed over to the applicable collection point for the recycling of electrical and electronic equipment.
-
Page 11: Installation And Preparation For Use
2. INSTALLATION AND • If the kitchen furniture is higher than the cooktop, the kitchen furniture must be PREPARATION FOR USE at least 10 cm away from the sides of WARNING : This appliance must be appliance for air circulation. installed by an authorised service •... -
Page 12: Electrical Connection And Safety
2.2 Electrical Connection and Safety • If the appliance is not connected to the mains with a plug, a all-pole WARNING: The electrical connection disconnector (with at least 3 mm contact of this appliance should be carried out spacing) must be used in order to meet by an authorised service person or the safety regulations. -
Page 13: Safety Chain
2.3 Safety Chain The appliance can be prevented from falling over by securing the supplied safety chain to the rear of the cooker. Use a wall plug to fasten the hook (1) to the kitchen wall and connect the safety chain (3) to the hook with the help of the locking mechanism. -
Page 14: Product Features
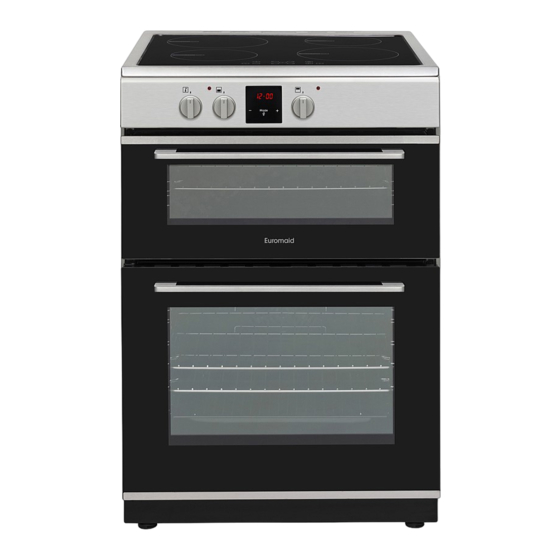
3. PRODUCT FEATURES Important: Specifications for the product vary and the appearance of your appliance may differ from that shown in the figures below. List of Components 1. Cooktop 2. Control Panel 3. Top Oven Door Handle 4. Top Oven Door 5. -
Page 15: Use Of Product
4. USE OF PRODUCT • If a suitable pan is placed on the cooking zone symbol will disappear and cooking continues at the selected 4.1 Hob Controls power level. Induction Zone • To obtain best energy transferring the The information given in the following table diameter of the cookware base should is for guidance only. - Page 16 10- Timer selection that is dangerous to touch. 11- Boost After switching off the cooking zone, the respective display will show “H” until the 12- On/Off corresponding cooking zone temperature is Use the induction cooking zones with at a safe level. suitable cookware.
- Page 17 set for more than one cooking zone). decrease heat setting button again. “L” will no longer be displayed and the hob will When the timer has run down, a signal will switch off. sound, the timer display will show “00” and the assigned cooking zone timer LED will Key Lock blink.
- Page 18 Turbo Function: Supply frequency is different from the rated Switch on the TURBO values. Switch the hob off by pressing , wait until “H” disappears from all function using the main zones, switch the hob on by pressing oven function control and continue to use.
- Page 19 heating element will start operating. The Upper Heating temperature can be adjusted using the Function: Switch on main oven thermostat knob. This function is the UPPER function used for grilling and toasting food. Use the using the top oven upper shelves of the oven. Lightly brush the function control knob.
- Page 20 3. After a few seconds, the dot will stop flashing and will remain illuminated. Key Lock The key lock automatically activates Function Description after the timer has not been used for 7 seconds. “ ” symbol will appear and remain Auto cooking illuminated.
- Page 21 This function helps you to cook for a fixed period of time. A time range between 0 and 3. Use the “+” and 10 hours can be set. Prepare the food for “-” buttons to set the cooking and put it in the oven. desired finishing time.
-
Page 22: Accessories
4. Press “MODE” until cloth on first use. you see “end” symbol on the screen. The time and the symbols “A” will flash. 5. Select the desired finishing time using the “+” and “-” keys. “ ” symbol will disappear. •... -
Page 23: Cleaning And Maintenance
• The accessories may deform with heat. processing food in oven-friendly containers. Once they have cooled down, they will recover their original appearance and performance. • Trays and wire grids can be positioned on any level from 1 to 5. •... - Page 24 Cleaning the Inside of the Oven • The inside of enamelled ovens are best cleaned while the oven is warm. • Wipe the oven with a soft cloth soaked in soapy water after each use. Then, wipe the oven over again with a wet cloth and dry it.
- Page 25 • Use a glass cleaner to clean the inside release from the location bracket (x). Pull and outside of the glass parts. Then, the glass out in the direction of A. rinse and dry them thoroughly with a dry cloth. Cleaning the Enamelled Parts •...
-
Page 26: Maintenance
of a screwdriver) up to the end position. Removal of the Wire Shelf To remove the wire rack, pull the wire rack as shown in the figure. After releasing it from the clips (a), lift it up. 3. Close the door until it almost reaches the fully closed position and remove the door by pulling it towards you. -
Page 27: Troubleshooting&Transport
6. TROUBLESHOOTING&TRANSPORT 6.1 Troubleshooting If you still have a problem with your appliance after checking these basic troubleshooting steps, please contact an authorised service person or qualified technician. Problem Possible Cause Solution Check the household fuse for the appliance. Hob control card’s display is blacked out. -
Page 28: Transport
6.2 Transport If you need to transport the product, use the original product packaging and carry it using its original case. Follow the transport signs on the packaging. Tape all independent parts to the product to prevent damaging the product during transport. If you do not have the original packaging, prepare a carriage box so that the appliance, especially the external surfaces of the product, is protected against external threats. - Page 29 10757119 ıb...
Need help?
Do you have a question about the EMFS60DOINDSS and is the answer not in the manual?
Questions and answers