
Related Manuals for Esatto ETM314X


Summary of Contents for Esatto ETM314X
- Page 1 Product: Model Code/s: 314L Top Mount ETM314X Refrigerator ETM314W User Manual Exactly what you need Version: Online: V1.0 0621 esatto.house...
- Page 2 User Manual Appliances Exactly what you need...
-
Page 3: Table Of Contents
Contents Page 4 Page 5 Welcome Safety Warnings Page 8 Page 9 Product Overview Getting Started Page 9 Page 11 Installation Using Your Fridge Page 12 Page 12 Usage Tips Energy Saving Tips Page 13 Page 18 Maintenance FAQs and... - Page 4 Telephone 1300 11 4357 — Again, thank you for choosing Esatto and we look forward to being of service to you. Email support@residentia.group Kind Regards, The Residentia Team...
- Page 5 Safety Warnings IMPORTANT SAFETY INSTRUCTIONS READ CAREFULLY AND KEEP FOR FUTURE REFERENCE Read this manual thoroughly before first use, even if you are familiar with this type of product. The safety precautions enclosed herein reduce the risk of fire, electric shock and injury when correctly adhered to.
- Page 6 User Manual Safety Warnings (Continued) • WARNING: Do not use mechanical devices or other means to accelerate the defrosting process, other than those recommended by the manufacturer. • Usage restriction: This appliance is not intended for use by persons (including children) with reduced physical, sensory or mental capabilities, or lack of experience and knowledge, unless they have been given supervision or instructions concerning use of the appliance by a person responsible for their safety.
- Page 7 Safety Warnings (Continued) • Protect from moisture: To protect against the risk of electric shock, do not immerse the unit, cord or plug in water or spray it with any other liquid. Do not connect or disconnect the electric plug when your hands are wet.
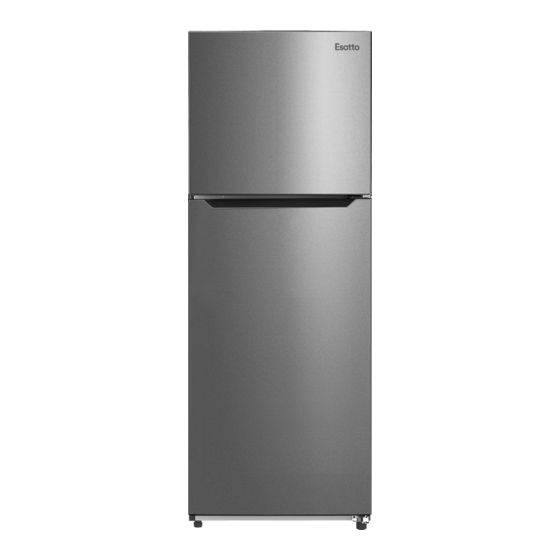
- Page 8 User Manual Product Overview Your Top Mount Fridge Levelling the Fridge a. Turn the feet clockwise to raise the refrigerator; b. Turn the feet counterclockwise to lower the refrigerator; c. Adjust both feet so the refrigerator is level.
- Page 9 Getting Started Unpacking • Packaging materials: This appliance has been packaged to protect it against transportation damage. Remove all packaging materials from around and inside the appliance and keep the original packaging carton and materials in a safe place. It will help prevent any damage if the product needs to be transported in the future, and you can use it to store the appliance when it is not in use.
- Page 10 User Manual Installation (Continued) Installation Cont. Electrical connection • WARNING! It must be possible to disconnect the appliance from the mains power supply; the plug must therefore be easily accessible after installation. • Before plugging in your new fridge, let it stand upright for at least 2 hours. This will allow the refrigerant gases to settle into the compressor and reduce the possibility of a malfunction in the cooling system.
- Page 11 Using Your Fridge The temperature controls are located on the inside of the refrigerator. The Thermostat Controls A) Setting: Use the button to cycle through the temperature settings in the following order: 1, 2, 3, 4, 5 • 1: The warmest temperature setting •...
-
Page 12: Usage Tips
User Manual Usage Tips • Do not store food uncovered in the fridge. Always use good quality, fridge-proof packaging to maintain food quality. Remove air from packages of solid food and seal bags tightly before freezing. • Keep portions small to ensure they are frozen (and subsequently defrosted) rapidly. •... -
Page 13: Maintenance And Cleaning
Maintenance and Cleaning Defrosting The refrigerator has an automatic defrosting function. Frost formed due to change of season or temperature may also be manually removed by disconnecting the appliance from power supply. Alternatively, wipe the surface with a dry towel. - Page 14 User Manual Maintenance and Cleaning (Continued) Maintenance and Cleaning Cont. Service, repair and spare parts Do not attempt to alter or modify this appliance in any way, or to repair or replace any part unless it is specifically recommended in this manual. All other servicing should be referred to a qualified technician. Contact our after sales support on 1300 11 43 57 for advice.
- Page 15 Maintenance and Cleaning (Continued) Maintenance and Cleaning: Reversing the Door Cont. 4. Unscrew the middle hinge screws to remove the middle hinge. 5. Next, remove the two hole plugs. 6. Remove the screw cap to remove the screw on the middle beam.
- Page 16 User Manual Maintenance and Cleaning (Continued) Maintenance and Cleaning: Reversing the Door Cont. 10. Dismantle the stoppers and sleeve pipes on the lower cover of both refrigerator door and freezer door. 11. Install them on the other side of both doors and exchange the installation of the sleeve pipe and hole cap on the top of the refrigerator door.
- Page 17 Maintenance and Cleaning (Continued) Maintenance and Cleaning: Reversing the Door Cont. 14. Take out the left upper hinge, left upper hinge cover, and right decorative cover from the accessory bag, install the freezer door on the middle hinge, and install the left upper hinge, left hinge cover and hole cap.
-
Page 18: Faqs And Troubleshooting
User Manual FAQs and Troubleshooting Problem Possible Cause Possible Solution The appliance • The appliance is not plugged in. • Plug in the appliance. does not • The appliance is turned off. • Turn on power point. operate. • The circuit breaker tripped or a •... - Page 19 Specifications Model: ETM314W & ETM314X Product Dimensions: W: 595mm, D: 695mm, H: 1620mm Weight (Net/Gross): 55/62kg Net Capacity: 314L Energy Rating: 3 Stars MEPS Standards This product complies with AS/NZS 60335.1 and AS/NZS 60335.2.24 electrical safety, and with EN 55014-1:2006+A1:2009 A2:2011 for electromagnetic compatibility.
-
Page 20: Purchase Details
User Manual Purchase Details For your records, please record details of your purchase Your serial number can be found on the rear below and staple your receipt on the opposite page. of your refrigerator STORE DETAILS STORE NAME ADDRESS TELEPHONE PURCHASE DATE PRODUCT DETAILS MODEL NO. - Page 21 Attach your receipt to this page...
- Page 22 User Manual Warranty Information WARRANTY TERMS AND CONDITIONS IN THIS WARRANTY REFRIGERATION APPLIANCES ‘acceptable quality’ as referred to in clause 10 of this warranty has the same meaning referred to in This document sets out the terms and conditions of the the ACL;...
- Page 23 You will bear the cost of transportation, travel and For Appliances and services provided by Residentia delivery of the Appliance to and from Residentia Group in Australia, the Appliances come with a Group or its ASR. If you reside outside of the service...
- Page 24 This page User Manual is intentionally left blank Appliances Exactly what you need A RESIDENTIA GROUP INITIATIVE...
Need help?
Do you have a question about the ETM314X and is the answer not in the manual?
Questions and answers