
Related Manuals for Greenway Home Products GACS835


Summary of Contents for Greenway Home Products GACS835
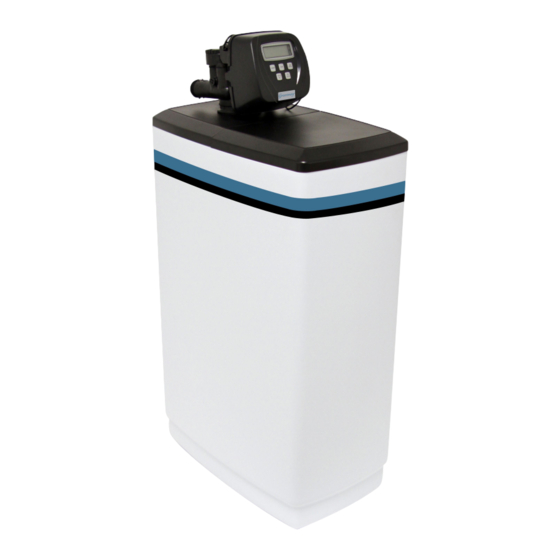
- Page 1 Water Technologies Advance Cabinet Series Softeners Water Technologies Water Technologies Installation Instructions & Owner’s Manual...
- Page 2 able of onTenTs Preinstallation Instructions for Dealers Page Bypass Valve Page Installation Instructions Page Programming Procedures for Water Softeners Page Operating Displays for the Softener Page Start-up Instructions Page Specifications Page Troubleshooting Guide Page 10-11 Replacement Parts Page 12-17 Quick Reference Guide Page Back Cover Your Water Test Hardness...
- Page 3 reinsTallaTion nsTruCTions The manufacturer has set the water treatment unit’s sequence of cycles, cycle times, salt dose, exchange capacity, and gallon capacity. For water softeners the salt dose refill time has been preset. The dealer should read this page and guide the installer regarding hardness, day override, and time of regeneration, before installation: For the installer , the following must be used:...
- Page 4 Normal Operation Position: The inlet and outlet handles point in the direction of flow indicated by the engraved arrows on the control valve. Water flows through the control valve for normal operation of a water softener or filter. During the regeneration cycle this position provides regeneration water to the unit, (Fig. 1) while also providing untreated water to the distribution system 2. Bypass Position: The inlet and outlet handles point to the center of the bypass. The system is isolated from the water pressure in the plumbing system. Untreated water is supplied to the (Fig.
- Page 5 nsTallaTion nsTruCTions GENERAL INSTALLATION & SERVICE WARNINGS The control valve, fittings and/or bypass are designed to accommodate minor plumbing misalignments. There is a small amount of “give” to properly connect the piping but the water softener is not designed to support the weight of the plumbing. Do not use Vaseline, oils, other hydrocarbon lubricants or spray silicone anywhere. A silicone lubricant may be used on black “O” Rings, but is not necessary. Avoid any type of lubricants, including silicone, on red or clear lip seals. Do not use pipe dope or other sealants on threads. Teflon tape must be used on the threads of the ®...
- Page 6 5. INLET/OUTLET PLUMBING: Be sure to install Bypass Valve onto main control valve before beginning plumbing. Make provisions to bypass outside hydrant and cold hard water lines at this time. Install an inlet shutoff valve and plumb to the unit’s bypass valve inlet located at the right rear as you face the unit. There are a variety of installation fittings available. They are listed under Installation Fitting Assemblies, page 17. When assembling the installation fitting package (inlet and outlet), connect the fitting to the plumbing system first and then attach the nut, split ring and “O” Ring. Heat from soldering or solvent cements may damage the nut, split ring or “O” Ring. Solder joints should be cool and solvent cements should be set before installing the nut, split ring and “O” Ring. Avoid getting solder flux, primer, and solvent cement on any part of the “O” Rings, split rings, bypass valve or control valve. If the building’s electrical system is grounded to the plumbing, install a copper grounding strap from the inlet to the outlet pipe. Plumbing must be done in accordance with all applicable local codes. 6.
- Page 7 rogramming roCedures for aTer ofTeners 1. Set time of day: Time of day should only need to be set after extended power outages or when daylight saving time begins or ends. If an extended power outage occurs, the time of day will flash on and off indicating that the time should be reset. STEP 1 – Press SET CLOCK. STEP 2 – C urrent Time (hour): Set the hour of the day using the s or t buttons. AM/PM toggles after 12:00. Press to go to step 3.
- Page 8 2. Programming cont’d: STEP 4 – R egeneration Time (Hour): Set the hour of day for regeneration using the s or t buttons. AM/PM toggles after 12:00. The default time is 2:00 a.m. Press to go to step 5. next STEP 5 – N ext Regeneration Time (Minutes): Set the minutes of day for regeneration using the s or t buttons. Press to exit Installer Displays/Settings. next PeraTing isPlays for The ofTener 1.
- Page 9 Once a manual regeneration is initiated, the unit will go into the FILL position. This position allows water to enter the brine tank until it reaches the proper level. Once this position is complete, you will notice a 240 Minute (4 hours) SOFTENING position. This 4-hour window allows the salt to dissolve and achieve proper brine strength. During these FILL and SOFTENING positions, you will have softened water available for use. Once the unit advances to the BACKWASH position and subsequent positions thereafter (see Start Up Instructions for regeneration sequence), the water softener will deliver water, but it will be untreated. IMPORTANT : With the Dry Salt Storage Feature, the brine tank will refill 4 hours before the actual regeneration occurs. You may experience a small amount of noise for a short period of time at 10:00 p.m. (with typical setting) on the night that regeneration is to occur. This noise is only the brine tank filling and at no time during this process will you be without treated water.
- Page 10 TarT nsTruCTions for aTer ofTeners 1. W ith the softener in the bypass mode (Fig. 2 on page 2) and the control valve in normal operation where the display shows either the time of day or the gallons remaining: Manually add 3 GALLONS of water to the regenerant tank. NOTE: If too much water is put into the brine tank during softener start up it could result in a salty water complaint after the first regeneration.
- Page 11 Note the color of water coming from faucet. If discolored let water run until clear. NOTE: At no time should there be “large particles” of media noticed at faucet or laundry tub. If this is seen immediately shut off water and bypass system as this could be an indication of a distributor failure. Contact manufacturer or distributor for assistance. PeCifiCaTions Model GACS835 GACS1035 Maximum 21,000 @ 9.0 32,000 @ 15.0 Capacity: (Grains/Lbs.
- Page 12 roubleshooTing uide PROBLEM CAUSE CORRECTION A. transformer unplugged A. reconnect transformer 1. Timer does not B. no power at outlet B. repair or use working outlet display time of C. defective transformer C. replace transformer D. defective PC board D. replace PC board A. outlet is on a switch A. use unswitched outlet 2.
- Page 13 roubleshooTing uide PROBLEM CAUSE CORRECTION A. motor not operating A. replace motors B. no power at outlet B. repair outlet or use working outlet C. defective transformer C. replace transformer 6. Valve stalled in D. defective PC board D. replace PC board regeneration E. broken drive gear or drive cap assy. E. replace gear or drive cap assy. F. broken piston retainer F. replace drive cap assy. G. broken main or regenerant piston G. replace main or regenerant piston A. connect transformer and PC board...
- Page 14 Replacement parts can be purchased by checking our website at www.greenwaywt.com, or ePlaCemenT arTs by calling our customer service line at 1-866-253-0447, Monday to Thursday from 8:30 AM to 5:00 PM (EST), Friday from 8:30 AM to 4:00 PM (EST), or write: Greenway Water Technologies, Customer Service Center, 400 Southgate Drive, Guelph, ON, Canada N1G 4P5.
- Page 15 ePlaCemenT arTs INJECTOR ASSEMBLIES Item No. Part No. Description Qty. YY.WS.CV3176 Injector cap YY.WS.CV3152 O-ring 135 YY.WS.CV3177 Injector screen YY.WS.CV3010-1Z Injector assembly plug E injector assembly, YY.WS.CV3010-1E WhiTe F injector assembly, YY.WS.CV3010-1F blue not shown YY.WS.CV3170 O-ring 011, lower not shown YY.WS.CV3171 O-ring 013, lower * The injector plug and the injector each use one lower and one upper o-ring REFILL PORT ASSEMBLY...
- Page 16 ePlaCemenT arTs DRAIN LINE ASSEMBLY 3/4” Item No. Part No. Description Qty. YY.WS.CH4615 Locking clip, elbow YY.WS.CPKP10TS8-BULK Insert, 5/8” tube YY.WS.CV3192 Nut, 3/4” drain elbow YY.WS.CV1358-01 Drain elbow assembly, 3/4” NPT YY.WS.CV3163 O-ring 019 YY.WS.CV3159-01 DLFC retainer assembly YY.WS.CV3162-007 0.7 DLFC for 3/4” elbow YY.WS.CV3162-010 1.0 DLFC for 3/4” elbow YY.WS.CV3162-013 1.3 DLFC for 3/4” elbow YY.WS.CV3162-017 1.7 DLFC for 3/4” elbow YY.WS.CV3162-022 2.2 DLFC for 3/4” elbow YY.WS.CV3162-027 2.7 DLFC for 3/4” elbow YY.WS.CV3162-032 3.2 DLFC for 3/4” elbow YY.WS.CV3162-042 4.2 DLFC for 3/4” elbow 3/4”...
- Page 17 ePlaCemenT arTs WATER METER & METER PLUG Item No. Part No. Description Qty. YY.WS.CV3151 Nut, 1” QC YY.WS.CV3003 Meter assembly, includes items 3 & 4 YY.WS.CV3118-01 Turbine assembly YY.WS.CV3105 O-ring 215 YY.WS.CV3003-01 Meter plug assembly SAFETY FLOAT ASSEMBLY Item No. Part No. Description YY.WS.CH4650-01 474 safety elbow 3/8” YY.WS.CH4655 474 .5 gpm flow control YY.WS.CH4615 Elbow locking clip YY.WS.CH4640-32 474 float assm 32” w/ grommets YY.WS.CH4500-48...
- Page 18 ePlaCemenT arTs BYPASS VALVE Item No. Part No. Description Qty. YY.WS.CV3151 Nut, 1” quick connect YY.WS.CV3150 Split ring YY.WS.CV3105 O-ring 215 YY.WS.CV3145 Bypass rotor, 1” YY.WS.CV3146 Bypass cap YY.WS.CV3147 Bypass handle YY.WS.CV3148 Bypass rotor seal retainer YY.WS.CV3152 O-ring 135 YY.WS.CV3155 O-ring 112 YY.WS.CV3156 O-ring 214...
- Page 19 nsTallaTion iTTing ssemblies 3/4” & 1” PVC SOLVENT ELBOW 1” PVC MALE NPT ELBOW Item No. Part No. Description Qty. Item No. Part No. Description Qty. YY.WS.CV3007-01 3/4” & 1” PVC solvent elbow assy. YY.WS.CV3007 1” PVC male NPT elbow assy. YY.WS.CV3151 Nut, 1” quick connect YY.WS.CV3151 Nut, 1” quick connect YY.WS.CV3150 Split Ring YY.WS.CV3150 Split Ring YY.WS.CV3105 O-ring 215 YY.WS.CV3105 O-ring 215 YY.WS.CV3189...
- Page 20 uiCk eferenCe uide MANUAL REGENERATION GENERAL OPERATION NOTE: For softeners, if brine When the system is operating, one of three displays will be shown: Time of day, gallons of treated water available, or gallons per minute. Pressing tank does not contain salt, fill next with salt and wait at least 2 will toggle between the three choices. hours before regeneration.
Need help?
Do you have a question about the GACS835 and is the answer not in the manual?
Questions and answers