Table of Contents
Advertisement
Quick Links
Advertisement
Chapters
Table of Contents

Related Manuals for bluefin WIFI Master Plus THBF855


Summary of Contents for bluefin WIFI Master Plus THBF855
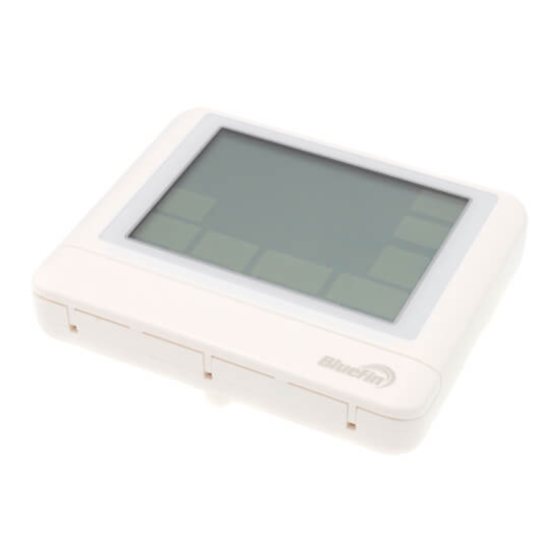
- Page 2 Installation Manual THBF855-WIFI The WiFi digital programmable thermostat allows you to control the temperature anytime and anywhere. It features a large backlight display and LCD Touch Screen for ease of programming. Compatible with any Smartphone-iOS and Android. Thermostat Application Guide Power Type Description A trained, experienced...
-
Page 3: Table Of Contents
Installation Tips Page Table of Contents I nsta I lation Tips Thermostat Quick Reference Wiring Wiring Diagrams 9-11 12-17 Technician Setup Una version en espanol de este manual se puede descargar en Programming 18-22 la pagina web de la compania. Specifications °... - Page 4 Installation Tips Subbase Installation G) Horizontal Mount Installation Tip: • @Vertical Mount ; Electrical Hazard Failure to disconnect the power before ®,#1 beginning to install this product can ���Uu�m��/ m= m:nr�� cause electrical shock or equipment damage. • Mercury Notice All of our products are mercury free.
-
Page 5: I Nsta I Lation Tips
Installation Tips Mount Thermostat Align the 4 tabs on the subbase with corresponding slots on the back of the thermostat, then push gently until the thermostat snaps in place. -
Page 6: Thermostat Quick Reference
Thermostat Quick Reference Getting to know your thermostat Days of the week and the current time The current room temperature The user selectable setpoint temperature Fan Buttons Hold is displayed when thermostat program is permanently overridden. Next step Buttons System Operation Indicators: If these are Set time Buttons flashing, the compressor delay is active. -
Page 7: Wiring
Wiring Caution: Warning: Electrical Hazard � Failure to disconnect the power All components of the control before beginning to install this system and the thermostat product can cause electrical shock installation must conform to '"or equipment damage. Class II circuits per the NEC Code. Wiring 1. - Page 8 Wiring Terminal Designations The following terminals on the thermostat wall plate are wired according to the type of HVAC system connected to and how the thermostat is configured. CONVENTIONAL HEAT MODE HEAT MODE COOL MODE COOL MODE HVAC STAGE 1 STAGE 2 STAGE 1 STAGE 2...
- Page 9 Wiring Wiring Tips Note: Wire Specifications In many heat pump systems with Use shielded or non-shielded 18-22 no emergency heat relay, a jumper gauge thermostat wire. can be installed between E and W2 to turn thermostat into a single stage control for Emergency Heat Operation.
-
Page 10: Wiring Diagrams
Wiring Diagrams & Power supply & Factory-installed jumper. Remove only when installing on 2-transformer systems & Use either O or B terminals for cha nge over valve Typical 2H/2C System: 1 Transformer (HOT) �@ L ..c& @@]- COMPRESSOR RELAY Typical Cool-Only System With Fan HEAT RELAY... - Page 11 Wiring Diagrams Typical Heat Only System With Fan c:.----------1 (HOT) RH @@ V @ @ t=======• � @ @ HEAT RELAY H---1 G @ @ FAN RELAY Note: In many systems with no emergency heat relay a jumper can be installed between E and W2.
- Page 12 Wiring Diagrams Typical 3H/2C or 2H/1 C Heat Pump System (HOT) & COMPRESSOR RELAY COOL CHANGE & EMERGENC Y OVER VALVE HEAT RELAY HEAT CHANGE @® OVER VALVE FAN RELAY @® AUXILIARY HEAT RELAY COMPRESSOR RELAY2 Typical 2H/2C System: 2 Transformer REMOVE JUMPER &...
-
Page 13: Technician Setup
Technician Setup 1. Press MENU button 2. Press and hold button for 3 seconds. This 3 second delay is TECHNICIAN SETUP designed_so that homeowners do not accidentally access the installer settings. 3. Configure the installer options as desired using the table below. 4. - Page 14 l\.11 T I\ I ,- r-11\11 r-1 I I.LI" 1_1_11 11·· Technician Setup LCD Will Show Adjustment Options Default Tech Setup Steps This feature allows the installer to You can select the minimum select the minimum run time for compressor run time from "off': the compressor.
-
Page 15: Swing (Cycle Rate Or Differential)
Technician Setup LCD Will Show Adjustment Options Default Tech Setup Steps The swing setting often called The heating swing setting is HEFH S�JHJG ° "cycle rate': "differential" or adjustable from 0.2 to 2 . For "anticipation" is adjustable. A example: A swing setting of Heating °... - Page 16 Technician Setup Tech Setup Steps LCD Will Show Adjustment Options Default The cooling fan delay setting will You can set the cooling fan delay to OFF, 15, 30, 60 or 90 delay the fan from coming on in f-R"' rnn1 I�...
- Page 17 Technician Setup Tech Setup Steps LCD Will Show Adjustment Options Default □ You can select either 12 or 24 12 H Use the or GJ key to select OU� hour clock setting. 12 or 24 hour clock. 12 or 24 Clock , - ,-,i-- ··,...
- Page 18 Technician Setup LCDWillShow Adjustment Options Default Tech Setup Steps If ON is selected the beep will When any key is pressed ab sound. audible beep will sound. There is u , - an ON or an OFF. Beep If OFF is selected, there is not sound.
- Page 19 Programming Swing Setting Tip The second stage will turn on at 2x the swing setting. The second stage will turn off when 1 x the swing is reached. For example, if the swing ° setting is .5 degrees for heating and the thermostat is set at 70 F, the first °...
- Page 20 Programming Set Time (If using programming} Press the button MENU 2. Press SET TIME Day of the week will be flashing. Use the[±] or C=J key to select the current day of the week. Press NEXT 5. The current hour will be flashing. Use the [±] orC=J key to select the current hour.
- Page 21 Programming Select using the system key. You have to HEAT COOL Note: program heat and cool each separately. Press MENU Press Monday will be displayed and the SET SCHED. Note: WAKE icon will be shown. You are now programming t he time WAKE period for that day.
- Page 22 Programming 5. Press NEXT. 6. The setpoint temperature will be flashing. Use the[±] or [:] key to make your setpoint selection for that day's WAKE period. Press NEXT. 8. Repeat steps 4 through 7 for that day's LEAVE time period, RETURN time period, and SLEEP time period.
- Page 23 Programming Factory Default Program Setpoint Setpoint Day of Events Time Temperature Temperature the Week (HEAT) (COOL) ° ° ° ° Wake F (21 F (24 ° ° ° ° Leave F (17 F (28 Weekday ° ° ° ° Return F (21 F (24 °...
- Page 24 Thermostat Quick Reference A Note About Auto Changeover: If the thermostat is set to Auto, you have the ability to switch between Auto Heat or Auto Cool by pressing the System key. This can be done once the current mode has reached its set- point.
- Page 25 Setting up the WiFi connection This WiFi thermostat works with the "SmartTherm" App, compatible with iOS and Android systems and available for download in the Apple store or Google Play.
- Page 26 Operating Manual...
- Page 27 • • Quickstart Guide Control Sch dti Cool Note: Insert the quick start guide behind thermostat Table of Contents Page Company Information & Table of Contents 2- 3 Creating an Account Following Schedule, ..Home Page Device List Cool Fan On for1...
-
Page 28: Creating An Account
Creating An Account Before You Begin Download the SmartTherm app from the Apple Store or Google Play Store. You must have your WIFI GET IT ON � Coogle play network password ready. • • ..•:m- Oemo Step 1 - Log In or Create a new Account Note: Multiple people can use the... - Page 29 Regiser Account • • < N: e w Accloun1 Step 2 - Register your Account After successful registration, Slgnup return to this screen and tap "Login".
-
Page 30: Home Page
Home page Ocstat Heating Control Select to enter Heating control the device list page. -
Page 31: Device List
Device List • • Heating Control Nomon1d�a Tap Add New Device to add a thermostat to your account. -
Page 32: Add A Thermostat
Add A Thermostat • ·- Choose device step 1 - Select Your Thermostat... - Page 33 Add A Thermostat Add new dewce, Has the device been nstalled end power tutried on? Step 2- Thermostat enters the binding state Select the YES button...
- Page 34 Add A Thermostat • ·- < Touch the Menu button, as sholl'm below Step 3 - Thermostat enters the binding state Select the YES button...
- Page 35 Add A Thermostat • ·- Touch I T�tlni.csan bunon lor 3-5 seconds, • as 1:.ho¥1n b�low Step 4 - Thermostat enters the binding state Select the YES button...
- Page 36 Add A Thermostats • ·- Touch the FAN button for 3-5 seconds as shown below Step 5 - Thermostat enters the binding state Select the YES button...
- Page 37 Add A Thermostat • ·- Choose your network The wrrent d«tli ico doc not n 1pp01t Gmmvork Step 6- Connecting To tesll-ocstat The Thermostat •••••••••••• Re-nember rTI'/ pass'Mffll The WIFI symbol will flash at the top. Connect to your WIFI network and enter the password.
- Page 38 Add A Thermostat • • Step 7- Connecting Add ..To The Thermostat • ·- Use the'W iF i Settings" button below to go to your A.ft� COl'lnecing to the device settings and 't�r4-f Network, please navigate baok to thi!i APP tn connect to the thermostat continue rhtt setup ptocen! WIFI network (it will begin...
- Page 39 Add A Thermostat ·-- 5"at1mgs Wi-Fi Wi...fi Step 8- Connecting To therm_98d863-be0c0e Llme.!urH !kl- The Thermostat a ,. 123- Connect to the WiFi network ChinaNet-ASHh (J_) � Chlna:Nel-dveF that starts with "therm" . Once �o 1est1--ocstat connected, return to this.,app, •...
- Page 40 Add A Thermostat • hlaSlhl < Step 9- Binding Device Device binding is usually completed in 15-25 seconds. ✓ Search device The , conflguration of WlFi Binding dev,ce " Ro ll)' cane...
- Page 41 Connecting Your Thermostat Nll!SIM :Heating Coritrol • • STN855W No"'°' d:ua...
- Page 42 Control Screen Overview Back Button • Return back to Device List screen. • � Thermostat Setting 11:s, Set the minimum and maximum IIIQfljf,I. ,ii.t $'1TN855W temperature of the thermostat and temperature compensation. Schoo Control Room Temperature The current ambient temperature of the room. Relay �...
- Page 43 Thermostats Schedule • • Setting NoSl� • J:1tAM STH85SW Enter settings and copy Co trol Schedule. 5elllngs Copy System model schedule Choose to view schedules for > 06:00 different system modes. 08:.00 > Ill'" Schedule list 18:00 Time and temperature to 22:00 modified per each schedule •...
- Page 44 Modify the schedule • • Back Button Return back to Device Control screen. Save Button Edit Schedule Save the revised schedule. � Change temperature Cool button Modify the temperature of the specified time period. Change the time Scroll up and down to select the specified time.
-
Page 45: Thermostat Control
Copy schedule • • .,�-· Back Button ntAM No�M. Copy Return back to My Thermostats control Monday screen. Tuesday Where is the schedule Copy from the schedule for the Wedrtosday specified day. Th� To this timetable flidly Copy the schedule marked 2 to other selected dates. - Page 46 Thermostats Menu • • �SIM • Heating Control STN855 W • No more d.al $et!inQ$ Thermostats Menu Enter settings and Delete thermostat...
-
Page 47: Thermostat Details
Thermostat details • • Back Button Return back to Device Control screen. ,..SIM9 Thermostat name button De-vice name TN 55W The name of the thermostat Device time 2020 07 can be modified. Versiunea firmware �' Thermostat time The time of the thermostat can be modified. - Page 48 -English: " This device complies with Industry Canada licence-exempt RSS standard(s). Operation is subject to the following two conditions: (1) this device may not cause interference, and (2) this device must accept any interference, including interference that may cause undesired operation of the device."...
- Page 49 FCC STATEMENT: This device complies with Part 15 of the FCC Rules. Operation is subject to the following two conditions: ( 1) This device may not cause harmful interference, and ( 2) This device must accept any interference received, including interference that may cause undesired operation. Warning: Changes or modifications not expressly approved by the party responsible for compliance could void the user's authority to operate the equipment.
- Page 50 there is no guarantee that interference will not occur in a particular installation. If this equipment does cause harmful interference to radio or television reception, which can be determined by turning the equipment off and on, the user is encouraged to try to correct the interference by one or more of the following measures: Reorient or relocate the receiving antenna.Increase the separation between the equipment and receiver.
Need help?
Do you have a question about the WIFI Master Plus THBF855 and is the answer not in the manual?
Questions and answers