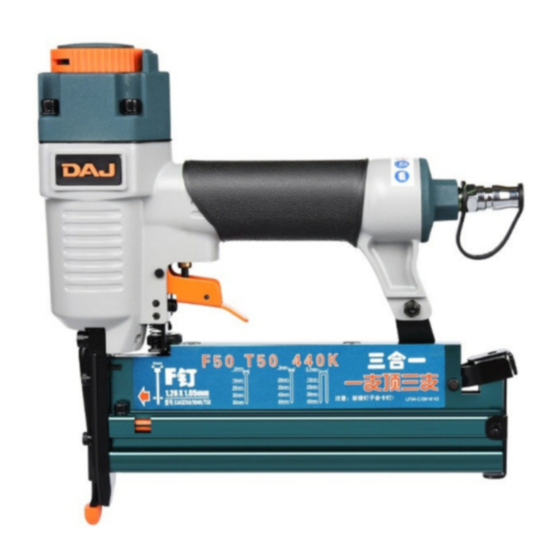
Summary of Contents for DAJ XAGD9040III
- Page 1 USERS MANUAL 18GA. 1/4" NARROW CROWN STAPLER MODEL: XAGD9040III WARNING Failure to follow warning could result in DEATH OR SERIOUS INJURY. M0737 05/12 V1...
-
Page 2: Table Of Contents
CONTENTS: IMPORTANT INFORMATION EXPLANATION OF THE NAILING ACTION GENERAL SAFETY RULES WORK AREA PERSONAL SAFETY TOOL USE AND CARE SERVICE AIR SOURCE DESCRIPTION AND SPECIFICATION SPECIFICATION FEATURES ASSEMBLY/INSTALLATION OPERATION LUBRICATION ADJUSTING AIR PRESSURE CONNECTING AIR SUPPLY TOOL TESTING NAIL LOADING METHODS OF OPERATION COLD WEATHER OPERATION ADJUSTING THE NAILING DEPTH... -
Page 3: Important Information P1
IMPORTANT INFORMATION The employer must enforce the use of safety glasses by the tool operator and others in work area. ALWAYS WEAR EAR AND HEAD PROTECTION. Always WARNING wear ear protection to protect your ears from loud noise, TO AVOID SERIOUS PERSONAL INJURY, ALL USERS AND Always wear head protection to protect your head from EMPLOYERS/OWNERS MUST READ AND UNDERSTAND flying objects. -
Page 4: Air Source
TOOL SERVICE CONDITION THAT MAY AFFECT THE TOOL'S OPERATION. If damaged, have the tool serviced before using. Many USE ONLY ACCESSORIES THAT ARE IDENTIFIED BY THE accidents are caused by poorly maintained tools. MANUFACTURER FOR THE SPECIFIC TOOL MODEL CHECK SAFETY BEFORE USE. Make sure the safety USE OF UNAUTHORIZED PARTS OR FAILURE TO FOLLOW operates properly. -
Page 5: Specification P3
FUNCTIONAL DESCRIPTION AND SPECIFICATIONS WARNING Disconnect the tool from the air source before making any adjustments, changing accessories o storing the tool. Such precautionary safety measures reduce the risk of unintentional tool operation. FIG. 1 Adjustable Exhaust Deflector Trigger Air Cap Hand Grip Air Plug Body... -
Page 6: Features P4
FEATURES If the tool is not used with an in-line lubrication system on the air supply it is necessary to periodically lubricate the Quick-release latch for jams. tool with air tool lubrication. New designed light die cast alum alloy body. Under low use, lubricate once a day. -
Page 7: Tool Testing
against the wood. WARNING THE TOOL MUST NOT OPERATE. Do not exceed maximum recommended air pressure Separate the safety from the wood. Next, point the tool marked on the tool. Verify prior to using the tool that the air downward, pull the trigger and then wait in that position source has been adjusted within the rated air-pressure for 5 seconds or longer. -
Page 8: Methods Of Operation
COLD WEATHER OPERATION FIG. 6 WARNING DO NOT USE A FROZEN TOOL. Allow tool to thaw before using. Moisture frozen in the tool may impede internal components resulting in the risk of injury and/or tool damage. When using the tool in cold conditions the tool will cycle slower than usual while driving the first nails. -
Page 9: Nail Indicator
ADJUSTING THE EXHAUST FIG. 11 The direction of the exhaust vent can be changed by turning the top cover (FIG 9). FIG. 9 Safety No-Mar Tip The nose cap may reduce nailing depth due to its thickness. Re-adjustment of nailing depth is required. NAIL INDICATOR MAINTENANCE The red indicator bars are used to show when the tool... -
Page 10: Storage P8
With ON/OFF switch in OFF position, plug compressor WARNING into electrical outlet. Do not attempt to clean by inserting pointed objects through Close pressure regulator by turning all the way to the openings. Sharp edges may damage internal components left. Turn compressor ON and let it pump all the way up and cause a serious hazard. -
Page 11: Trouble Solving P9
TROUBLE SOLVING PROBLEMS POSSIBLE CAUSES SUGGESTED SOLUTIONS Air leaking near the top of 1. Loose screws. 1. Tighten screws. the tool or in the trigger 2. Worn or damaged O-rings or seals. 2. Install overhaul kit. area. Air leaking near the bottom 1.


Need help?
Do you have a question about the XAGD9040III and is the answer not in the manual?
Questions and answers