Table of Contents
Advertisement
Quick Links
We advise you to read this manual carefully, which contains all the instructions for
maintaining the appliance's aesthetic and functional qualities.
For further information on the product: www.smeg.com
Contents
ORIGINAL INSTRUCTIONS
4
4
7
7
7
7
7
8
9
9
10
10
11
12
12
12
13
13
15
18
20
20
20
20
22
24
25
27
27
27
28
3
Advertisement
Table of Contents

Subscribe to Our Youtube Channel
Related Manuals for Smeg SFA579X2


Summary of Contents for Smeg SFA579X2
-
Page 1: Table Of Contents
5 Installation 5.1 Electrical connection 5.2 Cable replacement 5.3 Positioning ORIGINAL INSTRUCTIONS We advise you to read this manual carefully, which contains all the instructions for maintaining the appliance's aesthetic and functional qualities. For further information on the product: www.smeg.com... -
Page 2: Instructions
Instructions 1 Instructions • Do not allow children younger than 8 years old to come near the 1.1 General safety instructions appliance when in operation. • Cleaning and maintenance must Risk of personal injury not be carried out by unsupervised •... - Page 3 Instructions • DO NOT USE OR STORE • Do not use cleaning products FLAMMABLE MATERIALS NEAR containing chlorine, ammonia or THE APPLIANCE. bleach on steel parts or parts with metallic surface finishes (e.g. • NEVER USE AEROSOL CANS anodizing, nickel- or chromium- NEAR THE APPLIANCE WHILE IT plating).
- Page 4 Instructions • Remove all trays and racks which • Position the appliance into the are not required during cooking. cabinet cutout with the help of a second person. • Do not cover the bottom of the oven cavity with aluminium or tin •...
-
Page 5: Appliance Purpose
Instructions • Before carrying out any work on 1.3 Manufacturer liability the appliance (installation, The manufacturer declines all liability maintenance, positioning or for damage to persons or property moving), wear personal protective caused by: equipment. • use of the appliance other than the •... -
Page 6: How To Read The User Manual
Instructions To dispose of the appliance: 1.7 How to read the user manual • Cut the power supply cable and remove This user manual uses the following reading it along with the plug. conventions: Power voltage Instructions Danger of electrocution General information on this user manual, on safety and final •... -
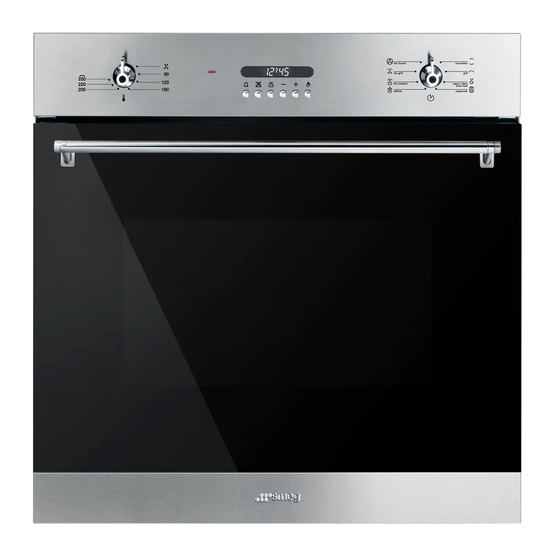
Page 7: Description
Description 2 Description 2.1 General Description 1 Control panel 5 Fan 2 Oven light 6 Rack/tray support frames 3 Seal Frame shelf 4 Door... -
Page 8: Control Panel
Description 2.2 Control panel 1 Temperature knob 2.3 Other parts This knob allows you to select the cooking Oven shelves temperature and the Vapour Clean The oven features shelves for positioning temperature (on some models only). trays and racks at different heights. The Turn the knob clockwise to the required insertion heights are indicated from the value, between the minimum and maximum... -
Page 9: Available Accessories
Description 2.4 Available accessories Deep tray Rack useful for collecting fat from foods placed on the rack above and for cooking pies, useful for holding cooking containers. pizzas and baked desserts. Tray rack Some models are not provided with all accessories. The oven accessories intended to come into contact with food are made of materials that comply with... -
Page 10: Use
3 Use High temperature inside the oven during use 3.1 Instructions Danger of fire or explosion High temperature inside the oven • Do not spray any spray products near during use the appliance. Danger of burns • Do not use or leave flammable materials near the appliance. -
Page 11: Using The Accessories
3.3 Using the accessories Tray rack The tray rack has to be inserted into the tray. Racks and trays In this way fat can be collected separately Racks and trays have to be inserted into the from the food which is being cooked. side guides until they come to a complete stop. - Page 12 Functions list Supercook The combination of fan-assisted Convection cooking and traditional cooking As the heat comes from above and allows different foods to be cooked below at the same time, this system on several levels extremely quickly is particularly suitable for certain and efficiently, without odours and types of food.
-
Page 13: Programmer Clock
3.5 Programmer clock Defrost Rapid defrosting is helped by switching on the fan provided and the top heating element that ensure uniform distribution of low temperature air inside the oven. Fan grill Minute minder timer key The air produced by the fan softens the strong heatwave generated by End of cooking key the grill, grilling perfectly even very... - Page 14 Timed cooking Programmed cooking Timed cooking is the function Programmed cooking is the which allows a cooking operation function which allows a cooking to be started and then ended after operation to be started at a set a specific length of time set by the time and then ended after a user.
- Page 15 End of cooking Stopping the buzzer At the end of cooking the oven will switch The buzzer stops automatically after about off automatically and simultaneously a seven minutes. It can be deactivated buzzer will start to sound intermittently. After manually by pressing the key the buzzer has been deactivated, the If a timed or programmed cooking process display will go back to displaying the...
-
Page 16: Cooking Advice
3.6 Cooking advice • To check whether the dessert is cooked right through: At the end of the cooking General advice time, put a toothpick into the highest point of the dessert. If the dough does not stick • Use a fan assisted function to achieve to the toothpick, the dessert is cooked. - Page 17 Cooking information table Weight Temperature Time Food Function Shelf (minutes) (Kg) (°C) Lasagne 3 - 4 Convection 220 - 230 45 - 50 Pasta bake 3 - 4 Convection 220 - 230 45 - 50 Roast veal Supercook/Fan Assisted 180 - 190 90 - 100 Pork Supercook/Fan Assisted...
-
Page 18: Cleaning And Maintenance
Cleaning and maintenance 4 Cleaning and maintenance Food stains or residues Do not use steel sponges or sharp scrapers 4.1 Instructions as they will damage the surfaces. Use ordinary non-abrasive products with Improper use the aid of wooden or plastic utensils if Risk of damage to surfaces necessary. - Page 19 Cleaning and maintenance 2. Grasp the door on both sides with both Removing the internal glass panels hands, raise it so that it forms an angle of For easier cleaning, the internal glass around 30° and remove it. panels of the door can be removed. 1.
-
Page 20: Cleaning The Oven
Cleaning and maintenance 4. Clean the external glass panel and the 4.4 Cleaning the oven panels removed previously. Use In order to keep your oven in the best absorbent kitchen roll. In case of possible condition, clean it regularly after stubborn dirt, wash with a damp sponge letting it cool down. - Page 21 Cleaning and maintenance Removing rack/tray support frames Cleaning the top of the oven cavity Removing the guide frames enables the High temperature inside the oven sides to be cleaned more easily. This during use operation should be performed each time Danger of burns the automatic cleaning cycle is used (on some models only).
-
Page 22: Vapour Clean
Cleaning and maintenance 4.5 Vapour Clean • Pour approx. 40 cc of water onto the floor of the oven. Make sure it does not Vapour Clean is an assisted overflow out of the cavity. cleaning procedure which facilitates the removal of dirt. Thanks to this process, it is possible to clean the inside of the oven very easily. -
Page 23: Extraordinary Maintenance
Cleaning and maintenance 4.6 Extraordinary maintenance Vapour Clean setting 1. Turn the function knob and the Removing and installing the door seal temperature knob to the symbol. To remove the seal: 2. Set a cooking time of 18 minutes using •... - Page 24 Cleaning and maintenance Replacing the internal light bulb 4. Slide the lamp out and remove it. Live parts Danger of electrocution • Unplug the appliance from the power supply. 1. Completely remove all accessories from inside the oven. 2. Remove the rack/tray support frames. Do not touch the halogen lamp 3.
-
Page 25: Installation
Installation 5 Installation Fixed connection Fit the power line with an omnipolar circuit 5.1 Electrical connection breaker in compliance with installation regulations. Power voltage The circuit breaker should be located near Danger of electrocution the appliance and in an easily reachable position. -
Page 26: Positioning
Installation 5.3 Positioning Position of the power cable Heavy appliance Crushing hazard • Position the appliance into the cabinet cutout with the help of a second person. Pressure on the open door Risk of damage to the appliance • Never use the oven door to lever the appliance into place when fitting. - Page 27 Installation Fastening bushings Appliance overall dimensions (mm) 1. Remove the bushing covers inserted on the front of the appliance. 2. Mount the appliance into the recess. 3. Secure the appliance to the piece of furniture using the screws. 4. Cover the bushings using the covers that were previously removed.
- Page 28 Installation Mounting under worktops (mm) Make sure that the piece of furniture rear/bottom part has an opening of approx. 60 mm.
- Page 29 Installation Mounting into a column (mm) Make sure that the piece of furniture top/rear part has an opening approx. 35-40 mm deep.
- Page 32 914777857/A...
Need help?
Do you have a question about the SFA579X2 and is the answer not in the manual?
Questions and answers