Yamaha NS-SW200 Owner's Manual
Hide thumbs
Also See for NS-SW200:
- Owner's manual (164 pages) ,
- Service manual (47 pages) ,
- Owner's manual (20 pages)
Table of Contents
Advertisement
Available languages
Available languages
Quick Links
Advertisement
Chapters
Table of Contents

Related Manuals for Yamaha NS-SW200


Summary of Contents for Yamaha NS-SW200
- Page 1 URABLH Subwoofer NS-SW300 NS-SW200 Owner’s Manual Manual de instrucciones...
- Page 2 This product, when installed as indicated in the instructions 2. Keep these instructions. contained in this manual, meets FCC requirements. CAUTION Modifications not expressly approved by Yamaha may void 3. Heed all warnings. your authority, granted by the FCC, to use the product. RISK OF ELECTRIC SHOCK 4.
- Page 3 If some trouble or malfunction occurs, • Yamaha cannot be held responsible for injury to you or malfunctions. immediately turn off the power switch and disconnect the plug damage of the products caused by improper use or from the AC outlet.
- Page 4 Installation Handling Connections • Do not place the unit in an unstable position where it might • If connecting external units, be sure to thoroughly read the • Do not touch the surface having this label. Doing accidentally drop or fall over and cause injuries. manual for each unit and connect them in accordance with the so may cause burns.
-
Page 5: Table Of Contents
Information CONTENTS Information for users on collection and disposal of old equipment: About functions and data included in the ADVANCED YAMAHA ACTIVE SERVO This symbol on the products, packaging, and/or unit accompanying documents means that used TECHNOLOGY II ............1 electrical and electronic products should not be •... -
Page 6: Advanced Yamaha Active Servo Technology Ii
The Twisted Flare Port developed by Yamaha changes the way in which the port widens toward its end, and also adds a “twist” to suppress airflow turbulence at each end of the port Cabinet and thus prevent noise from occurring. -
Page 7: Features
• The Automatic power-switching function saves you the trouble of pressing the STANDBY/ON button to turn the power on and off. • The subwoofer can be linked to a Yamaha component for simultaneous power on/off operation. Use the supplied system control cable to connect the... -
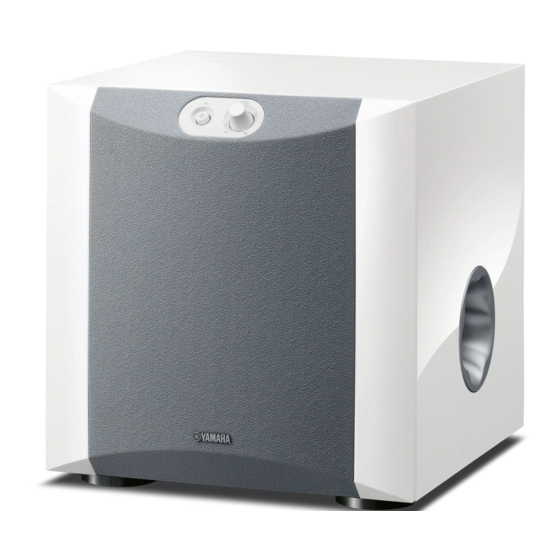
Page 8: Controls And Their Functions
CONTROLS AND THEIR FUNCTIONS Check the model number of your subwoofer on the label on the rear panel. NS-SW200 NS-SW300 Front < Front < Rear Rear... - Page 9 Connect the supplied system control cable here. If you use the system control cable to 2 VOLUME control ( page 11) connect a subwoofer to a Yamaha component (that features a system connector jack), Adjusts the volume level. Turn the control clockwise to increase the volume, and turning on or off the power to the connected component automatically turns the counterclockwise to decrease the volume.
-
Page 10: Connections
• All connections must be correct, that is to say L (left) to L; R (right) to R; “+” to “+” and “–” to “–”. Connecting to line output (pin jack) terminal(s) of the amplifier Example: Connecting one subwoofer NS-SW300 NS-SW200 Subwoofer Subwoofer Mono pin cable... - Page 11 Example: Connecting two subwoofers NS-SW200 NS-SW300 Subwoofer Subwoofer Subwoofer Subwoofer Amplifier or Amplifier or receiver Mono pin cable receiver Mono pin cable Connecting to the INPUT3 (LFE) terminal If your amplifier (or receiver) can cut off high frequencies from signals sent to the subwoofer, connect the...
-
Page 12: Connecting To Speaker Output Terminals Of The Amplifier
Use speaker cables to connect the speaker output terminals of the amplifier to the subwoofer’s INPUT 1 (FROM AMPLIFIER) terminals. Connect the front speakers to the subwoofer’s OUTPUT (TO SPEAKERS) terminals. Although the subwoofer is connected between the front speakers and the amplifier, the sound volume or quality will not be affected. Connecting one subwoofer NS-SW300 NS-SW200 Subwoofer Right front Left front... - Page 13 Connecting two subwoofers NS-SW200 NS-SW300 Right front Left front Left front Right front speaker speaker speaker speaker Speaker output Amplifier or terminals receiver Speaker output Amplifier or terminals receiver Subwoofer Subwoofer Subwoofer Subwoofer Example: Connecting the subwoofer to an amplifier featuring two sets of speaker output terminals (A and B) that can output sound signals simultaneously Set the amplifier so that both sets of speaker output terminals (A and B) will output sound signals simultaneously.
-
Page 14: Connecting To The Input1/Output Terminals Of The Subwoofer
Simply insert the banana plug into the terminal. 15 mm / NS-SW300 Remove about 15 mm (5/8") of insulation. 10 mm NS-SW200 NS-SW200 Remove about 10 mm (3/8") of insulation. Press and hold the terminal’s tab, as shown Good No Good in the figure. -
Page 15: System Connections
System connections AUTOMATIC POWER-SWITCHING FUNCTION If you use the included system control cable to connect a subwoofer to a Yamaha This function automatically places the subwoofer in standby mode if the subwoofer does component (that features a system connector jack such as a YSP series component or not detect a signal from the amplifier for a certain period of time. -
Page 16: Adjusting The Balance
To achieve natural sound with an effective super-bass component, you must adjust the volume and tone balance between the subwoofer and the front speakers. Follow the procedure described below. If your amplifier or other component connected to the system features subwoofer settings, make the appropriate settings on that component. NS-SW300 NS-SW200 Rear panel Rear panel... - Page 17 ADJUSTING THE BALANCE Set the VOLUME control to minimum (0). PHASE switch Turn on the power to the component(s) connected to the subwoofer. In most situations, set this switch to select the reverse mode. However, depending on your speaker systems or listening condition, there may be a case when better If the component is connected to the subwoofer’s SYSTEM CONNECTOR jack, turn sound quality is obtained by selecting the normal mode.
-
Page 18: Subwoofer Frequency Characteristics
500Hz Frequency response graph* Frequency response graph* When combined with 10 cm (4") or 13 cm (5") When combined with 20 cm (8") or 25 cm (10") NS-SW200 acoustic suspension, 2-way system front acoustic suspension, 2-way system front speakers speakers... -
Page 19: Troubleshooting
If the instructions given below do not help, or if the problem you are experiencing is not listed below, turn off the power to the unit, disconnect the power cord and contact an authorized Yamaha dealer or service center. Problem... -
Page 20: Specifications
Dimensions (W × H × D)......290 × 306 × 351 mm (11-3/8" × 12" × 13-7/8") Weight .....................11.2 kg (24.7 lbs.) The contents of this manual apply to the latest specifications as of the publishing date. To obtain the latest manual, access the Yamaha website then download the manual file. - Page 21 • Asegúrese de que la unidad no se le caiga y no la someta a • Yamaha no se hace responsable de sus lesiones o los daños a eléctricas. ningún impacto fuerte. De no seguirse estas instrucciones, existe sus productos debidos a uso inapropiado o modificaciones de riesgo de descargas eléctricas, incendio o averías.
- Page 22 Instalación Mantenimiento Instalación • No coloque la unidad sobre superficies inestables, donde pueda • Desconecte el enchufe de alimentación de la toma de CA antes • No utilice esta unidad en las proximidades de equipos caerse o volcarse por accidente y provocar lesiones. de limpiar la unidad.
- Page 23 Información para usuarios sobre la recogida y CONTENIDO eliminación de equipos viejos: Acerca de las funciones y datos incluidos en ADVANCED YAMAHA ACTIVE SERVO Este símbolo en los productos, embalajes y/o la unidad TECHNOLOGY II ............1 documentación adjunta significa que los productos eléctricos y electrónicos usados no se deben...
-
Page 24: Advanced Yamaha Active Servo Technology Ii
El puerto abocinado trenzado desarrollado por Yamaha cambia la forma en la que el puerto se ensancha hacia su extremo, y también incorpora un “trenzado” para suprimir la... -
Page 25: Características
Yamaha para su encendido y apagado simultáneos. Utilice el cable de control del sistema que se suministra NOTA para conectar el subwoofer con un componente Yamaha que cuente con un terminal de conexión del sistema. También se puede utilizar la colocación mostrada en la figura Colocación del subwoofer entre los altavoces... -
Page 26: Controles Y Sus Funciones
CONTROLES Y SUS FUNCIONES Compruebe el número de modelo de su subwoofer en la etiqueta del panel trasero. NS-SW300 NS-SW200 Superior Superior Delantero < Delantero < Trasero Trasero... - Page 27 Ajusta el nivel del volumen. Gire el control hacia la derecha para subir el volumen y a Yamaha (que cuente con un terminal de conexión del sistema), el subwoofer se la izquierda para bajarlo.
-
Page 28: Conexiones
• Todas las conexiones deben ser correctas, esto es, L (izquierdo) con L, R (derecho) con R, “+” con “+” y “–” con “–”. Conexión con los terminales (con clavija) de salida de línea del amplificador Ejemplo: Conexión de un subwoofer NS-SW300 NS-SW200 Subwoofer Subwoofer Cable monoaural con clavija Amplificador o... - Page 29 Ejemplo: Conexión de dos subwoofers NS-SW200 NS-SW300 Subwoofer Subwoofer Subwoofer Subwoofer Amplificador o Amplificador o receptor Cable monoaural con clavija receptor Cable monoaural con clavija Conexión con el terminal INPUT3 (LFE) Si el amplificador (o el receptor) puede cortar las frecuencias altas de las señales enviadas al subwoofer,...
-
Page 30: Conexión Con Los Terminales De Salida De Los Altavoces Del Amplificador
OUTPUT (TO SPEAKERS) del subwoofer. Aunque el subwoofer esté conectado entre los altavoces delanteros y el amplificador, esto no afectará al volumen o calidad del sonido. Conexión de un subwoofer NS-SW300 NS-SW200 Subwoofer Altavoz Altavoz Altavoz... - Page 31 Conexión de dos subwoofers NS-SW200 NS-SW300 Altavoz Altavoz Altavoz Altavoz derecho derecho izquierdo izquierdo delantero delantero delantero delantero Terminales de Amplificador o salida de altavoces receptor Terminales de Amplificador o salida de altavoces receptor Subwoofer Subwoofer Subwoofer Subwoofer Ejemplo: Conexión del subwoofer con un amplificador que cuenta con dos conjuntos de terminales de salida para altavoces (A y B) y que puede dar salida simultánea a las señales de sonido...
-
Page 32: Conexión Con Los Terminales Input1/Output Del Subwoofer
Inserte la clavija tipo banana en el terminal. 15 mm / NS-SW300 Retire unos 15 mm de aislamiento. 10 mm NS-SW200 NS-SW200 Retire unos 10 mm de aislamiento. Bien Mantenga presionada la lengüeta del terminal, como se muestra en la figura. -
Page 33: Conexiones Del Sistema
El subwoofer componente de la serie YSP o un receptor Yamaha), el subwoofer se encenderá o apagará se enciende automáticamente tan pronto como detecta una señal desde el amplificador. -
Page 34: Ajuste Del Balance
Para conseguir un sonido natural con un componente efectivo de ultragraves, deberá ajustar el balance del volumen y el tono entre el subwoofer y los altavoces principales. Siga el procedimiento que se describe a continuación. Si el amplificador u otro componente conectado al sistema incluye ajustes de subwoofer, realice los ajustes necesarios en ese componente. NS-SW300 NS-SW200 Panel trasero Panel trasero... - Page 35 NOTA AJUSTE DEL BALANCE Cuando se haya ajustado el balance del volumen entre el subwoofer y los altavoces principales, Ponga el control VOLUME al mínimo (0). podrá ajustar el volumen de todo su sistema de sonido empleando el control de volumen del Encienda el componente o componentes conectados con el subwoofer.
-
Page 36: Características De Frecuencias Del Subwoofer
Cuando se usa en combinación con un sistema Cuando se usa en combinación con un sistema NS-SW200 de altavoces principales de 2 vías de de altavoces principales de 2 vías de suspensión acústica de 10 cm o 13 cm. -
Page 37: Resolución De Averías
Si las instrucciones facilitadas no ayudan a solucionar el problema, o si el problema no es uno de los que aparecen en la siguiente lista, apague la alimentación de la unidad, desenchufe el cable eléctrico y póngase en contacto con un distribuidor o centro de servicio autorizado de Yamaha. -
Page 38: Especificaciones
Dimensiones (An × Al × Pr)..........290 mm × 306 mm × 351 mm Peso ........................... 11,2 kg El contenido de este manual se aplica a las últimas especificaciones según la fecha de publicación. Para obtener el último manual,acceda al sitio web de Yamaha y descargue el archivo del manual. - Page 39 Yamaha Global Site https://www.yamaha.com/ Yamaha Downloads https://download.yamaha.com/ Manual Development Group © 2013 Yamaha Corporation Published 11/2020 IPEI-C0 VDU7520 10-1 Nakazawa-cho, Naka-ku, Hamamatsu, 430-8650 Japan...
Need help?
Do you have a question about the NS-SW200 and is the answer not in the manual?
Questions and answers