
Related Manuals for LG DLGX9501K


Summary of Contents for LG DLGX9501K
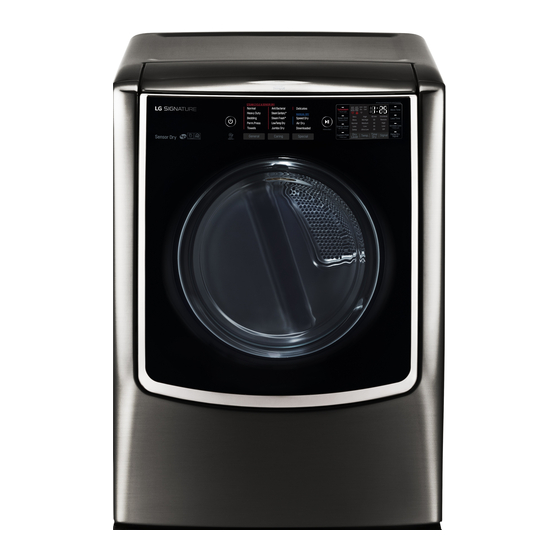
- Page 1 OWNEr’S MANuAL DrYer Please read this owner’s manual thoroughly before operating and keep it handy for reference at all times. DleX9500* DlGX9501* www.lg.com MFL67731067...
-
Page 2: Table Of Contents
TABLE OF CONTENTS TABLE OF CONTENTS IMPORTANT SAFETY OPERATION INSTRUCTIONS operating the Dryer cycle Guide What to Do if You Smell GaS Sorting loads BaSic SafetY PrecautionS loading the Dryer california Safe DrinkinG Water anD check the lint filter before every load toXic enforcemen act Storage under the lid GrounDinG inStructionS... -
Page 3: Important Safety Instructions
iMPOrTANT SAFETY iNSTruCTiONS IMPORTANT SAFETY INSTRUCTIONS READ ALL INSTRUCTIONS BEFORE USE WArNiNg For your safety, the information in this manual must be followed to minimize the risk of fire, explosion, or electric shock, or to prevent property damage, injury to persons, or death. Your safety and the safety of others is very important. -
Page 4: Basic Safety Precautions
iMPOrTANT SAFETY iNSTruCTiONS IMPORTANT SAFETY INSTRUCTIONS READ ALL INSTRUCTIONS BEFORE USE WArNiNg For your safety, the information in this manual must be followed to minimize the risk of fire, explosion, or electric shock, or to prevent property damage, injury to persons, or death. BASIC SAFETY PRECAUTIONS WArNiNg To reduce the risk of fire, electric shock, or injury to persons when using this appliance, follow basic precautions,... -
Page 5: Grounding Instructions
iMPOrTANT SAFETY iNSTruCTiONS IMPORTANT SAFETY INSTRUCTIONS READ ALL INSTRUCTIONS BEFORE USE WArNiNg For your safety, the information in this manual must be followed to minimize the risk of fire, explosion, or electric shock, or to prevent property damage, injury to persons, or death. GROUNDING INSTRUCTIONS This appliance must be grounded. -
Page 6: Safety Instructions For Steam Functions
iMPOrTANT SAFETY iNSTruCTiONS IMPORTANT SAFETY INSTRUCTIONS READ ALL INSTRUCTIONS BEFORE USE WArNiNg For your safety, the information in this manual must be followed to minimize the risk of fire, explosion, or electric shock, or to prevent property damage, injury to persons, or death. SAFETY INSTRUCTIONS FOR INSTALLATION WArNiNg To reduce the risk of injury to persons, follow all industry recommended safety procedures including the use of long... -
Page 7: Safety Instructions For Connecting Electricity
iMPOrTANT SAFETY iNSTruCTiONS IMPORTANT SAFETY INSTRUCTIONS READ ALL INSTRUCTIONS BEFORE USE WArNiNg For your safety, the information in this manual must be followed to minimize the risk of fire, explosion, or electric shock, or to prevent property damage, injury to persons, or death. SAFETY INSTRUCTIONS FOR CONNECTING ELECTRICITY WArNiNg To reduce the risk of fire, electric shock, or injury to persons when using this appliance, follow basic precautions,... -
Page 8: Transmitter Module Information
Responsible Party: This equipment has been tested and found to comply LG Electronic USA , Inc. with the limits for a Class B digital device, pursuant 1000 Sylvan Avenue Englewood Cliffs, NJ 07632 to part 15 of the FCC Rules. These limits are designed TEL. -
Page 9: Product Specifications
In addition to the source code, all referred license terms, warranty disclaimers and copyright notices are available for download. LG Electronics will also provide open source code on CD-ROM for a fee covering the cost of performing such distribution (including media, shipping and handling) upon email request to opensource@lge.com. -
Page 10: Special Features
STEAM FuNCTiONS LG’s steam technology injects fabrics with a swirling jet of hot steam to refresh clothes. Simply select the STEAM FRESH™ cycle, or add a steam option to selected cycles. -
Page 11: Product Overview
NOTE • Visit www.lg.com to purchase accessories. • Contact LG Customer Service at 1-800-243-0000 (1-888-542-2623 in Canada) if any accessories are missing. • For your safety and for extended product life, use only authorized components. The manufacturer is not responsible for product malfunction or accidents caused by the use of separately purchased unauthorized components or parts. -
Page 12: Control Panel Features
3 seconds. STEAM FUNCTIONS - LG’s steam technology injects fabrics with a swirling jet of hot steam to refresh clothes, reduce static, and make ironing easier. Simply select the Steam Fresh™ cycle, or you can add a steam option to selected cycles. -
Page 13: Display
PrODuCT OVErViEW Display The display shows the settings, estimated time remaining, options, and status messages for your dryer. When the dryer is turned on, the light in the display will illuminate. wWARNING : To reduce the risk of fire, electric shock, or injury to persons, read this entire manual, including the Important Safety Instructions, before operating this dryer. -
Page 14: Installation
iNSTALLATiON INSTALLATION Installation Overview Checking and Leveling the dryer Venting the Dryer choosing the proper location 240V(uSA) 120V 230V(CANADA) (gas) (Electric) Connecting gas Dryers Connecting Electric Dryers Plugging in the power cord (gas Dryer Type) (Electric Dryer Type) and grounding Press and hold installation test Test run... -
Page 15: Installation Location Requirements
iNSTALLATiON Installation Location Requirements WArNiNg Read all installation instructions completely before installing and operating your dryer! It is important that you review this entire manual before installing and using your dryer. Detailed instructions concerning electrical connections, gas connections, and exhaust requirements are provided on the following pages. •... -
Page 16: Clearances With Optional Pedestal Base
iNSTALLATiON 1"* 30" 5"** (76,1 cm) (2,5 cm) (12,7 cm) Clearances with Optional Pedestal Base recommended InstallatIon spacIng for cabInet InstallatIon • For cabinet installation with a door, minimum ventilation openings in the top of the cabinet are required. 7"* (17.8 cm) 7"* (17.8 cm) *Required spacing ** For side or bottom venting,... -
Page 17: Leveling The Dryer
iNSTALLATiON Leveling the Dryer WArNiNg 2. Use an adjustable wrench to turn the leveling feet. Turn clockwise to raise the dryer or counterclockwise • To reduce the risk of injury to persons, adhere to all to lower it. Raise or lower the leveling feet until the industry recommended safety procedures including dryer is level from side to side and front to back. -
Page 18: Reversing The Door
iNSTALLATiON Reversing the Door WArNiNg Reversing the Door’s Hinge and Strike 1. Remove the four screws on the right door frame THE DRYER DOOR IS VERY LARGE AND HEAVY. Two or (handle and strike), lift it off, and set the parts aside. more people are required when reversing the door. - Page 19 iNSTALLATiON Reversing the Cabinet Components Mounting the Door 1. Remove the two screws and the latch assembly from 1. Align the hinge with the mounting holes. the left side of the opening. 2. While supporting the door, fasten the four hinge 2.
-
Page 20: Installing The Side Vent Kit
It can also be configured to vent to the bottom or side (right-side venting is not available on gas models). An adapter kit, part number 383EEL9001B, may be Cover purchased from an LG retailer. This kit contains the Plate necessary duct components to change the dryer vent ”... -
Page 21: Venting The Dryer
iNSTALLATiON Venting the Dryer WArNiNg To reduce the risk of fire, electric shock, or injury to persons when using this appliance, follow basic precautions, including the following: • Do not crush or collapse ductwork. Failure to follow • Rigid or semirigid metal ducting is recommended for use between the dryer and the wall. - Page 22 iNSTALLATiON Venting the Dryer (cont.) ductwork CORRECT VENTING MAxIMUM LENGTH OF NUMBER OF WALL CAP TYPE 4-INCH DIAMETER 90° ELBOWS RIGID METAL DUCT Recommended 65 ft. (19.8 m) 55 ft. (16.8 m) 4” 47 ft. (14.3 m) (10.2 cm) 36 ft. (11.0 m) 4”...
-
Page 23: Connecting The Inlet Hose
iNSTALLATiON Connecting the Inlet Hose The dryer must be connected to the cold water tap using the new water supply hose. Do not reuse old hoses. NOTE • Water supply pressure must be between 20 psi and 120 psi (138–827 kPa). •... -
Page 24: Connecting Gas Dryers
iNSTALLATiON Connecting Gas Dryers WArNiNg To reduce the risk of fire, electric shock, or injury to persons when using this appliance, follow basic precautions, including the following: • Gas supply requirements: • Connect the dryer to the type of gas shown on As shipped from the factory, this dryer is the nameplate. - Page 25 iNSTALLATiON Connecting Gas Dryers (cont.) WArNiNg connecting the gas supply 1. Make sure that the gas supply to the laundry room is To reduce the risk of fire, electric shock, or injury turned OFF. Confirm that the type of gas available in to persons when using this appliance, follow basic your laundry room is appropriate for the dryer.
- Page 26 iNSTALLATiON Connecting Electric Dryers WArNiNg WArNiNg To help prevent fire, electric shock, serious injury, To reduce the risk of fire, electric shock, or injury or death, the wiring and grounding must conform to persons when using this appliance, follow basic to the latest edition of the National Electrical Code, precautions, including the following: ANSI/NFPA 70 and all applicable local regulations.
-
Page 27: Connecting Electric Dryers
iNSTALLATiON Connecting Electric Dryers (cont.) USA only WArNiNg • Use a 30 A, 240 V, UL-listed power cord with #10 AWG-minimum copper conductor and closed loop or • Connect the power cord to the terminal block. forked terminals with upturned ends. Connect each power cord wire to the terminal block 2. - Page 28 iNSTALLATiON Connecting Electric Dryers (cont.) USA only WArNiNg • Use UL-listed 4-wire #10 AWG-minimum copper conductor cable. • Connect the power cord to the terminal block. • Allow at least 5 ft. (1.5 m) length to allow for removal Connect each power cord wire to the terminal block and reinstallation of the dryer.
- Page 29 iNSTALLATiON Connecting Electric Dryers (cont.) USA only WArNiNg • Use a 30 A, 240 V, UL-listed power cord with #10 AWG-minimum copper conductor and closed loop or • Connect the power cord to the terminal block. forked terminals with upturned ends. Connect each power cord wire to the terminal 2.
- Page 30 iNSTALLATiON Connecting Electric Dryers (cont.) USA only WArNiNg • Use UL-listed 3-wire #10 AWG-minimum copper conductor cable. • Connect the power cord to the terminal block. • Allow at least 5 ft. (1.5 m) length to allow for removal Connect each power cord wire to the terminal block and reinstallation of the dryer.
-
Page 31: Special Requirements For Manufactured Or Mobile Homes
iNSTALLATiON Special Requirements for Final Installation Check Manufactured or Mobile Homes Once you have completed the installation of the dryer and it is in its final location, confirm proper operation Any installation in a manufactured or mobile home must with the following tests and the Installation Test (Duct comply with the Manufactured Home Construction and Check) on the following page. -
Page 32: Installation Test (Duct Check)
iNSTALLATiON Installation Test (Duct Check) 4. Check the display for results. Once you have completed the installation of the dryer, During the test cycle, monitor the FLOW SENSE use this test to make sure the condition of the exhaust display on the control panel. If the Flow Sense system is adequate for proper operation of the dryer. - Page 33 iNSTALLATiON Installation Test (Duct Check) (cont.) • Check the Error Code before you call for service Error Code Possible Causes Solutions • Temperature sensor failure • Turn off the dryer and call for service. tE1 or tE2 • Humidity Sensor failure. •...
-
Page 34: Operation
OPErATiON OPERATION Operating the Dryer CLEAN THE LINT FILTER If the lint filter has not already been cleaned, lift out the filter and remove the lint from the last load. This will help ensure the fastest and most efficient drying performance. -
Page 35: Cycle Guide
Sensor Dry cycles utilize LG’s unique dual sensor system to Use Manual Dry cycles to select a specific amount of detect and compare the moisture level in clothes and in the drying time and a drying temperature. -
Page 36: Sorting Loads
OPErATiON Sorting Loads Check the Lint Filter before Every Load fabric care labels Most articles of clothing feature fabric care labels that Always make sure the lint filter is clean before starting a include instructions for proper care. new load; a clogged lint filter will increase drying times. To clean, pull the lint filter straight up and roll any lint fabric care labels off the filter with your fingers. -
Page 37: Using The Lid
OPErATiON Using the Lid Opening the lid - Push the front handle to slide the lid open. Closing the lid - Pull the top of the handle to slide the lid closed. WArNiNg • To avoid injury, do not place fingers under the lid or between the lid and the cabinet when pressing or sliding the top lid open or closed. -
Page 38: Cycle Modifier Buttons
OPErATiON Cycle Modifier Buttons SENSOR DRY cycles have preset settings that are Your dryer features several additional cycle options to selected automatically. MANUAL DRY cycles have customize cycles to meet your individual needs. Certain default settings, but you may also customize the option buttons also feature a special function (see the settings using the cycle modifier buttons. -
Page 39: Special Functions
OPErATiON Special Functions The option buttons also activate special functions, including CHILD LOCK. Select the option by pressing the option button. Press and hold the option button to select special features marked with the asterisk (*), such as Child Lock. * cHIld lock Use this option to prevent unwanted use of the dryer or to keep cycle settings from being changed while the... -
Page 40: Custom Program
(Do NOT use for urethane foam, Steam Functions down feathers or delicate items) LG’s new steam technology allows you to inject fabrics with a swirling jet of hot steam to refresh clothes. Simply select the STEAM FRESH™ cycle, or you can add a steam option to selected cycles. -
Page 41: Steam Cycle Guide
OPErATiON Steam Functions (cont.) NOTE • Steam may not be clearly visible during the steam WArNiNg cycles. This is normal. • Do not use Steam Fresh™ with items such as wool • Do not open the dryer door during steam cycles. clothing or blankets, leather jackets, silk, wet clothes, Failure to follow this warning can cause serious injury lingerie, foam products, or electric blankets. -
Page 42: Smart Appliance Connectivity
This smart appliance offers options for how you do laundry. Once it is connected to the internet through a home Wi-Fi network, you can check the progress of a cycle and control the appliance remotely with the LG Smart Laundry application for your smart phone. -
Page 43: Smart Thinq
SMArT APPLiANCE CONNECTiViTY Smart ThinQ™ 9. The application now works to connect the appliance and register it as a Wi-Fi product. A notification appears when the dryer is successfully set up and Remote Start the product registration and Wi-Fi setup is complete. Use a smart phone to control the appliance remotely. - Page 44 SMArT APPLiANCE CONNECTiViTY Download Cycle Smart Diagnosis™ The Download Cycle features of this appliance allow Use your phone to record the Smart Diagnosis™ signal if you to download new and special cycles that are not you have problems with your appliance. included in the basic cycles on the appliance.
-
Page 45: Using Smart Diagnosis
Should you experience any problems with your dryer, it has the capability of transmitting data to your Smart Phone using the LG Smart Laundry&DW Application or via your telephone to the LG call center. Smart Diagnosis™ cannot be activated unless your dryer is turned on by pressing the Power button. If your dryer is unable to turn on, then troubleshooting must be done without using Smart Diagnosis™. -
Page 46: Maintenance
MAiNTENANCE MAINTENANCE Regular Cleaning cleaning the lint filter Always clean the lint filter after every cycle. WArNiNg To reduce the risk of fire, electric shock, or personal injury when using this appliance, follow basic precautions, including the following: • Unplug the dryer before cleaning to avoid the risk of electric shock. -
Page 47: Troubleshooting
TrOuBLEShOOTiNg TROUBLESHOOTING Before Calling for Service Your dryer is equipped with an automatic error-monitoring system to detect and diagnose problems at an early stage. If your dryer does not function properly or does not function at all, check the following before you call for service. - Page 48 TrOuBLEShOOTiNg Before Calling for Service (cont.) Problem Possible Causes Solutions Drying time is • Heat settings, load size, or • The drying time for a load will vary depending on the heat not consistent dampness of clothing is not setting, the type of heat used (electric, natural gas, or LP gas), consistent.
- Page 49 TrOuBLEShOOTiNg Before Calling for Service (cont.) Problem Possible Causes Solutions Steam does not • Water level error. • Unplug dryer and call for service. generate but no error code is shown Garments still • Too many or too different types •...
-
Page 50: Specifications
SPECiFiCATiONS SPECIFICATIONS Steam Dryer Models DLEx9500* DLGx9501* Description Steam Dryer Electrical Requirements Please refer to the rating label regarding detailed information. Gas Requirements NG: 4-10.5 inches WC LP: 8–13 inches WC Dimensions 29”(W) X 33 ”(D) X 40 ”(H), 56” (D with door open) 73.7 cm (W) X 84.8 cm (D) X 103.9 cm (H), 142.3 cm (D with door open) Net Weight Gas dryer : 160.7 lbs(72.9 kg) -
Page 51: Warranty
Should your LG Dryer (“Product”) fail due to a defect in materials or workmanship under normal home use, during the warranty period set forth below, LG will at its option repair or replace the product. This limited warranty is valid only to the original retail purchaser of the product and applies only when purchased and used within the United States including U.S. - Page 52 LG Electronics at the number below. For assistance or service, call 1-800-243-0000. If you need further assistance, you can write to LG with any questions or concerns at the address below: LG Electronics, 201 James Record Road, Huntsville, Alabama 35813...
- Page 53 1-800-243-0000 1-888-542-2623 canada register your product online! www.lg.com...
Need help?
Do you have a question about the DLGX9501K and is the answer not in the manual?
Questions and answers