Table of Contents
Advertisement
Quick Links
Advertisement
Table of Contents

Related Manuals for Nokia RM-256


Summary of Contents for Nokia RM-256
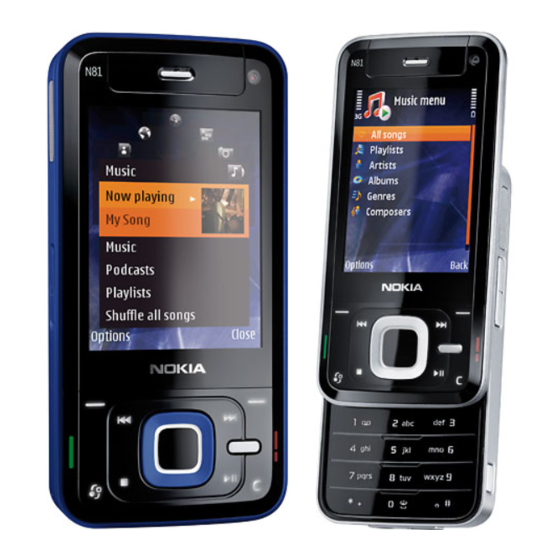
- Page 1 Nokia N81 User Guide EN 9204238 ISSUE 1 EN...
- Page 2 The third-party applications provided with your device may have been created and This product is licensed under the MPEG-4 Visual Patent Portfolio License (i) for may be owned by persons or entities not affiliated with or related to Nokia. Nokia personal and noncommercial use in connection with information which has been...
- Page 3 LIMITED TO WARRANTIES OF TITLE, MERCHANTABILITY OR FITNESS FOR A PARTICULAR PURPOSE, OR THAT THE APPLICATIONS WILL NOT INFRINGE ANY THIRD-PARTY PATENTS, COPYRIGHTS, TRADEMARKS, OR OTHER RIGHTS. Issue 1 EN, 9204238...
-
Page 4: Hello
With your Nokia N81 you can enjoy your favorite music on the go. The Nokia Music Store* offers you over one million songs to browse and purchase—over the air using your N81 and at home with your compatible PC. If you are tired of struggling with wires, connect to compatible stereo headphones with Bluetooth connectivity. -
Page 5: Table Of Contents
Save and edit names and numbers ........ 28 Get started................11 Copy contacts............... 29 Additional applications............11 Add ringing tones for contacts ........30 Nokia support and contact information .......11 Create contact groups ............30 Your Nokia N81 ........12 Messaging ..........31 Welcome ................12 Write text ................ - Page 6 RealPlayer ................76 Connection security............61 Adobe Flash Player ............77 Bookmarks view..............61 IM—instant messaging ............77 End connection ..............62 Nokia Lifeblog ..............80 Settings ..................62 Digital rights management ..........83 Adobe Reader ..............84 Connections..........64 Converter ................84 Bluetooth connectivity .............64 Personalize your device......85...
- Page 7 Settings ..........94 General ..................94 Phone ..................99 Connection ................ 101 Applications ..............104 Troubleshooting: Q&A......105 Battery information......107 Charging and discharging ..........107 Nokia battery authentication guidelines....107 Care and maintenance ......109 Additional safety information..... 111 Index ............115...
-
Page 8: For Your Safety
For your safety Read these simple guidelines. Not following them may be SWITCH OFF WHEN REFUELING Do not use dangerous or illegal. Read the complete user guide for the device at a refueling point. Do not use near further information. fuel or chemicals. - Page 9 Third-party sites are not When using the features in this device, obey all laws and affiliated with Nokia, and Nokia does not endorse or respect local customs, privacy and legitimate rights of assume liability for them. If you choose to access such others, including copyrights.
- Page 10 Warning: Use only batteries, chargers, and Your service provider may have requested that certain enhancements approved by Nokia for use with this features be disabled or not activated in your device. If so, particular model. The use of any other types may these features will not appear on your device menu.
-
Page 11: Support
Support Help available on the Nokia N81 product support pages on www.nseries.com/support or your local Nokia website. When an application is open, select Options > Help access help for the current view. Nokia support and contact When you are reading the instructions, to switch between... -
Page 12: Your Nokia N81
SIM card, you can insert your SIM card in it. When the providers already installed in your device, or you may Nokia N81 is switched on without a SIM card, the offline receive or request the settings from the network service profile is automatically activated. - Page 13 Nokia N81. With retrieval, data is transferred from the the other device, open the message, and follow the other device to your Nokia N81. You may be asked to keep instructions on the display. or delete the original data in the other device, depending Select the device from which you want to transfer on the device model.
-
Page 14: Essential Indicators
To edit the shortcut, scroll to it, and select Options > The device keypad is locked. Shortcut settings. You can, for example, create or change A clock alarm is active. the name of the shortcut. The second phone line is being used (network service). A transfer log is shown after every transfer. -
Page 15: Navi™ Scroll Key
A USB connection is active. Multimedia menu With the multimedia menu, Navi™ scroll key you have quick and easy access to multimedia Hereinafter referred to as the scroll key. content, games, your most Use the scroll key to move around the menus ( important contacts, and most ), and to select items ( ). -
Page 16: Volume And Loudspeaker Control
When connecting any external device or any headset, active call or are listening to a sound, press the volume key. other than those approved by Nokia for use with this The built-in loudspeaker allows you to speak and listen device, to the Nokia AV Connector, pay special attention to from a short distance without having to hold the device to volume levels. -
Page 17: Prolong Battery Life
Nokia may produce software updates that may offer new features, enhanced functions, or improved performance. To prolong the operating time of your device, switch You may be able to request these updates through the Bluetooth connectivity off when you do not need it. -
Page 18: Music
Music Music player Press , and select Music > Music player. Select Music or Podcasts. Music player supports files formats such as .aac, .aac+, Select categories to navigate to the song or podcast .eaac+, .mp3, .wav, and .wma. Music player does not episode you want to hear. - Page 19 If you play podcasts, shuffle and repeat are automatically Playlists switched off. To view and manage playlists, in the music menu, select To adjust the volume, use the volume key. Playlists. The following playlists appear automatically: Most played, Recently played, and Recently added.
- Page 20 If an episode is never played or completely played, it plays • To use Nokia Music Manager in Nokia Nseries PC Suite, from the beginning. connect the compatible USB cable and select PC Suite as the connection mode.
- Page 21 To remove songs or albums, select an item in the list, and click Remove from list. Both Windows Media Player and Nokia Music Manager in Check that the list pane contains the files you want to Nokia Nseries PC Suite have been optimized for synchronize and that there is enough free memory on transferring music files.
-
Page 22: Nokia Music Store
When you open Visual Radio for the first time, a wizard To access the Nokia Music Store, you must have a valid helps you to save local stations. internet access point in the device. For more details, see ‘Access points’, p. - Page 23 You can normally make a call or answer an incoming call loudspeaker is in use, because the volume may be while listening to the radio. The radio is muted when there extremely loud. is an active call. To view available stations based on location, select Options >...
-
Page 24: Nokia Podcasting
To change station details, select Options > Station > Edit. Settings Settings Before using Nokia Podcasting, set your connection and download settings. Select Options > Settings and from the following: Check with your service provider for terms and data service Start-up tone—Select whether a tone is played when the... - Page 25 Automatic updates only occur if a specific default access descriptions, not specific episodes. General topics, such point is selected and Nokia Podcasting is running. If as football or hip-hop, usually give better results than Nokia Podcasting is not running, the automatic updates a specific team or artist.
- Page 26 Directories To import an .opml file stored on your device, select Options > Import OPML file. Select the location of the Directories help you to find new podcast episodes to which file, and import it. to subscribe. To send a directory folder as a multimedia message or by To open Directories, press , and select Music...
- Page 27 To play a portion of a podcast during download or after If you do not have an access point defined or if during partial downloading, select Podcasts > Options > Play packet data connection you are asked to enter a user name preview.
-
Page 28: Contacts (Phonebook)
To check to which groups a contact belongs, select the Tip! To add and edit contact cards, you can also use contact and Options > Belongs to groups. Nokia Contacts Editor available in Nokia Nseries PC To delete a contact card in Contacts, select a card, and Suite. press... -
Page 29: Copy Contacts
Default numbers and addresses Tip! You can synchronize your contacts to a compatible PC with Nokia Nseries PC Suite. You can assign default numbers or addresses to a contact card. In this way if a contact has several numbers or... -
Page 30: Add Ringing Tones For Contacts
When fixed dialing is activated, calls may be possible to Write a name for the group or use the default name and the official emergency number programmed into your select OK. device. Select the group and Options > members. Scroll to a contact, and press to mark it. -
Page 31: Messaging
Messaging Press , and select Messaging (network service). Sent—The last messages that have been sent, excluding messages sent using Bluetooth connectivity are Important: Exercise caution when opening stored here. To change the number of messages to be messages. E-mail messages may contain malicious saved, see ‘Other settings’, p. -
Page 32: Write Text
Write text Select New message and from the following: Text message—to send a text message ABC, abc, and Abc indicate the selected character mode. Multimedia message—to send a multimedia message 123 indicates the number mode. (MMS) Audio message—to send an audio message (a To switch between the letter and number mode, press and multimedia message that includes one sound clip) hold... -
Page 33: Inbox-Receive Messages
select Options > Insert new > Image, Sound clip, or Tip! You can combine images, video, sound, and text Video clip. To insert a new slide to the message, select to a presentation and send it in a multimedia message. Slide. -
Page 34: Mailbox
packet data connection to retrieve the message to your Mailbox device, select Options > Retrieve. E-mail settings When you open a multimedia message ( ), you may see an image and a message. is shown if sound is Tip! Use Settings wizard to define your mailbox included, or... - Page 35 To connect to your mailbox and retrieve new e-mail If you want to close the connection and view the e-mail headings or messages, select Yes. When you view messages offline, select Options > Disconnect. messages online, you are continuously connected to a To open an e-mail message, press .
-
Page 36: Listen To Messages
The device mirrors the e-mail headings in the remote View messages on a SIM card mailbox. Although you delete the message content, the Before you can view SIM messages, you must copy them to e-mail heading stays in your device. If you want to remove a folder in your device. - Page 37 Message centres—View a list of all text message centers Image size—Define the size of the image in a multimedia that have been defined. message. Character encoding— To use character conversion to MMS creation mode—If you select Guided, the device another encoding system when available, select Reduced informs you if you try to send a message that may not be support.
- Page 38 Receive adverts—Define whether you want to receive Connection settings multimedia message advertisements. To edit the settings for the e-mail you receive, select Receive report—Select whether you want the status of the Incoming e-mail and from the following: sent message to be shown in the log (network service). User name—Enter your user name, given to you by your Deny report...
- Page 39 My e-mail address—Enter the e-mail address given to you Retrieval settings by your service provider. E-mail to retrieve—Define which parts of the e-mail are Outgoing mail server—Enter the IP address or host name retrieved: Headers only, Size limit (POP3), or Msgs.
- Page 40 your service provider's network. Contact your service Other settings provider for information about data transmission charges. Press , and select Messaging > Options > Settings > Other and from the following: Web service messages Save sent messages—Select whether you want to save a Press , and select Messaging...
-
Page 41: Games
Games Your Nokia N81 is compatible with the N-Gage™ gaming experience. With N-Gage, you can download and play high-quality multiplayer games. Your device includes either one of the following applications: • Discover N-Gage application—With this preview application you can get information about the upcoming N-Gage... -
Page 42: Camera
Camera • Your Nokia N81 has two cameras, a high resolution camera The quality of a digitally zoomed picture is lower than on the back of the device (the main camera in landscape that of a nonzoomed picture. • mode) and a lower resolution camera on the front (the The camera goes into the battery saving mode if there secondary camera in portrait mode). - Page 43 To activate the front camera, select Options > setting and memory in use (the counter is not displayed secondary camera. To take a picture, press . To zoom during image capture). in or out, press The device memory ( ) and memory card ( indicators shows where images are saved.
- Page 44 to activate the sequence mode (images only). See ‘Take ‘Bluetooth connectivity’, p. 64. This option is not pictures in a sequence’, p. 46. available during an active call. You can also send the image to a call recipient during an active call. Select to select a color effect Send to caller (only available during an active call).
- Page 45 These resolutions are only available in the main camera. Keep a safe distance when using the flash. Do not use the flash on people or animals at close range. Do not cover the Add to album—Select whether you want to save the image flash while taking a picture.
-
Page 46: Take Pictures In A Sequence
Colour tone—Select a color effect from the list. Video scenes Light sensitivity (images only)—Increase the light Auto ) (default) and Night sensitivity in low light to decrease the risk of getting Image scenes unsharp or too dark images. Higher sensitivity may Auto ) (default), User defined... -
Page 47: You In The Picture-Self-Timer
To use a time interval between taking pictures, select To switch off Self timer, in the active toolbar, select Self Sequence mode and a time interval. To start taking timer > Off. pictures, press . To stop taking pictures before the Tip! In the active toolbar, select Self timer >... -
Page 48: Record Videos
these conditions cannot be met. Move the camera closer to a bright, partially cloudy day or on a sunny day in the the object to take clearer portraits. shadow of trees. Depth Record videos When shooting landscapes and sceneries, add depth to To activate the main camera, press and hold . - Page 49 toolbar. See ‘Adjust color and lighting’, p. 45 and ‘Scenes’, The device memory ( ) and memory card ( p. 46. indicators show where videos are saved. To activate the front camera, select Options > To display all viewfinder indicators, select Options >...
- Page 50 Video settings Show captured video—Select whether you want the first frame of the recorded video clip to be shown on the display There are two kinds of settings for the video recorder: after the recording stops. Select Play from the active Video setup and main settings.
-
Page 51: Gallery
Gallery To store and organize your images, video clips, sound clips, Images and video clips playlists, and streaming links, press , and select Gallery. Pictures taken and video clips recorded with the camera Tip! To open the image tile of the multimedia menu, are stored in the Images &... -
Page 52: Print Basket
To print your images on a compatible printer, or to store If you want the active toolbar to be visible on the display, them for printing, select Options > Print. See ‘Image print’, select Options > Show icons. p. 56. You can also tag images for later printing to the If you want the active toolbar to be visible only when you Print Basket in Gallery. -
Page 53: Albums
To tag an image for later printing, select an image and Edit images to Print Basket from the active toolbar. To edit the pictures after taking them, or the ones already To view the images in the Print Basket, select from the saved in Gallery, select Options... -
Page 54: Edit Video Clips
Reduce redness The custom video clips are automatically saved in the Images & videos in Gallery. The clips are saved on the To reduce redness of the eyes in an image, select Options > memory card. Apply effect > Red eye reduction. -
Page 55: Slide Show
To select which parts of the video clip are included in the can also transfer your videos to a compatible PC using custom video clip, and define the start and end points for Bluetooth connectivity, or a compatible USB data cable. them, scroll to the desired point on the video, and select You can also cut the video clip for sending it in a Options... -
Page 56: Presentations
To browse the images, press (previous) or (next) To rotate the image 90 degrees clockwise or (available only when Zoom and pan is off). counter-clockwise, press . To rotate the image 45 degrees, press To adjust the tempo of the slide show, before starting the slide show, select Options >... - Page 57 Select a printer. The printer is set as the default printer. If you have connected a printer compatible with PictBridge using a compatible Nokia connectivity cable, the printer is automatically displayed. If the default printer is not available, a list of available printing devices is displayed.
-
Page 58: Web
Browse the web Press , and select (network service). Shortcut: To start the browser, press and hold To browse a web page, in the bookmarks view, select a in the standby mode. bookmark, or enter the address in the field ( ). - Page 59 You can save pages and browse them later, when offline. Tip! You can also search for keywords within the page You can also group these saved pages into folders. To by pressing access the pages you have saved, select select Options >...
- Page 60 Important: Only install and use applications and To set Mini Map on, select Options > Settings > other software from trusted sources, such as applications General > Mini Map > On. that are Symbian Signed or have passed the Java Verified Page overview testing.
-
Page 61: Connection Security
To define how the web feeds are updated, select Options > indicates the starting page defined for the default Settings > feeds. See ‘Settings’, p. 62. access point. You can save URL addresses as bookmarks while browsing Connection security on the internet. You can also save addresses received in messages to your bookmarks, and send saved bookmarks. -
Page 62: End Connection
End connection Access point—Change the default access point. See ‘Connection’, p. 101. Some or all access points may be To end the connection and view the browser page offline, preset for your device by your service provider, and you select Options >... - Page 63 Automatic reload—If you want the web pages to be refreshed automatically while browsing, select On. Privacy settings Auto. bookmarks—Enable or disable automatic bookmark collecting. If you want to continue saving the addresses of the visited web pages into the Auto. Bookmarks folder, but hide the folder from the bookmarks view, select Hide...
-
Page 64: Connections
Bluetooth—To connect wirelessly to another compatible Profile. To ensure interoperability between other devices device, first set Bluetooth connectivity On, then establish supporting Bluetooth connectivity, use Nokia approved a connection. To switch off Bluetooth connectivity, select enhancements for this model. Check with the... - Page 65 My phone's visibility—To allow your device to be found by you can also transfer files to another compatible device at other devices with Bluetooth connectivity, select Shown the same time. all. To set a time after which the visibility is set from For Bluetooth connectivity indicators, see ‘Essential shown to hidden, select Define...
- Page 66 Pair devices Set as unauthorised—Connection requests from this device must be accepted separately every time. To pair with compatible devices and view your paired To cancel a pairing, scroll to the device, and select devices, in the Bluetooth application main view, press Options >...
-
Page 67: Connection Manager
, and select Tools > Connectivity > Conn. Suite—to use Nokia PC applications such as mgr. You can see the open data connections: data calls Nokia Nseries PC Suite, Nokia Lifeblog, and ), high-speed data calls ( ), packet data connections... -
Page 68: Pc Connections
With Make sure that the device battery has enough power, or Nokia Nseries PC Suite you can, for example, transfer connect the charger before starting the update. images between your device and a compatible PC. -
Page 69: Synchronization
Server profiles device with a remote database on a server or compatible device. Press , select Tools > Utilities > Device mgr., and press Press , and select Tools > Sync. . You may receive server profiles and different Select a synchronization profile and Options >... -
Page 70: Tools
Tools File manager • Saved web pages • Contact information To browse files and folders, press , and select Tools > • Calendar notes File mgr.. The device memory view ( ) opens. Press • Applications shown in App. manager that you do not to open the memory card view ( need... -
Page 71: Voice Commands
To format a memory card, select Options > Format recognized voice tags and commands in the selected memory card. Select to confirm. device language, select Synthesiser > Off. To reset voice recognition learning, for example, when the main user of the device has changed, select Remove voice adapts.. -
Page 72: Applications
Applications Clock To change clock settings, select Applications > Clock > Options > Settings. Set time and date, define time and Press , and select Applications > Clock. To view your date formats, clock type, or the alarm tone. In Workdays active and inactive alarms, press . -
Page 73: Notes
To restore the original application, remove the attachment, or using Bluetooth connectivity. You can use application, and install the application again from the Nokia Application Installer in Nokia Nseries PC Suite to original installation file or the back-up copy. •... - Page 74 To maintain sufficient memory, use Applications > App. mgr.. Alternatively, search the Nokia Nseries PC Suite to back up installation files to a device memory or the memory card in File mgr., or compatible PC, then use the file manager to remove the...
-
Page 75: Calendar
To end the calendar alarm, select Stop. To set the alarm to snooze, select Snooze. You can synchronize your calendar with a compatible PC using Nokia Nseries PC Suite. When creating a calendar entry, set the desired Synchronisation option. -
Page 76: Recorder
Calendar views Recorder Select Options > Settings to change the starting day of To record voice memos, press , and select the week or the view that is shown when you open the Applications > Media > Recorder. To record a telephone calendar. -
Page 77: Adobe Flash Player
To adjust the volume, use the volume key. Streaming—Contact your service provider for the correct settings. Stream content over the air Adobe Flash Player Many service providers require you to use an internet access point (IAP) for your default access point. Other To view, play, and interact with compatible flash files made service providers allow you to use a WAP access point. - Page 78 Receive IM settings Allow messages from—To allow messages from all, select All. You must save the settings to access the service that you Allow invitations from—To allow invitations only from want to use. You may receive the settings in a special text your IM contacts, select IM contacts only.
- Page 79 To search for users, in the IM contacts view, select To prevent receiving messages from certain participants, Options > New IM contact > Search from server. You select Options > Blocking options. can search by User's name, User Phone number, and Record chats E-mail address.
-
Page 80: Nokia Lifeblog
IM server to which you want search, share, publish, and back up. Both Nokia Lifeblog PC to connect. and Nokia Lifeblog mobile let you send or blog your items IM login type—To log in automatically when you start IM, for others to see. - Page 81 DVD-ROM) to a compatible PC before using it. installed Nokia Nseries PC Suite, the PC installs the specific driver for your device. This may take a while. Before you install Nokia Lifeblog on a compatible PC, you Start the Lifeblog PC application. need the following:...
- Page 82 DVD-ROM). For more information on Nokia Nseries fastest way is to move the slider handle forward or PC Suite, see the guides available at the Nokia N81 backward, fast or slow. Alternatively, click the time bar to product support pages at www.nokia.com/support or select a date, use the Go to date feature, or use the arrow your local Nokia website.
-
Page 83: Digital Rights Management
Nokia Nseries PC Suite. Other transfer methods Not in use—View keys that have no media files connected may not transfer the activation keys which need to be to them in the device. -
Page 84: Adobe Reader
To buy more usage time or extend the usage period for a Converter media file, select Options > Get new key. To convert measures from one unit to another, press To view detailed information, such as the validity status and select Applications >... -
Page 85: Personalize Your Device
Personalize your device • To personalize your device, select from the following: To arrange the tiles in the multimedia menu, press , and select Options > Arrange tiles. • To use the standby display for fast access to your most frequently used applications, see ‘Active standby’, p. -
Page 86: 3-D Tones
If you want the caller’s name to be spoken when your To leave the Offline profile, press the power key, and select device rings, select Options > Personalise, and set another profile. The device re-enables wireless caller's name to On. The caller’s name must be saved in transmissions (providing there is sufficient signal Contacts. -
Page 87: Change The Look Of Your Device
you move away from it. The Doppler effect is not available To open a browser connection and download more themes, for all sound trajectories. General Menu view, select Download themes (network service). To listen to the ringing tone with the 3–D effect, select Options >... - Page 88 Scroll to an application or event, and press The standard scroll key shortcuts available in the standby mode cannot be used when active standby is on. To change the default applications’ shortcuts, press , and select Tools > Settings > General >...
-
Page 89: Make Calls
Make calls Voice calls To call a recently dialed number in the standby mode, press the call key. Scroll to the number, and press the call key. In the standby mode, enter the phone number, To send DTMF tone strings (for example, a password), including the area code. - Page 90 The other participants can For information on conference calls and voice dialling, see still continue the conference call. After you finish the the extended user guide at www.nokia.com/support or private conversation, select Options >...
-
Page 91: Answer Or Decline A Call
Voice dialing A short tone is played, and Speak now is displayed. Say clearly the name or nickname that is saved on the Your device supports enhanced voice commands. contact card. Enhanced voice commands are not dependent on the The device plays a synthesized voice tag for the speaker’s voice, so the user does not record voice tags in recognized contact in the selected device language, advance. -
Page 92: Log
When you select Reject to reject an incoming call, you can To clear all recent call lists, select Options > Clear recent send a text message informing the caller that you cannot calls in the recent calls main view. To clear one of the call answer the call. - Page 93 Monitor all communication events If you select log, all the log contents, recent calls register, and messaging delivery reports are permanently Icons in are as follows: deleted. Incoming Tip! In the details view, you can copy a phone number Outgoing to the clipboard, and paste it to a text message, for Missed communication events example.
-
Page 94: Settings
Settings To change settings, press , and select Tools > Settings. To edit settings related to the display, standby mode, and Scroll to General, Phone, Connection, or Applications, general functionality of your device, press , and select and press . Scroll to a setting or setting group you want Tools >... - Page 95 Light time-out—Select a time-out after which the Changing the settings for Phone language Writing backlight of the display is switched off. language affects every application in your device, and the change remains effective until you change these settings Standby mode again.
- Page 96 Sleep mode Text phone > Use text phone > Yes. To activate the loopset, select Loopset > Use loopset > Yes. Security Select to disable the power saver LED for the sleep mode. To edit settings related to the security, press , and select Tools...
- Page 97 Tip! To lock or unlock the keypad manually, pull the Glossary of PIN and lock codes lock switch. If you forget any of these codes, contact your service Phone autolock period—To avoid unauthorized use, you provider. can set a time-out after which the device automatically Personal identification number (PIN) code—This code locks.
- Page 98 Certificate management Before changing any certificate settings, you must make sure that you really trust the owner of the certificate and Digital certificates do not guarantee safety; they are used that the certificate really belongs to the listed owner. to verify the origin of software. View certificate details—check authenticity In the certificate management main view, you can see a list of authority certificates that are stored in your device.
-
Page 99: Phone
Before changing any certificate settings, you must make take a longer time to power on. Documents and files are sure that you really trust the owner of the certificate and unaffected. that the certificate really belongs to the listed owner. Navi wheel Scroll to an authority certificate, and select Options... - Page 100 Call Speed dialling—Select On, and the numbers assigned to the speed dialing keys ( ) can be dialed by Send my caller ID—You can set your phone number to be pressing and holding the key. See also ‘Speed dial a phone displayed to (Yes) or hidden from (No) the person to whom number’, p.
-
Page 101: Connection
Select which calls you want to divert and the desired Network diverting option. To divert voice calls when your number is Operator selection—Select Automatic to set the device to busy or when you reject incoming calls, select busy. Set search for and select one of the available networks, or the option on (Activate) or off (Cancel), or check whether Manual to manually select the network from a list of... - Page 102 For settings for Bluetooth connectivity, see ‘Bluetooth provider, and you may not be able to change, create, edit, connectivity’, ‘Settings’, p. 64. or remove them. indicates a protected access point. indicates a packet data access point. Data connections and access points To create a new access point, select Options >...
- Page 103 Prompt password—If you must enter the password every Packet data time you log in to a server, or if you do not want to save The packet data settings affect all access points using a your password in the device, select Yes. packet data connection.
-
Page 104: Applications
Access point name control With access point name control service, you can restrict packet data connections and allow your device to use only certain packet data access points. This setting is only available if your SIM card supports the access point control service. To set the control service on or off or to change the allowed access points, select Options... -
Page 105: Troubleshooting: Q&A
Troubleshooting: Q&A Access codes A: If another device is connected to your device, you can either end the connection using the other device or by Q: What is my password for the lock, PIN, or PUK codes? deactivating Bluetooth connectivity. Select Tools >... - Page 106 A: Save your data using one of the following methods: to use Nokia Nseries PC Suite, see the help function on • Use Nokia Nseries PC Suite to make a backup copy of all Nokia Nseries PC Suite or visit the support pages at data to a compatible computer.
-
Page 107: Battery Information
Always use original Nokia batteries for your safety. To check causes direct connection of the positive (+) and negative (-) that you are getting an original Nokia battery, purchase it from... - Page 108 If you cannot confirm that your Nokia battery with the Successful completion of the steps is not a total assurance of hologram on the label is an authentic Nokia battery, please do the authenticity of the battery. If you have any reason to not use the battery.
-
Page 109: Care And Maintenance
• Use a soft, clean, dry cloth to clean any lenses, such as responsibility organizations, or your local Nokia camera, proximity sensor, and light sensor lenses. representative. For more information, see product •... - Page 110 Eco-Declaration or country-specific information at www.nokia.com.
-
Page 111: Additional Safety Information
Additional safety information Small children Medical devices Your device and its enhancements may contain small parts. Operation of any radio transmitting equipment, including Keep them out of the reach of small children. wireless phones, may interfere with the functionality of inadequately protected medical devices. - Page 112 • Read and follow the directions from the manufacturer of equipment is improperly installed and the air bag inflates, their implanted medical device. serious injury could result. Using your device while flying in aircraft is prohibited. Switch If you have any questions about using your wireless device off your device before boarding an aircraft.
- Page 113 Emergency calls Certification information (SAR) This mobile device meets guidelines for exposure to radio Important: Wireless phones, including this device, waves. operate using radio signals, wireless networks, landline networks, and user-programmed functions. Because of this, Your mobile device is a radio transmitter and receiver. It is connections in all conditions cannot be guaranteed.
- Page 114 Use of device accessories and enhancements may result in different SAR values. SAR values may vary depending on national reporting and testing requirements and the network band. Additional SAR information may be provided under product information at www.nokia.com.
-
Page 115: Index
Index switching off 64 active toolbar 43 bookmarks 61 adjusting lighting and color 45 access point name control 104 editing videos 54 access points 101 flash 45 activation keys cache, clearing 62 image setup settings 45 See digital rights management calculator 72 saving video clips 48 active standby mode 87... - Page 116 inserting pictures 28 active toolbar 52 sending 28 editing images 53 editing images 53 contact information 11 images and videos 51 e-mail converter 84 ordering files in albums 53 automatic retrieving 35 copying contacts between the SIM card presentations 56 deleting mailbox 38 and device memory 29 print basket 52...
- Page 117 blocking 79 memory card tool 70 playlists 19 connecting to a server 78 menu, rearranging 85 transferring music 20 recording messages 79 messaging sending instant messages 79 cell broadcast 40 Navi wheel 15 internet e-mail 32 N-Gage 41 See web inbox 33 notes 73 internet access points (IAP)
- Page 118 service commands 31 text messages 36 settings SIM card radio 22 access points 102 copying names and numbers to RealPlayer 76 application 94 your device 29 recent calls 92 applications 104 messages 36 recorder 76 Bluetooth connectivity 64 names and numbers 29 remote mailbox 34 call barring 101 using device without a SIM card 86...
- Page 119 speed dialing 90 standby mode 85 video clips 51 support information 11 video player svg files 56 See RealPlayer switch 12 videos synchronization 69 See gallery voice commands 71 voice dialing 91 text messages voice mailbox 90 inbox 31 changing the phone number 90 receiving 33 diverting calls to voice mailbox 100 saving 40...
- Page 120 welcome application 12 writing language 95 writing language 100...
Need help?
Do you have a question about the RM-256 and is the answer not in the manual?
Questions and answers