IV Produkt Envistar Top Assembly Instructions Manual
Hide thumbs
Also See for Envistar Top:
- Operation and maintenance instructions (112 pages) ,
- Installation, operation and maintenance instructions (26 pages) ,
- Assembly instructions manual (20 pages)

Related Manuals for IV Produkt Envistar Top


Summary of Contents for IV Produkt Envistar Top
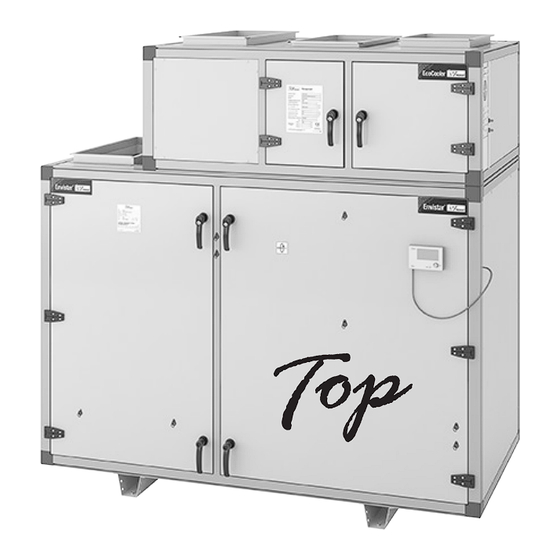
- Page 1 Assembly Instructions Envistar Top Size 04-21 Translation of the original instructions...
-
Page 3: Table Of Contents
Disassembling the fan ....................21 6.4.2 Reassemble/Refit fan ....................22 Fit cover detail on join ................22 ASSEMBLE, VERSIONS ....................23 Before assembly ..................23 Assemble Envistar Top thermal wheel (TER, TXR) ........24 Assemble Envistar Top thermal wheel/EcoCooler (TEC) ......25 Ver 2_en_2022-06-27... - Page 4 Assembly Instructions Envistar Top Assemble Envistar Top thermal wheel/ThermoCooler HP (TTC) .... 26 Assemble Envistar Top counter-flow exchanger (TEM, TXM)....27 Assemble Envistar Top with counter-flow exchanger, EcoCooler (TEC-M) ......................28 Assemble counter-flow exchanger in sectioned configuration ....29 CONNECT COIL, WATER ....................30 Connect coil to pipelines ................
-
Page 5: Safety
Assembly Instructions Envistar Top 1 SAFETY This section addresses important safety aspects of assembly, with the aim of raising safety awareness and avoiding personal injuries and damage to surroundings and units. • This manual contains important instructions. Read it carefully and follow the instructions. - Page 6 Assembly Instructions Envistar Top Order Portal ivprodukt.docfactory.com Warning notices Warning notices in the instruction warn of risks when handling and assembling the product. Carefully follow the instructions contained in warning notices. The warning symbol indicates that a risk exists. WARNING! indicates a potential risk that, if not avoided, can cause life-threatening or serioussituations that can lead to death or personal injury.
-
Page 7: Product Liability
3. Product code 7. QR code 4. Unit designation Report accidents, incidents Accidents or incidents are reported to IV Produkt. Product liability The unit complies with industry requirements for quiet air handling units with high-efficiency recovery systems for heating and cooling. -
Page 8: Receive, Unpack
Extended warranty is a supplement to the order and to claim extended warranty (5 years), according to ABM 07 with Appendix ABM-V 07 or according to NL 17 with Appendix VU 20, a complete documented and signed IV Produkt Service and Warranty book must be presented. Disclaimer Continuous product development may give rise to specification changes without notice. -
Page 9: General Information
• Pipe cutter Spare parts Spare parts and accessories for this unit are ordered from IV Produkt's nearest sales office. State the order number and unit designation. These can be found on a model iden- tification label, affixed to each part/component. Download separate spare parts list on IV Produkt’s order... -
Page 10: Symbols On Drawings And In Manual
Assembly Instructions Envistar Top Order Portal ivprodukt.docfactory.com Symbols on drawings and in manual 00128 Figure: Example of a layout drawing Outdoor air Extract air Supply air Exhaust air Filter Shut-off damper Trim damper Cooling coil water Heating coil water Heating coil electric... -
Page 11: Description Of The Unit
The counter-flow exchanger (TXM) can be delivered in block form (sectioned configuration) and must be assembled before being put in place with the other unit parts. Envistar Top thermal wheel (TER, TXR) 04, 06, 10 (TER) 09, 12, 16, 21 (TFF, TXR, TFT) - Page 12 Assembly Instructions Envistar Top Order Portal ivprodukt.docfactory.com Envistar Top thermal wheel/ThermoCooler HP (TTC) 09, 12, 16, 21 (TFF, TXR, TTC, TFT) 06, 10 (TEC, TTC) 00133 One-piece configuration: 06, 10 Block configuration (4 parts): 09, 12, 16, 21 Envistar Top counter-flow exchanger (TEM)
-
Page 13: Orientation Of The Unit's Sides/Parts
Assembly Instructions Envistar Top Orientation of the unit’s sides/parts 00050 Figure: Parts of the unit 1. Access side 4. Corner fitting 2. Back 5. Covers 3. Gable side Ver 2_en_2022-06-27 Page 13 (44) -
Page 14: Lift The Unit
Assembly Instructions Envistar Top Order Portal ivprodukt.docfactory.com 4 LIFT THE UNIT WARNING! Risk of life-threatening or serious crushing or compression injury. High unit parts, as well as unit parts with a high or o set centre of gravity, mean a greater risk of tipping. -
Page 15: Lifting With Forklift
Assembly Instructions Envistar Top Lifting with forklift The lifting forks (1) must be the same length as the unit packaging (2) or long- 00053 Figure: Lifting with forklift Lifting brackets, pre-mounted lifting lugs, spreader bar • The maximum angle at the lift hook is 80º... -
Page 16: Lift With Lifting Bracket, Emmt-08, For 50 Profile
Assembly Instructions Envistar Top Order Portal ivprodukt.docfactory.com Lift with lifting bracket, EMMT-08, for 50 profile • Load per lifting bracket ≤ 400 kg. • Load if all four brackets are used ≤ 1600 kg. • A safety factor of 1.6 has been utilised in static testing of the lifting bracket. -
Page 17: Prepare Assembly
Assembly Instructions Envistar Top 5 PREPARE ASSEMBLY When setting up the unit, it shall be horizontal at the longitudinal leading edge, as well as slightly inclined forward (towards the inspection side) to create proper drainage of condensation water. See "6.1 Assemble adjus- ter foot (accessory), adjust the height”, page 18. -
Page 18: Assembly, General
Assembly Instructions Envistar Top Order Portal ivprodukt.docfactory.com 6 ASSEMBLY, GENERAL Read and follow each step carefully to avoid making errors and causing personal injury or damage to surroundings or unit. See "1 SAFETY”, page 5, "4 LIFT THE UNIT”, page 14, "5 PREPARE ASSEMBLY”, page 17... -
Page 19: Fit Sealing Strip
Assembly Instructions Envistar Top Fit sealing strip • For correct assembly of sealing strip on different parts, see also "7 ASSEMBLE, VERSIONS”, page 23. • The sealing strip is only fitted on one of two opposite parts. • The sealing strip is not fitted on the rotary heat exchanger. -
Page 20: Quick Connectors
Assembly Instructions Envistar Top Order Portal ivprodukt.docfactory.com Quick connectors "10 CONNECT CONTROL EQUIPMENT”, page 35 and order-specific documentation (control diagram) on IV Produkt’s order portal. Quick connectors to be joined are marked with the same designation. Quick connector, signal feed 1. -
Page 21: Disassemble/Reassemble/Refit Fan
Assembly Instructions Envistar Top Disassemble/Reassemble/Refit Fan For better access to the inner corner struts when joining adjacent unit parts, the fan can be disassembled. 00220 Figure: Remove the fan and reassemble 1. Cover plate 4. Earthing braid 2. Pressure sensor module 5. -
Page 22: Reassemble/Refit Fan
Assembly Instructions Envistar Top Order Portal ivprodukt.docfactory.com 6.4.2 Reassemble/Refit fan 00230 Figure: Fan label – the arrow direction indicates whether the fan is for supply air or extract air. For multi-fan installa- tions, A/B/C, etc. indicates the fan position in the unit, as seen from the inspection door. -
Page 23: Assemble, Versions
"5 PREPARE ASSEMBLY”, page 17 • See "6 ASSEMBLY, GENERAL”, page 18 for detailed instructions in the steps. • Get the layout drawing on IV Produkt’s order portal (Technical data). See "2.1 IV Produkt’s order portal, support”, page Ver 2_en_2022-06-27... -
Page 24: Assemble Envistar Top Thermal Wheel (Ter, Txr)
Order Portal ivprodukt.docfactory.com Assemble Envistar Top thermal wheel (TER, TXR) 00129 Figure: Envistar Top thermal wheel in left-hand version: location of sealing strips 1. Supply air part 3. Exhaust air part 2. Thermal wheel part (no sealing strip) 4. Sealing strips 1. -
Page 25: Assemble Envistar Top Thermal Wheel/Ecocooler (Tec)
The drainage pipe must not cause a high pressure drop. Avoid long and/ or thin pipeline or hose. 00150 Figure: Envistar Top thermal wheel/EcoCooler in left-hand version: location of sealing strips 1. Supply air part 3. Exhaust air part 2. Cooling part (no sealing strip) 4. -
Page 26: Assemble Envistar Top Thermal Wheel/Thermocooler Hp (Ttc)
HP (TTC) "6 ASSEMBLY, GENERAL”, page 1 8 . 00135 Figure: Envistar Top thermal wheel/ThermoCooler HP in right-hand version: location of sealing strips 1. Exhaust air part 4. Supply air part 2. Thermal wheel part (no sealing strip) 5. Sealing strips 3. -
Page 27: Assemble Envistar Top Counter-Flow Exchanger (Tem, Txm)
Envistar Top Assemble Envistar Top counter-flow exchanger (TEM, TXM) 00136 Figure: Envistar Top counter-flow exchanger (TEM) in left-hand version: location of sealing strips 1. Exhaust air part 3. Supply air part 2. Counter-flow exchanger part (no sealing strip) 4. Sealing strips 1. -
Page 28: Assemble Envistar Top With Counter-Flow Exchanger, Ecocooler (Tec-M)
Order Portal ivprodukt.docfactory.com Assemble Envistar Top with counter-flow exchanger, EcoCooler (TEC-M) 00152 Figure: Envistar Top counter-flow exchanger/EcoCooler in left-hand version: location of sealing strips 1. Exhaust air part 4. Supply air part 2. Cooling part (no sealing strip) 5. Sealing strips 3. -
Page 29: Assemble Counter-Flow Exchanger In Sectioned Configuration
Assembly Instructions Envistar Top Assemble counter-flow exchanger in sectioned confi- guration The counter-flow exchanger can be disassembled for easier passage through confined spaces. 00061 Figure: Counter-flow heat exchanger, sectioned configuration 1. Corner strut 3. Joint fixings 2. Approximate location of quick connectors Take apart counter-flow heat exchanger 1. -
Page 30: Connect Coil, Water
Assembly Instructions Envistar Top Order Portal ivprodukt.docfactory.com 8 CONNECT COIL, WATER Connect coil to pipelines • In order not to damage the coil, always use a counterhold when connec- ting. • Make sure that connecting pipes (including insulation) do not block inspection hatches. -
Page 31: Heating Coil, Water (Etab-Tv) In Unit
00140 Figure: Connection Thermoguard configuration (ETAB-TV) 1. Pipe for excess fluid in case of risk of freezing 2. Pressure relief valve (Not included in IV Produkt delivery) Thermoguard coils: • are marked with inlet and outlet, respectively, on the fluid side, as well as air direction. -
Page 32: Connect Frost Protection Sensor
Assembly Instructions Envistar Top Order Portal ivprodukt.docfactory.com Connect frost protection sensor The sensor is placed at the coldest point of the coil, i.e. on the outgoing fluid assembly tubes. Frost protection sensor is connected to prevent ice from forming in the pipe lines of the coil. -
Page 33: Assemble Valve Actuator
Assembly Instructions Envistar Top Assemble valve actuator Assembly is carried out according to the accompanying instructions from IV Produkt’s supp- lier. See order-specific documentation on IV Produkt’s order portal. The control valve (shunt valve), which regulates water temperature to heating or cooling systems is operated by a valve actuator attached to a control unit. -
Page 34: Connect Coil, Electric
Assembly Instructions Envistar Top Order Portal ivprodukt.docfactory.com 9 CONNECT COIL, ELECTRIC Connect heating coil, electric (ETKB-EV), (ETAB-SV) WARNING! Risk of life-threatening or serious personal injury. Electrical voltage can cause electric shock, burns and death. The product must not be energised during assembly. -
Page 35: Connect Control Equipment
Assembly Instructions Envistar Top 10 CONNECT CONTROL EQUIPMENT WARNING! Risk of life-threatening or serious personal injury. Electrical voltage can cause electric shock, burns and death. The product must not be energised during assembly. • Electrical connection and electrical work may only be carried out by a qualified electrician. -
Page 36: Connect Supply Air Temperature Sensor
Assembly Instructions Envistar Top Order Portal ivprodukt.docfactory.com 10.3 Connect supply air temperature sensor • The supply air temperature sensor must always be placed after any duct coils (heating/cooling) • The supply air temperature sensor must not be placed in a sound atte- nuator. -
Page 37: Connect Drainage, Water Trap
• All drainages must be connected to separate water traps, which after these can be connected to a common drain. • Use separate drainage and water traps for negative pressure and positive pressure. For instructional videos see IV Produkt’s order portal: Water trap site-built assembly Water trap prefabricated MIET-CL-04 assembly. 11.1... -
Page 38: Connect Drainage Pipe To Floor Drain
Assembly Instructions Envistar Top Order Portal ivprodukt.docfactory.com 11.3 Connect drainage pipe to floor drain The instruction applies to TEC (09, 12, 16, 21) and TTC (06, 09, 10, 12, 16, 21). The drainage pipe on the unit is connected to the floor drain pipe with an NC coupling, which is loosely taped inside the support foot (hat profile). -
Page 39: Duct Connection, Duct Accessories
Duct accessories are placed according to set-up drawing. Order-specific drawings can be downloaded at IV Produkt’s order portal (Technical Data). See "2.1 IV Produkt’s order portal, support”, page 9. 12.1 Connect to ducts The unit is supplied with either rectangular or circular connection sleeves. -
Page 40: Connect Duct Coils
The coils have a rectangular connector for the guide system. 12.3 Connect damper (ETSP-UM, ETSP-TR) Dampers can be fitted for horizontal or vertical air stream. Envistar Top supplied with rectang- ular or circular dampers, depending on the size of the unit and duct connection. 12.4... -
Page 41: After Assembly
14 SUPPORT For more support see "2.1 IV Produkt’s order portal, support”, page 9 or contact IV Produkt on the telephone numbers and addresses on the last page. Ver 2_en_2022-06-27 Page 41 (44) - Page 42 Assembly Instructions Envistar Top Order Portal ivprodukt.docfactory.com Ver 2_en_2022-06-27 Page 42 (44)
- Page 43 Assembly Instructions Envistar Top Ver 2_en_2022-06-27 Page 43 (44)
- Page 44 You are welcome to contact us IV Produkt AB, Sjöuddevägen 7, S-350 43 VÄXJÖ +46 470 – 75 88 00 www.ivprodukt.se, www.ivprodukt.com Support: Control: +46 470 – 75 89 00, styr@ivprodukt.se Service: +46 470 – 75 89 99, service@ivprodukt.se Order Portal Spare parts: +46 470 –...
Need help?
Do you have a question about the Envistar Top and is the answer not in the manual?
Questions and answers