Summit RG244WS Owner's Manual And Installation Instructions

Summit RG244WS Owner's Manual And Installation Instructions

20" and 24" compact gas ranges

Advertisement

Safety Instructions ........................ 2-5
Owner's Manual and
Operating Instructions
Oven ............................................. 7-13
Surface Burners .............................. 6
Care and Cleaning
Broiler Compartment .................... 17
Broiler Pan and Grid ...................... 18
Burners .............................................. 15
Control Panel and Knobs ............... 6
Grates .............................................. 14
Lift-Up Cooktop .............................. 14
Lift-Off Oven Door .......................... 18
Oven Interior ................................... 19
Painted Surfaces ............................ 19
Removable Oven Bottom ............ 17
Shelves ............................................. 16
Thermostat Adjustment ................. 11
Installation Instructions ............ 20-28
LP ...................................................... 28
Troubleshooting Tips ...................... 29
Warranty ........................................... 31
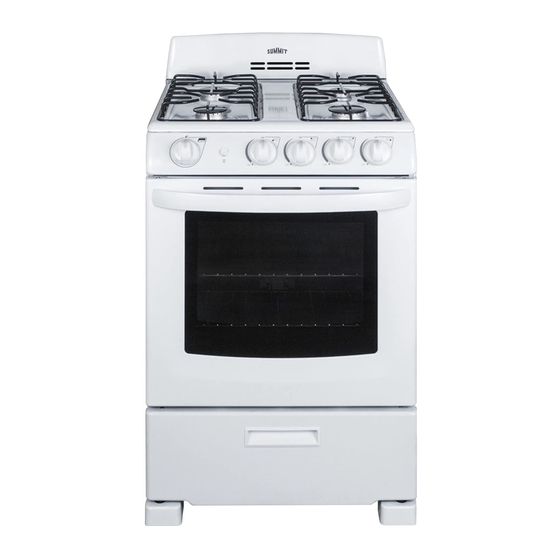
Write the model and serial
numbers here:
Model #
Serial #
You can find them on a label under
the cooktop. See the Lift-Up Cooktop
section in this manual for instructions
295D3817P004
on how to lift the cooktop.

Advertisement

Table of Contents
loading

Summary of Contents for Summit RG244WS

  • Page 1: Table Of Contents

    Safety Instructions ......2-5 Owner's Manual and Installation Instructions Operating Instructions Oven ..........7-13 Surface Burners ......6 Care and Cleaning Broiler Compartment ....17 Broiler Pan and Grid ...... 18 Burners ..........15 Control Panel and Knobs ....6 Grates ..........
  • Page 2 IMPORTANT SAFETY INFORMATION. READ ALL INSTRUCTIONS BEFORE USING. WARNING If the information in this manual is not followed exactly, a fire or explosion may result, causing property damage, personal injury or death. - Do not store or use gasoline or other flammable vapors and liquids in the vicinity of this or any other appliance. - WHAT TO DO IF YOU SMELL GAS Do not try to light any appliance.
  • Page 3: Safety Instructions

    WARNING GENERAL SAFETY INSTRUCTIONS WARNING Do not leave children alone or unattended in an area where an appliance is in use. They should never be NEVER use this appliance as a space heater to allowed to climb, sit or stand on any part of the appliance.
  • Page 4 IMPORTANT SAFETY INFORMATION. READ ALL INSTRUCTIONS BEFORE USING. WARNING KEEP FLAMMABLE MATERIALS AWAY FROM THE RANGE Do not store or use flammable materials in an oven or Do not let cooking grease or other flammable materials near the cooktop, including paper, plastic, pot holders, accumulate in or near the range.
  • Page 5: Oven

    WARNING OVEN SAFETY INSTRUCTIONS WARNING Pull the oven rack to the stop-lock position when loading NEVER cover any slots, holes, or and unloading food from the oven. This helps prevent passages in the oven bottom or cover an entire rack with burns from touching hot surfaces of the door and oven materials such as aluminum foil.
  • Page 6: Surface Burners

    Using the gas surface burners. Throughout this manual, features and appearance may vary from your model. Before Lighting a Gas Burner After Lighting a Gas Burner Make sure all burners are in place. Do not operate the burner for an extended period of time without Make sure all grates on the range are cookware on the grate.
  • Page 7 Using the oven. Throughout this manual, features and appearance may vary from your model. Oven Control Your oven is controlled by an OVEN TEMP knob. It can take up to 90 seconds before the flame comes on. After the oven reaches the selected temperature, the oven burner maintains the selected temperature.
  • Page 8 Using the oven. Upper Oven Vent Your oven is vented through ducts at the Do not leave plastic or flammable items rear of the range. Do not block these ducts on the cooktop—they may melt or ignite when cooking in the oven—it is important if left too close to the vent.
  • Page 9 Using the oven for baking. To avoid possible burns, place the shelves in the desired position before you turn the oven on. How to Set the Oven For Baking 1. Close the oven door. Then turn the OVEN 2. Check the food for doneness at the TEMP knob to the desired temperature.
  • Page 10 Using the oven for baking. Cookies Flat cookie sheets (without sides) produce Do not use a cookie sheet so large that it better-looking cookies. Cookies baked in a touches the walls or the door of the oven. jelly roll pan (short sides all around) may Never entirely cover a shelf with a large have darker edges and pale or light cookie sheet.
  • Page 11 Using the oven for roasting. Roasting is cooking by dry heat. Tender meat or poultry can be roasted uncovered in your oven. Roasting temperatures, which should be low and steady, keep spattering to a minimum. Roasting is really a baking procedure used for meats. Roasting is easy just follow these directions: How to Set the Oven For Roasting 1.
  • Page 12 Using the oven for broiling (some models). How to Set the Broiler Compartment Broiling is cooking food by direct heat from 3. If meat has fat or gristle around the above the food. Most fish and tender cuts edge, cut vertical slashes through both of meat can be broiled.
  • Page 13 Using the oven for broiling. Aluminum Foil You can use aluminum foil to line your broiler pan and broiler grid. However, you must mold the foil tightly to the grid and cut slits in it just like the grid. Broiling Compartment Guide Suggestions Both the oven and broiler compartment If desired, marinate meats or chicken doors must be closed during broiling.
  • Page 14 Care and cleaning of the range. Be sure electrical power is off and all surfaces are cool before cleaning any part of the range. WARNING If your range is removed for cleaning, servicing or any reason, be sure the anti-tip device is reengaged properly when the range is replaced.
  • Page 15 Care and cleaning of the range. Oven Air Vents Never block the vents (air openings) of the range. They provide the air inlet and outlet that are necessary for the range to operate properly with correct combustion. Air openings are located at the rear of the cooktop, at the top and bottom of the oven door, and at the bottom of the range.
  • Page 16 Removable Oven Bottom To replace: First remove the shelves from the oven. The oven bottom lifts from the front. 1. Grasp each side of the oven bottom and guide its rear tabs into the slots in the To remove: back of the oven. 1.
  • Page 17: Lift-Off Oven Door

    Care and cleaning of the range. Broiler Pan and Grid After broiling, remove the broiler pan from If food has burned on, sprinkle the grid with the oven. Remove the grid from the pan. detergent while hot and cover with wet Carefully pour out grease from the pan into paper towels or a dishcloth.
  • Page 18: Oven Interior

    Porcelain Oven Interior With proper care, the porcelain enamel If necessary, you may use an oven cleaner. finish on the inside of the oven will stay new- Follow package directions. looking for years. Cautions about using spray-on oven cleaners: Let the range cool before cleaning. Do not spray on the electrical controls We recommend that you wear rubber and switches because it could cause a...
  • Page 19: Installation Instructions

    Installation Range Instructions If you have questions, call 1.800.932.4267 or visit our Website at: www.summitappliance.com In the Commonwealth of Massachusetts FOR YOUR SAFETY • This product must be installed by a licensed plumber Do not store or use combustible materials, gasoline or or gas fitter.
  • Page 20 Installation Instructions WARNING Avoid placing cabinets above the range. To reduce the hazard caused by reaching over the open flames of operating burners, install a ventilation hood over INSTALLATION SAFETY the range that projects forward at least 5" beyond the front of the cabinets. INSTRUCTIONS The ventilating hood must be constructed of sheet metal not less than 0.0122"...
  • Page 21 Installation Instructions DIMENSIONS AND CLEARANCES Provide adequate clearances between the range and adjacent combustible surfaces. These dimensions must be met for safe use of your range. The range may be placed with 0" clearance below cooktop and at the back wall. Models 36”...
  • Page 22 Installation Instructions LOCATION PROVIDE ADEQUATE GAS SUPPLY Do not locate the range where it may be subject to Your range is designed to operate at a pressure of 5" of water column on natural gas or, if designed for LP gas strong drafts.
  • Page 23 Installation Instructions CONNECT THE RANGE TO GAS Shut off the main gas supply valve before disconnecting C. Install male 1/2" or 3/4" flare union adapter to the NPT the old range and leave it off until the new hook-up has internal thread of the manual shut-off valve, taking been completed.
  • Page 24 Installation Instructions RECOMMENDED GAS AND ELECTRIC SUPPLY LOCATION NOTE: Recommended gas hookup locations behind range. Gas fittings and shut-off valve should NOT protrude more than 2" from the wall to allow the range to fit against the wall.
  • Page 25 Installation Instructions ELECTRICAL CONNECTIONS SEAL THE OPENINGS Seal any openings in the wall behind the range and in Electrical Requirements the floor under the range when hookups are 120-volt, 60 Hertz, properly grounded dedicated circuit completed. protected by a 15-amp or 20-amp circuit breaker or time delay fuse.
  • Page 26 Installation Instructions ADJUST THE OVEN BURNER AIR QUALITY OF FLAMES SHUTTER IF NECESSARY (CONT.) The combustion quality of burner flames needs to be For LP Gas: determined visually. The flame should have approximately 1-inch blue cones. (A) Yellow flames: After 30 seconds of burner operation, check for flames Call for service.
  • Page 27 Installation Instructions LEVELING THE RANGE INSTALLING THE ANTI-TIP DEVICE WARNING A. Install the oven shelves in the oven and position the range where it will be installed with front access to ANTI-TIP DEVICE front leveling legs and rear access to rear leveling legs.
  • Page 28 Before you call for service... Oven temperature too hot Oven thermostat needs adjustment See the Adjust the oven thermostat—Do it yourself! or too cold section. Top burners do not light or Plug on range is not completely On models with electric ignition, make sure electrical do not burn evenly inserted in the electrical outlet plug is plugged into a live, properly grounded outlet.
  • Page 29 Notes.
  • Page 30 Notes.
  • Page 31: Warranty

    GENERAL PARTS AND LABOR WARRANTY Summit warrants, to the original purchaser of every new unit, that the cabinet and all parts thereof be free from defects in material or workmanship, under normal and proper use and maintenance service as specified by Summit and upon proper installation and start-up in accordance with the instruction packet supplied with each Summit unit.
  • Page 32 fitness for a particular purpose. There are no other warranties which extend beyond the description on the face hereof. • OUTSIDE UNITED STATES: This warranty does not apply to, and Summit is not responsible for, any warranty claims made on products sold or used outside the United States.

Table of Contents