Technibel MPAF90MR5I Operating Instructions Manual
Hide thumbs
Also See for MPAF90MR5I:
- Technical & service manual (107 pages) ,
- Installation instructions manual (57 pages)
Table of Contents
Advertisement
Quick Links
OPERATING INSTRUCTIONS • INSTRUCCIONES DE USO
NOTICE D'UTILISATION • BEDIENUNGSANLEITUNG
ISTRUZIONI D'USO •
This air conditioner uses the new refrigerant R410A
MPAF90MR5I
MPAF120MR5I
Save These Instructions • Guardéis estas instrucciones
Conserver ce notice d'utilisation • Bewahren Sie bitte diese Bedienungsanleitung auf
Conservate queste istruzioni• Guarde estas instruções
Split air conditioner system • Acondicionador de aire de consola partida sistema split
Condizionatore d'aria split system •
MANUAL DE INSTRUÇÕES
Climatiseurs split • Split-klimagerät
Aparelho de ar condicionado-Sistema Split
10/2009
Advertisement
Table of Contents

Related Manuals for Technibel MPAF90MR5I


Summary of Contents for Technibel MPAF90MR5I
- Page 1 NOTICE D’UTILISATION • BEDIENUNGSANLEITUNG ISTRUZIONI D’USO • MANUAL DE INSTRUÇÕES This air conditioner uses the new refrigerant R410A MPAF90MR5I MPAF120MR5I Save These Instructions • Guardéis estas instrucciones Conserver ce notice d’utilisation • Bewahren Sie bitte diese Bedienungsanleitung auf Conservate queste istruzioni• Guarde estas instruções Split air conditioner system •...
-
Page 2: Features
Features This air conditioner is an inverter type unit that automatically adjusts capability as appropriate. Details on these functions are provided below; refer to these descriptions when using the air conditioner. • Microprocessor Controlled Operation • Hot Start Heating System The interior compartment of the remote control Right from the start, the air is warm and unit contains several features to facilitate... -
Page 3: Table Of Contents
Contents Page Features ......................2 Product Information................... 3 Alert Symbols....................3 Installation Location ..................4 Electrical Requirements ..................4 Safety Instructions..................... 4 Names of Parts ....................5 Using the Remote Control Unit ............... 10 Operation with the Remote Control Unit ............12 1. -
Page 4: Installation Location
Installation Location • We recommend that this air conditioner be installed properly by qualified installation technicians in accordance with the Installation Instructions provided with the unit. • Before installation, check that the voltage of the electric supply in your home or office is the same as the voltage shown on the nameplate. -
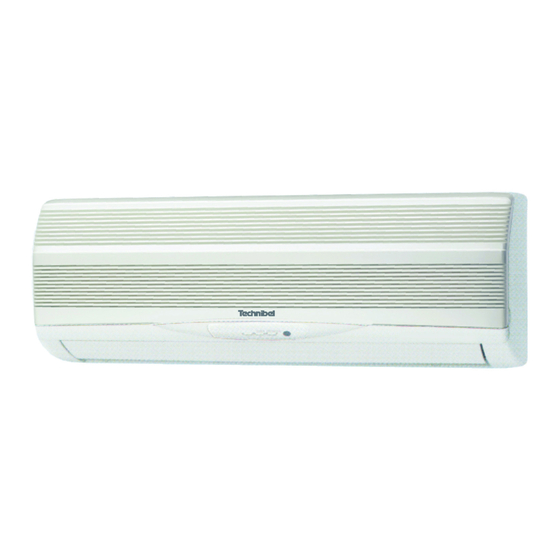
Page 5: Names Of Parts
Names of Parts Air intakes INDOOR UNIT Air outlet Remote control unit Drain hose Refrigerant tubes OUTDOOR UNIT Air outlet This illustration is based on the external view of a standard model. NOTE Consequently, the shape may differ from that of the air conditioner which you have selected. - Page 6 Unit Display and Operation Button LED CLEAN lamp IMPORTANT TIMER lamp Avoid using radio equipment OPERATION lamp such as mobile phone near (within 1 m) the remote control receiver. Some radio equipment may cause malfunction of the unit. (ON/OFF) button REMOTE CONTROL receiver If the trouble happens, disconnect power and restart...
- Page 7 Remote Control Unit (Display) Displayed when transmitting data Displayed when indoor unit sensor is in use Displayed when setting temperature Displayed when temperature is shown Displayed when setting timer Displayed when the time display is set to 12-hour time. Symbols (1) Operation mode (4) Timer 24-hour clock with ON/OFF...
- Page 8 Remote Control Unit Sensor Transmitter (Cover closed) Display CLE N ON/OFF operation button LED CLEAN 1 HR. TIMER button Temperature setting buttons (TEMP.) MODE selector button QUIET button FAN SPEED selector button NIGHT SETBACK button FLAP button HIGH POWER button ON TIME Advance button OFF TIME...
- Page 9 Remote Control Unit (continued) Temperature setting buttons Press the button to increase the set temperature. (TEMP.) Press the button to reduce the set temperature. The temperature setting changes by 1 °C or 2 °F each time one of the TEMP. buttons is pressed.
-
Page 10: Using The Remote Control Unit
Remote Control Unit (continued) SENSOR button When you press this button (use a small-tipped object such as a ballpoint pen), the mark will appear at the display. And the room temperature is detected by the sensor which is built into the indoor unit and the air conditioner is controlled accordingly. - Page 11 Using the Remote Control Unit (continued) How to Use the Remote When using the remote control unit, always point the unit’s transmitter head Control Unit directly at the air conditioner’s receiver. Air conditioner (Indoor unit) Receiver Remote control (Transmitter head) unit Remote Control Unit The remote control unit may be operated either from a non-fixed position or...
-
Page 12: Operation With The Remote Control Unit
Operation with the Remote Control Unit 1. Automatic Operation The air conditioner calculates the difference between thet thermostat setting and room temperature and automatically selects "COOL" or "HEAT" modes as appropriate. Them the air conditione continuously operates under the mode selected at initial operation. -
Page 13: Manual Operation
Operation with the Remote Control Unit (continued) 2. Manual Operation STEP 2 STEP 3 STEP 1 STEP 4 STEP 5 Check that the circuit breaker on the power panel is turned on. NOTE If the automatic operation settings of the unit do not meet your needs, press the setting buttons as described below and change the settings as desired. -
Page 14: Adjusting The Fan Speed
Operation with the Remote Control Unit (continued) • Choose the best position in the room for the remote control unit, which NOTE also acts as the sensor for room comfort and transmits the operating instructions. Once you’ve found this best position, always keep the remote control unit there. -
Page 15: Night Setback Mode
Operation with the Remote Control Unit (continued) 4. Night Setback Mode Night Setback Mode is used for saving energy. Press the NIGHT SETBACK button while operation. mark appears in the display. To release the night setback function, press the NIGHT SETBACK button again. -
Page 16: Quiet Mode
Operation with the Remote Control Unit (continued) 5. QUIET Mode QUIET Mode is used to reduce the fan sound of the indoor unit. Press the QUIET button. mark appears in the display. To cancel, press QUIET button again. • In QUIET Mode, the fan rotates at a slower speed than the fan speed setting. -
Page 17: Special Remarks
Special Remarks ‘‘DRY’’ ( ) Operation How it works? • Once the room temperature reaches the level that was set, the unit’s operation frequency is changed automatically. • During DRY operation, the fan speed automatically runs at lower speed for providing a comfortable breeze. -
Page 18: Setting The Timer
Setting the Timer NOTE In the descriptions below, the following settings are used for the temperature and time indicator selector button on the bottom front section of the remote control. • Temperature: °C • Time: AM, PM 1. How to set the present (Example) To set to 10:30 pm. - Page 19 Setting the Timer (continued) 3. How to set the ON time (Example) To start operation at 7:10 am. Operation Indication 1. Press the ON TIME setting The timer indication is button once. displayed, and the present ON time is shown. 2.
-
Page 20: Using The 1-Hour Off Timer
Using the 1-Hour OFF Timer 1. 1-Hour OFF Timer This function causes the unit to operate for one hour and then stop, regardless of whether the unit is on or off when this button is pressed. indicator in the display indicates that this function is operating. Setting procedure: Regardless of whether the unit is operating or stopped, press the 1 HR. -
Page 21: Adjusting The Airflow Direction
Adjusting the Airflow Direction 1. Horizontal The horizontal airflow can be adjusted by moving the vertical vanes with your hands to the left or right. When the humidity is high, the vertical vanes should be in the front CAUTION position during the cooling or dehumidifying operation. If the vertical vanes are positioned all of the way to the right or left, condensation may begin to form around the air vent and drip down. -
Page 22: Operation Without The Remote Control Unit
Operation without the Remote Control Unit INDOOR UNIT If you have lost the remote control unit or it has trouble, follow the steps below. When the air conditioner is not running Each time the OPERATION button is pressed, the type of operation conducted is indicated by the changing color of the OPERATION lamp. - Page 23 Care and Cleaning (continued) Anti-Mold Filter The anti-mold filter behind the air intake grille should be checked and cleaned at least once every two weeks. How to remove the anti-mold 1. Open the front panel until it's filter nearly horizontal, grasp the sections near the front panel arms on both sides, and then pull forward to remove the front panel Air clean filter...
- Page 24 Care and Cleaning (continued) Air Clean Filter The air clean filter removes dust and dirt from the air, and reduces odors and smoke from tobacco. This air clean filter cannot remove harmful gases or vapors nor ventilate air in the room. You must open doors or windows frequently when you use gas or oil heating appliances.
-
Page 25: Troubleshooting
Troubleshooting If your air conditioner does not work properly, first check the following points before requesting service. If it still does not work properly, contact your dealer or service center. Trouble Possible Cause Remedy Air conditioner does not run at all. 1. - Page 26 INFORMATION FOR CORRECT DISPOSAL OF THE PRODUCT IN ACCORDANCE WITH THE EUROPE- AN DIRECTIVE 2002/96/EC At the end of its working life this equipment must not be disposed of as an household waste. It must be taken to special local community waste collection centres or to a dealer providing this service. Disposing of an electrical and electronic equipment and its batteries separately avoids possible negative effects on the environment and human health deriving from an inappropriate disposal and enables its components to be reco- vered and recycled to obtain significant savings in energy and resources.
- Page 27 F-GAS REGULATION (EC) no. 842/2006 Non disperdere R410A nell'atmosfera: R410A è un gas fluorinato a effetto serra, coperto dal protocollo di Kyoto, con potenziale di riscaldamento globale (GWP) = 1975. Do not vent R410A into atmosphere: R410A is a fluorinated greenhouse gas, covered by Kyoto Protocol, with a Global Warming Potential (GWP) = 1975.
- Page 28 In order to carry on a constant improvement, our products can be modified with o ut prior notice. Per garantire un costante miglioramento dei nostri prodotti, ci riserviamo di modificarli senza preavviso. Par souci d’ a mé l ioration constante, nos produits peuvent ê t re modifié s sans pré a vis. Unsere Produkte werden laufend verbessert und können Vorankündigung abgeändert Werden.
Need help?
Do you have a question about the MPAF90MR5I and is the answer not in the manual?
Questions and answers