
Related Manuals for Go-Video GV3020


Summary of Contents for Go-Video GV3020
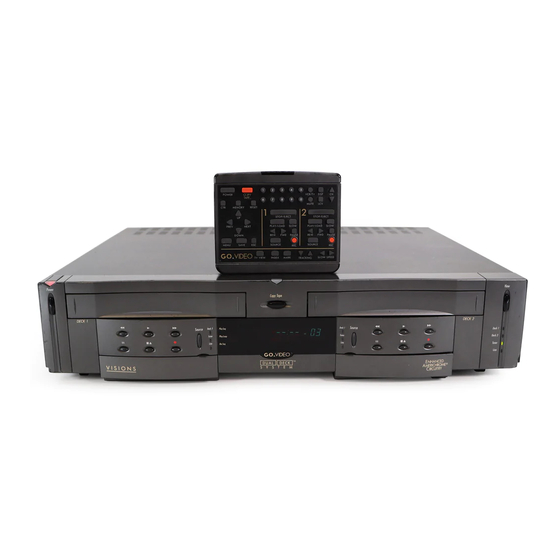
- Page 1 Owner’s Guide America's only Dual-Deck VCRs. 4-Head x 4-Head Hi-Fi Stereo Featuring NHANCED MERI HROME circuitry. V i d e o T e c h n o l o g y i n F a s t F o r w...
- Page 2 Gift Other: ________________________ How important were each of the following reasons in your decision to purchase a Dual-Deck VCR? Q u i c k R e f e r e n c e Please indicate whether each reason was very important, somewhat important, or not important.
- Page 3 Purchase Date: It is important that you register your Dual-Deck VCR with Go-Video, Inc. so that you can be contacted in the event of a product modification or recall. To register your Dual-Deck VCR, complete the warranty registration card and mail it in.
-
Page 4: Safety Instructions
These openings must not be blocked or covered. Never place your VCR on a bed, sofa, rug or other similar surface, on or near a radiator or heat register. - Page 5 12. POWER-CORD PROTECTION - Power-supply cords should be routed so that they are not likely to be walked on or pinched by items placed upon or against them, paying particular attention to cords of plugs, convenience receptacles, and the point where they exit from the unit. 13.
-
Page 6: Quick Connections
More advanced antenna and cable connection instructions begin on page 36. Place your Dual-Deck VCR next to your TV and plug the Dual-Deck VCR power cord into a wall outlet. Detach the antenna cable from your TV (it will be either a round coaxial cable or a flat twin-lead cable). -
Page 7: Table Of Contents
Safety Instructions ... ii - iii Quick Connections ... iv Features of Your Dual-Deck VCR ... 2 - 3 Exclusive Features of Your VCR ... 2 Other Key Features of Your VCR ... 3 Dual-Deck VCR Front Panel ... -
Page 8: Features Of Your Dual-Deck Vcr
Date and Time Stamp. Page 24. The Dual-Deck VCR can be set to record a date, time, and record Source message on the tape at the start of a Timer Record Event or manual recording. Custom Titler. Page 17. -
Page 9: Other Key Features Of Your Vcr
VHS Index Search System (VISS). Pages 13 - 14. Every time the Dual-Deck VCR enters record mode an Index Mark is placed on the tape. Index Marks can be manually inserted onto a tape during playback. Using the Index Scan and Search system the Index Marks can be quickly located during playback or while editing. -
Page 10: Dual-Deck Vcr Front Panel
Front Panel Display - Displays the status of your Dual-Deck VCR. (Fast Forward) buttons - Press to advance the tape when your Dual-Deck VCR is stopped. When your Dual-Deck VCR is playing, press Fast Forward for forward Picture Scan; press Fast Forward and hold for forward Jet Search. -
Page 11: Dual-Deck Vcr Front Panel
) buttons - Press to manually adjust Tracking up or down. Press Auto Track button to restore automatic tracking. TV/VCR button - Press to select the source of the picture on your TV screen - TV for your TV tuner, VCR for your Dual Deck VCR TV View. -
Page 12: Using Your Remote Control
MENU TV View Your Remote Control makes it simple to operate and program your Dual-Deck VCR. Take a moment to learn where the buttons are located on the Remote Control. The Remote Control is divided into six areas. See page 7 for detailed descriptions of the buttons. - Page 13 TV/VCR button - Press to select the Source of the picture on your TV screen - TV for your TV tuner, VCR for your Dual-Deck VCR tuner, tape decks, or Line inputs. TV VIEW button - Press to select the TV View. Deck 1, Deck 2, Tuner, Line 1 or Line 2 when the TV/VCR button is set to VCR.
-
Page 14: Playing A Tape
This prevents accidental recording over prerecorded scenes. Insert this tape into Deck 1 or 2. If your Dual-Deck VCR power is off it will now automatically turn on. Your Dual-Deck VCR has an Auto Play feature which automatically plays tapes that have the record safety tab removed (see page 34). If Auto Play is off, press Play for the deck containing the tape. -
Page 15: Variable Speed Slow-Motion Playback
Tracking for the best picture. Tracking Occasionally, when you play a tape in your VCR that was recorded on a different VCR or camcorder, noise (white streaks) may appear if the recorded tracks on it do not align precisely with the playback heads on your deck. -
Page 16: Duplicating A Tape
MARK TRACKING SLOW SPEED A popular feature of your Dual-Deck VCR is the ease and simplicity of copying prerecorded video tapes. Your Dual-Deck VCR has two copy modes that can be used when duplicating tapes. During AmeriChrome Copy 2, the recording speed of Deck 2 will automatically be set to match the play speed of Deck 1. -
Page 17: Video Sequencing
Playback Video Sequencing on your Dual-Deck VCR gives you the ability to play tapes starting on one deck and continuing to the next. The Dual-Deck VCR Play Mode indicators on the Front Panel indicate when Video Sequencing is set. See pages 4 - 5. - Page 18 6: COPY AUDIO INSERT WHEN OK PUSH SAVE Record Video Sequencing on your Dual-Deck VCR gives you the ability to record tapes starting on one deck and continuing to the next. The Dual-Deck VCR Play/Record mode indicators on the Front Panel indicate when Video Sequencing is set.
-
Page 19: Vhs Index Search System
The Index system provides a convenient means to Mark the start of a program or video scene. The Dual-Deck VCR records Index Marks on the tape each time you begin recording. You may add Index Marks during playback of prerecorded tapes to aid in editing. -
Page 20: Vhs Index Search System
Press the FWD (fast forward) or REW (rewind) button to advance the tape in the desired direction. The Dual-Deck VCR will scan for the next Index Mark. When the Index Mark is found the Dual-Deck VCR will automatically stop and playback a few seconds of the program. -
Page 21: Recording From Tv
Either deck of your Dual-Deck VCR may be used to make recordings. You can immediately begin recording any program you are watching if a blank tape is left in one of the decks. You then press that deck Source button, select Tuner and press Record. -
Page 22: Recording Two Programs From Tv
Dual-Deck VCR, set the TV/VCR button to TV and do not change this during recording. Otherwise, set the TV/VCR button to VCR and you may switch the TV View to either deck at will. Use the channel selector on your second tuner to choose the channel to be recorded on Deck 2. -
Page 23: Custom Titling
The Custom Title is recorded onto the tape in Deck 2 for approximately five seconds. You may review the Custom Title message by pressing the Save button anytime except while recording on Deck 2. Custom Titling POWER COPY VCR/TV TAPE MUTE MEMORY RESET STOP/EJECT STOP/EJECT... -
Page 24: Editing A Single Tape
TV VIEW TRACKING SLOW SPEED Your Dual-Deck VCR gives you a whole new range of editing capabilities. You can duplicate a tape, removing scenes from the original that you don't want to record on your copy. You may find it easier to edit when the On-Screen Display (OSD) is on your TV screen. -
Page 25: Editing Multiple Scenes Onto One Tape
Avoid leaving the deck in Record Pause for more than 3 minutes. Your Dual-Deck VCR will Auto Stop after 5 minutes in Record Pause to prevent excessive tape wear. -
Page 26: One-Touch Recording
One-Touch Recording (OTR) is a simple way to record TV programs in 30 minute increments. Once an OTR has been started, press Power to activate Auto Power Off and your Dual-Deck VCR will turn off automatically when the recording is done. -
Page 27: Setting The Timer To Record Later
A Timer Recording event allows you to program your Dual-Deck VCR in advance to record up to 10 hours of TV programs (8 events) for weeks, months, or years in advance. Before programming the timer, the clock must be set. If you try to program the timer when the clock is not set, the Set Date and Time Menu will appear. -
Page 28: Setting The Timer
Setting the Timer to Record Later POWER COPY VCR/TV TAPE MUTE MEMORY RESET STOP/EJECT STOP/EJECT PLAY/LOAD PLAY/LOAD PREV NEXT DOWN PAUSE MENU SAVE SOURCE SOURCE INDEX MARK TV VIEW TRACKING SLOW SPEED Set the Length of the event. Set the number of Hours of the recording. - Page 29 If you have a cable converter connected to the In From Cable connector on your Dual-Deck VCR, as shown on page 39, you will need to make sure the converter is left ON and set to the proper channel for your Timer Recording.
-
Page 30: Date And Time Stamp
6: COPY AUDIO INSERT WHEN OK PUSH SAVE Date and Time Stamp is a unique feature of your Dual-Deck VCR. By using the Date and Time Stamp you can easily find a specific program on a tape with many programs recorded on it. Combined with the Index Mark system each program you record will have an indexed introduction screen. -
Page 31: Main Menu
Programming from the Remote Control and Dual- Deck VCR Front Panel You can do On-Screen Programming with the Remote Control or the Front Panel. Because the Numeric buttons on the Remote Control offer the ease of direct entry of menu selections, the following instructions are primarily based on programming from your Remote Control. -
Page 32: On-Screen Programming
Turn Remote Load/Eject ON or OFF. See page 34 for description. Press Save to return to the Main Menu. Your Dual-Deck VCR automatically plays prerecorded tapes at the proper speed. Tapes are recorded at SP (Standard Play) unless you change the recording speed. -
Page 33: Set Date And Time
You must set your Dual-Deck VCR Clock and Calendar before using Timer Recording. Your Dual-Deck VCR will accurately maintain its Calendar up to December 31, 2091 once you have set the date and time, unless power is interrupted. The Clock must be reset after a power interruption. -
Page 34: Tuner/Channel Menu (Tv, Catv, Channel Memory)
On-Screen Programming Tuner/Channel Menu POWER COPY VCR/TV TAPE MUTE MEMORY RESET STOP/EJECT STOP/EJECT PLAY/LOAD PLAY/LOAD PREV NEXT DOWN PAUSE MENU SAVE SOURCE SOURCE TV VIEW INDEX MARK TRACKING SLOW SPEED MAIN MENU VIDEO MENU SET DATE AND TIME TIMER RECORDING... - Page 35 To add a channel to Channel Memory: Follow steps on the preceding page. Use the Numeric buttons to select on the Dual-Deck VCR the channel you wish to add. Use the Up/Down buttons to highlight Add. Press Next to add the channel.
-
Page 36: Option Menu (Titler)
On-Screen Programming Option Menu POWER COPY VCR/TV TAPE MUTE MEMORY RESET STOP/EJECT STOP/EJECT PLAY/LOAD PLAY/LOAD PREV NEXT DOWN PAUSE MENU SAVE SOURCE SOURCE TV VIEW INDEX MARK TRACKING SLOW SPEED MAIN MENU 1: VIDEO MENU SET DATE AND TIME 3: TIMER RECORDING... -
Page 37: Audio Menu (Hi-Fi, Audio Source)
Audio In connections on the rear panel (Line 2) of your Dual- Deck VCR. Use Simul 1 or 2 to record Simulcasts (see page 42) or when you have other audio equipment connected to your Dual Deck VCR (see page 41). -
Page 38: On-Screen Display
TV View indicator - Indicates the Source of the picture on your TV screen when the TV/VCR button is set to VCR. If TV View is set to Deck 1 or Deck 2 and no tape is playing in that deck, you will instead see that deck’s Source. For example, if TV View is set to Deck 1 and no tape is playing in Deck 1, you will see the Deck 1 Source, which may be Deck 2, Tuner, Line 1 or Line 2. -
Page 39: Front Panel Display
TIMER - Indicates that a Timer Recording event is in progress, or a Timer Recording event has been set and your Dual-Deck VCR is off. Blinks for Timer Record Error. VCR - Indicates that your Dual-Deck VCR is the source of the picture on your TV screen. Clock/Tape Counter... -
Page 40: Auto Features
Auto Rewind on or off in the Video Menu; it is preset to ON. See page 26. Auto Stop - Your Dual-Deck VCR will stop if a deck is left in Record Pause for more than 5 minutes, and will begin playing again if left in Play Still for more than 5 minutes. -
Page 41: Tape Counter & Memory Stop
The Tape Counter in your Dual-Deck VCR is a real-time counter. This means the display is shown in hours and minutes. If you are using a T-120 tape the Tape Counter will run from 0:00 to 2:00 in SP mode, 0:00 to 4:00 in LP mode and 0:00 to 6:00 in SLP mode. -
Page 42: Antenna Connections
(supplied) ANTENNA CABLES There are numerous possibilities for connecting your Dual-Deck VCR, your TV, your antenna or cable system, your other video equipment, and your stereo receiver. To choose an installation that fits your needs and your equipment, follow these steps. - Page 43 If both antennas have twin-lead cables, connect both to the In From Ant connection using the supplied adapter. A cable is supplied with your Dual-Deck VCR. Connect the coaxial (round) end of this cable to the Out To TV connection. Connect the other end of the supplied cable to the combined VHF/UHF input on your TV.
-
Page 44: Cable Connections
NE PAS OUVRIR DUAL-DECK VCR BACK PANEL Cable Ready Plus is designed to work with your cable converter box and your Dual-Deck VCR. It offers several advantages; for more information, contact a Go- Video representative at (602) 998-3400. Dual-Deck VCR Cable... - Page 45 The above instructions apply when your Dual-Deck VCR is on. If you wish to view your cable system when your Dual-Deck VCR is off, set your TV tuner to channel 2, 3 or 4, whichever is used by your cable system.
-
Page 46: Cable Connections
Set the TV/VCR selector to TV. On both the Dual-Deck VCR and the converter, select the channel to view and record. Start the recording (page 15). To record a basic channel while viewing any other basic or premium channel, follow these instructions. -
Page 47: Connecting Other Video Equipment
Connect your video equipment – VCRs, laser disc players, satellite receivers, Cable Ready Plus – to the Video In connection on your Dual-Deck VCR back panel. Set TV View to Line 2 to see the video input. If the video equipment has separate audio outputs, connect them to the Audio In connections on your Dual-Deck VCR back panel. -
Page 48: Audio Features & Connections
Record. Multichannel TV Sound (MTS) Stereo You can enjoy MTS broadcast stereo by connecting your Dual-Deck VCR to your stereo amplifier and speakers. MTS will allow you to enjoy full stereo sound when your Audio Source is set to Stereo. -
Page 49: Remote Volume Control And Muting
Press TV View to select Deck 1. Connect the Audio Out from the Dual-Deck VCR to the Input on an audio mixer. Connect the Output of the mixer into the Audio Line Input on the Dual-Deck VCR. Now you can mix existing audio from Deck 1, along with new audio or narration onto the new videotape in Deck 2. -
Page 50: Monitor Connections
The Monitor Out connection on the Dual-Deck VCR is useful for editing. Connect Monitor Out to your video mixing console or video monitor input. The picture will be the same as the Dual-Deck VCR Video Out however there will be no On-Screen Display. -
Page 51: Care Of Your Dual-Deck Vcr
Servicing of your Dual-Deck VCR should be done by an authorized service center. For service information, see the inside back cover. Energy Conservation Save energy. If you will not be using your Dual-Deck VCR for a long period of time, unplug the electrical cord. Shipping Your Dual-Deck VCR Carefully pack your Dual-Deck VCR in the original packing materials and carton for shipping. -
Page 52: Index
Index Adapter iv, Inside Front Cover AmeriChrome Copy 10 AmeriChrome Copy Indicator 4 Antenna Connections 36 - 37 Antenna Source 28 Audio Insert 35 Audio In and Out 4, 16, 41 Audio Menu 31 Audio Source 31 Auto Dimmer 34 Auto Play 26, 34 Auto Power Off 26, 34 Auto Power On 26, 34... -
Page 53: Index
Title Message 30 Tracking Control 9 Troubleshooting 49 - 50 Tuner/Channel Menu 28 - 29 TV + SAP 31 TV/VCR Button 5, 7 TV View Button 5, 7 TV View Indicators 5, 32 Twin-lead Connectors iv Up Button 7 VISS (VHS Index Search System) 13 - 14 Video Cameras 4, 41 Video In &... -
Page 54: Technical Specifications
Technical Specifications RECORDING SYSTEM Rotary, azimuth four-head helical scanning system. Luminance: FM azimuth recording. Color signal: converted sub-carrier phase shift recording. TELEVISION SYSTEM NTSC-type color signal EIA Standard (525 lines, 60 fields). AUDIO TRACK NORMAL: 1 track/HI-FI: 2 track. TAPE WIDTH 12.7 mm, 1/2 inch. -
Page 55: Troubleshooting
ATR, SAVE, and ESC buttons on Deck 1. This last step will clear all memories (deck speeds, Timer Recordings and Channel Memory) in your Dual-Deck VCR. If these steps do not correct the problem, the Dual-Deck VCR must be serviced by an authorized service center. - Page 56 Is Timer Recording, Rewind or One-Touch Record in progress? Page 33. See Auto Power Off. Pages 26 and 34. The Dual-Deck VCR must be serviced by an authorized service center to restore Timer Recording functions. Contact a Go-Video, Inc. Customer Service Advisor at for assistance or authorized service center locations.
-
Page 57: Limited Warranty
The product you have purchased has been carefully engineered and manufactured under Go-Video's rigid quality standards and should give you satisfactory and dependable operation. However, like all consumer electronic products, it may occasionally require adjustment, replacement parts, maintenance or service. Therefore, Go-Video provides a limited warranty for its products. - Page 58 COPYRIGHT WARNING Federal copyrihgt law provides severe civil and crimi- nal penalties for the unauthorized reproduction, distri- bution, or exhibition of copyrighted motion pictures and videotapes (Title 17, United States Code, Sections 501 and 506). This product is not made or sold for unauthorized recording or playback or copyrighted works, includ- ing, without limitation, unauthorized recording from precorded copyrighted cassettes.
Need help?
Do you have a question about the GV3020 and is the answer not in the manual?
Questions and answers